• Steel Soldiers now has a few new forums, read more about it at: New Munitions Forums!

  • Microsoft MSN, Live, Hotmail, Outlook email users may not be receiving emails. We are working to resolve this issue. Please add support@steelsoldiers.com to your trusted contacts.

What have you done to your 5 ton this week?

Ajax MD

Well-known member
1,569
1,414
113
Location
Mayo, MD
Wes,

After following your posts you should know that I have nothing but respect for you, so don't think I'm dissing your advice. I'm sorry if my earlier post sounded melodramatic. I made it sound like I'm bumbling along when I actually have a plan. Let me give you a little more detail on that:

First, the transmission jack *is* a rolling, creeper type. In fact, it's sturdier and safer than using a creeper made for a human, to roll an 800lb. transfer case around on. The style is similar to the transmission jack pictured in the -20 TM and it's rated for 2,000 lbs. I took careful measurements and the cradle will easily reach the transfer case. I won't be anywhere under or near the transfer case when it's time to lower or raise it.

I hear what you're saying about the quality of civvy, Chinese made tools these days and that thought did enter my mind. It's why I've oversized the jack for 1 ton and engine hoist to 2 tons when the transfer case only weighs 800 lbs. I've also talked to 2 other fellows who recommended this jack, saying that it made swapping the transfer case a safe job when they used it.

Here's some good news: After I made my post last night, I was contacted by a heavy truck mechanic for the county, who lives right around the corner from me. He works on fire trucks and garbage trucks for the county and also helps MV hobby owners fix their trucks. He has offered to help me with the whole job, including access to tools if the need arises. We discussed the entire job at length.

Just to reiterate- Once the jack is raised and the transfer is chained/strapped to the jack, NO ONE is going to be anywhere near or under the transfer case when it is lowered. Once the transfer is lowered, we can rotate the cradle 90 degrees for removal through the side of the truck as the TM says to do. Once the transfer has been wheeled out from under the truck, we'll use the 4,000 lb. engine hoist to shuttle the old transfer off the jack and the new transfer onto the jack and reverse the process.

If at any time, something seems unsafe, or if the equipment isn't meeting the requirements in terms of safety, reach or mobility, I will stop the job and regroup. I realize there are a lot of ways to skin the same cat and I'll definitely discuss your method with the assisting mechanic before we start.
 

whatadeuce

Active member
Steel Soldiers Supporter
959
38
28
Location
Loxahatchee, Florida
Hello Ajax md, and I follow what you are saying here. I too like to work in safety, where I guive attention to what I am doing. Im grateful to have a big garage with a concrete florr, and it makes jobs pleasurable.
 

Attachments

fasttruck

Well-known member
1,265
633
113
Location
Mesa, AZ
The people that swapped out transfer cases all the time had a jig or saddle on their jack to steady the case in an upright position to take it in or out of the truck as the flat side of the t case is not the bottom.
 

77 AMG

Active member
403
62
28
Location
Owingsville, KY
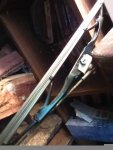
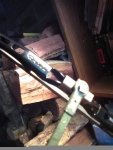
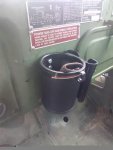
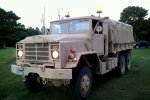
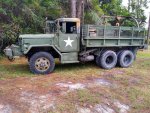
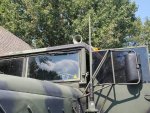
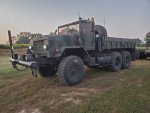
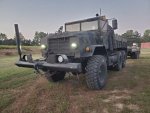
I took mine to a Labor Day cookout and give people rides in the back, plus home brewed an "easier to find" wiper blade solution, and I use it for a daily driver (round trip is 96 miles, so, I sleep at the shop several times a week) Oh! And added a 59 cent cupholder from Goodwill. Holds the monster size drink cups nicely!
 

Attachments

Last edited:

Ajax MD

Well-known member
1,569
1,414
113
Location
Mayo, MD
The people that swapped out transfer cases all the time had a jig or saddle on their jack to steady the case in an upright position to take it in or out of the truck as the flat side of the t case is not the bottom.
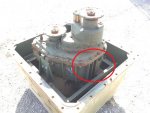
Correct, mine has a cradle with adjustable legs to support odd shapes and a safety chain to wrap around the transfer case to secure it to the jack.
The whole assembly is kind of an oblong triangular shape, but there is a flat section on the bottom that the jack will be able to support with good stability. I thought that I might have to shore it up with some cribbage in the cradle but that appears to be unnecessary.

In this image, the red circle indicates the bottom of the transfer case. You're looking at the drain plug. That's the flat surface that will sit in the jack's cradle.
 

Attachments

jonesal

Mission Specialist
Steel Soldiers Supporter
413
69
28
Location
Brookings, SD
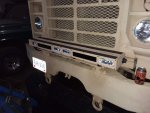
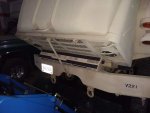
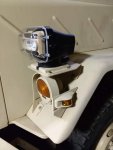
I'm about 1/2 way done installing an Eyecon Light kit on my M923. Once I get a bit further, I'll post a separate thread on the whys and wherefores.

1371939060097.jpg278.jpg281.jpg307.jpg013.jpg

Al Jones
M923
 

Ajax MD

Well-known member
1,569
1,414
113
Location
Mayo, MD
Ok, I'm at the "swap" point with this transfer case replacement.
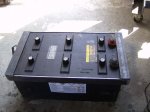
Everything is disconnected, removed. The mounting bolts have been broken loose and the transfer is ready to be lowered down.
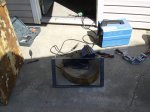
Oddly, the biggest PITA of the day, was rolling the new transfer case out of my garage, around to where the truck is parked. Long story, which I will not bore you with.

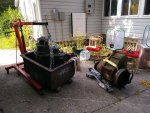
The new transfer case is still in the can but sitting next to the truck, ready to be hoisted out and set onto the jack, when it's time. I've used hardened 3/8 bolts in the companion flanges, staggering the (3/8) chain as Wes suggested. I'm using a 2-ton engine hoist.

Tomorrow's mission is to make the swap. As long as the new transfer case is bolted into the truck, I'll be happy. I can reconnect and reassemble all the little stuff during the week.

Oh- The old transfer case is a real mess inside. It only had 1/3 of the recommended fluid level and that was pure mud. The drain plug had a giant ball of metal filings stuck to it but no large, solid pieces fell out. The front shaft output has too much play but hasn't started leaking yet. The rear shaft output moves around a LOT. The jack shaft is the only one with no play.
 

Ajax MD

Well-known member
1,569
1,414
113
Location
Mayo, MD
The speedo angle drive doesn't want to come out of the transfer case. I can't seem to loosen the angle drive off of the large nut.
I can spin the nut free of the transfer case but the angle drive bumps into the side and so it will not spin.

I was being cautious. Does the angle drive separate from the large nut?
 

8madjack

Active member
416
78
28
Location
Gold country Ca.

simp5782

Feo, Fuerte y Formal
Supporting Vendor
12,118
9,355
113
Location
Mason, TN
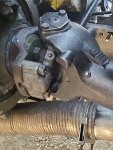
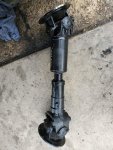
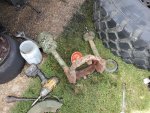
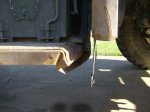
Replaced the driveline with a new 92C to 1810 morph and slip yoke. New heavy tube. New tandem driveline is 1710s and a 3.5in tube over rhe small 5 ton standard unit. Replaced a drivers brake drum due to heat cracks along with new bearings and seals. Replaced the drivers side brake spider and cans with a NOS one. Ran the steam cleaner sprinkler under it for a few days.

Replaced the rear wire harness the driveline took out. replaced a service supply hose. Removed the puradyn bypass system due to a leak on the main tank. Relocated the air compressor suction line.

Installed a roof mounted air horn. Resealed the passengers side glass and window frame. Rerouted the 2 main supply air lines for the rear brake relay valves outside the firing line of a driveshaft mishap. Replaced the exhaust system as well.
 

Attachments

Brutacus

Active member
Steel Soldiers Supporter
242
206
43
Location
Marion, AR.
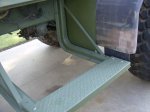
I finally got my passenger side step, and splash shield fixed. It was in really rough shape.
HPIM2387.jpg

HPIM2484.jpg

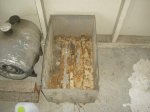
I also found myself some plastic battery boxes to replace my rusted out steel ones.

HPIM2476.jpg

HPIM2478.jpg

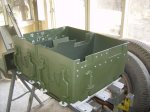
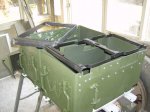
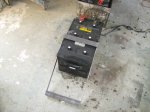
The battery box plate was super corroded, I'm going to sand blast it to clean it up. The other thing I did with the plastic boxes is to reinforce the sides with some steel plate. The screws are just temporary, I'm going to make it permanent with flat head rivets. The rivets won't take up as much room in the box as the plastic boxes are skinnier than the steel boxes.
HPIM2481.jpgHPIM2480.jpg

HPIM2475.jpgHPIM2474.jpg

I'm also making some hold-down brackets for my group 8D batteries. I still have some tabs to fab up on the ends for the hook bolts. When I finish with the brackets I was thinking of coating them that flex seal stuff.
 

Ajax MD

Well-known member
1,569
1,414
113
Location
Mayo, MD
Old transfer is removed from truck. New transfer is removed from shipping can.
My neighbor the heavy truck supervisor was super helpful. Scrounger came by to view the progress and declared it satisfactory. Crazy amount of knowledge and stories in that soldier.

Even after jacking up the truck, the transfer was just too high to squeeze out the FP wheel well as the TM directs. The toolbox was easily removed so we slipped it out between the 1st dually and the toolbox frame. Plenty of room, zero drama.

Um... I grossly underestimated the weight of the empty shipping can and pulled a muscle helping to move it out of the way. Like, several popping noises and tearing sensations. It was a freak move and happened in a split second. All that fear of being smashed by the transfer and I hurt myself on the shipping can...Jesus wept.

Anyway, we'll install the new one in a few days or a week when my wing is fixed. Now that I finally see how well the transfer balances on the jack (yes, it's strapped down) I'm confident about the installation. Pretty excited to get it all back together.
 

Attachments

Top
AdBlock Detected

We get it, advertisements are annoying!

Sure, ad-blocking software does a great job at blocking ads, but it also blocks useful features of our website like our supporting vendors. Their ads help keep Steel Soldiers going. Please consider disabling your ad blockers for the site. Thanks!

I've Disabled AdBlock
No Thanks