• Steel Soldiers now has a few new forums, read more about it at: New Munitions Forums!

  • Microsoft MSN, Live, Hotmail, Outlook email users may not be receiving emails. We are working to resolve this issue. Please add support@steelsoldiers.com to your trusted contacts.

What have you done to your 5 ton this week?

Ford Mechanic

Active member
1,805
6
38
Location
Edenton, NC
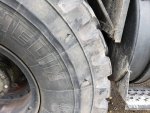
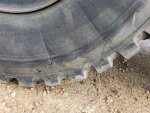
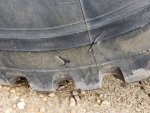
Was a busy 3500mi week. Met a few different great SS members a few small truck issues. Did have my first wheel failure. At around 60. Felt like a blowout just not how a runflat blowout feels. Was about 80mi of 2 lane highways from my destination and cant get the studs in store really so i bound ir up. Double chained. 25 to 35mph. Did real well. Was able to clean up the damaged stud heads. Put new lug nuts on drive it home. LMTV type wheel with 80k miles on it.


Sent from my SM-G935P using Tapatalk
Any indication of what caused the failure? And have you changed those axles? The wheel bearing part looks much different than mine.

Sent from my SM-G900V using Tapatalk
 

simp5782

Feo, Fuerte y Formal
Supporting Vendor
12,125
9,384
113
Location
Mason, TN
Any indication of what caused the failure? And have you changed those axles? The wheel bearing part looks much different than mine.

Sent from my SM-G900V using Tapatalk
A2 hubs are different than M39,809,939A0/1 hubs. Heat, stress, road conditions. Just worn out. Those faces arent thick. It has happened to other folks in the past...

That wheel had only been on the rear for 3000 miles of this trip. It was on the passengers front since it was installed in January. I swapped it last week. I cleaned the wheels and didnt notice any cracks. but i did fall off in some huge potholes. I Mean bad. I have one 16.00 I need to replace. I will upload pics of that tire tomorrow. It has about 9 sidewall gashes and chunks. When this all happened I thought it was that tire that blew, but with how everything felt I knew it was not blowout with a runflat. Too severe of a noise and vibration. Actually tried to push me across the lane like a broken/missing dog bone and the axle shifted so I knew something was out of the ordinary wrong.

I am just one of the brave ones that even loaded at 57k i double chained the axle up and drove on another 80 miles to get it fixed. Safe speed, no traffic roads in the middle of the night. I would have MUCH preferred it be the front tandem that I had to chain up but I wasn't going to swap drums on the highway. Could have. but oh well.
 

TechnoWeenie

Well-known member
Steel Soldiers Supporter
1,653
1,669
113
Location
Nova Laboratories, WA
Replaced an air line.

Removed the eight layers of paint, come to find out the air lines are original. Rear emergency glad hand valve is stuck closed... Better than stuck open... But it needs to be replaced.
 

MyothersanM1

19K M1 Armor Crewman
Steel Soldiers Supporter
1,958
427
68
Location
Culver City, CA
Actually not just this week, but done over the last few months. I have just been slow to post.

These are not anything huge as far as projects go, but mostly just incidentals, conveniences and upgrades.

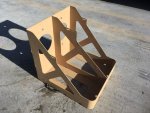
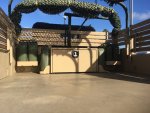
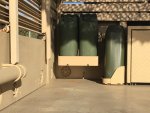
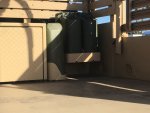
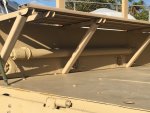
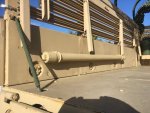
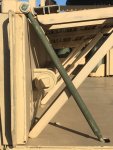
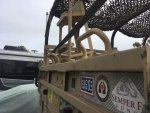
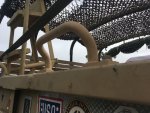
I installed two double jerry can holders in both front corners of the bed. The holders are originally designed for MRAPs. No, I don't really use those metal cans for fuel. They are for decoration. I attached some footman loops for strap retention.

IMG_2480.jpgIMG_2586.jpgIMG_2588.jpgIMG_2587.jpg


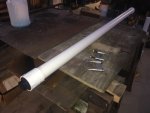
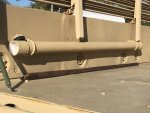
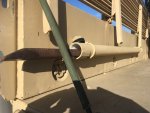
Made a holder for my "Tanker's Bar" out of 1 1/2" PVC. I didn't want to out it up under the bed so I tucked it nicely underneath the left side troop seat using some stainless steel u-bolts. I installed it angled slightly down toward the rear of the truck for easy removal.
IMG_2526.jpgIMG_2584.jpgIMG_2583.jpgIMG_2582.jpgIMG_2581.jpgIMG_2585.jpg


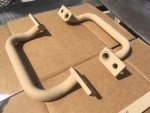
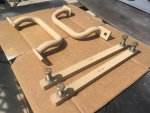
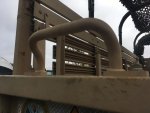
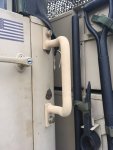
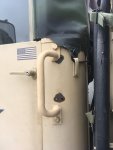
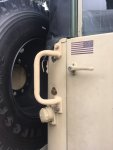
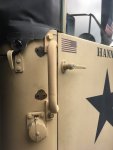
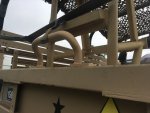
I found these really sturdy MRAP handles with steel barstock threaded backing plates and originally bought a pair for my tailgate handles. They are almost a direct replacement. However, the existing holes are off by about 3/16" on one side. I just opened the holes a little with a step bit a we were installed.
I liked them so much, I ended buying two more pair. I put a set on my cab. The passenger side had to install farther forward due to the slave receptacle. So, we installed it curving rearward to avoid hitting the door. Now, I just have to deal with the holes the old handles left behind.
I also replaced the center tailgate handle I had installed that was from a Deuce tailgate. Those bolt holes were an exact match. Simple install there.

IMG_2781.jpgIMG_2780.jpgIMG_2792.jpgIMG_2793.jpgIMG_2795.jpgIMG_2787.jpgIMG_2788.jpgIMG_2789.jpgIMG_2790.jpgIMG_2794.jpg
 

big block 88

Member
862
17
18
Location
Topeka/Kansas
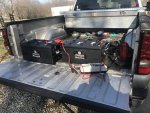
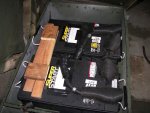
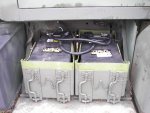
923 is getting her 8d's. I let the genius charge them up first. I always like my batteries at their max lethal levels for when i work on them.

No pic but the cobra classic is mounted in the 925. Mounted it on the winch control tower.
 

Attachments

Elijah95

Certified Rookie
1,239
1,196
113
Location
Georgia
Cleaned and Mic’d all 26 head bolts, then lubed with Rotella t6. Torqued the head down, reset timing (it actually slipped from 16° up to 24+!) to 15.5° and ran the overhead; we are getting closer to lift off!
 

tobyS

Well-known member
4,832
833
113
Location
IN
923 is getting her 8d's. I let the genius charge them up first. I always like my batteries at their max lethal levels for when i work on them.

No pic but the cobra classic is mounted in the 925. Mounted it on the winch control tower.

Laughing with you.....there is a lot of open metal near those bad boys. Are you doing the 1100 or 1450 cca?
 

Attachments

74M35A2

Well-known member
4,145
330
83
Location
Livonia, MI
Cleaned and Mic’d all 26 head bolts, then lubed with Rotella t6. Torqued the head down, reset timing (it actually slipped from 16° up to 24+!) to 15.5° and ran the overhead; we are getting closer to lift off!
How did you measure, and set it (separate questions)? 24 degrees would typically cause head gasket issues. Is this what happened? I assume you mean it slipped 24 degrees toward the retard direction? I don’t think it can slip to the further advance direction, unless you mean it slipped 24 degress toward retard amd was squirting ATDC. Thanks, your work looks clean.
 

Elijah95

Certified Rookie
1,239
1,196
113
Location
Georgia
How did you measure, and set it (separate questions)? 24 degrees would typically cause head gasket issues. Is this what happened? I assume you mean it slipped 24 degrees toward the retard direction? I don’t think it can slip to the further advance direction, unless you mean it slipped 24 degress toward retard amd was squirting ATDC. Thanks, your work looks clean.
Measured circumference of balancer, divided by 360 which gives you a number like .083 which is 1 degree of timing, so my engine was timed at 8° and I wanted 15.5 so 15.5-8=7.5

Then multiply the 7.5 and .083 and you get .625” which is how far I need to move the engine with marks on damper (tdc marked, and my “new” time marked) go slightly past it by atleast 1/2" then rotate engine in normal direction to remove gear slack to give me a total of 15.5° timing.

I’m not sure how it slipped advanced but it definitely popped the crap out of that gasket that was already weak.

Thank you!
 

CARMAN

Active member
Steel Soldiers Supporter
649
86
43
Location
Broad Run VA
Actually not just this week, but done over the last few months. I have just been slow to post.

These are not anything huge as far as projects go, but mostly just incidentals, conveniences and upgrades.

I installed two double jerry can holders in both front corners of the bed. The holders are originally designed for MRAPs. No, I don't really use those metal cans for fuel. They are for decoration. I attached some footman loops for strap retention.

View attachment 723814View attachment 723813View attachment 723811View attachment 723812


Made a holder for my "Tanker's Bar" out of 1 1/2" PVC. I didn't want to out it up under the bed so I tucked it nicely underneath the left side troop seat using some stainless steel u-bolts. I installed it angled slightly down toward the rear of the truck for easy removal.
View attachment 723815View attachment 723819View attachment 723818View attachment 723817View attachment 723816View attachment 723820


I found these really sturdy MRAP handles with steel barstock threaded backing plates and originally bought a pair for my tailgate handles. They are almost a direct replacement. However, the existing holes are off by about 3/16" on one side. I just opened the holes a little with a step bit a we were installed.
I liked them so much, I ended buying two more pair. I put a set on my cab. The passenger side had to install farther forward due to the slave receptacle. So, we installed it curving rearward to avoid hitting the door. Now, I just have to deal with the holes the old handles left behind.
I also replaced the center tailgate handle I had installed that was from a Deuce tailgate. Those bolt holes were an exact match. Simple install there.

View attachment 723822View attachment 723821View attachment 723827View attachment 723828View attachment 723830View attachment 723823View attachment 723824View attachment 723825View attachment 723826View attachment 723829
Looks nice. What was your source for the "netting" you string across your bows. Looks cool and would be a great add on for when I remove cargo cover for the summer but want some shade when hanging out or camping.
 

tobyS

Well-known member
4,832
833
113
Location
IN
1450 had them in the 925 for 2 years or so. They have been fantastic. I wish the batteries were outside the cab that under the seat crap is a terrible idea.
The 817 was a lot easier down at the step. Probably higher up for deeper water.
 

tobyS

Well-known member
4,832
833
113
Location
IN
The last truck I bought is the only one of 16 that started on it's own and has NOT had battery issues. They are not Hawkers.

I just sold a M931A2, 2012 rebuild that had Hawkers and one kept draining the entire bank. The guy put in 2 8d's and sold me the 3 2012 hawkers back for $50 each.

I have another....so they are going in the golf cart (it's 48vdc).
 
Top