-
Steel Soldiers now has a few new forums, read more about it at: New Munitions Forums!
What have you done to your CUCV today/lately? - Part 1
- Thread starter DXTAC
- Start date

- Status
- Not open for further replies.
More options
Who Replied?allenhillview
New member
- 272
- 3
- 0
- Location
- Jonesborough, TN.
2HIJOS2126
New member
- 103
- 2
- 0
- Location
- IDAHO FALLS, ID.
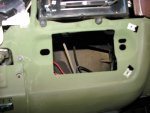
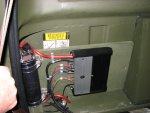
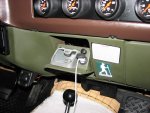
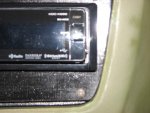
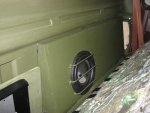
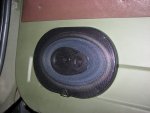
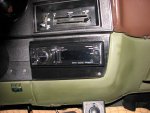
Stereo install looks awesome... ![Thumbs Up [thumbzup] [thumbzup]](https://www.steelsoldiers.com/images/smilies/icon_smile_thumzup.gif)
chevyCUCV
New member
- 598
- 5
- 0
- Location
- Massachusetts
I seized a brake caliper the other day.
I just placed my order from rockauto for the parts. ( cheaper than local place by a lot+ better quality i hope )
Also i took my truck off the road. Whenever i decide to re register it i think i will use antique plates.
I just placed my order from rockauto for the parts. ( cheaper than local place by a lot+ better quality i hope )
Also i took my truck off the road. Whenever i decide to re register it i think i will use antique plates.
1ton cucv k5 turbo
Member
- 367
- 0
- 18
- Location
- Castalian Springs, TN
Originally Posted by 1ton cucv k5 turbo
Noted a few weeks ago..... had an issue with charging system pushing 30+ volts and then nothing....... i had gen1 rebuilt, due to being in a rush to be mission ready, for a trail ride, ( which, fell through at the last minute...) cost me 80something bucks.... Stll pushed 30+ volts. I then went and had Gen2 rebuilt at a different vendor... (cost $25.00 helping out an ole school disabled vet... PRICELESS.. He has a customer for life BTW....) Went ahead and paid him to build me a replacement spare, should be ready in a few days.... System currently still pushing 29-30 volts... Thinking the high dollar rebuild on GEN1 is kinda hot, cranking out a full 15+ volts... ( voltmeter in dash currently sits just a hair in the red, and not in the normal green position..) gonna wait until i have spare in hand and installed to see if it drops it down to the correct 28 volts.
Sorry for the delay... its been about 3 weeks since i could get back to this... Was finally able to pick up a 3rd ( spare ) alt i had built... swapped it out this past weekend.. and Cha ching... its charging correctly again.. at 28volts.. All is good now with ole Beulah.. took the Alt in question and had it tested... and its a HOT one.. putting out 15.8 volts.... So, its still under warranty... gonna get those idiots in Nashville to fix it..( this will be the 3rd and last time, i have them do any Alt work for me...).
So, now... with a new job change, and some medical stuff coming up... gonna have to hold off on any new upgrades for a bit...
Noted a few weeks ago..... had an issue with charging system pushing 30+ volts and then nothing....... i had gen1 rebuilt, due to being in a rush to be mission ready, for a trail ride, ( which, fell through at the last minute...) cost me 80something bucks.... Stll pushed 30+ volts. I then went and had Gen2 rebuilt at a different vendor... (cost $25.00 helping out an ole school disabled vet... PRICELESS.. He has a customer for life BTW....) Went ahead and paid him to build me a replacement spare, should be ready in a few days.... System currently still pushing 29-30 volts... Thinking the high dollar rebuild on GEN1 is kinda hot, cranking out a full 15+ volts... ( voltmeter in dash currently sits just a hair in the red, and not in the normal green position..) gonna wait until i have spare in hand and installed to see if it drops it down to the correct 28 volts.
Suggestion:
Check the voltage across the terminals in each battery separately with engine running and dash voltmeter in the red. Report back what you find please.
Sorry for the delay... its been about 3 weeks since i could get back to this... Was finally able to pick up a 3rd ( spare ) alt i had built... swapped it out this past weekend.. and Cha ching... its charging correctly again.. at 28volts.. All is good now with ole Beulah.. took the Alt in question and had it tested... and its a HOT one.. putting out 15.8 volts.... So, its still under warranty... gonna get those idiots in Nashville to fix it..( this will be the 3rd and last time, i have them do any Alt work for me...).
So, now... with a new job change, and some medical stuff coming up... gonna have to hold off on any new upgrades for a bit...
- 34,010
- 1,821
- 113
- Location
- GA Mountains
Lets see! Pulled the cluster out of the M1010 today as it had no lights. Got everything cleaned up and she should be OK now. Did put LED bulbs in but they were weak (after dark check) and put 194s back in. Also drilled the back channel bumper for the military trailer plug. Bought a new plug from Eriks and did all the solder connections on that as well. Perhaps tomorrow I can button up the dash and get the trailer plug installed and the wires tapped in. I've also been troubleshooting the side floods on it lately. Problem one was there was no relay under the dash. Quelled that problem and got power to one side but not the other. When I pulled the dash I checked the switches and one flood light switch was bad. Swapped over the switch from the GPFU so should be GTG.
- 4,812
- 748
- 113
- Location
- Liberty Hill, SC
I just fought with putting new brakes, all new hardware, and new oil seal on the driver side of the Hyrailer for about 4 hours... I dinged the seal a little when I was putting it in the drum, so I hope it doesn't start leaking for a long time.
I would have done the other side but it is almost 2300 and I don't feel like dragging out the steam cleaner (I'm doing the brakes and seals on both sides as the pass side was leaking oil bad.) and then fighting with that side as well.
I would have done the other side but it is almost 2300 and I don't feel like dragging out the steam cleaner (I'm doing the brakes and seals on both sides as the pass side was leaking oil bad.) and then fighting with that side as well.
Vhyle
New member
- 181
- 1
- 0
- Location
- Clarksville, TN
The replacement fuel drainback line just shipped to my door, so now I can put the truck back together this weekend. I'll also be doing trans filter and gasket, glow plugs and fuel filter.
mtn man
Member
- 81
- 10
- 8
- Location
- Wilkesboro, NC
Did rotor/hubs on front, pads, repacked wheel bearings and calipers last night. Drove the 1009 100 miles to airport this am and thank goodness no issues.
2HIJOS2126
New member
- 103
- 2
- 0
- Location
- IDAHO FALLS, ID.
I cut up some metal to start building my safari/headache rack...gonna go to a buddys shop tomorrow and start welding it together... I'll post pics of the progress later next week...
- 8,292
- 686
- 113
- Location
- Corpus Christi, TX
What have I done with my CUCV lately?
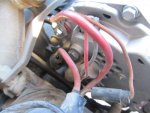
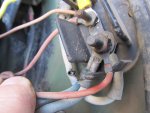
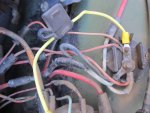
Well, I killed the electrica system this evening. How's that for good work. REplaced the alternator, hooked up the negative and poof, sparks, smoke from the engine side of the firewall. FFFFFFFFFFFFFFFFFFFFFF!!!!!!!!!!!!!!!!!!!!!!!!!!!!!!!!!!!!!!!!!!!!!!!!!!!!!!!!!!!!!!!!
Well, I killed the electrica system this evening. How's that for good work. REplaced the alternator, hooked up the negative and poof, sparks, smoke from the engine side of the firewall. FFFFFFFFFFFFFFFFFFFFFF!!!!!!!!!!!!!!!!!!!!!!!!!!!!!!!!!!!!!!!!!!!!!!!!!!!!!!!!!!!!!!!!
Was alcohol involved?????What have I done with my CUCV lately?
Well, I killed the electrica system this evening. How's that for good work. REplaced the alternator, hooked up the negative and poof, sparks, smoke from the engine side of the firewall. FFFFFFFFFFFFFFFFFFFFFF!!!!!!!!!!!!!!!!!!!!!!!!!!!!!!!!!!!!!!!!!!!!!!!!!!!!!!!!!!!!!!!!

Finally got the m1009 home from gsa in Tifton GA. Took 3 weeks and 4 different shipping company's but finally got it home. Truck has no brakes and didnt run and its 20 degrees out. Luckily my wife volunteered to steer while i used my van push it in the garage. 2 new batteries and a oil change and she fired up!!

SGT LongT
Member
- 203
- 23
- 18
- Location
- Palm Bay, FL
Finally upgraded my fuel filter from the original box type to a spin on filter. I used the FM100 series from Stanadyne that I purchased from thedieselstore.com. For those of you considering a spin on fuel filter upgrade I high recommend this series. The FM100 series is modular with numerous options that include water in fuel sensor, fuel heater, lift pump, and others. The spin on fuel filters are themselves varied for size and micron rating. I chose to put on a hand primer pump that sits on the top of the unit and the clear bowl that screws onto the bottom of the filter for visual water in fuel checks. I ended up having to make a mounting bracket for the fuel filter only because I put the hand pump primer on the unit, otherwise the filter unit would have bolted right into the holes on the fire wall where the original fuel filter bracket is bolted.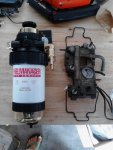
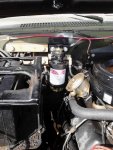
Parts list from thedieselstore.com: 33642 (housing and filter) STA29575 (150 micron prefilter) STA29899 (clear fuel bowl) STA29578 (hand primer pump)


Parts list from thedieselstore.com: 33642 (housing and filter) STA29575 (150 micron prefilter) STA29899 (clear fuel bowl) STA29578 (hand primer pump)
- 8,292
- 686
- 113
- Location
- Corpus Christi, TX
- 8,292
- 686
- 113
- Location
- Corpus Christi, TX
- 26,246
- 1,185
- 113
- Location
- NY
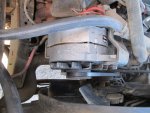
Carnac, that looks like a Wilson alternator.
They are known to not be correctly built and cause the issue you just had.
Here is a thread that had the same exact issue. http://www.steelsoldiers.com/showth...oing-crazy&highlight=alternator+wires+picture
I'd suspect your new alt was your problem.
They are known to not be correctly built and cause the issue you just had.
Here is a thread that had the same exact issue. http://www.steelsoldiers.com/showth...oing-crazy&highlight=alternator+wires+picture
I'd suspect your new alt was your problem.
- 8,292
- 686
- 113
- Location
- Corpus Christi, TX
Thanks, even though you did ban me, LOL.
Will have all my alternators rebuild and ensure they use the isolated ground on them.
Hopefully I only fried the two wires leading to the block. I'll replace the one wire leading to the battery. I'll splice, solder and heat shrink the one going down to the wiring harness. I'll have a spare glow plug relay and card on hand and hopefully that will take care of this.
Thanks DH.
chief1983
Member
- 290
- 1
- 16
- Location
- Saint Charles, MO
Would a continuity test between the negative terminal and the alternator housing be sufficient for checking the rebuild before install? Would be a good tip to spread around if so.
- Status
- Not open for further replies.
- 112,579members
- 166,181threads
- 2,340,591posts
- 1,048online users

