• Steel Soldiers now has a few new forums, read more about it at: New Munitions Forums!

  • Microsoft MSN, Live, Hotmail, Outlook email users may not be receiving emails. We are working to resolve this issue. Please add support@steelsoldiers.com to your trusted contacts.

What have you done to your CUCV today/lately - Part 2

AECS

Member
310
6
18
Location
Munford, TN
New injectors and rebuilt pump. Runs like a champ! 700 for the rebuilt pump at Midsouth Diesel in Memphis. Pricey but well reviewed, local to me, and well worth it me be able to drop it on the counter in person if it aint right.
 

joshuak

Active member
747
214
43
Location
Slower shore, DE
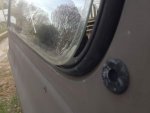
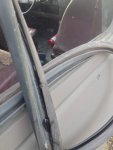
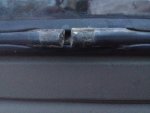
Tired of water seeping through the side window seals on my hard topper, I followed this recommendation and removed the lacing or lock striping in the middle of the seal, popped the window out, removed the seal, cleaned the window rubber and fiberglass top, applied black RTV sealer in the groove that goes fits on the fiberglass, put rubber back on the fiberglass top, applied sealer where the window fits in, slid the window in, re installed the lock stripping (very easy with a Leslie 47000), cleaned up the excess sealant and last step will be to re install the metal clip when the paint dries.

Some pictures:

IMG_0840.jpg IMG_0846.jpg IMG_0848.jpg IMG_0855.jpg
 

Another Ahab

Well-known member
17,999
4,556
113
Location
Alexandria, VA
Tired of water seeping through the side window seals on my hard topper, I followed this recommendation and removed the lacing or lock striping in the middle of the seal, popped the window out, removed the seal, cleaned the window rubber and fiberglass top, applied black RTV sealer in the groove that goes fits on the fiberglass, put rubber back on the fiberglass top, applied sealer where the window fits in, slid the window in, re installed the lock stripping (very easy with a Leslie 47000), cleaned up the excess sealant and last step will be to re install the metal clip when the paint dries.
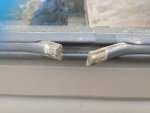
When you have the right tool, the job can be just SO much easier.

How did you even know that there WAS such a tool!?
 

rsh4364

Active member
1,372
15
38
Location
greensprings ,ohio
I got my broken/stuck glow plugs out! Didn't have antiseize so the injectors will wait a day or two before going back in. Glow plugs aren't going to be delivered for a few days anyway.
Ill bet you never have to go thru that pain again!I check my GPs every oil change now.I learned because this is my second 1009.Its also a really good idea to do a compression check when changing the GPs,if you weren't 4 hrs away Id help you out.Maybe a local diesel mech.has a gauge to lend.
 
Last edited:

gottaluvit

Well-known member
Ill bet you never have to go thru that pain again!I check my GPs every oil change now.I learned because this is my second 1009.Its also a really good idea to do a compression check when changing the GPs,if you weren't 4 hrs away Id help you out.Maybe a local diesel mech.has a gauge to lend.
Actually they got that way real fast. Just a few starts. I think I got defective 13Gs. The 070 Wellmans were starting it but it took three tries or so. There were two not working but none swollen. The 13s swelled on test starts! Here's the link to a thread on this.http://www.steelsoldiers.com/showthread.php?147087-New-Glow-Plugs-Installed-Starts-Worse-Than-Ever
 

tim292stro

Well-known member
2,118
41
48
Location
S.F. Bay Area/California
So to clarify - that 24V is with the ballast resistor in plage and new glow plugs? If so, I'd pull the resistor pack and have a look - even though you've decided to do the 12V mod, I'd still like to chase the failure to conclusion (working in tech that's how we operate, we want to understand and log everything we experience - might help the next guy).
 

gottaluvit

Well-known member
So to clarify - that 24V is with the ballast resistor in plage and new glow plugs? If so, I'd pull the resistor pack and have a look - even though you've decided to do the 12V mod, I'd still like to chase the failure to conclusion (working in tech that's how we operate, we want to understand and log everything we experience - might help the next guy).
Ballast resister was in place and there were less than half (I assume) of the glow plugs working. I know two that came out didn't work and the three stuck ones I don't know for sure but figured they were not working since they swelled.
 

cucvrus

Well-known member
11,473
10,434
113
Location
Jonestown Pennsylvania
I have an M1009 Crown of thorns that is charging at 36 volts I just drove it to work today. And the only thing that I noticed is the dash lights are very bright and the Sony kicks off because of the over charge. I am thinking it is the left alternator. I don't think I would see it in the dash lights from the right alternator. I will get the volt meter out later and check.

I got out the Fluke and checked the voltage 16.4 on the left alternator and 38 volts on the right alternator. No time for piddling around with how or why diagnostics. I just removed both alternators and installed a new (rebuilt) set. I will send the defective alternators to the rebuild shop and get them checked out or rebuilt. Saves me a lot of head aches and miss diagnosis. With all LED lighting my alternators took a early holiday. At idle with all the lights and acceseries running it was fine and the radio would play. As soon as i drove it shut the radio down and the lights and gauges peaked. That was easy.
 

gottaluvit

Well-known member
Ok so that was before you decided to move to 12V. Let me know what you measure out on the resistor when you're done taking it out.
Ok. I will measure it's resistance. I most likely will just keep it mounted and tuck the wires behind it. I didn't cut anything. I will tap into the 12v on the fused side of the 12v power block that is only inches from the relay/solenoid.
 

cucvrus

Well-known member
11,473
10,434
113
Location
Jonestown Pennsylvania
If you were closer to PA would help you out. I had a few people bring me CUCV's from other states ( NY,MD, VA,NJ, NH) to fix issues. I don't know it all but I can spot poor modifications from 10 feet away. And most if not all were worked on by people that tried the best they could from poor information they read on line and ended up making matters worse. Once they started one change and that did not work. They tried something else and it just snowballed from there. They ended up with a mess that cost several times what the failed part would have cost that initiated the problem to begin with. Do as you may. Just trying to help. Remember they ran 30 years and they were maintained by the instructions outlined in the TM. That is what is always referenced here the TM. Good Luck. Winter is upon us. Stay warm. Keep it simple keep it stock then the books are your friend. I wish the CUCV Electric Glow plug diagnostic book was available for you guys in the stickies. Very helpful and self explanatory manual on the CUCV glow system I ever read.
 

gottaluvit

Well-known member
If you were closer to PA would help you out. I had a few people bring me CUCV's from other states ( NY,MD, VA,NJ, NH) to fix issues. I don't know it all but I can spot poor modifications from 10 feet away. And most if not all were worked on by people that tried the best they could from poor information they read on line and ended up making matters worse. Once they started one change and that did not work. They tried something else and it just snowballed from there. They ended up with a mess that cost several times what the failed part would have cost that initiated the problem to begin with. Do as you may. Just trying to help. Remember they ran 30 years and they were maintained by the instructions outlined in the TM. That is what is always referenced here the TM. Good Luck. Winter is upon us. Stay warm. Keep it simple keep it stock then the books are your friend. I wish the CUCV Electric Glow plug diagnostic book was available for you guys in the stickies. Very helpful and self explanatory manual on the CUCV glow system I ever read.
Now that I realize I was the fault of my issues and you have informed me of the correct starting procedure, I believe I will keep it stock. I don't like stuff being molested but didn't want to deal with stuck glow plugs either. However, it wasn't their fault nor the 24v ballast resisters fault. It was my ignorance.
 

NovacaineFix

Member
662
1
18
Location
San Diego, California
I have an M1009 Crown of thorns that is charging at 36 volts I just drove it to work today. And the only thing that I noticed is the dash lights are very bright and the Sony kicks off because of the over charge. I am thinking it is the left alternator. I don't think I would see it in the dash lights from the right alternator. I will get the volt meter out later and check.
I will send the defective alternators to the rebuild shop and get them checked out or rebuilt.
That was easy.
I had the same thing just a few months back, had the alternating disco effect of warning lights from both GEN lights on the dash.
Mine wound up being the left alternator and was feeding 32 volts into the right one once driving, at idle it was more like 28 volts.

Replacing both at the same time, does save a lot of time and gives you a warranty at the same time, I like warranties.

True that many people just don't understand the nature of 24 volt vehicles [I didn't before I had my 1009] and when you get something like the military chevy's that are a hybrid 24 volt system, it just makes people want to run away.

Everytime I see a post on here, it is a reminder of what I have done to my 1009 or what needs to be done, so please keep'em coming.
 

cucvrus

Well-known member
11,473
10,434
113
Location
Jonestown Pennsylvania
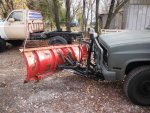
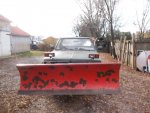
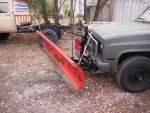
DSCF5780.jpgDSCF5776.jpgDSCF5777.jpgDSCF5778.jpgDSCF5779.jpgToday I was working on the Jersey Indian and checked out the plow operation. Everything works as designed. I was unable to decipher the wiring but found out the truck side had the wrong harness and it was all hacked up. Works like new now.
 

cucvrus

Well-known member
11,473
10,434
113
Location
Jonestown Pennsylvania
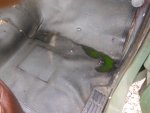
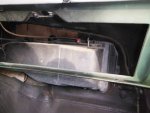
DSCF5781.jpgHey whats that on the floor of the Jersey Indian? Lemon Lime soda. It sure is sweet. DSCF5782.jpgFirst step remove the 4 7mm screws that hold the glove box in place on the lower hinge. DSCF5783.jpgNext to make it nice and easy remove the rearDSCF5784.jpg battery and battery tray.
 

cucvrus

Well-known member
11,473
10,434
113
Location
Jonestown Pennsylvania
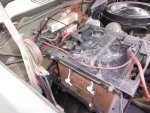
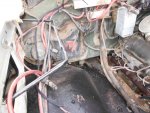
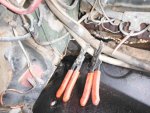
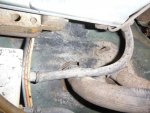
DSCF5785.jpgI used a set of heater hose hemostats to close off the coolant so I could remove the heater core.The Jersey Indian has the original heater hoses.DSCF5786.jpgDSCF5787.jpgDSCF5789.jpgDSCF5790.jpgYou must remove 3 -1/4" / 7/16" nuts under the hood on the firewall. they are best removed with a 7/16" - 11M/M deep socket. Clean and wire brush the threads on the bolts and spray oil on them or they will break loose from the heater box inside the cab. DSCF5788.jpgRemove the heater control cable that is visible in the glove box opening. It has a 7 mm screw and a red tab that fastens it to the heater box. Also you must remove the one 5/16" hex screw from the defroster duct. This will allow the heater box to be removed.
 
Top