• Steel Soldiers now has a few new forums, read more about it at: New Munitions Forums!

  • Microsoft MSN, Live, Hotmail, Outlook email users may not be receiving emails. We are working to resolve this issue. Please add support@steelsoldiers.com to your trusted contacts.

What have you done to your CUCV today/lately - Part 2

AFGVET

Member
40
71
18
Location
Fort Bragg NC
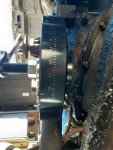
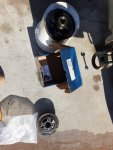
I needed to do both the radiator and a harmonic balancer. I suspected that the rubber in that 40 year old stock harmonic balancer if not shot would let go at the worst possible moment. So I decided on doing a Fluidampr.
The radiator was rotted out completely on the lower half. I got a radiator from Summit, one of their Classic OEM. It ran me over $500. (rebuilding the old one was going to be over that).
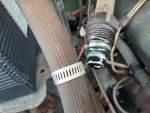
Well Caveat Emptor. The first problem was that the engine oil cooling lines wouldn't screw in. The was a small slip of paper in the radiator's box mentioning something about Summit not covering stripped threads. So I pulled out the radiator and took a close look at the fitting in the radiator's side tank. The bums that made it in Mexico (yes it was made in Mexico, not hyperbole) did not completely cut threads in it. I took first to a radiator shop and they referred me to their machinist, but while he examined it and mentioned that the oil cooler's construction (inside the radiator) was of a lesser quality than the original. (something about barrel vs. plate). -well I can always put in an auxiliary cooler if its a problem, right?-
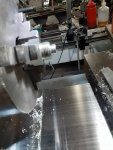
Machinist said the female fitting in the radiator was "rough" and not really cut at all for any fitting. Additionally, it was not deep enough to ensure the male fitting would seat deep enough. This was fixed by using a steel intermediate fitting and turning it to fit.

The Fluidampr went right in with no problems.
I bolted up the pulleys and Lo and behold the power steering pump was being a difficult Son-of-a-Cuss (see no profanities for all you thin-skinned word police).
Yes there is that GM claw tool (thexton 383) for this, but I didn't have it.
I watched this video and found it very helpful. (especially that part about the hidden 14mm bolt)
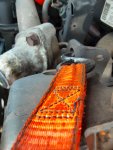
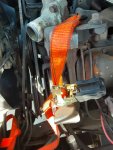
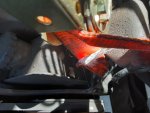
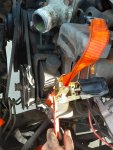
I devised a method using a ratchet strap to pull the pump in the correct direction. It worked pretty well.

My wife came out and I watched as I turned it a few times. With no overt sounds of strike at the flywheel, I started her up.
She actually asked what I had done because it was much smoother and quieter.

(I tried to sequence the photos, but I couldn't figure out how)20241117_133651.jpg20241117_140559.jpg20241119_111404.jpg20241119_125803.jpg20241119_134840.jpg20241120_162415.jpg20241123_114151.jpg20241123_114156.jpg20241123_114208.jpg20241123_114220.jpg20241123_114226.jpgBelt Configeration Radiator Project.jpgEnd of project.jpg
 

Attachments

Last edited:

2INSANE

Well-known member
727
834
93
Location
Belgrade, Montana
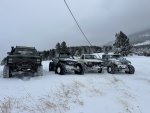
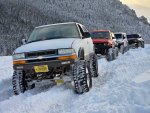
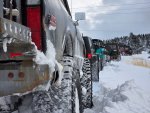
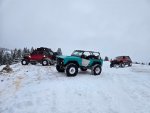
New Year’s Day a group of 14 of us went to the top of Flathead pass during a snow storm. 1/2 of us got stuck. We all creeped, winched, dug and pulled each other to the top. A few close calls with roll overs or sliding off the mountain and had only one Jeep break down. After the trail ride was over, on the way home my front differential new Yukon 5.13 gear blew. Other then that, that’s all I’ve done so far.
 

Attachments

87cr250r

Well-known member
1,268
1,996
113
Location
Rodeo, Ca
Check out a product called Daubert Nox-Rust 121 B. It's supposed to be the self-healing wax coating GM uses on some of their truck frames. I'm in California so I can't tell you how well it works but it looks good and the price isn't bad. It can be applied over other coatings and requires minimal prep. It's a newer technology based on gelled calcium sulfonate.
 

latvius

Member
70
19
8
Location
Ariton Alabama
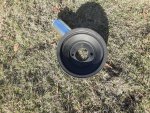
Replaced the harmonic balancer, pulley and front seal. The pulley was wobbling and I wasn't sure which was the culprit before I took it apart so I bought both. Other than old the HB looked pretty good but the pulley looks crooked around the rung that mates with the HB, it's hard to see in the pic but I think that was my problem. I had to make a redneck seal installation tool wood was faster to make and got the job done installing the front seal. I had bought a new bolt but it was 2.5 times as long as the original so I ended up using it with a boat load of washer as the installation tool. Then I used a chain to keep it from turning while I got the torque wrench on it.
20250111_110258.jpg20250111_112418.jpg20250111_133841.jpg20250111_134429.jpg20250111_134432.jpg
 

WWRD99

Well-known member
Steel Soldiers Supporter
1,157
1,783
113
Location
York Pa
Replaced the harmonic balancer, pulley and front seal. The pulley was wobbling and I wasn't sure which was the culprit before I took it apart so I bought both. Other than old the HB looked pretty good but the pulley looks crooked around the rung that mates with the HB, it's hard to see in the pic but I think that was my problem. I had to make a redneck seal installation tool wood was faster to make and got the job done installing the front seal. I had bought a new bolt but it was 2.5 times as long as the original so I ended up using it with a boat load of washer as the installation tool. Then I used a chain to keep it from turning while I got the torque wrench on it.
View attachment 938904View attachment 938905View attachment 938907View attachment 938908View attachment 938909
Where'd you find the front pulley?

Sent from my SM-S906U using Tapatalk
 

AFGVET

Member
40
71
18
Location
Fort Bragg NC
I needed to do both the radiator and a harmonic balancer. I suspected that the rubber in that 40 year old stock harmonic balancer if not shot would let go at the worst possible moment. So I decided on doing a Fluidampr.
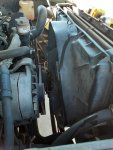
The radiator was rotted out completely on the lower half. I got a radiator from Summit, one of their Classic OEM. It ran me over $500. (rebuilding the old one was going to be over that).
Well Caveat Emptor. The first problem was that the engine oil cooling lines wouldn't screw in. The was a small slip of paper in the radiator's box mentioning something about Summit not covering stripped threads. So I pulled out the radiator and took a close look at the fitting in the radiator's side tank. The bums that made it in Mexico (yes it was made in Mexico, not hyperbole) did not completely cut threads in it. I took first to a radiator shop and they referred me to their machinist, but while he examined it and mentioned that the oil cooler's construction (inside the radiator) was of a lesser quality than the original. (something about barrel vs. plate). -well I can always put in an auxiliary cooler if its a problem, right?-
Machinist said the female fitting in the radiator was "rough" and not really cut at all for any fitting. Additionally, it was not deep enough to ensure the male fitting would seat deep enough. This was fixed by using a steel intermediate fitting and turning it to fit.

The Fluidampr went right in with no problems.
I bolted up the pulleys and Lo and behold the power steering pump was being a difficult Son-of-a-Cuss (see no profanities for all you thin-skinned word police).
Yes there is that GM claw tool (thexton 383) for this, but I didn't have it.
I watched this video and found it very helpful. (especially that part about the hidden 14mm bolt)
I devised a method using a ratchet strap to pull the pump in the correct direction. It worked pretty well.

My wife came out and I watched as I turned it a few times. With no overt sounds of strike at the flywheel, I started her up.
She actually asked what I had done because it was much smoother and quieter.

(I tried to sequence the photos, but I couldn't figure out how)View attachment 938529View attachment 938530View attachment 938532View attachment 938533View attachment 938534View attachment 938535View attachment 938536View attachment 938537View attachment 938538View attachment 938539View attachment 938540View attachment 938541View attachment 938542
Additional photos: 15JAN2025
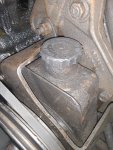
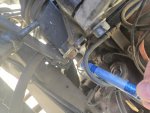
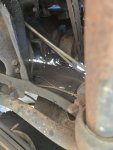
20250115_151302.jpgThis (the bolt that the blue min-flashlight is pointing at above this line) is just one of the bolts that needs to be loosened to tighten the PS pump belt.
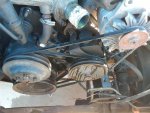
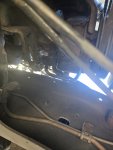
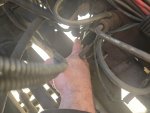
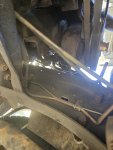
The other one is best accessed from underneath.
See the below photos20250115_151335.jpgYou can actually see it from the top but access is easier from underneath.20250115_151438.jpg
 

Attachments

AFGVET

Member
40
71
18
Location
Fort Bragg NC
4 spots to loosen, per the TM

DO NOT pry on power steering pump (5) reservoir or pull on filler neck when
rotating power steering pump, Failure to follow this caution may result in
damage to power steering pump.

NOTE: the numbers in parenthesis correspond to the parts in the exploded view
• If removing belt (1), perform step 1.
• If removing power steering pump (5), perform steps 1-3.
1. Loosen adjusting nut (2) and adjusting bolts (7 and 12).
2. Rotate power steering pump (5) to
loosen belt (1).
3. Remove belt from pulley (14), Discard belt if worn or damaged.

(Additionally) You could try loosening mounting nut (3)1737080023237.png
 
Top
AdBlock Detected

We get it, advertisements are annoying!

Sure, ad-blocking software does a great job at blocking ads, but it also blocks useful features of our website like our supporting vendors. Their ads help keep Steel Soldiers going. Please consider disabling your ad blockers for the site. Thanks!

I've Disabled AdBlock
No Thanks