• Steel Soldiers now has a few new forums, read more about it at: New Munitions Forums!

  • Microsoft MSN, Live, Hotmail, Outlook email users may not be receiving emails. We are working to resolve this issue. Please add support@steelsoldiers.com to your trusted contacts.

Wrecker wishlist of mods

red

Active member
1,988
25
38
Location
Eagle Mountain/Utah
why not move the torch tanks to one side-dedicated- and cut out the other for an access panel under tire tray. I have never understood why they put one tank on each side forcing to connect with a long section of hose,,,, kinda risky to me.. no welding truck was ever set up that way...

Red, Like where your going with the dump truck stuff. just wish there was an easier solution to the golden driveshaft for the crane. talked to the driveshaft shop the other day and to put a 1330 (old GM type Ujoint)(easy off shelf replacement) cardone joint at each end of that shaft, build a new shaft, balance, and put a slip in there would be close to $1100.00 But we have to finish the yoke flange before the feasibility is worked out, to see if the angle of the dangle will be within 23* for the cardones. My machinist has the bearing cap and spud shaft built, just waiting on a seal and I can seal the bugger up and move the truck off the hill and measure for the shaft. But if I put in a 10or 18spd trans. I will be right back here again increasing this angle due to moving the power divider back..... again... the 936 method of a pump mounted to the back of the power divider and hoses running up to the crane drive is the ultimate way to go.

I will be sipping rum and coconut for about 2 weeks and will try to get some pics of what we came up with posted when I get back.
That CV shaft is expensive pretty much no matter how it's replaced apparently. I didn't think it would be that much for a new PTO shaft to be setup. Looked at the hydraulic pump on my m816 and looks like it could be relocated under the truck to copy the m936, would need a hydraulic swivel at the base of the crane to allow for full rotation or run a few long hoses and keep an eye on them when rotating the crane (limited).

Was going to pull the dump bed hydraulics but currently have a trade lined up, dump bed/components for the shelter from a m109. Trade is pending in the spring when the weather clears up.
 

zebedee

conceptualizer at large
Steel Soldiers Supporter
1,629
724
113
Location
Central NY
why not move the torch tanks to one side-dedicated- and cut out the other for an access panel under tire tray. I have never understood why they put one tank on each side forcing to connect with a long section of hose,,,, kinda risky to me.. no welding truck was ever set up that way....
Yup - that's the plan. I am progressing a full conversion of a US issue M816 to how the Australian army modified their 29.

However because of the two longitudinal ribs in the wrecker body, over the chassis rails - the center space, directly under the spare tyre would only be accessible by removing the tyre and making a hatch in the floor.

Here is a pic of the M816 at the Puckapunyal Tank Museum, known as 'Shakey'. You can see the 'twinned' bottle stowage, aswell as the carrier for the trailer board, telescoping hazard beacon and the different tyre pattern. They were all soft tops too.
M816 Bandiana walk around.jpg

More pics at: http://www.grubbyfingersshop.com/wa...ecker Walkaround/M816 Wrecker Walkaround.html
(This truck did spend time with a civi contractor at the Woomera rocket range so some aspects of this truck may not be as originally prepped by the Army - like the "TRW" painted panels and removal of some of the marker lamp guards....)
 
Last edited:

Csm Davis

Well-known member
4,165
393
83
Location
Hattiesburg, Mississippi
Yup - that's the plan. I am progressing a full conversion of a US issue M816 to how the Australian army modified their 29.

However because of the two longitudinal ribs in the wrecker body, over the chassis rails - the center space, directly under the spare tyre would only be accessible by removing the tyre and making a hatch in the floor.

Here is a pic of the M816 at the Bandiana Tank Museum, known as 'Shakey'. You can see the 'twinned' bottle stowage, aswell as the carrier for the trailer board, telescoping hazard beacon and the different tyre pattern. They were all soft tops too.
View attachment 656533

More pics at: http://www.grubbyfingersshop.com/wa...ecker Walkaround/M816 Wrecker Walkaround.html
(This truck did spend time with a civi contractor at the Woomera rocket range so some aspects of this truck may not be as originally prepped by the Army - like the "TRW" painted panels and removal of some of the marker lamp guards....)
Okay bud by trailer board you mean tow lights? And as to the access to the space why not make it fuel or oil storage? Then direct access wouldn't be needed.
A few questions about your Australian wreckers what is the can behind the air cleaner? And inboard of both front turn signals is some kind of mount what are they? And why the extra brace to the top of the windshield to the mirrors? Love all of the extra lights except the two we talked about at the rally that go through the soft top! That stinks of Military intelligence.

Sent from my SM-G900V using Tapatalk
 

zebedee

conceptualizer at large
Steel Soldiers Supporter
1,629
724
113
Location
Central NY
Okay bud by trailer board you mean tow lights?
Yes - adjustable in width so that lights are always on extremities of casualty. I'll try and find a pic.... look at this vid https://www.youtube.com/watch?v=XzV3Z8ScIhQ at 51 secs, it's the Mack wrecker that replaced the M816.
And as to the access to the space why not make it fuel or oil storage? Then direct access wouldn't be needed.
Welding in the front bulkhead would require cab removal..
A few questions about your Australian wreckers what is the can behind the air cleaner?
Factory Cummins Bypass Oil Filter - I found one in a truck scrap yard in Buffalo. Bracket/Shield between that and the hood is fab'd.
And inboard of both front turn signals is some kind of mount what are they?
They are holders for "TAC Plates". Unit and divisional ID 'badges' that can be removed/changed etc. Two front and two rear.
101 TAC plates.jpgWreckers would have the Blue/Yellow/Red with white numbers being Engineers or "Hotel 8's" in US parlance, then the other plate would be what ever unit they were attached to - Armour, Transport, Signals, Infantry, Construction etc., whatever.
And why the extra brace to the top of the windshield to the mirrors?
I guess that helps with the extra weight of the repeater lamps and guards.
Love all of the extra lights except the two we talked about at the rally that go through the soft top! That stinks of Military intelligence.
Yeah - no kidding!

Updated post 256 with new floor piece..
 
Last edited:

zebedee

conceptualizer at large
Steel Soldiers Supporter
1,629
724
113
Location
Central NY
adjustable beacon light arrangement?
It is a simple ~2" square tube with corresponding 'inner' and a captive nut with 'T' headed bolt. It is welded to the bulkhead and the spare tyre support bracket. At the top, the fixed tube is also tied into the trailer board stowage 'goal post'.

I'll try to get some pics off of the other laptop (in the shop) and put them up for you.
 

zebedee

conceptualizer at large
Steel Soldiers Supporter
1,629
724
113
Location
Central NY
Extended floor piece welded in. New bottle 'buckets' (?) need to be fab'd. Won't be using the original ones as they are too big a diameter. Replacements were segmented on a sheet brake rather than rolled.

M816 Oxy floor.jpg M816 bottle fab.png

Passenger side holder cut out.
This will make it real easy to access the spare and the deck bins!...
M816 Acet 1.jpg M816 acet 2.jpg
Little if any patching needed. 'Sugar scoop' antenna base support to be added to end of bulkhead, approximate location specified, but method and exact location left to the 'end user'. Not sure why the antenna base was not installed when all of the wreckers were initially received/mod'd.


NB. US military bottles are unique sizes. Aussie bottles are smaller (in this application) and were civi sourced from BoC. Ahhh - the good ol' Commonwealth!
 
Last edited:

zebedee

conceptualizer at large
Steel Soldiers Supporter
1,629
724
113
Location
Central NY
Last edited:

zebedee

conceptualizer at large
Steel Soldiers Supporter
1,629
724
113
Location
Central NY
Holleybone mounted. (Towbar)

M816 towbar mount1.jpgM816 towbar mount2.jpg
Have pics to show me lunette end, but...

M816 towbar mount4.jpgM816 towbar mount3.jpg

I had to self engineer the feet end, angled to allow for feet coming out past lip on body.

Both brackets will be yellow. Adds 3" to overall width of body, but still narrower than mirrors. Also I am not sure if I want to add some kind of padlock deal - probably not originally done though it wouldn't be too hard.

... and ignore the stake pocket that needs repair!
 
Last edited:

Another Ahab

Well-known member
17,993
4,538
113
Location
Alexandria, VA
That must have been some kind of tough working that weld around the diameter. [thumbzup]

It looks like you found some kind of cold galvanizing spray somewhere; is that what the grey is?
 

zebedee

conceptualizer at large
Steel Soldiers Supporter
1,629
724
113
Location
Central NY
That must have been some kind of tough working that weld around the diameter. [thumbzup]
Cheers. Overhead is not my strong suit!

It looks like you found some kind of cold galvanizing spray somewhere; is that what the grey is?
Nope - there is some exposed steel (I impatiently moved one of the screw/handles - wiping off some damp primer), the lunette tube is 3" galv (suitably ground for the weld) and some of the primer was a black'ish....
 

73m819

Rock = older than dirt , GA. MAFIA , Dirty
Steel Soldiers Supporter
In Memorial
12,195
320
0
Location
gainesville, ga.
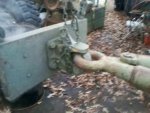
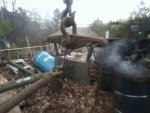
We had been talking about a reversed tb pull for a better lift tow in another thread, I thought I would post my post describing my reverse tb lift tow rig here so other wrecker owners may use this idea to get away from the 2 pivot point doing a standard lift tow.

Here are some pictures.

The hitch is a HEAVY DUTY industrial unit, forgot the rating but more then anything I am going to lift tow, lust above the lower bolt is the lock pin (cannot be opened or closed with the pin in), the bolts are special grade 8 as well as the washers/nuts, torqued to what ever the bolts called for, the chain holds the fixture level for ease of attaching (it can be removed or left in place during the lift tow, does not matter, I will most likely leave it because I lost the original after I removed it at some time in the past).

tb 1.jpg

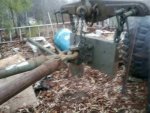
The 2 chains between the riffle bar and the fixture is there JUST to set the fixture, the fixtures top edge towards the towed vehicle gets set on the bumper, once secured to the bumper the riffle bar is lowered, the pins are pulled and the chains are left to hang, the riffle bar is then lowered to the lift brackets with REAR lift shackles (straight, this gives a better lift, I all ways carry a pair with tb pins, I trust mine over the lifts).
tb 2.jpg

The EXTRA riffle bar pins are there in case I drop one, or need some more if a chain lift is needed, better to have extra and not needed the need a extra and not have it.
tb 3.jpg

The wood insert if pine, grips a lot better then oak, notice where my rear lift brackets are, I added a second set for the safety chains.
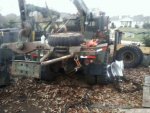
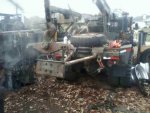
tb 4.jpg

tb 5.jpg

tb 6.jpg

A side view along with a view of MORE clutter.
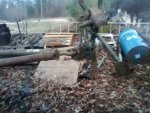
tb 7.jpg

The BIG shackle get the hook out of the hood/radiator, it also makes things easier to rig up/down
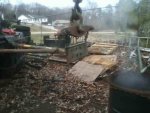
tb 8.jpg

The fixture is set down on the front bumper, I have a pair of 6' of 1/2" grade 80+ chain with a grab hook on one end and a slide hook on the other, the slide hook is hooked into the front spring shackle, goes under the front bumper, up over the fixture, across the top, down along the out side of the frame to a cross member where the GRAB hook is secured back to the 1/2" chain then wired tied, then a 1/2" binder is used to pull everything TIGHT, cheater TIGHT, this is rigging is done for both sides. Rigged this way, all the PULL is put on the frame and spring shackle, NOT on the bumper. The pull chains can be placed where it is the strongest and easiest, as long as the fixture does not move and NO pull is on the bumper, I like the above rigging points, easy, fast, and strong.

Once the fixture is in place, the riffle bar is attached. Before the fixture is attached the tb 3/4" pins are pulled, tb is extended about a foot, everything rigged, the towed vehicle if lifted, brought in, the 3/4 pins are installed, the boom supports are installed on the boom after a finial check of everything, away we go, after a short bit of travel, a recheck stop is done.

So far I have not had a issue with this rig( I do have some up dates in mind for the fixture but don't have time), the big test came when I had to recover Swiss's m62 (about 34,000 lbs.) up on his property in Lula , about mile and a half on OLD logging road with a lot of steep ups/downs, very sharp turns (even a 3 point due to the62 on the hook), all of this with some very narrow spots.

I can use this rig with/without a front bumper, just attach the fixture to ANYTHING available, this goes for the lift as well, attach lift chains to where ever that is solid .

I am looking for the newer HEAVY 4 piece tb so I can shorten up the tb distance to the 819 and in turn shorten up the boom extension.
 

red

Active member
1,988
25
38
Location
Eagle Mountain/Utah
Nice.

For shorter legs, what about using a pair of the crane support legs? Rated to handle the crane at maximum lift so I think they would be strong enough for that kind of setup.
 

73m819

Rock = older than dirt , GA. MAFIA , Dirty
Steel Soldiers Supporter
In Memorial
12,195
320
0
Location
gainesville, ga.
Thank you for the thought but I need the ring on the tb. so this would not work, just using the inner legs will not make any difference, I WILL NOT cut up a tb and I will not weld on a tb, the heat changes the metal, may/may not decrease the strength and I am sure that my welds would hold but with the main part of a towing rig it is not worth taking the chance on hurting/killing somebody.
 

Csm Davis

Well-known member
4,165
393
83
Location
Hattiesburg, Mississippi
Thank you for the thought but I need the ring on the tb. so this would not work, just using the inner legs will not make any difference, I WILL NOT cut up a tb and I will not weld on a tb, the heat changes the metal, may/may not decrease the strength and I am sure that my welds would hold but with the main part of a towing rig it is not worth taking the chance on hurting/killing somebody.
You do know that you can shorten the towbar without using a cutting torch right? Band saw, or pipe cutter should work with no heating problems then just redrill the outer leg holes. Also the shorter bar will be stronger when fully collapsed than the stock length.

Sent from my SM-G900V using Tapatalk
 
Last edited:
Top