• Steel Soldiers now has a few new forums, read more about it at: New Munitions Forums!

  • Microsoft MSN, Live, Hotmail, Outlook email users may not be receiving emails. We are working to resolve this issue. Please add support@steelsoldiers.com to your trusted contacts.

WSUCougar's M925A1 Acquisition and Build Thread

wsucougarx

Well-known member
6,951
67
48
Location
Washington State
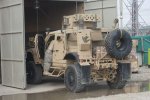
Been away from this project for a bit. Actually, I've been away from my MV's for a bit. Pretty much lost ALL interest in the MV's since August. Been having other "projects" coming up and found myself selling off all my extra parts to fund them. Now that these "projects" have been funded, I have found myself slowly getting back in my MV's. So, I've got a couple little projects in store for my gun truck.
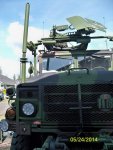
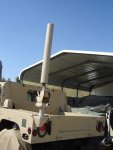
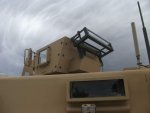
I secured another antenna to put on the gun truck. It looks a bit like a CIED antenna. If not an CIED then it'll be repurposed to look like one.
 

Amer-team

Well-known member
1,710
38
48
Location
Centralia/WA
Welcome back. I am still up for meeting for hamburgers if we can find a good time. The 1st Sgt. and I went to Camp Rilea last weekend and acted as troop transport. that brought some life back into this for me as well. The 923 is a pleasure to drive.
 

camoyj7

Member
926
18
18
Location
wonder lake IL
I'm making my own chicken plate for my LWS. Do you think it would clear the cross bar if the mounting holes were a half inch lower to raise the plate?
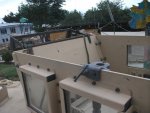
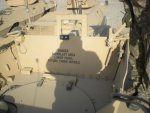
I had a little time yesterday before my son's Little League game and today to add some parts to the LWS. Yesterday, I managed to muscle that 100+ lb armor plate to the LWS. That was something else to get up there. I got her up onto the fender and then did a balance trick standing on the hood trying to get the plate into place. I almost dropped her a couple times but managed to get the mounting bolts in without incident. I picked up the HMMWV chicken plate and the UPA off Craigslist last November or so for about $60 total;-).
Today I got the MK-64 into place along with the 40mm ammo tray.
My biggest concern going into this project was height clearance. At the top of the armor plate she's at 12'...no problem. I also had to add some washers to the lower bolt mounts so she could clear the front LWS crossbar. I tried to locate a riser but all the risers I found fit the HMMWV weapon tray and not the M939 series weapon tray.
Pics:
1- Universal Pintle Adapter (UPA) for mounts with armor plates
2- UPA with armor plate (HMMWV plate)
3- MK64 MOD 7 Mount
4- Pic showing the overhang over the cab (passenger side)
5- MK64 MOD 7 close up
6,7- Had to space the Plate upward to clear the front crossbar
8- Backside of the mount
9- Pic showing the overhang over the cab (driver side)
 

wsucougarx

Well-known member
6,951
67
48
Location
Washington State
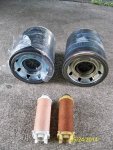
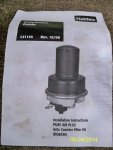
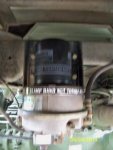
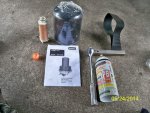
Air Dryer Dessicant Filter Replacement

Decided to replace the dessicant filter and it's associated maintenance parts on the truck. Since this truck was a unit truck that was never rebuilt/refurbished, there was no indication of when the last maintenance service was done. Not wanting to mess around with the brake system, I opted to service the air dryer sooner than later. It was a pretty straightforward process all in all. The only chore was muscling the old dessicant filter from the housing. Ended up having to use PB Blaster to soak loosen the rubber seal. Once off just replace all the parts in the kit. One peace of mind down, more to follow;-)
 

Attachments

wsucougarx

Well-known member
6,951
67
48
Location
Washington State
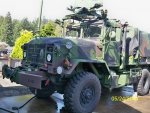
Counter IED Antenna Project

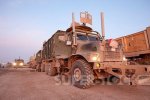
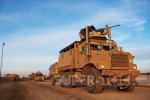
Well, I've searched high and low for an actual CIED antenna and found this broadband military one that looks similar. A couple months ago, I actually found the "correct" CEID antenna but it was $600. My pockets aren't exactly deep enough to buy something like that so I found this similar looking one for $60 on ebay from beltfed34. The antenna riser is the correct one for the CIED. I picked that up for $50 shipped from a fellow SS.
In reviewing pic of OIF trucks, I found the larger vehicles had the CIED mounted forward on the trucks. I went into my garage and mount an antenna mount fitting for this install. Though not the correct mount, it works. I also found that the sheet metal on the side of the hood lacked reinforcement. I noticed there was considerable amount sway while driving down the road at highway speeds. To remedy this, I bolts a small L-shaped bracket on the inside of the hood to secure the sheet metal. This took care of all the sway.
After everything was mounted, my concern shifted towards the height of the antenna assy. Luckily it was good to go!

Pics:
1,2,3- Mounting bracket used
4,5- The wannabe CIED antenna installed starboard side
6- Real CIED mounted
7,8- Placement of the CIED on large MV's. In this case an MTVR
 

Attachments

Last edited:

wsucougarx

Well-known member
6,951
67
48
Location
Washington State
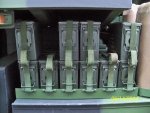
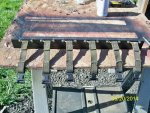
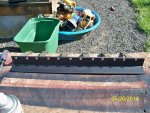
M240B (7.62mm) Ammo Can Storage Rack

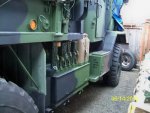
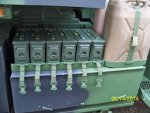
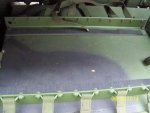
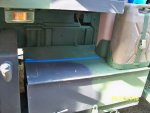
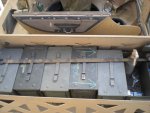
As I stood out on the street and looked at my "completed" gun truck, I realized she wasn't as complete as I thought. The main weapon on this platform is the 7.62x51mm M240B. As I looked at her, the LWS has provisions for the .50 Cal ammo cans. But lacks the M19A1 (.30 cal/7.62mm) ammo can mounts. Hmmm, that makes no sense I thought. Then looking at the secondary weapon, we have a 5.56mm M249...again, that makes no sense. So, I began to brainstorm another project. We needed some kind of mount for the correct ammo cans for this system and where to put it. After much thought, I found some wasted real estate on top of the tool box. I figured that would be the best place to make use of this wasted space. Unfortunately, I wasn't able to put two complete rows of cans due to the reinforcement on the cargo bed. I came up two cans short...oh well. We'll just make due with what we have.
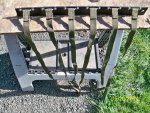
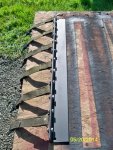
One thing I had to make sure of is to put RTV on the mounting bolts to keep water out of the tool box. I also laid down some 3M foam to prevent metal to metal contact between the mount and ammo cans. Also the foam helps keep things from sliding around. I opted to use straps for each column of cans to really keep them secure. I know it's a bit redundant but since I had a surplus of these footman loop straps in a box, I decided to use more than I needed. I main "L" shaped bracket was left over from the LWS hatch project. So all in all, the cost of this project was just what I paid for the bolts, nuts, and actual ammo cans that I picked up locally for around $10 each.

Pics:
1- Rear ammo can mounting bracket with long straps
2-4- Front ammo can mounting bracket with short straps
5- Making the measurements for proper placement. Measured to accept .50 and .30 cal ammo cans
6- Ammo can mounting brackets in place with a 3M foam strip installed
7- First row of .30 cal ammo cans in place
8- Second row of ammo cans in place. Note the lack of two cans due to structural interference via bed supports
9- Side shot.
 

Attachments

Last edited:

wsucougarx

Well-known member
6,951
67
48
Location
Washington State
Classic Army M15A4 Carbine w/M203 Airsoft Review

This review goes out to all those who want a realistic M4 type carbine and/or a realistic M203 grenade launcher. Last year I secured a Well gas blow back M4 Airsoft. It was pretty flimsy and I was a bit taken back by the lack of quality in that unit. A couple weeks ago, I decided I wanted an M203 for a static display and didn't want to mount it on the flimsy M4 that I currently had. I did a search and found several airsoft M4's available with a huge difference in price and materials used. Naturally I didn't want a plastic receiver M4 nor did I want one that rattled around while you held it. Then I stumbled upon a used Classic Army M15A4 Carbine w/Armalite logo X-series on ebay.
I did some research and found the Classic Army M15A4 Carbine w/Armalite logo had some really good reviews. It had a functioning charging handle, functioning ejection port cover, selectable selector lever, aluminum upper/lower receivers, removable carrying handle, metal flash suppressor, adjustable collapsible stock, and more importantly it felt like the real deal. It didn't rattle and the weight ratio felt like the real deal as well. I am well pleased of the quality that went into this unit.
I then researched and found an airsoft M203 40mm grenade launcher of surprising quality and feel as well. In comes the G&P M203. It too feels like the real thing! The breach operates, the safety lever works, made of metal/plastic, and it even has rifling in the barrel!!! This unit doesn't rattle and feels correct as well. The only difference is it feels a little lighter than the real deal.
I should also mention the paint and materials used would definitely pass as the real thing. To top things off, I put a USMC Blue Gear 3 point sling on this setup.
With this project, I am into it $247. The M15A4 carbine cost me $150 shipped, the M203 $84 shipped, and the sling $13 shipped. Considering a rubber ducky M16A1 is around $150-300, I got a steal on this realistic setup.

Pics:
1- M4 w/M203 breach closed
2- M4 w/M203 breach open
3- M4 w/mag in
4- M4 w/mag released
5- G&P M203 closeup (serial number same on all models)-Note the M203's safety on.
6- M4 Close up (serial number same on all models)
7- M4's starboard side
8- M4's ejection port cover opened
9- Top of M4 carrying handle
10- M203's rifling. Talk about details;-)
 

Attachments

Last edited:

wsucougarx

Well-known member
6,951
67
48
Location
Washington State
Classic Army M15A4 Carbine w/M203 Airsoft Review (Cont)

Here are a couple more pics. The second pic show the other LWS airsofts being used. At the top is an ECHO1 M240B w/USGI M240B pintle mount, the middle is a Classic Army M249 rail model, and at the bottom is the Classic Army M15A4 Carbine Armalite.
The first pic shows a side by side comparison between a real carbine and the airsoft. Pretty darn close to each other. Very realistic.
 

Attachments

Last edited:

srodocker

Well-known member
6,549
69
48
Location
Lacey, Washington
Im going to have to get some airsoft guns to put in all my weapon holders. I have my replica m2 at dans house I need to find a place to mount on the truck or make a tripod for it.
 

wsucougarx

Well-known member
6,951
67
48
Location
Washington State
Goodbye Kayla, I will miss you ole girl

Well, amid this project, I had a really hard day today. I had to put our pooch of 14.5 years down today. This was truly one of the hardest decisions I have ever had to make. It's amazing how you can get so attached to a four legged creature. I guess after 14.5 years they become a part of you and your family. I'm going to miss you Kayla! You were an outstanding dog that always kept me company during this project. My biggest regret is you never got the chance to ride in my truck. I love you ole girl, you will be missed!!!
 

Attachments

Top
AdBlock Detected

We get it, advertisements are annoying!

Sure, ad-blocking software does a great job at blocking ads, but it also blocks useful features of our website like our supporting vendors. Their ads help keep Steel Soldiers going. Please consider disabling your ad blockers for the site. Thanks!

I've Disabled AdBlock
No Thanks