• Steel Soldiers now has a few new forums, read more about it at: New Munitions Forums!

  • Microsoft MSN, Live, Hotmail, Outlook email users may not be receiving emails. We are working to resolve this issue. Please add support@steelsoldiers.com to your trusted contacts.

goldneagle's M923 recovery and modification thread

goldneagle

Well-known member
4,537
1,067
113
Location
Slidell, LA
The new shoes look great, GE.
Thanks Doug. Now all I need to do is paint over the lug nuts and valve stems. I guess the spare tire will go in the back of the cargo area. It's 15" wide and will not fit where the current spare is secured. They must install the cargo box further back on the A1 and A2 models.
 

goldneagle

Well-known member
4,537
1,067
113
Location
Slidell, LA
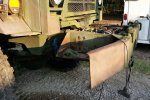
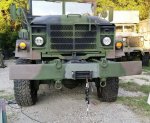
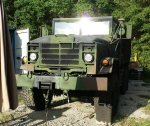
Update: I started to install an MRAP 24 volt 18,000lb winch on my M923 cargo truck. Juan Prado came over this morning and we tackled the project together. I am glad I had the help! With the heat outside and the weight of the parts it was a big help. We removed the large chain I had hanging from the bumper. We then removed the bumper and set it aside.

We then unbolted the hood support cross-member from one side of the truck frame. We manged to slide the extension splice plate between the bracket and truck frame. We secured it with several bolts and them attache the frame extension on that side. We also secured the hood support cross-member to the truck frame.

We then unbolted the other side of the hood support cross-member and removed the angle bracket. Had to drill new holes in the bracket to allow the other splice plate to slide in behind the cross-member bracket. (The existing cross-member setup is too tight to allow the splice plate to slide in between it and the truck frame)

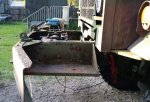
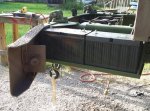
We manged to install both frame extensions and also the weight trays from a M936A2 wrecker. I will be using the weight trays to store 4 Group 31 batteries to be used with the winch.

Next we worked on the C-channel pieces we will use to support the winch in place. I had some left over hood support cross-members left over from winces I had sold. We notched the ends of the C-channel so they would sit flat on the bottom of the truck frame extensions. We drilled new holes through the cross-members to mount the brackets above the cross-members.

We also drilled 8 new holes through the frame and weight tray to secure the brackets.

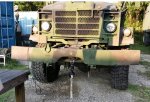
Once we had the support platform secured we reinstalled the front bumper. By this time we were burned out from the heat and called it quits for the day.

I will continue with installing the winch later this week. I need to install the long bolts in back of the shackle mounts. I also have to drill out the holes for mounting the winch to the platform we installed today.

Next I have to install the batteries and secure them. I also have some electrical work to do. I will update as progress is made.

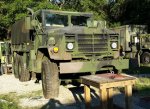
Here are some pictures.
 

Attachments

turnkey

New member
757
2
0
Location
wadsworth,ill
Great work and the seats look great and safe.....Although you could have used Bean Bags for Wal-mark 20 bucks eachs and 2 rolls of Different colored duck tape...there all done.
 

goldneagle

Well-known member
4,537
1,067
113
Location
Slidell, LA
Whats that hanging over the right side of the bumper in pic#1. You have to pull start that beast?:lol:
LOL That is the end of a 3 way outdoor extension cord. We used it to run the angle grinder. We were too tired to thoroughly clean up and I wanted to capture a few pictures of the work we did. You know members wine when you don't post pictures. :grd:
 

goldneagle

Well-known member
4,537
1,067
113
Location
Slidell, LA
Went out early this morning to work on the LONG shackle mount bolts that I had trouble installing. They would not line up with the bottom holes. So I removed the 2 large bolts that held the bottom shackle mounts in place as well as the smaller bolts that held the triangle piece to the bumper. I then maneuvered the triangle piece until the bolt went through with a little help from the hammer. (had to clean up the thread with a thread file and a re-tapping tool. I got the shackle mount lightly secured with the long bolt. Then using hole alignment punches I was able to line up the other large bolt holes. Inserted the large bolts to secure the shackle mount. Then I used the punches to align the 2 other holes and get the smaller bolts in. Then i tightened the bolts snugly.

I repeated the same procedure on the other side as well. So I finally have the front bumper secured into place. Next I will work on attaching the winch to the cross-member.
 

goldneagle

Well-known member
4,537
1,067
113
Location
Slidell, LA
Here are some progress shots. I marked and drilled the mounting holes into thew cross-member for the winch. I also removed the fairlead from the winch. I will custom mount it to the bumper. I primed and painted the area in-between the frame rails. I had someone help me put the winch back on top of the cross-member so I can secure it in place. I need to tweak the holes in the cross-member to allow me to attach the winch with 8 bolts.
 

Attachments

goldneagle

Well-known member
4,537
1,067
113
Location
Slidell, LA
Made some progress today. Started by wire wheeling the rust off the recycled weight trays. Used the rust inhibitor and then painted the weight trays and surrounding area with green CARC substitute paint.

I also notched the upper triangles that attach the bumper so that the battery terminals will not ground out when installed on the weight trays.

I drilled the 8 holes in the cross-member larger so I could install the 8 metric bolts that secure the winch to the truck. Secured the winch to the cross-member using 8 bolts.

Relocated the hood tilt retainer bracket from below the bumper to top of bumper. I will replace the T shaped support arm with a shorter one tomorrow.
 

Attachments

goldneagle

Well-known member
4,537
1,067
113
Location
Slidell, LA
Another good progress day today! Started by replacing the hood support pole with a shorter one. Got a used one from the scrapper earlier this year. Sanded it, primed it and painted it. Installed it later when the paint dried.

Next I lifted the batteries into place to see how they fit. Good fit.

I cut off a 21 inch piece of old 5 ton bumper to use as a backing plate for the fairlead. I cut the top of the bumper piece so it would fit flat over the original bumper. I left the angle bend on the bottom for strength. I cut out the center rectangle to allow the cable to pull through to the fairlead. After lining it up I drilled some 1/2" holes to attach the plate to the bumper.

I also marked and measured the locations of the holes that will attach the fairlead to the new plate. Installed the fairlead with (4) 1/2" hardened bolts.

That is all I got done today. Here are progress pictures.
 

Attachments

goldneagle

Well-known member
4,537
1,067
113
Location
Slidell, LA
Today I fabricated braces that go from the front of the winch (where the fairlead use to attach) to the front bumper. These braces strengthen the winch during pulls. I used 2"x2" x 3/8" angle against the winch. I used 3" C-channel for the brace and another piece of 2"x2" x 3/8" angle against the bumper. See the pictures for detail.
 

Attachments

goldneagle

Well-known member
4,537
1,067
113
Location
Slidell, LA
Spent the early part of the day researching the proper setup for charging 2 isolated battery banks with 1 alternator. IN the end I decided that the 3 terminal isolator switch is the cheapest solution to the problem. I may add a relay with a switch in the cab to turn off the charging to the front battery bank if needed. I may also install a solar charger for that battery bank.

Today I started by drilling one hole through the bumper into the angle brackets installed yesterday. I then dug up the NATO receptacle I had laying around. After some looking around I decided to use a piece of bumper scrap to make a mounting bracket to install the NATO receptacle to. I found a good place behind the bumper on the driver's side to install the NATO receptacle.

I used the jigsaw to cut a piece off a bent bumper. After grinding it straight and smooth i used a hole saw to drill a 1-3/4" hole n the center. I then marked and drill 4 smaller holes for the screws that attach the NATO receptacle to the new bracket. I reattached the power cables to the NATO receptacle. I also installed some shrink tubing over the positive connection to make sure it will not short out.

I secured the NATO receptacle the the fabricated angle iron using the 4 provided screws. I then drilled (2) 7/16" holes in the narrow side of the angle bracket.

Once I positioned the new bracket to the bumper I marked and drill the 2 holes into the bumper. I attached the new bracket with NATO receptacle to the back of the bumper with 2 bolts. I ran the cables to the batteries but did not attach.

I removed on top bolt off the frame extension and sanded the area clean of paint. I used 2 star washed and the bolt to secure the ground strap to the truck frame.

I also primed and painted some of the metal work installed. See pictures of the progress made.
 

Attachments

Csm Davis

Well-known member
4,166
393
83
Location
Hattiesburg, Mississippi
uploadfromtaptalk1438784177712.jpeg
Okay bud you said good or bad so I have both I like the idea but you have a problem in the picture above your cable is rubbing on the bumper and that is bad, it will cause problems it will eat the bumper and cable. You needto move the winch up a inch or two.
 
Last edited:

goldneagle

Well-known member
4,537
1,067
113
Location
Slidell, LA
View attachment 573942
Okay bud you said good or bad so I have both I like the idea but you have a problem in the picture above your cable is rubbing on the bumper and that is bad, it will cause problems it will eat the bumper and cable. You needto move the winch up a inch or two.
Actually it's an optical illusion. It is not on the bumper at all. When I lined up the fairlead I made sure the cable could not rub on any metal surface while in use. That was the reason I moved the fairlead to the front of the bumper. I will try to get a better angle for a picture.


Cable_Clearance_1.jpgCable_Clearance_1a.jpgCable_Clearance_1b.jpg
 
Last edited:

goldneagle

Well-known member
4,537
1,067
113
Location
Slidell, LA
I did not get much done today. But i did fabricate and install a bracket/plate to hold the military receptacle for the remote control. See picture.
 

Attachments

Top
AdBlock Detected

We get it, advertisements are annoying!

Sure, ad-blocking software does a great job at blocking ads, but it also blocks useful features of our website like our supporting vendors. Their ads help keep Steel Soldiers going. Please consider disabling your ad blockers for the site. Thanks!

I've Disabled AdBlock
No Thanks