• Steel Soldiers now has a few new forums, read more about it at: New Munitions Forums!

  • Microsoft MSN, Live, Hotmail, Outlook email users may not be receiving emails. We are working to resolve this issue. Please add support@steelsoldiers.com to your trusted contacts.

My New Project - 1942 Ford GPW

Another Ahab

Well-known member
17,999
4,556
113
Location
Alexandria, VA
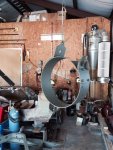
In spite of some tinfoil hat types, that is the central dust collector for my wood working shop with is adjacent to the garage shop. All my woodworking tools are plumbed to this central collector with tube gates with I open and close depending upon which tool I am working with.

Thanks for asking.
I'm a "sucker" for Central Dust Collectors. D*** thing looks like it's stainless; nice item!
 

Tinwoodsman

Well-known member
Steel Soldiers Supporter
3,923
76
48
Location
Comfort, Texas
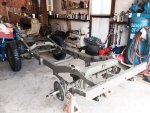
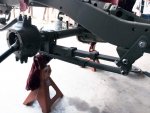
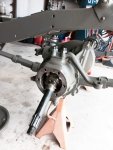
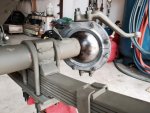
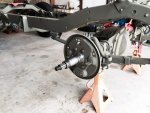
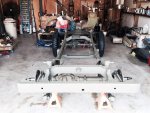
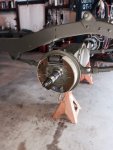
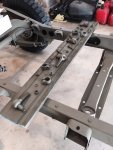
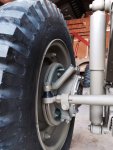
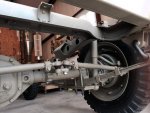
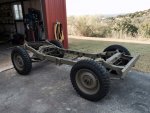
Tried to get to a rolling chassis today but fell a little short of the mark. I can roll it if I pick up the front end but **** it is heavy. Did get both axles mounted on spring packs and did get the torque reaction spring added to the driver's side front spring which helps prevent drivers side sag. Also installed the front axle knuckles and got the bearings shimmed properly. Then installed the knuckle bell oil seals and cleaned, packed and installed the front RZeppa axles. Finally installed the front wheel backing plates and spindles. Tomorrow I will work on the front brakes and wheel bearings and hub. Then I can call it a rolling chassis.

Chassis-Side-View.jpg Torque-Reaction-Spring.jpg RZeppa-Axle.jpg Knuckle-Oil-Seals.jpg Backing-Plate-and-Spindle.jpg Half-Rolling-Chassis.jpg
 

Another Ahab

Well-known member
17,999
4,556
113
Location
Alexandria, VA
Tried to get to a rolling chassis today but fell a little short of the mark. I can roll it if I pick up the front end but **** it is heavy. Did get both axles mounted on spring packs and did get the torque reaction spring added to the driver's side front spring which helps prevent drivers side sag. Also installed the front axle knuckles and got the bearings shimmed properly. Then installed the knuckle bell oil seals and cleaned, packed and installed the front RZeppa axles. Finally installed the front wheel backing plates and spindles. Tomorrow I will work on the front brakes and wheel bearings and hub. Then I can call it a rolling chassis.

View attachment 576912 View attachment 576917
Oh, Man; it is coming together SO sweet. :drool:

Outstanding, Brother Woodsman; outstanding.
 

Tinwoodsman

Well-known member
Steel Soldiers Supporter
3,923
76
48
Location
Comfort, Texas
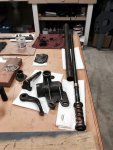
Back at the chassis today. Installed the front brake hardware and then the front drum/hub components. Spent considerable time cleaning up the tie rods and tie rod ends. Primed, painted and installed them and the refurbished bell crank hardware. Finally, mounted the two front tires and now I have a rolling chassis. Every component of the chassis has been refurbished or replaced. Just like 1942.

Front-Brakes.jpg Tie-Rod-Parts.jpg Tie-Rod-Ends.jpg Tie-Rods.jpg Frame.jpg
 

zout

In Memorial
In Memorial
7,744
154
63
Location
Columbus Georgia
Lets see.....Life expectancy of a WC 1942 was what? Surely not to survive the war.So the time..care..patience TWM has in restoring this far exceeds the pin point quality the mfg stuck in it.Plus i doubt he's going to go shoot rounds through it or blow it up.
 

Tinwoodsman

Well-known member
Steel Soldiers Supporter
3,923
76
48
Location
Comfort, Texas
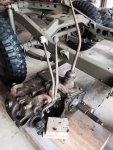
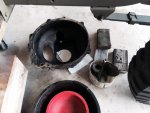
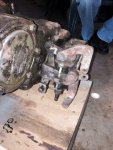
Spent the day trying to determine the parts needed to rebuild the steering gear and drag link. Cleaned everything and ordered the missing or defective parts and should be good to go soon. Then moved on to the tranny and transfer case. Removed the bell housing and all parts are good so tried cleaning everything with the powerwasher and got covered with cruddy grease. Soldied B will not be happy. Removed all the external parking brake components and will look for a new liner for the brake band. Hopefully some parts will be rolling in by Friday. Here are some pictures.

Steering-Gear.jpg Drag-Link.jpg Tranny-and-Transfer-Case.jpg Bell-Housing.jpg External-Parking-Brake.jpg
 

clinto

Moderator, wonderful human being & practicing Deuc
Staff member
Administrator
Super Moderator
Steel Soldiers Supporter
Supporting Vendor
12,596
1,132
113
Location
Athens, Ga.
tried cleaning everything with the powerwasher and got covered with cruddy grease.
I have been playing with cars for a long time and have still never been able to decide what the best choice is here.

Pressure washing it is fast and easy but the inevitable sprayback sucks and the environmental issues are non favorable.

I have a nice 30 gallons parts washer but it takes forever for a lot of the crud that's really on there, requiring a stiff bristled brush and further cleaning, so it's time consuming. And you still have to blast it when you're done so paint will stick.

You can't just blast it in your cabinet with all the slime because you'll contaminate your media.

This leaves either having it vatted at the local machine shop or having a bulk sandblasting outfit do it.

I'm at the point where I think the best choice is having a local shop vat everything. That's what I am doing with my customer's '66 Plymouth Valiant I am building.

I'd kind of like to buy a pressurized parts washer cabinet like what big shops have: heated cleaning solution, parts on a rotisseries, everything moving and getting blasted. Best non-abrasive cleaning I've ever seen, but a tough buy for us home enthusiasts. Lot of money, takes up a lot of room and an environmental hazard when it comes time to servicing the cleaning solution.

http://www.bendpak.com/shop-equipment/parts-washer/parts-washers/
 

Rmtaunton

Well-known member
1,510
31
48
Location
Smyrna, ga
I would order every thing for the bell crank , there are a few places that sell the full kit I started just replacing pieces and eventually ended up buying them all costing twice as much
 

Tinwoodsman

Well-known member
Steel Soldiers Supporter
3,923
76
48
Location
Comfort, Texas
Any method has its problems but the popular method in this are is mobile dustless blasting. It uses a combination of water and recycled glass. The user can use a simple dust mask and goggles and the residue is vertically washed away. The biggest benefit is that is a cool process with now warping or distortion. Since I have plenty of land I still use my sandblaster for most projects that do not fit in the cabinet..
 

Tinwoodsman

Well-known member
Steel Soldiers Supporter
3,923
76
48
Location
Comfort, Texas
I would order every thing for the bell crank , there are a few places that sell the full kit I started just replacing pieces and eventually ended up buying them all costing twice as much
Strangely, the bellcrank, shaft and associated parts are in great condition.
 

Another Ahab

Well-known member
17,999
4,556
113
Location
Alexandria, VA
I'm at the point where I think the best choice is having a local shop vat everything. That's what I am doing with my customer's '66 Plymouth Valiant I am building.
Those automobiles from the 60's, those were real CARS; hard not to love 'em:

- Good Ol' Solid Detroit Steel

Love to see a photo of that item if possible when you finish. Oh, Please!?
 
Last edited:

Tinwoodsman

Well-known member
Steel Soldiers Supporter
3,923
76
48
Location
Comfort, Texas
Slugging away on the parking brake hardware and bell housing today. One more round of greasy crud cleaning and then sandblasted the parts. Surface cleaned blasted parts with Scotchbrite pad and then primed everything. I know taking everything down to the fasteners and cleaning and painting them is extreme but if you are an anal person you should be the biggest Azzhole in town. :mrgreen: Zout will tell you that.

Parking-Brake-Parts.jpg
 

Another Ahab

Well-known member
17,999
4,556
113
Location
Alexandria, VA
Slugging away on the parking brake hardware and bell housing today. One more round of greasy crud cleaning and then sandblasted the parts. Surface cleaned blasted parts with Scotchbrite pad and then primed everything. I know taking everything down to the fasteners and cleaning and painting them is extreme but if you are an anal person you should be the biggest Azzhole in town. :mrgreen: Zout will tell you that.

View attachment 577979
Wow. Now THAT is some Prime Product right there.

I made an ANAL-y-sis, and the results from the lab are conclusive:

- "It Don't Get Better Than That".

Clinically proven. :jumpin:
 

Tinwoodsman

Well-known member
Steel Soldiers Supporter
3,923
76
48
Location
Comfort, Texas
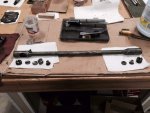
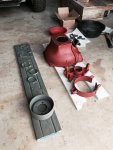
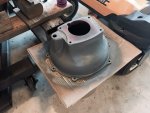
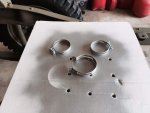
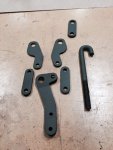
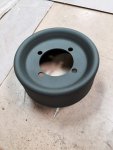
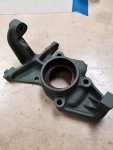
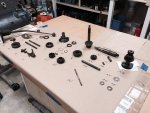
Today was spent putting the final paint on the bell housing, parking brake parts and axle tube clamps. Then I disassembled the T84 transmission and inspected each part since I did see evidence of water penetration. Finally tally showes an order for $305 in tranny parts will get the job done. Still cheaper that a $950 rebuild. :(

Here are some pictures:

Bell-Housing.jpg Axle-Tube-Clamps.jpg Parking-Brake-Hardware.jpg Parking-Brake-Drum.jpg Brake-Drum-Band.jpg TC-Parking-Brake-Bracket.jpg Transmission-Parts.jpg
 
Top