• Steel Soldiers now has a few new forums, read more about it at: New Munitions Forums!

  • Microsoft MSN, Live, Hotmail, Outlook email users may not be receiving emails. We are working to resolve this issue. Please add support@steelsoldiers.com to your trusted contacts.

M1010 for my daughter the field biologist

jpg

Member
611
15
18
Location
Boston, MA
Don't know the best way to clean up the discoloration, but isolating the dissimilar metals with neoprene or nylon washers will prevent any galvanic action (you don't want the dissimilar metals making any contact with one another). Painting the sides of the drilled hole in the aluminum (hobby enamel, or even nail polish) will also help that).
That's a steel rivet securing aluminum sheet. I'd need to drill them all out in order to isolate the metals. At that point, I could just replace them with aluminum rivets. Perhaps that's the best approach...
 

Another Ahab

Well-known member
17,999
4,556
113
Location
Alexandria, VA
Yes. I was told that the mount and power feed at the passenger's feet of my M1010 were for NBC detection gear, sensors that were supposed to alert the occupants if there were dangerous chemicals, biological agents, or radiation in their environment. I thought NBC stood for Nuclear/Biological/Chemical threats. The M1010s were designed to have special air filtration to protect patients from exposure, though I'm told that equipment was rarely installed in the field. The NBC detection gear was supposed to tell you when you needed to use the protective gear.
You're likely right, and I'm likely wrong; it was a long time ago (and I don't brag about my memory).

I was in uniform so long ago that the training was in "ABC" warfare, before the whole change to "NBC" rolled around.

ABC was an acronym for Atomic/ Biological/ Chemical.

Printing it out makes me realize you are absolutely right, it was "Biological" not "Bacteriological" (though it all means the same thing). :)
 

Csm Davis

Well-known member
4,166
393
83
Location
Hattiesburg, Mississippi
that link did not work for me this one does
http://stormins.vstore.ca/product_info.php/products_id/10818/osCsid=0a844f92a7efe61b9fedcccd652f5a4f

I remember times when I would have given 10 bucks to wash up good ...................[/INDENT]
That's nice if you have access to lots of potable water but a better solution in lots of situations is Grime Boss hand wipes you can get them at Home Depot and they are great at removing almost anything including the smell of gear oil and diesel!
 

jpg

Member
611
15
18
Location
Boston, MA
Rear passenger compartment heater issues

I tried firing up the rear passenger compartment heater. No luck. The fuel valve below the heater is open. I'll try bleeding the fuel lines and the TM troubleshooting next.

This truck lived in the South, so the heater has probably never run since it was first tested after manufacture and maybe after delivery. Looking inside the rotating heater grate, it seems something built a nest in there. I'll be cleaning that out...

If anyone has tricks for firing up one of these heaters after it sat unused for 30 years, I'd appreciate any suggestions.
 

Whiterabbit

Member
744
14
18
Location
Bristol Va.
Oh, Steel rivet issue. Drill them out, clean it up and a spray/drown hole with Mercury outboard chromate primer, replace rivet with aluminum, wipe off excess primer. This coming from a Series III Land Rover owner!
 

Another Ahab

Well-known member
17,999
4,556
113
Location
Alexandria, VA
Oh, Steel rivet issue. Drill them out, clean it up and a spray/drown hole with Mercury outboard chromate primer, replace rivet with aluminum, wipe off excess primer. This coming from a Series III Land Rover owner!
Absolutely, a system al all-similar metals (if you are willing to tackle it) IS the ideal solution.
 

microjeep

In Memorial
In Memorial
850
470
63
Location
blairsville ga.
Yes. I was told that the mount and power feed at the passenger's feet of my M1010 were for NBC detection gear, sensors that were supposed to alert the occupants if there were dangerous chemicals, biological agents, or radiation in their environment. I thought NBC stood for Nuclear/Biological/Chemical threats. The M1010s were designed to have special air filtration to protect patients from exposure, though I'm told that equipment was rarely installed in the field. The NBC detection gear was supposed to tell you when you needed to use the protective gear.

Perhaps I was misinformed. Here's what I know for sure. The truck came with a heavy metal mount at the passenger's feet. It looks like it was intended to mount electronic gear. The heavy cable fed it directly from the power distribution bus on the firewall. The cable has 4 conductors, 2 positive and 2 negative. You can see the mount and the cable in the third picture in my post #112 above. I removed the cable and the mount, since they serve no purpose for me and they were in the way.
"I was told that the mount and power feed at the passenger's feet of my M1010 were for NBC detection gear"? "since they serve no purpose for me"? That's where you mount the amp for the bumpin stereo!
 

USAFSS-ColdWarrior

Chaplain
Super Moderator
Steel Soldiers Supporter
18,541
5,851
113
Location
San Angelo, Tom Green County, Texas USA
"I was told that the mount and power feed at the passenger's feet of my M1010 were for NBC detection gear"? "since they serve no purpose for me"? That's where you mount the amp for the bumpin stereo!
OUCH - That RED font is HARD to read. It's been proven that the default colors work best for most men & machines. OUCH, my poor ol' eyes.
~
 

jpg

Member
611
15
18
Location
Boston, MA
You do need to remove all the iron oxide, though, or your built-in galvanic cell will still work.
Understood, but to remove all the rust stain would involve grinding away much of the aluminum around the rivet holes. would it work to make a thorough cleaning with a mild abrasive like a Scotch pad, followd by RustOleum Rust Reformer to chelate any remaining ferrous oxide? I have little experience with this steel/aluminum issue... I usually have one or the other.
 

jpg

Member
611
15
18
Location
Boston, MA
Cab floor rust and related mysteries

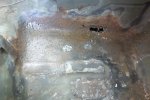
The rubber floor mat had holes through which we could see rust. As recommended by cucvsrus and others, I removed the rubber and the underlying jute. We definitely have some rust, but I suppose it could be worse.
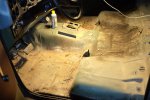
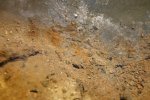
DSCF2753.jpgDSCF2754.jpgDSCF2760.jpg
We haven't started grinding yet. Before we do, I have some questions. Between the seats we have black spots that look like old mildew. I'm inclined to wire brush the mildew away, to provide a clean surface for a new coat of paint. Does this seem like the right approach?

There is a plate welded to the floor at the passenger's feet. It was buried under the mat. Can't see if there's rust beneath it. Can't reach the rust to treat it if it's there. Does this plate serve any purpose? Should I grind away the welds and get rid of it? Does it have any value to anyone? I.e. is it useful to someone?
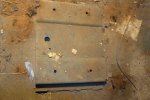
DSCF2768.jpg
If you look to the right of the photo above, (right is toward the front of the truck), you can see 2 clumps where the jute still adheres to the floor. The remains of the screws holding the NBC mount remain in their holes under those clumps. I snapped off the heads trying to remove them. I'll take a vice grips to them from underneath and see if I have any better luck from that direction. Assuming they snap off again, what should I do? They're rusted solid to the floor pan, and PB Blaster didn't make a dent. I'm inclined to grind and drill until they're gone, so I can get rid of the rust that surrounds them. Then I figure I'll weld the holes closed and paint with rust reformer and rustoleum. Is that the right approach? Is there a better way?

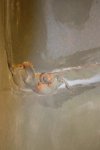
The "bridge" that runs from the transfer shift lever to the back of the cab is secured in front by 2 bolts. These bolts screw into nuts that seem a little like molly bolts, in that it seems they're intended to expand when tightened. One of these bolts came out easily enough. The other just spun. Clearly the nut on the far end wasn't secured to the floor pan. I used a breaker bar to pull up on the bridge while turning the bolt, hoping to create enough friction on the nut that it would allow the bolt to turn. What actually happened is I pulled the nut through the hole in the floor, never having gotten the bolt to turn relative to the nut. Photos below. How should I reassemble this? I imagine I can get the old nut off with some combination of heat and vice grips. What should I use for reassembly?
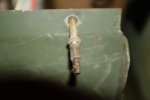
DSCF2769.jpgDSCF2758.jpg
These photos show the bolt with the nut still attached, and the 2 holes, one with the nut still in place, and one without. It also shows the artifacts discovered under the jute -- an ace bandage clip, the back for a uniform device, and a 30-amp fuse.

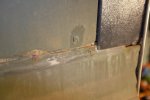
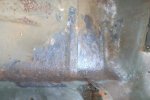
With the seats out, I noticed some rust at the back of the cab, at about head level while seated.
DSCF2766.jpgDSCF2765.jpg
I figure to hit this with a wire brush and rust reformer, unless the experts have a better suggestion.

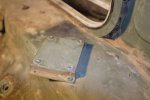
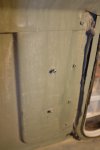
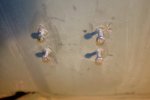
Below we have 2 mounts for something... I'm curious what they're for. The square plate is on the floor behind the drivers right hip, and the 2 screws are on the back of the cab wall, behind the passenger's left hip.
DSCF2755.jpgDSCF2767.jpg

I presume these are fire extinguisher mounts, just inside the door on each side. Does anyone have a good source for the hardware necessary to secure a fire extinguisher here?
DSCF2763.jpg

Thanks in advance for all the help. This is my first MV, and I'm trying to do this right.
 

jpg

Member
611
15
18
Location
Boston, MA
The transfer case shift level rides in a slot in a rusty plate visible in my first picture above. Is there any reason not to remove it, clean it, and paint it? It seems straightforward and safe enough. Or will I open a can of worms if I remove it? I would like to be able to reassemble this when I'm finished...
 

TB58

Member
289
2
18
Location
Fayetteville, Nc
Going back a ways but some ideas on the winch. on my 5000+-lb 4runner I have a 9500lb winch. On a good hill and any kind of resistance the winch will be working pretty hard. As was said before, get the most winch you can. Also I would highly recommend the synthetic rope for the winch. One it is much lighter and easier to work with. The other bonus is the safety aspect. If it fails it drops dead on the ground rather than slinging all over the place.
 

jpg

Member
611
15
18
Location
Boston, MA
Going back a ways but some ideas on the winch. on my 5000+-lb 4runner I have a 9500lb winch. On a good hill and any kind of resistance the winch will be working pretty hard. As was said before, get the most winch you can. Also I would highly recommend the synthetic rope for the winch. One it is much lighter and easier to work with. The other bonus is the safety aspect. If it fails it drops dead on the ground rather than slinging all over the place.
I got great deal on a Warn 18,000 lb winch. I need to fab a mount for it, since Warn doesn't sell one. I'm thinking an appropriate sized angle iron between the frame rails. I need to work out the engineering details...
 

Whiterabbit

Member
744
14
18
Location
Bristol Va.
The "bridge" that runs from the transfer shift lever to the back of the cab is secured in front by 2 bolts. These bolts screw into nuts that seem a little like molly bolts, in that it seems they're intended to expand when tightened. One of these bolts came out easily enough. The other just spun. Clearly the nut on the far end wasn't secured to the floor pan. I used a breaker bar to pull up on the bridge while turning the bolt, hoping to create enough friction on the nut that it would allow the bolt to turn. What actually happened is I pulled the nut through the hole in the floor, never having gotten the bolt to turn relative to the nut. Photos below. How should I reassemble this? I imagine I can get the old nut off with some combination of heat and vice grips. What should I use for reassembly?

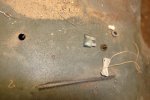
If you can remove that nut insert then just rough it and the hole up and JB Weld it back in there. Better yet would be to use an expanding Nutsert. Knid'a like pop rivets with threads. I love 'em for mounting junk on blind panels and floors. You don't really need the tool, you can expand them with a bolt and nut tightened in it.
Those mounting plates on the front floor? Remove and toss them. They were for NBC and radio gear. You'll never need them and they just suck up floor space. Once the floor is prepped I'd use this stuff on it. http://www.monstaliner.com/
Find 2 good fire extinguishers with mounts and drill the ext.mount to match the bolt pattern behind the seat and stick the other in the back crew compartment. Most "GI" extinguishers on the market are out of date.
 

jpg

Member
611
15
18
Location
Boston, MA
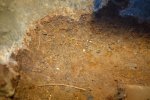
Ground off the radio mount welded to the passenger side floor. Rust underneath that was only cosmetic. Wire brushing revealed that rust over by the transmission hump is fatal, for the floor pan. Bummer.
DSCF2772.jpgDSCF2771.jpg
Unfortunately, it seems the rusted-through area is just above the replacement floor pans I see at LMC and Jegs. The "drop-in" pans seem to have more of the compound curve, which is what I need. Not sure what they mean by "drop-in" though... No one seems to have replacement transmission humps. So I guess I just grind away the rusted area and weld 16G sheet steel to the edge of the replacement floor pan.

There was BondO filling in the big hole. It didn't look like the floor mat had ever been lifted, and there was no evidence of treating the rest of the rust. Just one area of BondO. Curious... How did it come to rust only in the areas by the transmission hump, and toward the inner back corners of the floor pans?

I have basic welding skills and a Ready Welder. I plan to replace only the rusted metal, so I'll cut out the relevant parts of the replacement floor pan.

If anyone cares to offer suggestions or pointers to where a first-timer should go for skills, I'd appreciate any suggestions. I've read other SS posts, and watched youtube videos.
 

Another Ahab

Well-known member
17,999
4,556
113
Location
Alexandria, VA
Ground off the radio mount welded to the passenger side floor. Rust underneath that was only cosmetic. Wire brushing revealed that rust over by the transmission hump is fatal, for the floor pan. Bummer.
View attachment 578977View attachment 578978
Unfortunately, it seems the rusted-through area is just above the replacement floor pans I see at LMC and Jegs. The "drop-in" pans seem to have more of the compound curve, which is what I need. Not sure what they mean by "drop-in" though... No one seems to have replacement transmission humps. So I guess I just grind away the rusted area and weld 16G sheet steel to the edge of the replacement floor pan.

There was BondO filling in the big hole. It didn't look like the floor mat had ever been lifted, and there was no evidence of treating the rest of the rust. Just one area of BondO. Curious... How did it come to rust only in the areas by the transmission hump, and toward the inner back corners of the floor pans?

I have basic welding skills and a Ready Welder. I plan to replace only the rusted metal
, so I'll cut out the relevant parts of the replacement floor pan.

If anyone cares to offer suggestions or pointers to where a first-timer should go for skills, I'd appreciate any suggestions. I've read other SS posts, and watched youtube videos.
I like how you're not hesitant to tackle the rough spots, jpg; more power to you.

I wish I had some wisdom to lend, but I'm no expert (other than recognizing the old bromide that "rust never rests", and "ain't" that a drag).

You go, though, Brother! [thumbzup]
 
Top
AdBlock Detected

We get it, advertisements are annoying!

Sure, ad-blocking software does a great job at blocking ads, but it also blocks useful features of our website like our supporting vendors. Their ads help keep Steel Soldiers going. Please consider disabling your ad blockers for the site. Thanks!

I've Disabled AdBlock
No Thanks