• Steel Soldiers now has a few new forums, read more about it at: New Munitions Forums!

  • Microsoft MSN, Live, Hotmail, Outlook email users may not be receiving emails. We are working to resolve this issue. Please add support@steelsoldiers.com to your trusted contacts.

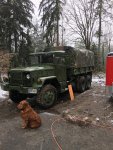
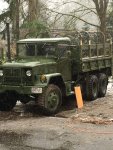
The Centipede aka my new 1988 m35a2c

rustystud

Well-known member
9,280
2,988
113
Location
Woodinville, Washington
Installed my Pioneer tool rack last night. Now I've got to find the thread that someone wrote on the available tools to go on it.

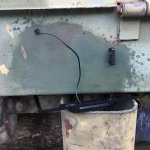
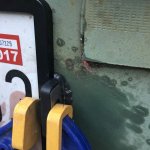
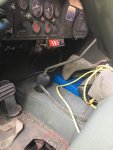
Also does anyone have the NSN for the remote air tank drains in this photo? I like them a lot but can't find a part # for repairs in the future.

View attachment 642894
You cannot find them listed because they are not military items ! That was someones modification. I have added regular semi-truck pull drains on mine. Their cheap at about $10.00 a valve with a long pull cord.
 

zanther

Member
158
2
18
Location
Maltby, WA
Ah ha! well I also realized I'd been goofing up, this is a dual circuit model but only has the 2 remote drains, which means I haven't been emptying the other one. Thankfully it was bone dry when I opened it up to vent last night.

I checked with the NAPA in Woodinville and Mill Creek about the 1/4" drains, they're all on order so I've just ordered one from the internet.


Got a lot of tinkering done last night and today.
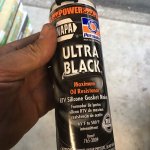
I replaced one of the windshield seals with a new one I got,turns out it didn't quite fit so I had to cut it in the middle to remove some extra length along the bottom part. Next problem was that it didn't actually seal any better than the old one I had, I used some RTV silicone on the inside of the window frames to make a better seal. I used a light coating of oil on the cab frame, so hopefully the silicone only stick to the window part.

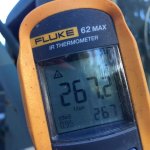
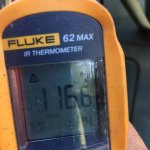
Took the truck for a drive last night to get some parts at NAPA, Rhuey saw me on the drive evidently, feels like I'm a celebrity driving this thing around town. Took measurements on my shiny exhaust vs painted and it's quite the reflection/refraction off that Stainless, almost 150 degrees lower on the stainless! I have plans to mod the old hand guard but it's not a priority for now. I'm hunting for some very high temp pain to paint the muffler. I'd prefer green but HomeDepot has black if all else fails.

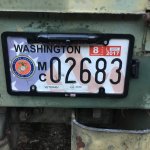
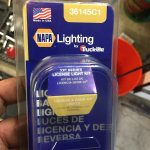
Also mounted my license plate bracket with camera and light. It's not wired it yet but I've also got a small 24v to 12v converter that I plan to junction off the running lights so that it's only powered when the lights are on. There's a 7" screen to mount somewhere in the cab but it's currently got a suction base. Hopefully I'll get lines ran tomorrow between the two. I'm waiting on Packard connectors to make some Y-splitters so I'll at least be ready when they get here.

The light is a standalone/add on one from NAPA, says the input in 5-30 volts, so we'll see! it was meant to self-stick with a backing but I had to rotate it to get it to fit, so I used some of the same RTV silicone to attach it to the license plate holder, the wires are in a hard casing that goes through the bumper so I'll attach a hose clamp on the backside and that should be fairly secure.

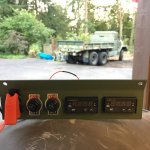
And I got my EGT/Boost gauges in from Those Military Guys, I'm adding some aircraft toggle covers as I plan to use the switches for my Cree 52" light bar that I want to add to the truck in an eyebrow mount. They're remarkably cheap, $100 on Ebay, I got I on recommendation from my brother who runs them on his RAZR. it's 12 volt unfortunately but I've got a converter coming for it. I thought about just connecting it to one of my batteries, but I don't want to have a mismatch in charge state if I can help it. Gauges get mounted tomorrow and hopefully I'll have time to hook them up and drill the manifold hole for the boost sensor.
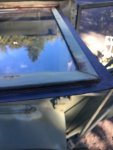
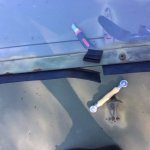
20160909_232518870_iOS.jpg20160909_235126146_iOS.jpg20160910_011327010_iOS.jpg20160910_011331379_iOS.jpg20160910_020821841_iOS.jpg20160910_021108298_iOS.jpg20160910_021402147_iOS.jpg20160910_021651042_iOS.jpg20160910_021943214_iOS.jpg20160910_022022646_iOS.jpg
 
Last edited:

zanther

Member
158
2
18
Location
Maltby, WA
@Jericho, I can't take credit for the design that's all TMG's, though I agree it's a nice one! I did get the other 2 toggle covers on yesterday, being the first day of football season, I didn't get anything else done on the truck.
 

zanther

Member
158
2
18
Location
Maltby, WA
I mentioned in the What did you do to your deuce this week thread, that I'd completed the FDC bypass , I haven't turned up the fuel yet because it's running like a champ right now. I need to troubleshoot my boost gauge, I got the directions from the manufacture Those Military Guys , I'll ask them if it's okay to post in the deuce forum for everyones knowledge. I also need to get a new tap to install the EGT sensor before I mess with the fuel rate. I broke my tap handle while testing it on a different piece of metal. I shouldn't have bought a cheap set as the metal of the handle was really poor quality,the internal jaws that hold the tap broke on first tightening. I'd like to believe I'm superman and my raw strength broke it but...

I had an extra piece of 8/4 maple , bought as part of a plan to build a tatami mediation platform for a friend, so I used that to make new uprights and one new bow for the back canvas. The dimensions aren't perfect, compared to the fiberglass upright I was using as a template, but close enough. The maple isn't very rot resistant but it was what I had on hand so it'll do for now. The canvas is now mounted on the truck for the first time, that'll be nice to have some dry area when I use the truck for errands. I've been just tarping whatever I was hauling, that was a pain.

20161223_191128156_iOS.jpg20161223_184824448_iOS.jpg20161223_170617207_iOS.jpg
 

zanther

Member
158
2
18
Location
Maltby, WA
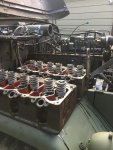
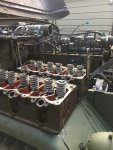
It's been a few months since I updated the thread. Not a lot has changed, working on head gaskets right now. As well as building the canadian roof rack. I want to mount my 50" LED light forward and then a couple of side lights.

While I've got the engine halfway dismantled I'm also going to replace the cooling system hoses and repaint components after cleanup.

20170410_012334782_iOS.jpg20170408_153543945_iOS.jpg
 

zanther

Member
158
2
18
Location
Maltby, WA
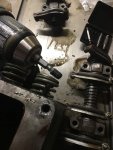
I got my broken air intake stud out today. Thanks the fine guys on this forum, I followed the advice I found about soaking in rust penetrant for a few days and not being in a rush.

I used a fine point center punch to get a good center point, then used a left hand drill bit, followed by a cheap easy out that I got off amazon. it worked really well and quite fast once I actually got started on trying to remove it.

I'm hoping that my local Fastenal will be able to replace this stud, I found the NSN in the -34p but not having much luck online searching.

20170412_012448722_iOS.jpg
 

rustystud

Well-known member
9,280
2,988
113
Location
Woodinville, Washington
I got my broken air intake stud out today. Thanks the fine guys on this forum, I followed the advice I found about soaking in rust penetrant for a few days and not being in a rush.

I used a fine point center punch to get a good center point, then used a left hand drill bit, followed by a cheap easy out that I got off amazon. it worked really well and quite fast once I actually got started on trying to remove it.

I'm hoping that my local Fastenal will be able to replace this stud, I found the NSN in the -34p but not having much luck online searching.

View attachment 675079

The "Tacoma Screw" directly across the street from the Fastenal store will probably have them. Or they can order them in really fast.
 

zanther

Member
158
2
18
Location
Maltby, WA
20170408_153543945_iOS.jpg
The cylinder head wrench I made to disassemble the heads turned out to be perfectly in line vertically. I used it this weekend to reinstall the heads after changing out the head gaskets.

I should have gotten more photos but while it was apart I went ahead and installed spin on adapters from Jtonka, changed all the fluids, and changed the coolant lines out as they were looking pretty weathered.

I also got the EGT sensor finally installed, I put it next to #4 cylinder near the collector in the manifold. I'm hitting 1070* on a uphill unloaded right now. I'll probably need to turn the fuel down but I'm comfortable watching the EGT's for now and adjusting via foot pedal.

I'll get some photos of the 90* elbow I installed on the air intake as well, very simple but helps the rain shed rather than collecting inside the mushroom lip. I got the idea from another thread.

next up will be installing the 15800 Curtis hitch and figuring out my 24-12v conversion for civi trailers.
 

rustystud

Well-known member
9,280
2,988
113
Location
Woodinville, Washington
View attachment 676601
The cylinder head wrench I made to disassemble the heads turned out to be perfectly in line vertically. I used it this weekend to reinstall the heads after changing out the head gaskets.

I should have gotten more photos but while it was apart I went ahead and installed spin on adapters from Jtonka, changed all the fluids, and changed the coolant lines out as they were looking pretty weathered.

I also got the EGT sensor finally installed, I put it next to #4 cylinder near the collector in the manifold. I'm hitting 1070* on a uphill unloaded right now. I'll probably need to turn the fuel down but I'm comfortable watching the EGT's for now and adjusting via foot pedal.

I'll get some photos of the 90* elbow I installed on the air intake as well, very simple but helps the rain shed rather than collecting inside the mushroom lip. I got the idea from another thread.

next up will be installing the 15800 Curtis hitch and figuring out my 24-12v conversion for civi trailers.
Good job ! I need to come over and check out your rig.
 

zanther

Member
158
2
18
Location
Maltby, WA
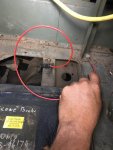
I got a chance to briefly troubleshoot my dash Brake light this morning. It illuminates if I have the parking brake set, but did not illuminate during complete brake failure. I do have a dual circuit MC. I took the wire off of the proportioning valve and determined it's a ground type system. ie the loss of pressure in the valve should cause it to complete the ground side of 24v circuit, which illuminates the dash lamp. I've confirmed the wire is good by building air pressure in the truck, disengaging the parking brake, and then running a test wire to the frame for ground. I pulled it up through the MC fill cover so that I could easily see the light .

TNJ Murray has valve with the correct part #, but listed for the A3. I've ordered it and it'll be here soon.

I also got a chance to check out where my brake hardline running back to the rear axles broke this past weekend. Looks like it rubbed on a cross member in FL3 behind the coupler to FL8. I've ordered enough brake line to refit the truck.

My plan is to essentially rebuild the brake system, I do need to figure out why my front brakes didn't continue working after rear brake loss. My assumption is that it's not worked since I got the truck and ignorance of not knowing what the brake feel should be like led me to believe it was working when in fact I was only using the rear brake portion.
20170810_152638486_iOS.jpg20170810_152649160_iOS.jpg
 

zanther

Member
158
2
18
Location
Maltby, WA
I've begun work on rebuilding my brake system, much to my wife's dismay when she viewed the receipts for parts and tools.

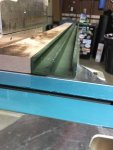
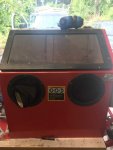
I bought a cheapo sandblasting cabinent at HF. I figured it'd be a good start for $112. I've already ordered a new gun, the one in the kit sucks. (or rather it doesn't suck like it should!)
20170825_173757920_iOS.jpg
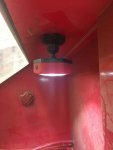
For light, I bought one of their battery powered, magnetic attaching LED's. I use it with Eneloop rechargeables, though I'd like to upgrade at some point to shore-powered lights.
20170825_173805495_iOS.jpg
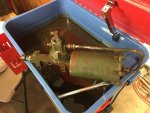
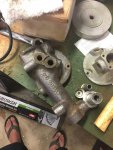
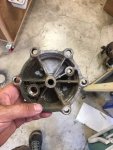
I've taken the front axle airpack off, I have a '88 dual circuit AF truck.
I started with solvent tank, I use a diluted amount of Purple Power Clean, though am condsidering switching back to plan ol' solvent.
20170818_001038772_iOS.jpg
and have disassembled and sandblasted it.
20170825_033417418_iOS.jpg20170818_011212750_iOS.jpg
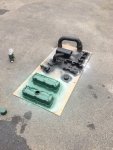
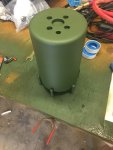
I did paint the air cylinder already, I needed to see some sort of progress.
20170825_174340410_iOS.jpg
I plan to follow an article I saw on electrolysis for rust removal, an old trick vehicle restorers use to help clean the ports of rust. I do have hones for the cylinders, when I get to that stage.
http://www.rowand.net/Shop/Tools/Electrolysis.htm


There's the usual story that this is going much slower than expected, life keeps getting in the way of my Project time. I'm taking my time, even though it's killing me not driving the deuce for my sunday cruise. I think brakes are important, your thoughts may vary. ;)
 

zanther

Member
158
2
18
Location
Maltby, WA
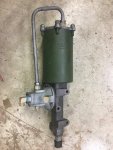
Got the first airpack rebuilt finally.
20170829_045253500_iOS.jpg

I ended up going with 80 grit glass media from HF , changing from 12 grit walnut shell that HF also sells. It works much better. I also installed an inline desiccant dryer at the sandblasting cabinet to help with media clumping.
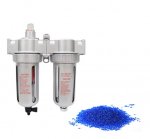
https://www.amazon.com/gp/product/B00UEUYHOG/ref=oh_aui_detailpage_o05_s00?ie=UTF8&psc=1
AirDryer.png
of note, it's a 3/8's dryer but it has 1/2" NPT ports so you have to get adapters as well.


Hoping I can remove the other airpack tonight and start cleaning it up. It should go much faster now that I've got things dialed in.
 

rustystud

Well-known member
9,280
2,988
113
Location
Woodinville, Washington
Got the first airpack rebuilt finally.
View attachment 696917

I ended up going with 80 grit glass media from HF , changing from 12 grit walnut shell that HF also sells. It works much better. I also installed an inline desiccant dryer at the sandblasting cabinet to help with media clumping.
https://www.amazon.com/gp/product/B00UEUYHOG/ref=oh_aui_detailpage_o05_s00?ie=UTF8&psc=1
View attachment 696920
of note, it's a 3/8's dryer but it has 1/2" NPT ports so you have to get adapters as well.


Hoping I can remove the other airpack tonight and start cleaning it up. It should go much faster now that I've got things dialed in.

I would remove the pressure switch on the end of the air-pac. They are nothing but trouble. Go with the air-line pressure switch conversion that the military recommends. A simple brake air switch from any truck shop will work.
Besides that, looks good !
 

zanther

Member
158
2
18
Location
Maltby, WA
Thanks! I wish I'd have known that before I ordered two new switches. :/ The SMARPI for dual-circuit still notes using the hydraulic stop switches. I did find the PSMAG sheet on updating and have ordered the kits from Eriks.

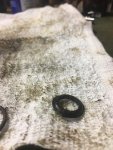
I did find that there is a small conical rubber oring between my air cylinder and the slave body, but there is not replacement in the rebuild kit. Does anyone know where to get one? It goes in a recess around the 5th hole on air cylinder. I may just not be searching right because I don't see other folks mentioning it in their airpack rebuild threads.
20170830_143618014_iOS.jpg
 
Top
AdBlock Detected

We get it, advertisements are annoying!

Sure, ad-blocking software does a great job at blocking ads, but it also blocks useful features of our website like our supporting vendors. Their ads help keep Steel Soldiers going. Please consider disabling your ad blockers for the site. Thanks!

I've Disabled AdBlock
No Thanks