• Steel Soldiers now has a few new forums, read more about it at: New Munitions Forums!

  • Microsoft MSN, Live, Hotmail, Outlook email users may not be receiving emails. We are working to resolve this issue. Please add support@steelsoldiers.com to your trusted contacts.

What have you done to your HMMWV today/lately

3jacks

Active member
153
39
28
Location
Near Jackson, MO
I've been wanting to turn up the injection pump for a while now but I always told myself I would wait until I had an EGT gauge first. I found this one new for 40 dollars off on the auction site. The 1500 degree gauge would've been ideal but I couldn't pass up the deal. I tapped the probe 2 inches behind the passenger side flange where it connects to the manifold. I put the gauge where the air filter restriction meter was. 12 volts came from my Sure Power battery balancer that I have for my stereo setup. I was very surprised by my EGTs but I'll post separately about that.
View attachment 694072
I meant to get a picture of where I put the probe but I forgot and don't feel like moving the radio rack and dog house again.
Very interested in your findings. I have an EGT gauge to install with the same purpose...bump the FI up and get some more gitty-up but was concerned about damaging engine components. Following your post!
 

NormB

Well-known member
1,220
72
48
Location
Cloverly,MD
Took the beast to the range today with a couple of 1911 pistols (DGFM, SIG 1911F Scorpion) and a Pre-model 17 revolver (1947) for a break from work, working on the truck, take advantage of the weather (mid seventies when I left, around 80 on the way home), nice back road kind of 17 mile trip past rapidly disappearing farms and very little traffic.

Part of my "getting used to it" effort. Have rear tires at 40 psi (with airlift bumper and spare tire), front at 35. Feels pretty good to me.

I've read others talk about "not trusting" their trucks. With as much time/effort as I've put into this it SHOULD be roadworthy, trustworthy. Getting that way anyway.

This is what I bought it for though. NON-highway driving, parades, range trips, farming (definitely intend to hook up a disc harrow somewhere down the road).

It's slow, smooth, steady, power steering is a LITTLE quick to respond compared to my Tacoma but better than the alternative.

Next on the list: changing lube in hubs/diffs and winding the new cable onto the winch.
 
Last edited:

Carrera911

Active member
138
31
28
Location
Cumming, Georgia
Took the beast to the range today with a couple of 1911 pistols (DGFM, SIG 1911F Scorpion) and a Pre-model 17 revolver (1947) for a break from work, working on the truck, take advantage of the weather (mid seventies when I left, around 80 on the way home), nice back road kind of 17 mile trip past rapidly disappearing farms and very little traffic.

Part of my "getting used to it" effort. Have rear tires at 40 psi (with airlift bumper and spare tire), front at 35. Feels pretty good to me.

I've read others talk about "not trusting" their trucks. With as much time/effort as I've put into this it SHOULD be roadworthy, trustworthy. Getting that way anyway.

This is what I bought it for though. NON-highway driving, parades, range trips, farming (definitely intend to hook up a disc harrow somewhere down the road).

It's slow, smooth, steady, power steering is a LITTLE quick to respond compared to my Tacoma but better than the alternative.

Next on the list: changing lube in hubs/diffs and winding the new cable onto the winch.
Interesting that you have your tire pressure that high. Granted I don't have a bumper or spare but I noticed my tires were bulged in the center and thus not wearing evenly. I set them to 30 all around last fall which rose to 34 in the warmer weather. They're at 26 now which will hopefully make them wear a little better.
 

infidel got me

Well-known member
1,679
32
48
Location
Newberry, Florida
I have load range g goodyears on the rear-- I was running 30 psi and wore the centers quickly. I dropped down to 25 and the wear seems better.

I have load range f on the front, 30 psi, and they still look new??? I don't know if the load range makes a difference in the wear. The higher load

range tire wore way quicker....
 

NormB

Well-known member
1,220
72
48
Location
Cloverly,MD
Interesting that you have your tire pressure that high. Granted I don't have a bumper or spare but I noticed my tires were bulged in the center and thus not wearing evenly. I set them to 30 all around last fall which rose to 34 in the warmer weather. They're at 26 now which will hopefully make them wear a little better.
I chose those pressures based on skimming through, oh, I don't know, maybe ten or twelve THOUSAND threads on "what should my tire pressure be?"

I can read the manual. Matter of fact TM 9-2320-280-10 happens to be open to page 2-87 right beside me as I type this. Information is very clear regarding proper tire inflation. "Do not exceed 50 psi (345 kPa) cold radial tire inflation pressure"

I rode around for a bit with front and rear at 45. Front end seemed too "stiff" to me so I lowered TP to 40 up front.

One of the regulars here, Moose-somethingorother, had directions on drawing a chalk line across the tread and rolling the truck past that line a few times. If the outside is still present, let out air; if the center's still present add air. Says it works for any load, any tire, and I can believe that. PV=nRT and all, bias, radial, why I never heard or read that before is beyond me. It's like something some shade-tree mechanic came up with about 100 years ago in the age of Tin Lizzies based on first principles.
 

NormB

Well-known member
1,220
72
48
Location
Cloverly,MD
Got around to draining/filling the geared hubs today. Pretty straightforward job.

Had bought a bag of nuts from AMTAK months back, using a 5/8-18 - I forget, wife thought it was 16, I couldn't find a magnifying glass - but I did find the die to chase the threads and I did this on every single stud. Then took a wire brush to some of the rust, hit pretty much everything I could with RUstoleum rust reformer spray, inside the wheels too.

Drained the rear differential no problem. Problem is the front drain plug. Seems pretty solidly frozen in place. I'll hit it with some heat tomorrow, try again. If all else fails I can drill it out with indexed drill bits and peel out the remaining threads. A heck of a lot easier on a mill than upside down on the truck. "All else" includes removing the cover to drain the hub, but I like when things work the way they were designed, how they're supposed to work.

Anyone else have a similar experience? I don't want to mess up anything else in the process.
 

NormB

Well-known member
1,220
72
48
Location
Cloverly,MD
Got front differential drain plug out. MAPP gas torch and TIGHTENED it just a hair; backed out easily then.

So all fluids and assemblies finally drained, filled, tested. Going to try and get more backroad time this coming week.

Meanwhile, installed a transfer case LOCK light. Used 16 gauge prestolite wire and packard fittings to match everything and tapped into a 24V block I wired inside the battery box for fans and accessory power. Less likely to forget and leave the thing in high or low lock again, but I've gotten pretty good at checking first before driving.
 

gtodan

Active member
Steel Soldiers Supporter
115
46
28
Location
Marion, Iowa
Meanwhile, installed a transfer case LOCK light. Used 16 gauge prestolite wire and packard fittings to match everything and tapped into a 24V block I wired inside the battery box for fans and accessory power. Less likely to forget and leave the thing in high or low lock again, but I've gotten pretty good at checking first before driving.

Norm could I trouble you for some pics of your install? Sounds like a good idea. Thanks DanJ
 

NormB

Well-known member
1,220
72
48
Location
Cloverly,MD
Meanwhile, installed a transfer case LOCK light. Used 16 gauge prestolite wire and packard fittings to match everything and tapped into a 24V block I wired inside the battery box for fans and accessory power. Less likely to forget and leave the thing in high or low lock again, but I've gotten pretty good at checking first before driving.
Norm could I trouble you for some pics of your install? Sounds like a good idea. Thanks DanJ
Sure thing: IMG_0505.jpg
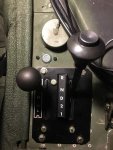
This was both easier AND harder than I thought it would be. I replaced my 218 TC with an NP242 and thought the TC Lock light was a good idea. Lamps are relatively cheap - I think it was around $15 - I bought spools of the prestolite wire and connectors through Eriks Military surplus. So I ran some 16g wire with a female connector plugged into the light above the TC, transmission, using speedo cable for routing, but with everything mounted (wiring, shifter box, muffler, dual oil filters) it was a tight squeeze getting it up inside. I'd drilled a 7/8" hole about 3/4" forward of theforward edge of the shifter plate, enlarged it with a file or two, flipped it over to mark holes for screws, then, using a bicycle brake cable (with a metal ball at one end) through one side of the lamp, I fished the cable through one side hole, put in an 8-32 screw (could've used 10-24 which I also had, but 8-32 has enough "bite" I don't think it's going anywhere), then put in the other.

Now that I knew how long the wire needed to be to reach the TC case switch at the rear, I cut the wire, used another connector, and ran HOT to the bus bar (whole thing is fused at 10A, I have the fans and fog/spot light bar wired to it).

Ground went to a stud I located on the frame confirming ground continuity with a jumper to HOT, touching the YUGE ring connector to several spots while I watched the lamp light.

Works great. (I took picture with battery negative lead switch off).

Oh, one other thing. There's a "ledge" just forward of the shifter underneath, part of the support frame, I think. I tried missing it without running into the test plug (big round thing), almost missed it. Had to take a dremel tool to the lamp to trim away just enough plastic so it would fit flush up against the tunnel. Might get around to touching it up with some 383 or something later. I'm afraid if I start painting, I won't know where to stop.
 

gottaluvit

Well-known member
H4 conversion headlights installed in 2-man and changed a running light bulb getting all lights working on both. (After the off road testing and cleaning and painting I will put new LED headlights in 4-man.) Then time to make sure hub and transfer cases are full and off to the 4x4 roads with both trucks to test the 4 wheel drive. I figured I may as well test them both before stripping them of the covers and internal insulation and cleaning them up.
 

3jacks

Active member
153
39
28
Location
Near Jackson, MO
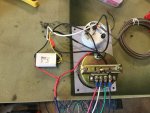
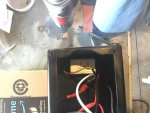
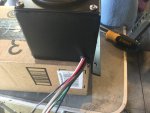
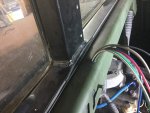
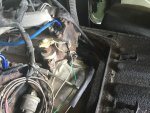
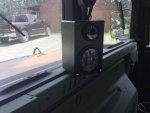
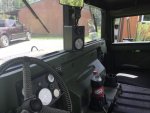
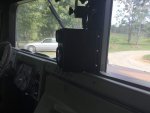
EGT and Tach install. Had my local fab shop cook me up a box. pulled power for the tach from fuel gauge and the gauge lights are pulled from gauge cluster light with a 24v to 12v converter to light the EGT. Haven't hopped up the injection pump yet but took it out for a spin and cruising at 55mph had a little over 800 degrees EGT. Dropping the throttle a few times had it around 950 degrees at close to 60 mph. Didn't try a standing start full throttle yet. Pics of the wiring and install below.
 

Attachments

Another Ahab

Well-known member
17,999
4,556
113
Location
Alexandria, VA
EGT and Tach install. Had my local fab shop cook me up a box. pulled power for the tach from fuel gauge and the gauge lights are pulled from gauge cluster light with a 24v to 12v converter to light the EGT. Haven't hopped up the injection pump yet but took it out for a spin and cruising at 55mph had a little over 800 degrees EGT. Dropping the throttle a few times had it around 950 degrees at close to 60 mph. Didn't try a standing start full throttle yet. Pics of the wiring and install below.
The custom-fab box is a nice item.

Is that aluminum?
 

Another Ahab

Well-known member
17,999
4,556
113
Location
Alexandria, VA
I see now, Pic #1 kind of gives it away as steel. I only zeroed in on Pic #6 (and the radiuses edges made me think aluminum for some reason).

That shop does good work, I'll give them that much.

That's a pretty piece of work.
 

ari

New member
233
3
0
Location
dacula Ga
I installed a tach today too I fabbed up a housing out of a pipe cap and made a metal bracket to hold it in place. I also had to replace the yellow tach signal mine was bad I got a replacement from 86humv. as soon as I get done installing it I find this so I went ahead and ordered it. mine will tide me over till it gets here. https://www.summitracing.com/int/parts/atm-5204
IMAG0876.jpg
 
Top
AdBlock Detected

We get it, advertisements are annoying!

Sure, ad-blocking software does a great job at blocking ads, but it also blocks useful features of our website like our supporting vendors. Their ads help keep Steel Soldiers going. Please consider disabling your ad blockers for the site. Thanks!

I've Disabled AdBlock
No Thanks