• Steel Soldiers now has a few new forums, read more about it at: New Munitions Forums!

  • Microsoft MSN, Live, Hotmail, Outlook email users may not be receiving emails. We are working to resolve this issue. Please add support@steelsoldiers.com to your trusted contacts.

FLU419 SEE HMMH HME Owners group

glcaines

Well-known member
3,912
2,586
113
Location
Hiawassee, Georgia
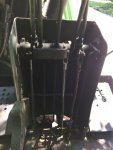
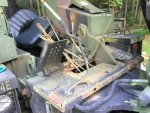
To dismantle the control tower on the backhoe you need to remove the pin holding the hydraulic cylinder in place. I was a little nervous with all of that steel hanging over me so I took my JD tractor, sans the bucket, and lowered the boom onto the SEE backhoe, locking it into the teeth of the shovel. I finally broke into the tower for the controls. What a mess! You have to remove all control arm knobs and additionally loosen the locking nuts on the stabilizer control arms so that they can be rotated inward so the tower cover can be removed. Everything is rusted and corroded. I'm going to have to completely dismantle everything, clean up the parts, paint them, grease everything and put it back together again. I intend to make the entire tower and innards look like new when I'm finished. However, first I have to confirm that I can get the stuck left stabilizer control working and that the rest of the hydraulic valving assembly is working and dependable. If not, I'll be looking for a replacement. The other five controls on top work well, although rusty. However, the foot pedal linkages and valving need significant help.
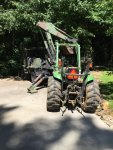
JD 4600 Stabilizing.JPG
Control Tower.JPG
 

Speedwoble

Well-known member
606
301
63
Location
New Holland, PA
..... first I have to confirm that I can get the stuck left stabilizer control working and that the rest of the hydraulic valving assembly is working and dependable. If not, I'll be looking for a replacement.......
I have a spare backhoe taking up space in my driveway. Not that I would like removing the valving, but I have parts. Also, the valves are much easier to work on if you remove the backhoe from the truck. How you would keep it upright while removing valves and depressurizing the cylinders, I am not sure. Especially with that little green runt! (I work for brand red, so the other colors are unacceptable)
 

The FLU farm

Well-known member
Steel Soldiers Supporter
3,338
1,319
113
Location
The actual midwest, NM.
You have a button between the seats, and then the trailer brake on the column.

But what you need now is a hydraulic impact to run off of the SEE. I was so impressed with the 3/4" that I bought a 1" version, too.
It's supposedly good for 2,500 ft.-lbs.
 

The FLU farm

Well-known member
Steel Soldiers Supporter
3,338
1,319
113
Location
The actual midwest, NM.
To dismantle the control tower on the backhoe you need to remove the pin holding the hydraulic cylinder in place. I was a little nervous with all of that steel hanging over me ...

I'd rather cut the cover, which I may do anyway to create an access opening to the rear, but either way, the locks should keep the backhoe from moving when the cylinder is removed.
 

glcaines

Well-known member
3,912
2,586
113
Location
Hiawassee, Georgia
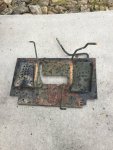
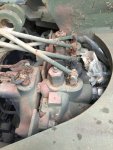
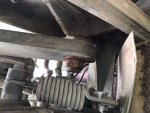
Well, I finally completely removed the tower and baseplate. That was a real pain! I disconnected all of the control rods at the top, and left the axle mechanism in the tower. I'll remove it, clean up the axle and tower and repaint them. I then removed the baseplate, another major pain, complete with the pedals and arm. I'll remove the pedals and the control arm, clean up everything and paint everything. I'm actually thinking about painting the baseplate with black spray-on bed liner. I'm going to pressure wash the backhoe tomorrow, and try to clean up the valve assembly. It is pretty rusty - much more rust than you see in the photo. I'll then clean up and paint everything that goes under the tower and baseplate. When I reinstall the baseplate and tower I'm going to have someone help me. Removal was definitely a two-man job lifting and guiding the control rods. I may go ahead and remove the control rods and install them after the tower is in place. I got rained out with a thunderstorm today.
Base Plate Prior to Removal.JPGBase Plate Removed.JPGValve Assembly.JPG
 

peakbagger

Well-known member
734
360
63
Location
northern nh
Well, I finally completely removed the tower and baseplate. That was a real pain! I disconnected all of the control rods at the top, and left the axle mechanism in the tower. I'll remove it, clean up the axle and tower and repaint them. I then removed the baseplate, another major pain, complete with the pedals and arm. I'll remove the pedals and the control arm, clean up everything and paint everything. I'm actually thinking about painting the baseplate with black spray-on bed liner. I'm going to pressure wash the backhoe tomorrow, and try to clean up the valve assembly. It is pretty rusty - much more rust than you see in the photo. I'll then clean up and paint everything that goes under the tower and baseplate. When I reinstall the baseplate and tower I'm going to have someone help me. Removal was definitely a two-man job lifting and guiding the control rods. I may go ahead and remove the control rods and install them after the tower is in place. I got rained out with a thunderstorm today.
View attachment 807317View attachment 807318View attachment 807319
Looks like the definition of a "Can of Worms" SEE style. Thanks for posting!
 

The FLU farm

Well-known member
Steel Soldiers Supporter
3,338
1,319
113
Location
The actual midwest, NM.
are those 14.00r20 or 14.5? Nice ditch!
Thanks, 419g.

Those are still the miserable Michelins they come with. Earlier that day I took out a sidewall on one (and later got stuck in that ditch, after finding out that the loader wouldn't hold the front end up).
It now has 13.50, I think, Super Swampers on it. Much better.
 

419g

Member
40
18
8
Location
USA
Thanks, 419g.

Those are still the miserable Michelins they come with. Earlier that day I took out a sidewall on one (and later got stuck in that ditch, after finding out that the loader wouldn't hold the front end up).
It now has 13.50, I think, Super Swampers on it. Much better.
Flu, You must have the:
Super Swamper M16-58 SS-M16 37X13.50R20LT
The other one they make is good up to 2250lb?!
Super Swamper Rok-13 Irok Tire 33x13.50R20Lt
I am only familiar with the Mich it says 7000lb ish. I do like those specs thou, seems like the perfect option for the SEE but those are spendy.
 

Sgt Jiggins

Potato Peeler
Steel Soldiers Supporter
433
205
43
Location
Lynchburg, VA
Thanks, 419g.

Those are still the miserable Michelins they come with. Earlier that day I took out a sidewall on one (and later got stuck in that ditch, after finding out that the loader wouldn't hold the front end up).
It now has 13.50, I think, Super Swampers on it. Much better.
I hate to say it but I took out the sidewall on one of mine the other day too. Luckily I had the spare mounted and ready to go. But that now leaves me needing to find new rubber. I know ag tires aren't to a lot of folks liking, but they are tough and they can carry a load. Mine sees so little road time now that ag is probably the way to go in my case. Only other downside: they're going to tear the SSSSSS outta my yard.
 

The FLU farm

Well-known member
Steel Soldiers Supporter
3,338
1,319
113
Location
The actual midwest, NM.
Flu, You must have the:
Super Swamper M16-58 SS-M16 37X13.50R20LT
The other one they make is good up to 2250lb?!
Super Swamper Rok-13 Irok Tire 33x13.50R20Lt
I am only familiar with the Mich it says 7000lb ish. I do like those specs thou, seems like the perfect option for the SEE but those are spendy.
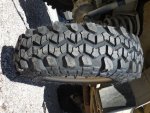
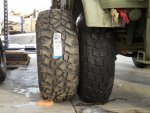
I think they're basic TSLs, and either 39 or 40 in nominal diameter. Either way, bias tires and with about a 4,000-lb. load rating.
Got those and the Rockers at about the same time, so I get the numbers mixed up. I think the Rockers are 40x16.50s, also bias and about a 4K load rating.

Technically they would be maxed out as far as load ratings go even at full pressure, but I never drive at freeways speeds, let alone for hours at a time, so 35-40 psi has worked great so far.DSCN0228.JPGDSCN0141.JPG
 

Sgt Jiggins

Potato Peeler
Steel Soldiers Supporter
433
205
43
Location
Lynchburg, VA
But what you need now is a hydraulic impact to run off of the SEE. I was so impressed with the 3/4" that I bought a 1" version, too.
It's supposedly good for 2,500 ft.-lbs.
I bought the 3/4" impact too. Love it. Or, rather, more like RESPECT it. It will tear stuff up faster than just about any other tool I own if not used very carefully. After using it, I am not sure what I could find myself working on that called for the 1" monster. Yikes.
 

glcaines

Well-known member
3,912
2,586
113
Location
Hiawassee, Georgia
I need to replace the main air line from the downloader to the air tanks. I want to use stainless steel. I've found a 6 foot piece of 10 mm O.D. stainless with 2 mm wall thickness. However, I'm trying to find the correct ferrules for the connections. I can use the original nuts, but I don't know the type of ferrule used.
 

peakbagger

Well-known member
734
360
63
Location
northern nh
I need to replace the main air line from the downloader to the air tanks. I want to use stainless steel. I've found a 6 foot piece of 10 mm O.D. stainless with 2 mm wall thickness. However, I'm trying to find the correct ferrules for the connections. I can use the original nuts, but I don't know the type of ferrule used.
I have posted in the past about the odd ball air fittings, here is clip from an older post. I think the ferrules you are looking for maybe the Metric AN fittings.

The air fittings in this system are bit of nightmare as they are mix of metric AN fittings and Metric straight threads. I picked up a metric pitch gauge and had a set of calipers so I got to learn how to identify the various types and sizes. Some of them appear to be cast aluminum and dont take any torque so you need to be careful to get a wrench on them to take the torque. There is not a lot of clearance in that area to get a crescent wrench in there. I have had bad experiences with the Chinese jumbo metric wrench sets being quite "sloppy" so I actually ordered up individual Craftsman large size wrenches that tend to have tighter tolerances.
 

Speedwoble

Well-known member
606
301
63
Location
New Holland, PA
I need to replace the main air line from the downloader to the air tanks. I want to use stainless steel. I've found a 6 foot piece of 10 mm O.D. stainless with 2 mm wall thickness. However, I'm trying to find the correct ferrules for the connections. I can use the original nuts, but I don't know the type of ferrule used.
I have these lines premade by a local shop. Contact me if you would like to be part of the next batch. All stainless steel51C8B142-197D-461E-A135-1FCDAE4303B4.jpeg
 

Speedwoble

Well-known member
606
301
63
Location
New Holland, PA
Have you heard of Fretting corrosion? https://en.m.wikipedia.org/wiki/Fretting
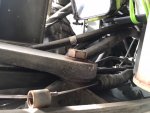
It is caused by relative motion between parts and is a major source of fatigue failure. It generally leaves telltale reddish rust powder. I was under my FLU replacing my air line and noticed the large front bolts holding the deck on were loose and fretting. They will be a pain to tighten, but clearly need it. I have been hearing a creaking when turning or other motions that cause the deck to rock. Just a public service announcement to check your nuts regularly. There is a military service bulletin for the bolts holding the back of the deck.86F1AD2D-05CA-4EFF-8C18-7D9422343474.jpeg
EEF1DEB9-FBC6-49E2-8EFC-8FD75F068989.jpeg
 

glcaines

Well-known member
3,912
2,586
113
Location
Hiawassee, Georgia
Does anyone know of a source for an alcohol evaporator tank with all of the fittings and hose that is in good condition? I removed mine for cleaning. Although mine has a new looking cap on it, the tank was about half full of dirt and sand and all of the fittings are rusted solid. Someone was obviously using the SEE with the cap off. I put a dish washer soap pellet in the tank along with very hot water and pretty much got the tank cleaned out. However, the rest is trash. I ordered a rebuild kit for the alcohol pump from EI, but haven't received it yet.
 

The FLU farm

Well-known member
Steel Soldiers Supporter
3,338
1,319
113
Location
The actual midwest, NM.
Unless you want it all there for looks, I wouldn't worry about it where you live.

I stole the needed parts off of my parts SEE, then capped the inlet on the regulator on that one. Well, I have only filled the functional system once in several years (it ran empty pretty quickly) and never did do anything about the non-existent setup on the parts SEE.

Both are run in down to -20 or so without any problems, but it is admittedly unusually dry here.
 

glcaines

Well-known member
3,912
2,586
113
Location
Hiawassee, Georgia
Not meaning to argue with Dave, just sharing what happened with mine, because it was the same as you're describing on yours: the handle was fully seated on that plastic catch/saddle and the engine didn't turn off. I pulled the engine cover and found that the cable was bending in a way that didn't allow it to fully engage the mechanism on the drivers' side of the block to cut the fuel. If you're having a hard time seeing it, you should be able to separate it quickly from the rest when you throttle up. It's that exact cable that I wound up flooding with aerokroil to get it to let go. As I said before, just be patient, work with the machine, do the maintenance (!), and it will hopefully come back to life for you n no time.
When you say 'cable' do you really mean cable? On mine there is a steel rod that screws into a ball joint on the bottom and the top is threaded. On my SEE, there aren't any cables anywhere on the throttle mechanism. Mine is bent badly right where the threads start on the top and is causing problems. From the top you can barely tell it's bent, but looking from underneath the SEE, you can see it's badly bent. I either needed to try to straighten it or replace it. I ordered a new rod, called Pin, Shoulder, Headless, P/N 406-300-06-15 from EI.
 
Last edited:

The FLU farm

Well-known member
Steel Soldiers Supporter
3,338
1,319
113
Location
The actual midwest, NM.
Uh, oh. That reminds me.
I have a (left, I think) outrigger that operates normally when extending, but requires pulling HARD on the lever to get to go back up.

I need to remove the cover and see what (not) going on in there. Before I break something.
An update may be in order. With everything still in place, and the backhoe stowed, I could spray some Twice As Good (JB-80) onto all the rods on the valves.
Everything worked smoothly, including the previously balky outrigger.

Well, after getting everything hot and toasty (an hour plus of hard digging) the dang outrigger was acting up again. There's more going on in there, apparently.
 
Top
AdBlock Detected

We get it, advertisements are annoying!

Sure, ad-blocking software does a great job at blocking ads, but it also blocks useful features of our website like our supporting vendors. Their ads help keep Steel Soldiers going. Please consider disabling your ad blockers for the site. Thanks!

I've Disabled AdBlock
No Thanks