HDN
Well-known member
- 2,199
- 5,341
- 113
- Location
- Finger Lakes Region, NY
I'm in the midst of swapping the old 365/80R20s on my M35A3 to some pre-loved 395/85R20s. This swap has successful results documented throughout the Steel Soldiers forums, so I decided to take the plunge. I would've liked to stick with 365s because I like the look of them, but I was able to purchase and ship six Michelin XZL+ 395/85R20s from CSM Army Tires for less than the price of two brand new Pirelli or Continental 365/80R20s. Plus my wife likes the look of the bigger tires! Amazing how much difference 3" more inches of diameter makes!
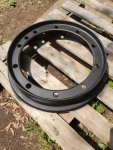
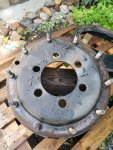
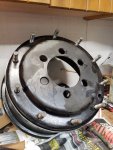
I would've liked to just break the rim down, replace the seals, slap the tire on, and bolt it back together to get back on the road. But these rims are a bit rusty and can definitely use a cleaning and a new coat of paint! The stud threads were also pretty gnarly and needed to be chased.
Here I will document what I did and the results. Once I get the process down with the first wheel, I plan to take a few videos while I work on the second wheel to show what I'm doing with moving pictures! So far I've done all this work myself with the following tools:
3/4" drive socket set
1/2" drive socket set
2" adjustable wrench
Two 36" pry bars
1" drive 1:64 torque multiplier (a Chinese tool from Amazon.com) with 10-amp geared hammer drill (without running the hammer) and custom-made adapter
Tap and die for 3/4"-16 threads
A cheap hydraulic floor jack for getting the beadlock insert out (could've probably just used a third pry bar instead)
Chain
Wire brushes (angle grinder, drill, Dremel, hand brushes)
4x4 and larger wood blocks
4-ton bottle jack to jack up truck
6-ton jack stand (big one needed for the height of the axle)
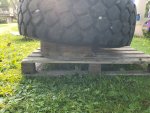
A wooden pallet to help me keep my work out of the dirt and grass
Paint includes both Rustoleum and Krylon products. Permatex rust treatment is also being used, along with Permatex thread sealer for the air pipe and connections to the CTIS hardware. I plan to never-sieze the lug nuts as I do with my other vehicles, but I don't think I will do that with the nuts holding the rim together. Note that these rims are painted with CARC and that proper safety precautions need to be taken when doing anything that'll turn the paint into an airborne powder! For that I have a 3M respirator with P95 cartridges. Safety glasses, goggles, face shield, and so on to protect your eyes, steel-toe shoes, and other common-sense PPE is important for a job like this!
I hope to be done with this project by August The first wheel's taken me a long time because it's been a huge learning process for me as well as waiting to get the tools I need to get the job done. I don't think the subsequent ones will take me as long!
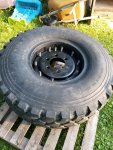
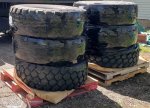
So first thing's first: New-to-me tires! These were purchased from CSM Army Tires down in Alabama. The owner, Philip, worked with me and my budget and set me up with 75%+ tread Michelin XZL+ 395/85R20 tires. Like he says on his website, there's no dry rot! It's hard for me to tell how old these tires are, but they look like they're in great shape. They were shipped right to my home via Estes freight. A lift gate and a powered pallet jack got both 700-lb pallets from the van to my work area.
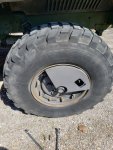
Stone cover on... Stone cover off! There are some old bug nests under the cover. The cover itself has some surface rust and chipped paint that'll be taken care of.
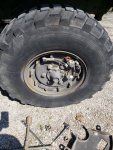
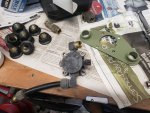
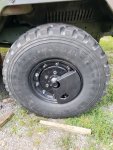
Almost ready to take the wheel off. The CTIS valve and air lines were removed per the instructions in the TM. The lug nut studs were treated with copper never-sieze, probably from when the Army last serviced the axles and brakes on the truck over 11 years ago. The TM says to deflate the wheel before removing. The tire had a hole in it so it was already deflated. The rubber in the tread is thick enough that it will roll around with squishing. I removed the wheel using tips from @simp5782 by carefully using a prybar between the ground and the wheel to make sure the wheel clears the wheel studs without scraping and damaging their threads, and scooching the wheel away from the truck. The wheel weighs probably about 300 lbs with no air in it or any CTIS hardware mounted.
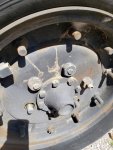
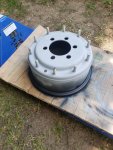
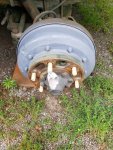
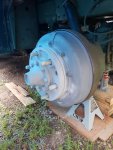
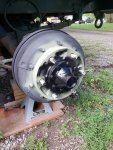
The brake drum has plenty of surface rust on it. You'll notice it was originally painted green, but I'm betting the paint wasn't temperature-resistant and probably degraded rapidly because of brake drum heat. I plan on wire brushing, priming, and painting the drum in-place, taking care to use the appropriate heat-resistant paint. The drums will be black this time because I can't find flat green paint that would be appropriate for this application.
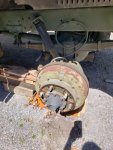
Here's the torque multiplier at work. I gave each nut several turns with the hand crank to bust them loose. There was a ton of resistance to the torque multiplier because everything was stuck so hard! One thing I will do with the next wheel is chase the rim stud threads with a die before trying to get the nuts off. It'll probably make the job a little easier! Note that I have a 1-1/2" socket over the wheel's air pipe to keep the pipe from getting destroyed by the torque multiplier's reaction arm.
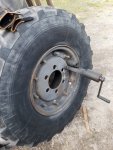
Here's a close-up of the torque multiplier I used as well as the big DeWalt hammer drill. To speed up the torque multiplier, I custom-printed a solid ABS plastic adapter that let me interface a 1/2" drive from my drill with the 1" drive on the torque multiplier. I connected the drill to the torque multiplier and ran the drill in low gear, no hammer, and it zipped the nuts right off the studs.

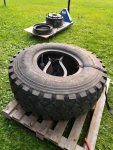
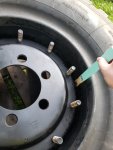
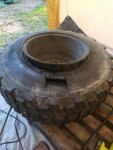
Once the nuts were off, I used my two prybars to work the beadlock flange off the rim. Then I got a few wood blocks just big enough to set the wheel on only by the rim, and used the prybars again to slide the tire off the rim. No tire soap was used to do this, although it probably would've made life easier.
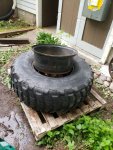
Yay! The tire's off the rim! Now to pull out that beadlock insert...
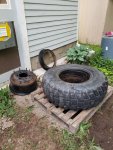
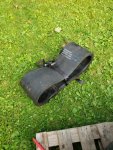
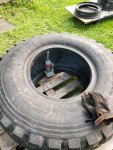
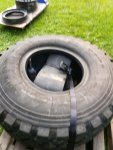
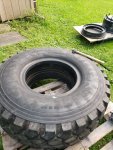
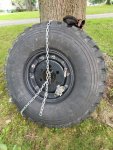
This took me awhile to do. I broke a light-duty ratchet strap trying to do this (they weren't kidding when they said it was rated for only 70 lbs ). I ended up wrapping a chain around the insert, linking it to a floor jack I had sitting atop a wood block on the tire's side wall. I used the jack handle and the jack as a big lever to pull the rubber insert out of the tire, with two other prybars assisting. The insert is an inch thick and weighs about 40 lbs. I am going to reuse it in the replacement tire.
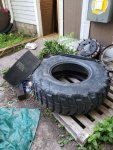
More pictures to come!
I would've liked to just break the rim down, replace the seals, slap the tire on, and bolt it back together to get back on the road. But these rims are a bit rusty and can definitely use a cleaning and a new coat of paint! The stud threads were also pretty gnarly and needed to be chased.
Here I will document what I did and the results. Once I get the process down with the first wheel, I plan to take a few videos while I work on the second wheel to show what I'm doing with moving pictures! So far I've done all this work myself with the following tools:
3/4" drive socket set
1/2" drive socket set
2" adjustable wrench
Two 36" pry bars
1" drive 1:64 torque multiplier (a Chinese tool from Amazon.com) with 10-amp geared hammer drill (without running the hammer) and custom-made adapter
Tap and die for 3/4"-16 threads
A cheap hydraulic floor jack for getting the beadlock insert out (could've probably just used a third pry bar instead)
Chain
Wire brushes (angle grinder, drill, Dremel, hand brushes)
4x4 and larger wood blocks
4-ton bottle jack to jack up truck
6-ton jack stand (big one needed for the height of the axle)
A wooden pallet to help me keep my work out of the dirt and grass
Paint includes both Rustoleum and Krylon products. Permatex rust treatment is also being used, along with Permatex thread sealer for the air pipe and connections to the CTIS hardware. I plan to never-sieze the lug nuts as I do with my other vehicles, but I don't think I will do that with the nuts holding the rim together. Note that these rims are painted with CARC and that proper safety precautions need to be taken when doing anything that'll turn the paint into an airborne powder! For that I have a 3M respirator with P95 cartridges. Safety glasses, goggles, face shield, and so on to protect your eyes, steel-toe shoes, and other common-sense PPE is important for a job like this!
I hope to be done with this project by August
So first thing's first: New-to-me tires! These were purchased from CSM Army Tires down in Alabama. The owner, Philip, worked with me and my budget and set me up with 75%+ tread Michelin XZL+ 395/85R20 tires. Like he says on his website, there's no dry rot! It's hard for me to tell how old these tires are, but they look like they're in great shape. They were shipped right to my home via Estes freight. A lift gate and a powered pallet jack got both 700-lb pallets from the van to my work area.

Stone cover on... Stone cover off! There are some old bug nests under the cover. The cover itself has some surface rust and chipped paint that'll be taken care of.


Almost ready to take the wheel off. The CTIS valve and air lines were removed per the instructions in the TM. The lug nut studs were treated with copper never-sieze, probably from when the Army last serviced the axles and brakes on the truck over 11 years ago. The TM says to deflate the wheel before removing. The tire had a hole in it so it was already deflated. The rubber in the tread is thick enough that it will roll around with squishing. I removed the wheel using tips from @simp5782 by carefully using a prybar between the ground and the wheel to make sure the wheel clears the wheel studs without scraping and damaging their threads, and scooching the wheel away from the truck. The wheel weighs probably about 300 lbs with no air in it or any CTIS hardware mounted.

The brake drum has plenty of surface rust on it. You'll notice it was originally painted green, but I'm betting the paint wasn't temperature-resistant and probably degraded rapidly because of brake drum heat. I plan on wire brushing, priming, and painting the drum in-place, taking care to use the appropriate heat-resistant paint. The drums will be black this time because I can't find flat green paint that would be appropriate for this application.

Here's the torque multiplier at work. I gave each nut several turns with the hand crank to bust them loose. There was a ton of resistance to the torque multiplier because everything was stuck so hard! One thing I will do with the next wheel is chase the rim stud threads with a die before trying to get the nuts off. It'll probably make the job a little easier! Note that I have a 1-1/2" socket over the wheel's air pipe to keep the pipe from getting destroyed by the torque multiplier's reaction arm.

Here's a close-up of the torque multiplier I used as well as the big DeWalt hammer drill. To speed up the torque multiplier, I custom-printed a solid ABS plastic adapter that let me interface a 1/2" drive from my drill with the 1" drive on the torque multiplier. I connected the drill to the torque multiplier and ran the drill in low gear, no hammer, and it zipped the nuts right off the studs.

Once the nuts were off, I used my two prybars to work the beadlock flange off the rim. Then I got a few wood blocks just big enough to set the wheel on only by the rim, and used the prybars again to slide the tire off the rim. No tire soap was used to do this, although it probably would've made life easier.

Yay! The tire's off the rim! Now to pull out that beadlock insert...

This took me awhile to do. I broke a light-duty ratchet strap trying to do this (they weren't kidding when they said it was rated for only 70 lbs

More pictures to come!


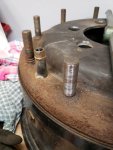
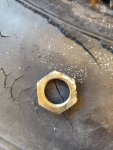
 Can't reuse those now, so I got a new set. I won't be making that mistake again!