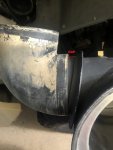
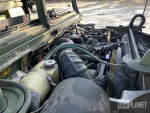
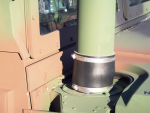
• Steel Soldiers now has a few new forums, read more about it at: New Munitions Forums!

  • Microsoft MSN, Live, Hotmail, Outlook email users may not be receiving emails. We are working to resolve this issue. Please add support@steelsoldiers.com to your trusted contacts.

Bringing back to life a 2009 HMMWV M1165A1 from GovPlanet - total newbie, please help...

T9000

Well-known member
Steel Soldiers Supporter
488
367
63
Location
California
Good News! I am sharing all these details in case someone else will ever run into these issues, which will save time (I am not sending you to read the manual :)...but it is useful in the longer run)
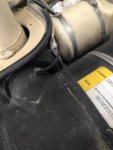
I removed the air cleaner canister since I was going to replace it because it is missing the bottom rubber boot (it is totally ripped) and in the process I was able to get behind the AC compressor and replace the last leaky return fuel line...without having to loosen the serpentine belt and/ or remove the compressor!
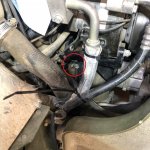
ReturnFuel2.jpg
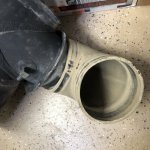
The air horn doesn't look too bad,,,there is some minimal oil inside, from the missing CDR valve line:
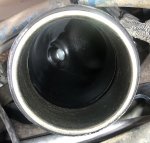
AirHorn3.jpg
 
Last edited:

T9000

Well-known member
Steel Soldiers Supporter
488
367
63
Location
California
The motor was barley if at all run without the CDR valve, it was removed during Demil
You are exactly right, I ran it for maybe 50 miles. I ordered new CDR valves, first I got a regular one (without DFW) thinking that I don't need the DWF, but then TNDRIVER mentioned that I should install it and I got motivated, and ordered all the parts with the DFW CDR valve.
I don't plan to take it under water and I don't have the tall exhaust, but I thought it would be better for the overall venting system as others have mentioned on the forum.
 

Action

Well-known member
3,576
1,557
113
Location
East Tennessee
You are exactly right, I ran it for maybe 50 miles. I ordered new CDR valves, first I got a regular one (without DFW) thinking that I don't need the DWF, but then TNDRIVER mentioned that I should install it and I got motivated, and ordered all the parts with the DFW CDR valve.
I don't plan to take it under water and I don't have the tall exhaust, but I thought it would be better for the overall venting system as others have mentioned on the forum.
The fording cdr valve does absolutely nothing with the vent system unless you rotate the switch under the dash.
 

T9000

Well-known member
Steel Soldiers Supporter
488
367
63
Location
California
The fording cdr valve does absolutely nothing with the vent system unless you rotate the switch under the dash.
It may not do anything actively, but it gives a place to connect the two open ended vent lines that otherwise are hanging open (I wrapped them until the installation is competed). Yes, the switch will be in the right position for the situation so everything will work as intended.
Of course I could have used a union to tie them together permanently and forgo the DFW system, but somehow I felt compelled to get it done.
 

T9000

Well-known member
Steel Soldiers Supporter
488
367
63
Location
California
Just a quick update, all parts arrived and I was up until 3AM on Thursday trying to install everything and as usual there is always some surprises…in this case the air cleaner rubber boot that was missing on my original one and the reason I wanted to replace it with a new one (like Action recommended) it hits the post that supports the canister itself and doesn’t allow it to fit flush against the wall where where the air stack comes in, it looks like that’s why it was removed in the first place.
In theory that should not have a functional impact (I think?) as there is a rubber elbow that connects the air stack into the air cleaner canister, but the about 1/4” gap doesn’t look good at all.
I will post some pictures after New Year’s!

Merry Christmas Everyone!!!! And have a Happy, Healthy, Successful & Blessed New Year!!!
 
Last edited:

Action

Well-known member
3,576
1,557
113
Location
East Tennessee
Just a quick update, all parts arrived and I was up until 3AM on Thursday trying to install everything and as usual there is always some surprises…in this case the air cleaner rubber boot that was missing on my original one and the reason I wanted to replace it with a new one (like Action recommended) it hits the post that supports the canister itself and doesn’t allow it to fit flush against the wall where where the air stack comes in, it looks like that’s why it was removed in the first place.
In theory that should not have a functional impact (I think?) as there is a rubber elbow that connects the air stack into the air cleaner canister, but the about 1/4” gap doesn’t look good at all.
I will post some pictures after New Year’s!

Merry Christmas Everyone!!!! And have a Happy, Healthy, Successful & Blessed New Year!!!
There should be a seal between the air cleaner can and the body. Are the 2 mounts below it bent?
 

T9000

Well-known member
Steel Soldiers Supporter
488
367
63
Location
California
There should be a seal between the air cleaner can and the body. Are the 2 mounts below it bent?
There was no seal when I took out the original air cleaner can, it was flush, metal on metal:
47120849-8297-4FA5-97F0-A8D9BE5F2963.jpeg


41B06BA8-CD0D-453F-9255-8485AE51B679.jpeg

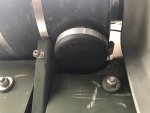
The two support brackets are not bent yet one interferes with the rubber boot holder even on the original one (if it wasn’t removed) by maybe 1/4” (that steel collar should not be like that, out of alignment and that’s fixed)
F1A0EADC-B7AB-4F69-98E4-02AA942FF8B6.jpeg

F7E467BD-FB50-4B7E-9BC4-98706CCBE905.jpeg

I will take a closer look when I get back and post pictures with the gap on the new one.
 
Last edited:

T9000

Well-known member
Steel Soldiers Supporter
488
367
63
Location
California
Are those pics in the last post of the old can INSTALLED, cuz the clamps arent on right.
Is this an early april fools joke?
Yes, those are the old pictures of the can that came originally installed on the truck, which I posted before to show the missing boot holder,
As I said above about the clamp (I knew you were going to focus on that) that’s not the issue, which I removed and can be easily installed correctly.
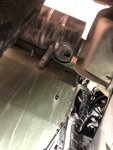
The issue is the support itself (without the clamp installed) interfering with the boot holder, which extends slightly beyond the footprint in the picture, where it has been removed, if you look closer.
I am not by the truck and cannot take pictures of the new one which I removed it for now just to understand what’s different from the old one.
Sorry for the confusion using the old pictures, I just wanted to show the straight supports and how even on the original can there was interference with the removed boot holder footprint.
 
Last edited:

T9000

Well-known member
Steel Soldiers Supporter
488
367
63
Location
California
It turns out that the issue was with the actual rubber elbow, which initially I pushed it all the way to the air canister edge, but that's not correct and it breaks the 90 degree angle with the stack, therefore a gap needs to be left, big enough to form a 90 degree with the stack, see picture below:

Air Cleaner1A.jpg

Air Cleaner2.png

I was worried that maybe I ordered the wrong part numbers, which has happened before.

And Action, thanks for mentioning the gasket, my truck didn't have it and I installed part number 12338379.
After fixing the return hose leak, now there is a new one , after the check valve, the short pierce of hose, which I think it is the last one :)

Happy New Year!
 
Last edited:

Action

Well-known member
3,576
1,557
113
Location
East Tennessee
Flip the rubber elbow the other way.

EDIT: actually, I have seen it both ways...
this is a GP picture

1641098583026.png
 
Last edited:

Action

Well-known member
3,576
1,557
113
Location
East Tennessee
there are 3 nutsert holes in the body around your fording intake stack. Can you see marks in the paint from where this was on your truck? They hold a flange that connects to elbow on bottom and the rubber sleeve on top. But this uses a shorter intake stack...

1641103457318.png
 

T9000

Well-known member
Steel Soldiers Supporter
488
367
63
Location
California
there are 3 nutsert holes in the body around your fording intake stack. Can you see marks in the paint from where this was on your truck? They hold a flange that connects to elbow on bottom and the rubber sleeve on top. But this uses a shorter intake stack...

View attachment 854840
Yes, there are several nutserts around the stack and I was wondering what they were, I will double check when I get home, now that I know what to look for. and will report back.
 

Retiredwarhorses

Well-known member
Steel Soldiers Supporter
4,400
4,182
113
Location
Brentwood, Calif
there are 3 nutsert holes in the body around your fording intake stack. Can you see marks in the paint from where this was on your truck? They hold a flange that connects to elbow on bottom and the rubber sleeve on top. But this uses a shorter intake stack...

View attachment 854840
this insert that uses the 3 rivnuts is for Non-fording equipped trucks, the air box collects the debris and there is a clean out at the bottom under the airfilter housing.
 

Action

Well-known member
3,576
1,557
113
Location
East Tennessee
this insert that uses the 3 rivnuts is for Non-fording equipped trucks, the air box collects the debris and there is a clean out at the bottom under the airfilter housing.
Yeah. I forgot that i used the h1 part. It looks the same on bottom as it does on top. So the elbow clamps to the bottom and junk stay out of that compartment. Still water tight.
 
Top
AdBlock Detected

We get it, advertisements are annoying!

Sure, ad-blocking software does a great job at blocking ads, but it also blocks useful features of our website like our supporting vendors. Their ads help keep Steel Soldiers going. Please consider disabling your ad blockers for the site. Thanks!

I've Disabled AdBlock
No Thanks