• Steel Soldiers now has a few new forums, read more about it at: New Munitions Forums!

  • Microsoft MSN, Live, Hotmail, Outlook email users may not be receiving emails. We are working to resolve this issue. Please add support@steelsoldiers.com to your trusted contacts.

Restoration of FAV #0010

Mogman

Moderator
Staff member
Moderator
Steel Soldiers Supporter
6,876
9,522
113
Location
Papalote, TX
Well the transmission is in and aligned, I had to remove the shift cover and re-install the speedo cable drive adapter, this is a custom mod as the 091 did not have a speedo drive, it is needed because the off road spindle set up does not allow for a speedo drive (the original German design simply drove the speedo from the right front wheel) but most Baja class sand rails were not concerned with speedometers so this had not been seen by many in the off road world.
I also replaced the drive seals and both output flanges, I was lucky to find some factory NOS flanges, they have not been made in many years.
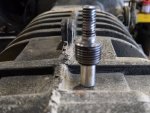
IMG_20221202_131658989.jpg
it decided to unthread from the transmission rather than let me remove the speedo cable, and it was held on by a nut on the inside of the transmission.
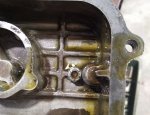
IMG_20221204_130032792.jpg
It is worth noting this is driven 1:1 from the pinion shaft, and the 091 trans has ether a .82 or .89:1 4th gear so this little cable is spinning faster than the crankshaft in 4th gear
and GEEZ it is really LONG, goes all the way to the front end before coming back to the speedo...
Also this week the replacement tie rod and all the new tie rod ends came in so the front end/steering/suspension other than shocks is complete.

There is a stud on the front of the transmission that is absolutely and unequivocally inaccessible with the sway bar center coupling in place so I did have to remove the sway bars to install the trans, thought it would be a great time to install the speedo cable also, even though it is somewhat accessible from underneath.
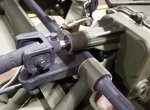
bolt.jpg
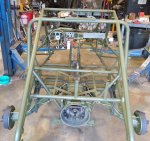
Well now it is on to the engine! Oh yes I did drop all of the rest of the components off at the blaster/primer guy today, all the baskets, skid plates bumpers..
A couple more pics..
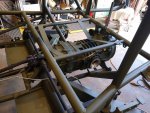
trans.jpg
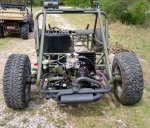
Rear.jpg
Still a long way to go...
 
Last edited:

Mullaney

Well-known member
Steel Soldiers Supporter
Supporting Vendor
7,696
19,723
113
Location
Charlotte NC
Well the transmission is in and aligned, I had to remove the shift cover and re-install the speedo cable drive adapter, this is a custom mod as the 091 did not have a speedo drive, it is needed because the off road spindle set up does not allow for a speedo drive (the original German design simply drove the speedo from the right front wheel)
I also replace the drive seals and both output flanges, I was lucky to find some factory NOS flanges, they have not been made in many years.
View attachment 885675
it decided to unthread from the transmission rather than let me remove the speedo cable, and it was held on by a nut on the inside of the transmission.
View attachment 885676
It is worth noting this is driven 1:1 from the pinion shaft, and the 091 trans has ether a .82 or .89:1 4th gear so this little cable is spinning faster than the crankshaft in 4th gear
and GEEZ it is really LONG, goes all the way to the front end before coming back to the speedo...
Also this week the replacement tie rod and all the new tie rod ends came in so the front end/steering/suspension other than shocks is complete.

There is a stud on the front of the transmission that is absolutely and unequivocally inaccessible with the sway bar center coupling in place so I did have to remove the sway bars to install the trans, thought it would be a great time to install the speedo cable also, even though it is somewhat accessible from underneath.
View attachment 885677
Well now it is on to the engine! Oh yes I did drop all of the rest of the components off at the blaster/primer guy today, all the baskets, skid plates bumpers..
A couple more pics..
View attachment 885680
View attachment 885682
Still a long way to go...
.
Yessir, you still have a long way to go - but darn - it sure is coming together nicely!
 

Mogman

Moderator
Staff member
Moderator
Steel Soldiers Supporter
6,876
9,522
113
Location
Papalote, TX
Well the last week or so I got the engine torn down, and Friday I picked up the fuel tank and new console from my metal guys.
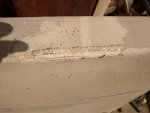
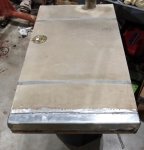
The fuel tank was split and repaired along one of the seams, they evidently did not grind it out deep enough and did not even stop the crack.

So my metal guys said they ground it deep well past the crack re-welded it and just for safe measure they broke a piece of aluminum and "braced" the entire end of the tank.
IMG_20221208_113412978.jpg
IMG_20221219_170100715.jpg
Those guys have been building and repairing aluminum and steel tanks for decades so I trust them explicitly (read dang fuel tank is basically right over the engine)
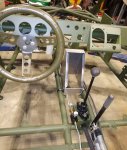
They also built me a custom console, I want to add at least a tach, wide band fuel mixture and an oil temperature gauge and this way there is no permanent modification to the FAV, again whom ever buys the FAV at the estate auction is welcome to tear it out! View is approximately from the drivers pint of view.
IMG_20221219_165913670.jpg
IMG_20221219_170011507.jpg
They built it out of 1/8" aluminum because the guys in the shop prefer to weld 1/8" and thicker, I think it will hold up a couple gauges.
Now to punch the holes for the nutserts for the face plate.
 
Last edited:

Mogman

Moderator
Staff member
Moderator
Steel Soldiers Supporter
6,876
9,522
113
Location
Papalote, TX
Even though I was waddling like a duck Monday after stuffing myself Sunday I managed to get the half shafts on, even my mentor with 30 years experience with off road buggies said these are somewhat of a PITA.
They are not sealed like a HMMWV half shaft, the flanges on the trans and stub shafts act as the outside seals, you have to pack the CV joints and pack the hollow area in the flanges then bolt them in.

EDIT, they also must be "timed" and you can rather easily rotate (swivel) the CV joint to where the balls fall out.

In the "spares" box from the DOE was a brand new set of Sway Away axles, I bought all new CV joints and had to drill out the outside ones for the 3/8" bolts the stub shafts use.
I also blasted the engine cases at the car wash, they came out pretty nice after soaking them for a week in de-greaser.
I will start assembling the engine next week.
 

Attachments

Last edited:

Mullaney

Well-known member
Steel Soldiers Supporter
Supporting Vendor
7,696
19,723
113
Location
Charlotte NC
Even though I was waddling like a duck Monday after stuffing myself Sunday I managed to get the half shafts on, even my mentor with 30 years experience with off road buggies said these are somewhat of a PITA.
They are not sealed like a HMMWV half shaft, the flanges on the trans and stub shafts act as the outside seals, you have to pack the CV joints and pack the hollow area in the flanges then bolt them in.
In the "spares" box from the DOE was a brand new set of Sway Away axles, I bought all new CV joints and had to drill out the outside ones for the 3/8" bolts the stub shafts use.
I also blasted the engine cases at the car wash, they came out pretty nice after soaking them for a week in de-greaser.
I will start assembling the engine next week.
.
Looking good!
You are making good progress too.

.
 

Mogman

Moderator
Staff member
Moderator
Steel Soldiers Supporter
6,876
9,522
113
Location
Papalote, TX
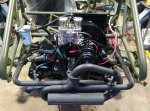
I got the engine in, covered in the other thread.
The wife and I filled and bled the clutch and brakes Saturday, it went really well, I expected to have al lot of problems bleeding the rear brakes with the Neal cutting brake but it did not seem to be a problem and fingers crossed the Neal is working and not leaking, knock on wood as there does not seem to be any rebuild components left.

but heck WE HAVE BRAKES!!!!!!!!!!!

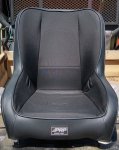
The seats and sliders also came in from PRP and we are ecstatic about the build quality etc. will post some pics and that story when the sun comes back out!
 

Attachments

Last edited:

Mogman

Moderator
Staff member
Moderator
Steel Soldiers Supporter
6,876
9,522
113
Location
Papalote, TX
Nurse Ratched had to go to town this morning so I shed my "new" splint (to be worn for the next 8 weeks) and went into the shop.
It is nice to get out in the shop even for some "light duty work"
I was working with the seats today.
As I stated before I contacted Corbeau and made two inquiries, the first was what "cloth" material they used, the answer was "weather resistant" no actual information.
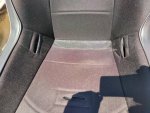
They do not call these "bucket" seats for no reason, they will literally fill with water in the rain, so I would not have to sit in a bucket full of water if I got caught in the rain I asked about installing drains in the seats and the answer I got back was "we do not recommend our seats get wet" UH, WHAT??? these ARE off road seats yes???
So off to PRP I went, they were very patient with me and answered all my questions, the material I chose was Cordura as it seems to be one of the best material in exposed applications, there were TONS of options and colors available, I felt a little underwhelmed ordering everything in black but this is a military vehicle after all, If I wanted to provide my own Cordura they would have gladly used it and I did find some in OD green but opted for the black instead.
As for the drains they were more than happy to install them while building my seats at no additional cost, no off the shelf seats here, every one built by hand to the customer specs.
I am very happy with the seats.
 

Attachments

Mogman

Moderator
Staff member
Moderator
Steel Soldiers Supporter
6,876
9,522
113
Location
Papalote, TX
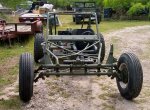
I need to pull some maint. on the DuraVee so I put the tires back on for the first time since the tear down so I could swap it around in the shop, was nice to see in rolling again.
It is also nice to be working in the shop again after almost 2 months...
 

Attachments

signalcorps

Active member
207
225
43
Location
Longwood Fl
Would you sell the center pod from your old dash? My dash had the center pod modified to add a modern light switch and other junk. All I need is the center pod, dont need the whole old dash. It looks like its riveted on. Let me know. Thanks.
 

Mogman

Moderator
Staff member
Moderator
Steel Soldiers Supporter
6,876
9,522
113
Location
Papalote, TX
Would you sell the center pod from your old dash? My dash had the center pod modified to add a modern light switch and other junk. All I need is the center pod, dont need the whole old dash. It looks like its riveted on. Let me know. Thanks.
No, the center pod is part of the dash and I have no interest in cannibalizing it. I restored the old dash, the "spare" new dash is blank
 

Attachments

Mogman

Moderator
Staff member
Moderator
Steel Soldiers Supporter
6,876
9,522
113
Location
Papalote, TX
You have come so far with it. I know how other stuff can get in the way but you have a very nice project going.
I have not actually listed it, I am hoping to get my knees replaced this year and then I hope this project will become more appealing to me, I am building this thing to drive being the only fully street legal "sand rail" in Texas, (apparently) but as it stands now getting in and out is an EXTREMELY painful experience.
 
  • Like
Reactions: D6T

signalcorps

Active member
207
225
43
Location
Longwood Fl
I have not actually listed it, I am hoping to get my knees replaced this year and then I hope this project will become more appealing to me, I am building this thing to drive being the only fully street legal "sand rail" in Texas, (apparently) but as it stands now getting in and out is an EXTREMELY painful experience.
I am sure there are people here ready to buy your project. You have done a lot of great work on it.
 
Top
AdBlock Detected

We get it, advertisements are annoying!

Sure, ad-blocking software does a great job at blocking ads, but it also blocks useful features of our website like our supporting vendors. Their ads help keep Steel Soldiers going. Please consider disabling your ad blockers for the site. Thanks!

I've Disabled AdBlock
No Thanks