• Steel Soldiers now has a few new forums, read more about it at: New Munitions Forums!

  • Microsoft MSN, Live, Hotmail, Outlook email users may not be receiving emails. We are working to resolve this issue. Please add support@steelsoldiers.com to your trusted contacts.

M37 Restoration Project - Revived

ab705

Active member
53
155
33
Location
Maine
My 1954 M37 restoration project has been on the back burner for a long time, and I'm finally getting around to working on it again. I did quite a bit of work on it years ago, so I already have a very good start. I've had it stashed away in a shipping container, and now it's residing in a storage unit a short distance from our house in Brunswick. We plan to build a second garage this year, and if/when that happens, I want to move it out of the storage unit and into my workshop/garage. In the meantime, my plan is to haul components of the M37 over to my workshop to work on them, since I don't believe that we're allowed to work on vehicles inside the storage units.

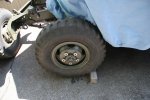
The photo below shows what my M37 looks like at present. It's a really solid truck with VERY little rust. I've removed most of the body parts, and all of the pieces are in the storage unit.
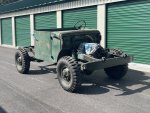
IMG_0622.JPG

To get the momentum going again, I thought I'd start by continuing work on the brake system. I already replaced/rebuilt all of the brake components for all four wheels some time ago at the same time that I overhauled the hubs and wheels/rims, so that much of the brake system is done. I went to a lot of trouble to find five rims and split rings that were in excellent or NOS condition, which I then sandblasted, primed, and painted. Here are a few photos of the brakes and wheels.
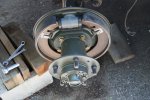
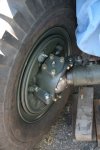
IMG_0826.JPG

IMG_0834.JPG

IMG_0830.JPG

A couple of weeks ago, I brought the frame member (running board support) that holds the brake master cylinder over to my workshop. The original master cylinder could probably be rebuilt, but as a safety upgrade I've decided to convert the brakes to a two-circuit (front-rear) system, using a tandem master cylinder. Shown below is the old master cylinder after cleaning it up.
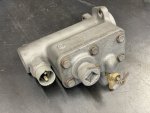
old-master-cylinder-after-cleaning-1.jpg

The replacement master cylinder (see below) is the tandem type, which, IF I recall correctly, is used in the late WM300 4x4 or maybe W300 4x4 Power Wagon. It has the same bore diameter as the original master cylinder, so the braking effort should be about the same.

new-master-cylinder.jpg

The new master cylinder doesn't have the vent connections like those on the original master cylinder, but I don't plan to do any deep-water fording, so I'm not concerned about that. I'll keep the old master cylinder on hand, just in case I ever sell the vehicle and someone wants to 'purify' the restoration and go 100% stock.

The main difference as far as installation goes, is that the original master cylinder had a three-bolt mount, whereas the tandem master cylinder is a two-bolt mount, so I had to alter the frame member a bit by drilling two new mounting holes, and just because I tend to over-engineer things a bit, I fabricated two adapter plates. The new master cylinder has to be mounted with its mounting boss almost touching the mounting flange of that frame member, and because there is some radius in the bend of that flange, I made one plate with a radiused edge to conform to the flange bend radius. That allowed me to avoid having to grind a radius into the master cylinder mounting boss. I made the other adapter plate as a backing/reinforcing plate, simply because I wanted to make sure that the frame member didn't lose any strength from the extra mounting holes, but instead would actually gain some extra strength from the plates. I could have welded these plates on, but I didn't want to make the installation too 'invasive.'

Here are the two adapter plates that I fabricated (one is 3/32" thick and the other is 1/4" thick):

master-cylinder-adapter-reinforcing-plates-1.jpg

The images below show the frame member with the adapter plates attached, after sandblasting, priming with self-etching primer, and painting in Marine Corps green alkyd enamel. BTW, the weld you see wasn't done by me; it's the original weld.

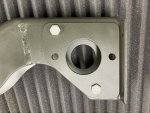
master-cylinder-frame-member-with-plates-on-1.jpg

master-cylinder-frame-member-with-plates-on-2.jpg

I tried the new tandem master cylinder for fit. So far so good. It won't be permanently mounted until after the frame member is reinstalled on the truck.
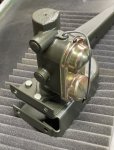
master-cylinder-checking-for-fit-2.jpg

As time (and available workspace) allows, I plan to work on many different components and update this thread periodically.

Stay tuned...
 
Last edited:

ab705

Active member
53
155
33
Location
Maine
More parts for the brake system arrived:
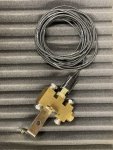
  • A pressure differential valve (NOT a proportioning valve) with system failure warning switch.
  • A pigtail for the failure warning switch with a water-resistant connector.
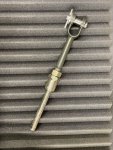
  • An NOS extension section for the brake cylinder push rod.
  • A high-strength stainless-steel clevis pin and cotter for the push rod.
IMG_1525.JPG

IMG_1529.JPG

More parts coming soon.
 

ab705

Active member
53
155
33
Location
Maine
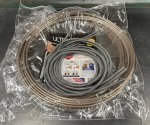
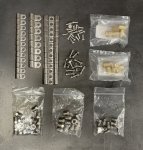
I'm planning to replace all of the brake lines, and some of the supplies arrived for that task. 1/4" copper-nickel brake line, stainless protective spring sleeves, stainless fittings, brass couplings, stainless hold-down clips, etc. Also got a brake light switch, tee fitting, and pigtail for the switch (not shown).

cuni-brake-line-and-stainless-spring-sleeve.jpg IMG_1536.JPG

I have several tubing cutters, but I thought I'd try a "constant tension" type to see if it's any gentler on the tubing. I haven't tried it yet.

brake-line-cutter.jpg
 

G744

Well-known member
Steel Soldiers Supporter
1,716
3,849
113
Location
Hidden Valley, Az
So nice to see this, and not another super-modified truck.

I know, I know, it's your truck, do what you like.

It's just that there are fewer nice examples of the superior engineering and workmanship these trucks exhibit.

Not to say I haven't seen some great conversions, mainly powerplant related.
 

ab705

Active member
53
155
33
Location
Maine
So nice to see this, and not another super-modified truck.
My preference is to keep my M37 basically stock, other than a few minor mods (mostly for safety) that don't affect its appearance very much, if any. One somewhat visible modification I'm thinking about would be to go with later M-series lights with larger lenses for better signal/tail/stop light visibility. They might need slightly different mounting brackets (not sure), but they will look similar to the original lights and still very 'military' (I'll keep the old lights stored away). I may also add seat belts. I'm trying to avoid invasive mods that can't easily be reversed. I've owned/built a number of off-road vehicles over the years, which I've put through their paces in some pretty rugged terrain, but my plan for the M37 is basically to use it as a Sunday driver.
 
Last edited:

ab705

Active member
53
155
33
Location
Maine
If you can find the Gama Goat light lenses, they will fit on the original Guide housings as they are round. The were made in clear, yellow, and red. Red being the most popular.
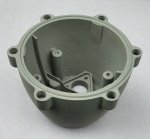
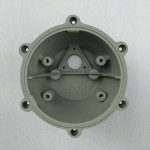
I've found replacement 'doors' for the original lights that have large lenses, but the problem is that the innards (sockets and socket brackets) of all of the lights are badly corroded, and so far, I haven't found proper replacements for them. It's obvious that when the lamps had been replaced in the past, whoever replaced them didn't bother to reinstall the O-ring or replace a damaged O-ring. Here's an example (and this is not the worst one):

m37-taillight-corroded-1.jpg
 

ab705

Active member
53
155
33
Location
Maine
@Mullaney, it looks like I may be able to use Gama Goat lenses after all. I just found and ordered four repair kits for the original lights that include new internal parts. I was able to completely disassemble two of the lights, but I'll have to drill and easy-out a few broken small internal screws in the other two, which shouldn't be too difficult...I've done a few hundred of them over the years. Thanks again for the Gama Goat lens suggestion. If it all works, I'll post some photos here.
 
Last edited:

M813rc

Well-known member
Steel Soldiers Supporter
4,220
3,270
113
Location
Near Austin, Texas
For anyone reading who is not familiar with what 'Gama Goat lens' means, the attached picture from my Mighty Mite thread should clear things up. It shows old small lens lights compared to large lens Gama Goat types.
Note that to replace the two-opening blackout-only right light requires replacing the two-wire housing with a three-wire housing and a little extra wiring on the vehicle itself to make it all work properly.

Cheers

28 - Copy.jpg
 

ab705

Active member
53
155
33
Location
Maine
For anyone reading who is not familiar with what 'Gama Goat lens' means, the attached picture from my Mighty Mite thread should clear things up. It shows old small lens lights compared to large lens Gama Goat types.
Note that to replace the two-opening blackout-only right light requires replacing the two-wire housing with a three-wire housing and a little extra wiring on the vehicle itself to make it all work properly.
At some time in the distant past, someone had already replaced the right-side blackout-only light with one that matched the left light. They had also installed turn signals. However, the wiring harness that serves the rear lights and trailer connector is too far gone to repair, so I'll end up doing some extra wiring anyway. I'm currently going through dusty bins and boxes to see how many Douglas (and Packard) connector parts I can find. I already have some on order, just to make sure I can get started.

Today I started cleaning up the first of the corroded light bodies in anticipation of receiving the repair kits for the lights. I began with the most corroded one, in which all of the internal screws were hopelessly rusted in. The little buggers thumbed their noses at penetrating oil and laughed at the application of heat, so I ended up drilling them out. A few came out clean with an easy-out, but most had to be tapped to the next larger size (10-32). Then I inserted some old screws in the holes to protect the threads, grit-blasted it, and gave it a coat of self-etching primer. The exterior looked great, and even the interior cleaned up better than I expected:

first-light-cleaned-and-primed-2-smaller-image.jpg first-light-cleaned-and-primed-1-smaller-image.jpg

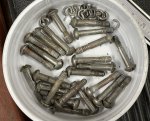
I also managed to salvage all of the original captive screws that mount the light 'doors' on the light bodies. I soaked them in acetone for a while to loosen the paint. They will still need a bit of cleanup with a soft wire brush. Most of the slots are still in good shape, but a few might need a little touch-up with a file. When working with straight-slot screws, I always use a hollow-ground screwdriver of the correct blade thickness and width to avoid damaging the slots.

light-door-screws-after-paint-removal-smaller-image.jpg

I plan to clean up the other three lights over the next few days, and maybe the repair kits will be here by then.
 
Last edited:

ab705

Active member
53
155
33
Location
Maine
Those are looking really good! [thumbzup]
Thanks. It will take a while to get it done, but working on a project like this is the part I like best...even more fun than driving them, IMHO.

I've had several vehicle projects over the years, but for the past 15 years my main project has been the restoration of a 220-year-old home. We recently sold that property, and now we're down to one home, and I have a little extra time between other tasks, so it's nice to get back to working on mechanical projects.

It looks like you have quite an impressive collection of MVs!
 

ab705

Active member
53
155
33
Location
Maine
Make sure to NOT use the larger, 21cp bulb in the closest socket, it will melt a hole in the lens...
They are OK in the deeper sockets, for the turn/stop circuit.
That certainly makes sense for plastic lenses. I noticed that in the old lights the smaller lamp was likewise in the socket closest to the lens. I suspect that the bulb sizes and placements figure into the optical design of the lenses, with the filaments placed at the optimal locations relative to the lenses.
 

ODAddict

Active member
Steel Soldiers Supporter
109
225
43
Location
Charlottesville, VA
I also recently dealt with the rebuilding of corroded light bodies and encountered similar problems.

Here's a technique you might try in addition to the penetrating oil soak: Before trying to loosen the screw or other fastener, try to tighten it a bit. It doesn't have to turn; it just has to move enough to break the corrosion bond (you may not be able to tell that it moved). Then add more penetrating oil. Lather, rinse, repeat 🙂

If the screw is particularly resistant, keep trying with your screwdriver firmly inserted into the slot (to prevent cam out) and wiggle the screw carefully and ever so slightly back and forth. Again, you're just trying to break the bond.

With a bit of patience and care, most of the time I was able to extract the fastener successfully and without any damage.
 

G744

Well-known member
Steel Soldiers Supporter
1,716
3,849
113
Location
Hidden Valley, Az
The older 'door' (proper name for the cover) with the oval shaped lenses really were optical lenses that magnified the illumination to look much larger at any distance.

If you have that style with functional turn signals, activate them and stand back a bit. You'll be surprised how bright and attention-getting they really are. A genius design...how to make a little light look big!

Nowadays, that tech is too expensive so designers resort to large faced covers and lots of reflectors or worse, distance dissapating LED's.
 

ab705

Active member
53
155
33
Location
Maine
The older 'door' (proper name for the cover) with the oval shaped lenses really were optical lenses that magnified the illumination to look much larger at any distance.
Yes, I've seen them in operation, and as I recall, the small glass lens in the original light door seemed to do a pretty good job of capturing the light from the filament and reshaping it into a decent beam pattern, although I can't remember how it compares to the larger ribbed/Fresnel-type lenses. After the Gama Goat light doors with the full plastic lenses arrive, I think I'll try a little experiment to see how the beam pattern, viewing angle, and overall brightness compare between the old and the new lens types. If it turns out that the original small glass lenses work well enough. I would consider re-using the old light doors. At least two of the original doors are in very good shape, and the other two might clean up OK.
 
Top
AdBlock Detected

We get it, advertisements are annoying!

Sure, ad-blocking software does a great job at blocking ads, but it also blocks useful features of our website like our supporting vendors. Their ads help keep Steel Soldiers going. Please consider disabling your ad blockers for the site. Thanks!

I've Disabled AdBlock
No Thanks