• Steel Soldiers now has a few new forums, read more about it at: New Munitions Forums!

  • Microsoft MSN, Live, Hotmail, Outlook email users may not be receiving emails. We are working to resolve this issue. Please add support@steelsoldiers.com to your trusted contacts.

My M715 'rework' project

M813rc

Well-known member
Steel Soldiers Supporter
4,206
3,188
113
Location
Near Austin, Texas
I do like the way your M35 shackle mount looks, and functions. It was one of the things I looked at, but the way the bumper on this M715 is, they just wouldn't fit properly.

For my other M715s, I do have the proper "behind the bumper" shackles I picked up many years ago. The one with the fire department bumper (which is actually my son's truck) could use a set of those shackles the way you did them.

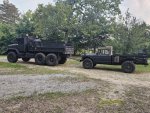
And worry not, my tow vehicles for the M715 will either be deuces or 5-tons, so the 715 won't be able to intimidate them. :)
It is heavy for it's size, particularly with the 6.2 now. I'll have to run it across the scales and see exactly what it does weigh.

Cheers
 

Barrman

Well-known member
5,254
1,762
113
Location
Giddings, Texas
Mine is over 7,000 pounds at the local scrap yard.

I think I the problem flat towing is the Castor of the front axle. The tires just don’t want to follow in a straight line. Not as bad as the front tires locking over when towing a M35 as we have both experienced. But enough to shove the front vehicle around.
 

M813rc

Well-known member
Steel Soldiers Supporter
4,206
3,188
113
Location
Near Austin, Texas
Hmmm.. I'll have to experiment with that. I don't want to be tearing up my tires either. If she's not going to behave, flat towing may have to be for emergency only.

Cheers
 

Barrman

Well-known member
5,254
1,762
113
Location
Giddings, Texas
With the Michelin XZL tires at their 80 psi max I flat towed once 180 miles round trip to the air show in Temple behind the M35 one year. No tire wear that I could determine. I just could only see the shadow of the M715 sometimes during the drive and didn’t like that so I either drove it or trailered it in the future.

My issues were local flat towing. When my 396 died 11 years ago I needed to flat tow it into my class from home. The kicker being I had to get it into one of the bays and onto a 4 post lift. The M715 is very, very difficult to push. Even with 5 or 6 students pushing. The M1009 was the only vehicle I had that could pull it onto the lift, drive off the front of the lift and turn around deep into my room and get out again once unhooked. Do not flat tow with a M1009 is all I’m going to write about that.

But, as you know I am not the smartest person. A few years later Colton wanted to take RED the M1009 he had built to the Texas Rally over in Bryan. He suggested flat towing the M715 behind RED. What could go wrong with a 16 year old driving that combination? 2 miles from home he pulled over and said he would not continue. We might have gotten up to 15 mph getting that far. I asked if he wanted to swap? Thinking swap the trucks around. He said sure, got out and walked around to my said saying your turn. He had gotten us through all the 90° turns required to get onto open road. I didn’t like the idea of swapping trucks on the shoulder. Knowing of an actual parking lot with easy access a few miles down the road I started driving to there. However, straight ahead open road was very comfortable so I just kept going the next 48 miles to the Rally without issues. We came home with the M715 doing to pulling of RED at a faster speed with much better road comfort.

Having learned twice not to tow with a M1009. I don’t remember what I was doing or why. But I was flat towing the M715 with the Blue Bomber. 1984 Air Force surplus 3/4 ton 2 wheel drive 6.2 powered Suburban. That experience was almost comfortable. I knew it was back there but had great control turning and braking.

So a few years later after the Cowdog 4x4 3/4 ton Suburban was built I didn’t even think twice about flat towing the M715 when I needed to bring the M715 home from doing brake work in my class. I no longer had soldier B to help with simple stuff like that since Colton was off at college. I normally keep the front tires of the M715 at 25 psi for around town comfort. Having not thought about that I learned it is a huge difference just trying to get out of the parking lot. The M715 just kept going straight and pushed the rear of the Cowdog around like I was on ice. Thankfully into a curb and not another vehicle. I used all the pavement available for all the rest of the turns getting home and never got over maybe 20 mph.

Front tire psi at tire max and the heaviest tow vehicle you have with as much rubber as possible is my take away from all my misadventures.

Those misadventures aren’t limited to flat towing though. Everyone of the issues written about above alternate with trailering issues I have experienced with the M715. All lugs snapping off a trailer hub in eastern Arkansas, 3 trailer flat tires going to Colorado, Truck engine and transmission overheating in the mountains of Pennsylvania, receiver hitch deforming coming back from the Temple air show, plus a few other issues.

No matter the weight rating of the trailer. It has to have at least 6 lugs per wheel, load range D or better trailer tires. The tow vehicle has to have a Class IV or better hitch and be rated for at least 10K towing. My experience is that anything lower than listed on any of those things ends badly.

It isn’t just me either. There is 25 years of flats towing issues over on the Zone. Experiences similar to mine, rear axle/hubs coming apart and front brakes catching on fire are some I can think of.
 

kendelrio

Well-known member
Steel Soldiers Supporter
2,677
8,646
113
Location
Alexandria, La
Flat towing:

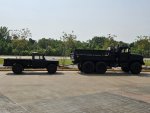
Earlier this year I flat towed my M715 to Bolivar, TX (about 225 miles one way) behind the 5 ton.

No issues at all, no weird tire wear etc. Granted, I used a medium duty tow bar and the tow adapter feet, so YMMV....

I've also flat towed it with my Ram and the only issue I had was I made the mistake of turning too sharply and the steer wheels of the M715 turned to 90° and I had to stop and straighten them out some.

20230526_063019.jpg

20230526_100740.jpg
 

M813rc

Well-known member
Steel Soldiers Supporter
4,206
3,188
113
Location
Near Austin, Texas
Towing with the M1009 reminds me of moving the V100 with one of mine. We were headed to an event, and I didn't realize that the V100 had thrown the alternator belt on the way, so when I stopped to fill up, she didn't want to start again. I couldn't bring myself to jump start her, even with slave cables, right after fueling and still sitting by the gas pumps. We had several deuces, but there wasn't enough room for them to tow the V either forwards or backwards, the only option was to use an M1009.

I was a bit worried about the notoriously weak 1009 pintle, it did it fine though, getting up to perhaps a scorching 2 mph and going just far enough in the parking lot to be out of the way.
We then ended up doing a "changing belts on an armoured car" display in the HEB parking lot, which drew quite the crowd!

Anything I try to tow the M715 with will have at least six large wheels and outweigh it around 3-1.

Meanwhile, Jason decided on Friday that we needed to test the integrity of his welds and the M715 bumper by bouncing it with the forklift. Nothing moved!

Cheers

138.JPG 139.jpg
 

M813rc

Well-known member
Steel Soldiers Supporter
4,206
3,188
113
Location
Near Austin, Texas
And another minor job completed on Friday, another "to do" picture marked done -

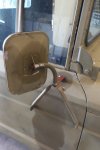
When I first got the truck, the mirrors were canted inwards and that highly offended my sense of aesthetics and balance in the world.
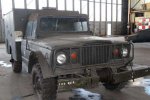
I have seen these "west coast" type mirrors on in-service M715 series vehicles, including the SeaBee M724 pictured below, and like them on the truck, so I decided they would stay. But they had to go vertical rather than look like the hunched shoulders of a vulture.

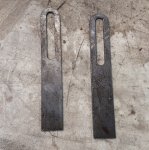
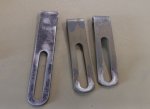
By the simple expedient of removing the door-end bolt for the upper bracket arm and pulling the mirror out a bit, I was able to determine that the top arm needed to be 5.5" long, rather than the 4.25" as they were. I planned to just get a piece of 1"x1/8" stock, cut it to the appropriate length and drill a hole in it, but Jason had a grander idea - to replicate the stock pieces to the needed length on the plasma table, adjusting slots and all. So we did!

The blanks came out really nicely and once cleaned up had rounded-over ends put on for the bolts. This was accomplished with a vise and a hammer, bending the ends around a rod.

A quick coat of primer and they went onto the truck, the mirrors now sit pleasingly vertical.

The discoloured areas on the doors and mirror backs are from the penetrating oil I squirted inside the mirror arms and let sit for a couple of days before trying to break the lower bolts loose.

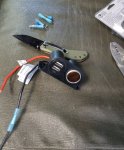
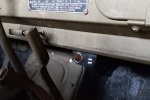
I also did the last bit of wiring I can think of, adding an auxiliary power receptacle under the dash, with a regular and two USB plugs. Sort of a practical necessity. I'll paint the housing when I repaint the dash, so hopefully it won't be too noticeable. It will probably move inside the original battery-box converted to a center console when I get that done.

Cheers

140.jpg 141.jpg 142.jpg 143.jpg 144.jpg 145.jpg 146.jpg 147.jpg 148.jpg 150.jpg 151.jpg 152.jpg
 
Last edited:

M813rc

Well-known member
Steel Soldiers Supporter
4,206
3,188
113
Location
Near Austin, Texas
So... after a long and exceptionally dry summer, I get to the point where I'm ready to have the inside of the bed sandblasted and get on with painting the truck and along comes the rain. :unsure:
Don't get me wrong, I'm always happy to see rain, since it makes plants grow, and when plants grow I don't have to feed my cows round bales of hay that cost over $100 each(!). Rain gets cussed by some folk, but around here it is cause for much rejoicing.
The downside is rain is wet and causes humidity. So it's either been raining, or too humid (100%) for Larry to do the sandblasting, because it clogs up his gear, and I can't proceed with paint until after that's done.
So, I twiddle my M715 thumbs and wait, hoping to thread the needle between the humidity drying off and it getting too cold to paint outdoors. Next week is supposed to be dry and in the 80s....

Preparatory to sandblasting, I had taken the bows off the back of the truck, it looks rather different without them. The front hoop is a tad off, having been modified by Reloader64 and his carport.
I think I'll go ahead and rebuild those bows, as they could be useful on one of the other two M715s. I'll replace the lower rail, as straightening it would be more work than it's worth, and its rust pitted anyway. I'll cut off the upper sections of the bows and make new ones that are a bit wider and perhaps taller, then put collars on them so they just slip onto the uprights. The current uppers, apart from being narrow, have some serious rust on them.

The reason sandblasting the bed is necessary is that the previous owner had a bottle of some sort of caustic in the bed. Over time, the plastic had degraded and ruptured, spilling the contents in the bed, so by the time I got the truck, it was pretty rusty back there.

I also replaced the leaky dry-rotted fuel filler neck, an NOS neck was included in the boxes of parts that came with the truck. The new one is nice pliable rubber. You can see the cracks in the picture of the old neck.

Cheers

153.jpg 154.jpg 155.jpg 156.jpg 157.jpg
 

M813rc

Well-known member
Steel Soldiers Supporter
4,206
3,188
113
Location
Near Austin, Texas
Well, Larry the Sandblaster is away and won't be available for a couple of weeks. :unsure:
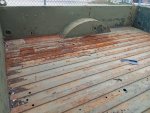
I was looking at the bed today and decided to have a go at the rusty area with a screwdriver to knock some of the loose stuff off and see how bad it actually is. Turns out that with the crusty crud surface layer scraped off, it isn't nearly as bad as I had thought. I think I'll have a go at it with a wire wheel and see how that turns out.
If that is successful, it sure would speed up the process of getting paint on the truck while it is still warm here (forecast upper 80s and dry next week).

Cheers

158.jpg
 

M813rc

Well-known member
Steel Soldiers Supporter
4,206
3,188
113
Location
Near Austin, Texas
Thanks, Tim. Turns out that a lot of what I thought was flaky rust was actually just dirt and crud crusted over the top and rust coloured. Doh!

Cheers
 
  • Like
Reactions: 98G

M813rc

Well-known member
Steel Soldiers Supporter
4,206
3,188
113
Location
Near Austin, Texas
Well, for various reasons, including travel and doing some immediately required work on yet another project truck (yes, I know :rolleyes:), I wasn't able to get back to the M715 bed until a couple of days ago, when we had a warm sunny day (mid 70s).

What had surprised me before was digging through some of the layer of "flaking rust" and finding good green paint underneath, not at all what I expecting!
Most of what was there turned out to be rust coloured crud, and while there were loads of actual rust flakes, they weren't from the M715 itself. I think something that had rusted to death had been carried in the bed at some point, and left all that residue behind.

I cleaned all the crud out the bed, and found the metal to actually be in very good shape. There was quite a bit of surface rust from where that chemical had spilled, and there is some rust pitting in spots, but that is old and had been painted over. I took a wire wheel to the bed and cleaned out the surface rust and flaky layers of paint down to mostly bare metal, sprayed that down with rust converter and let it sit in the sun a bit, then sprayed black rust primer over it.
Once I've done more surface prep and am sure the existing rust is "healed", I'll paint it with bed liner, which will conceal much of the surface irregularities.

Another issue to deal with is that The Mad Driller has been at work on this truck. On a quick count, I came up with 43 non-stock holes drilled around the bed! Someone with no spatial awareness and no concept of how to use any type measuring device had a go at the poor truck. There are holes so close together that they defy explanation, and other holes that just seem scattered around the bed. Perhaps they mounted some very oddly shaped gear back there.....:unsure:

I'll figure out how to deal with holes before proceeding with paint. There is still a lot of work to do before then.
While I was wire wheeling the bed, I also did a little surface rust/flaky paint removal on the back of the truck.

The 715 was owned by a volunteer fire department at some point in it's life, and at the risk of being rude, that explains a lot regarding drunken-spider wiring and random hole drilling.
At least they didn't paint the inside of the cab red!

Cheers

158.jpg 159.jpg 160.jpg 161.jpg 162.jpg 163.jpg 164.jpg 165 The Mad Driller.jpg
 

M813rc

Well-known member
Steel Soldiers Supporter
4,206
3,188
113
Location
Near Austin, Texas
That mad driller really does resemble you Rory.
Gee, thanks Tim!! rofl

Some of the holes are stock military, and the six in the side wall near the right front look like they could have been for an antenna mount, they are cleanly drilled and evenly spaced, the hole below definitely looks like it was there for the cables to go through. The rest just look like spray and pray.

One thing for sure - the bed would drain well in a rain storm!

Cheers

166.jpg 167.jpg
 

Barrman

Well-known member
5,254
1,762
113
Location
Giddings, Texas
Is there a cutout of the cowling in front of the radiator? That bigger “cable” sized hole in the bed reminded me of a radio truck version of the M715. There was a cooler for the system that mounting in front of the radiator requiring the cowling to be cut.

There are several pictures on the Zone of USAF security trucks with tripods mounted in the bed. That supposedly is what the 1 inch or so holes in the bed floor are for.
 

M813rc

Well-known member
Steel Soldiers Supporter
4,206
3,188
113
Location
Near Austin, Texas
The radiator cowling was cut/welded (back to close to stock configuration) by a previous owner to stick a civilian radiator in, I'll have to look at it again to see if there is something resembling what you describe there. My other M715s share some of the same bed holes, like the large ones in the floor and the front wall of the bed (which is why I didn't mark that one).
Ironically, I will have to drill more holes in the right side of the bed for my stock antenna mount. None of the existing holes can be used because they are behind the jerry can, which I want to keep. On the picture, I didn't mark the holes with bolts in them for the jerry can rack or the coachman loop for the strap.

Cheers
 

M813rc

Well-known member
Steel Soldiers Supporter
4,206
3,188
113
Location
Near Austin, Texas
Again, for a variety of reasons, this project stalled for a while, but we've been back at it for a few weeks.

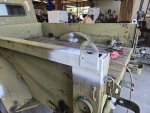
Remember the VFD Mad Driller? Well, his rapacious handiwork in the bed had to be addressed with the welder, particularly the holes in the wheel wells which would allow loads of dirty water in if the truck gets driven in the rain.
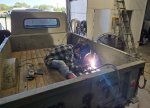
Courtney is way better with the welder than I am, her welds don't look like chewed bubblegum! Over a couple of days, a bunch of the 47 holes disappeared, replaced with nice smooth metal.
Once that was done, the entire bed interior was attended to with nylon brushes in the grinder, which work better than wire brushes, surprisingly enough, and don't shoot little wire missiles into your skin while you work.
As the good areas appeared, they were hosed with rust converter and primer, and eventually the whole bed was black inside. The metal looks pretty good now, and what pitting remains will be invisible once the 383-green coloured bed liner gets sprayed in there. But the liner has to wait until all the paint is well cured, so still a couple or so weeks away.

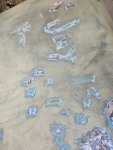
While we were at that, we went after the writing scratched into the paint on the cab roof. We never were able to determine what "Jay is a", referred to as the rest was unreadable! It shall likely forever remain a mystery.

I've been told before "Don't poke rust bubbles, because of what you might find underneath them". However that is precisely why I do poke them.
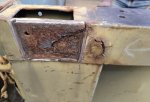
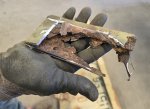
There was a rather large one on the back right upper bed rail, and when poked, it collapsed inward. Not a good sign.
Looking in through the stake pocket, it was easy to see that the back side was rather swollen too, looked bad. The only viable course of action, of course, was to take a cutting wheel to it.
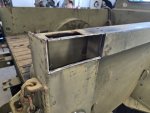
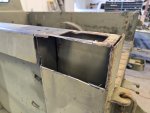
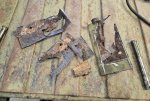
This revealed some really ugly rust between two layers of metal. It looks like the two layers were not sealed at the top and allowed water to get in. We think this may have frozen in winter and pushed the metal further apart, which let in more water, which rusted and pushed things further apart, which......(on and on).
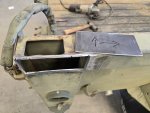
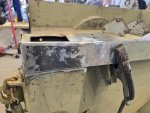
Examination of the back left showed the same problem there. Best solution - cut it all out and replace it with new metal, so we did. And made sure there were no open areas between the metals so that problem shouldn't arise again in the future.

Cheers

165 The Mad Driller.jpg 168 - Copy.jpg 169 - Copy.jpg 170 - Copy.jpg 171 - Copy.jpg 172 - Copy.jpg 173 - Copy.jpg 174 - Copy.jpg 175 - Copy.jpg 176 - Copy.jpg 177 - Copy.jpg 178 - Copy.jpg 179 - Copy.jpg
 

Mullaney

Well-known member
Steel Soldiers Supporter
Supporting Vendor
7,698
19,725
113
Location
Charlotte NC
Again, for a variety of reasons, this project stalled for a while, but we've been back at it for a few weeks.

Remember the VFD Mad Driller? Well, his rapacious handiwork in the bed had to be addressed with the welder, particularly the holes in the wheel wells which would allow loads of dirty water in if the truck gets driven in the rain.
Courtney is way better with the welder than I am, her welds don't look like chewed bubblegum! Over a couple of days, a bunch of the 47 holes disappeared, replaced with nice smooth metal.
Once that was done, the entire bed interior was attended to with nylon brushes in the grinder, which work better than wire brushes, surprisingly enough, and don't shoot little wire missiles into your skin while you work.
As the good areas appeared, they were hosed with rust converter and primer, and eventually the whole bed was black inside. The metal looks pretty good now, and what pitting remains will be invisible once the 383-green coloured bed liner gets sprayed in there. But the liner has to wait until all the paint is well cured, so still a couple or so weeks away.

While we were at that, we went after the writing scratched into the paint on the cab roof. We never were able to determine what "Jay is a", referred to as the rest was unreadable! It shall likely forever remain a mystery.

I've been told before "Don't poke rust bubbles, because of what you might find underneath them". However that is precisely why I do poke them.
There was a rather large one on the back right upper bed rail, and when poked, it collapsed inward. Not a good sign.
Looking in through the stake pocket, it was easy to see that the back side was rather swollen too, looked bad. The only viable course of action, of course, was to take a cutting wheel to it.
This revealed some really ugly rust between two layers of metal. It looks like the two layers were not sealed at the top and allowed water to get in. We think this may have frozen in winter and pushed the metal further apart, which let in more water, which rusted and pushed things further apart, which......(on and on).
Examination of the back left showed the same problem there. Best solution - cut it all out and replace it with new metal, so we did. And made sure there were no open areas between the metals so that problem shouldn't arise again in the future.

Cheers

View attachment 933965 View attachment 933966 View attachment 933967 View attachment 933968 View attachment 933969 View attachment 933970 View attachment 933971 View attachment 933972 View attachment 933973 View attachment 933974 View attachment 933975 View attachment 933976 View attachment 933977
.
Lookin Good! :cool:
 
Top
AdBlock Detected

We get it, advertisements are annoying!

Sure, ad-blocking software does a great job at blocking ads, but it also blocks useful features of our website like our supporting vendors. Their ads help keep Steel Soldiers going. Please consider disabling your ad blockers for the site. Thanks!

I've Disabled AdBlock
No Thanks