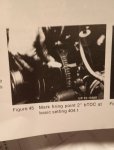
Progress. I removed the carb, the distributor, the fuel pump and little filter, and the distributor bearing and helical gear. I think the gear was installed 180 degrees out. The keyed bottom of the distributor and the slotted top of the helical gear is offset, so it only fits in the bearing one way. However, the slotted bottom of the helical gear is centered and I have heard is reversible 180 degrees. I think mine was reversed.
I removed the valve cover, which was pretty easy after getting the dash plate out. Like others, I had to drill out one of the screws holding the dash plate in. After loosening the coolant reservoir, it came right out. Under the cover I found several rocker arm retaining springs out of place, so I replaced them with snap ring pliers. I have started checking clearances but have only done a few, which weren't too tight. [Edit: Really got me wondering how those springs popped loose. What causes that? ]
Tomorrow I'm going to finish the valve clearances and make any adjustments needed, then bring the #1 to TDC and reinstall the fuel pump and distributor. I'm anxious to find out if I can get it all back together again with the distributor properly seated and the hash marks properly aligned with TDC.
Assuming I get that far, I might even get to try to drive again.
Lots of other little odd jobs going on. I repaired the rear passenger side reflector. The rubber strap broke during delivery, and when I tried to get the retaining nut off the back of the reflector to put the reflector on the new strap, it broke off. So I slathered the whole shebang with black Sikaflex, making sure to fill up all the cracks in the old rubber bezel. WHen it cured I sanded it all down smooth and it looks as good a new.
I repaired the door driver door handle so you can let yourself out without rolling down the window.
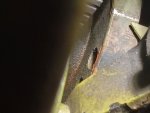
I opened up the little fuel filter and holy cow what a mess! Probably not going back in the truck right away. I have other modern filters right now. Eventually I might reinstall it just for originality. But maybe not.
Progress! I already signed up for Massmog in May. Gotta be ready!
View attachment 919886View attachment 919887View attachment 919888


 I got it solved! Starts instantly, idles smooth, revs fine!


