• Steel Soldiers now has a few new forums, read more about it at: New Munitions Forums!

  • Microsoft MSN, Live, Hotmail, Outlook email users may not be receiving emails. We are working to resolve this issue. Please add support@steelsoldiers.com to your trusted contacts.

84 m1009 cucv chevy blazer build-up

2INSANE

Well-known member
725
824
93
Location
Belgrade, Montana
Sure, I'm on mobile now and may have some on here, if I have better ones at home I'll add those later
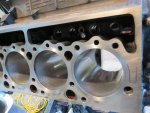
View attachment 814592dark spots on deck indicate water seepage.
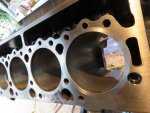
View attachment 814593uncleaned
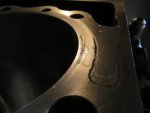
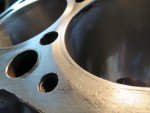
View attachment 814594already "deck honed"

This is all I found on my phone, will get the better ones later
Oh yea that looks very nice! What method did you use with the ARPs? Was it successful?

Bored and twitching from all the coffee, while waiting for the darn lifters to show up (Late shipping) I decided to pull out the ORD motor crossover brace that has been sitting in my upgrade pile for 7 years.

Using brake cleaner and a rag, I wiped off all the years of dust and rust that it accumulated.

Turning the shop fan on and opening the shop doors, I slapped on some PPE and got to spraying the sexy gloss black on the new crossmember.

I will do three coats. Don’t know why I even paint stuff. It will rust away in a few years anyhow lol!
 

Attachments

cruzer747

Active member
218
145
43
Location
California
I think my pic of the deck shows the residue from applying permatex activator in advance of using permatex hight temp thread sealant. Goop up, thread all the way in, remove, regoop and torque. No leaks. Second time doing same method. Heard good results also with ultra black. Plenty bad about the arp stuff. I've got much better pics of the deck before and after coming later.
 

2INSANE

Well-known member
725
824
93
Location
Belgrade, Montana
The lifters finally arrived! I put all 16 lifters in a plastic container and poured 15w-40 oil into the container. I will let them sit for 24 hours to totally soak in the oil.

24 hours might be too excessive but it’s almost bed time and I have to work tomorrow. 😂
 

Attachments

cruzer747

Active member
218
145
43
Location
California
Okay, back at my desktop, found a few more pics. I hope to find some before I did any of the deck honing... I will check my laptop and update this post if I do.
102.JPGthis is after honing as much as I had energy for.
099.JPGconcentric circles with sandpaper around fire ring surfaces (the corrosion was deeper than I could deck hone and I feel that the scratches in the same direction of the seal is better than perpendicular.
103.JPGMaybe it doesnt make a difference but it felt good to me considering the spots where you can see the pitting under where the old fire rings were still evident after cutting down a few thou.
104.JPGchamfering all holes is easy and is said to make a difference.
 

2INSANE

Well-known member
725
824
93
Location
Belgrade, Montana
Something worth mentioning. Last summer 2019 this motor was purchased from Boyce Equipmemt with said 23,000 k miles.

When I got the motor last summer I added a gear drive to keep the timing true.

A girdle to prevent cracks.

A fluidamper which I believe is a absolute must have to prevent crank failure.
 

Attachments

2INSANE

Well-known member
725
824
93
Location
Belgrade, Montana
Other things I did to this motor last summer:

Got the radiator refurbished with a new 4 core

Installed the ORD motor mounts

New G60s glow plugs

Refurbished oil pan

Refurbished Timing plate cover with crank seal

All new gaskets

New Lift Pump

New Valve Covers

Rear Main Seal

Added the Arp studs

New water pump

As you can see I have a lot of time and money vested in this motor. Reguardless of the problems it has a year later, I am not giving up on it until she is beyond repair.

On another note. When she dies, all her goodie upgrades and parts can be swapped over to another 6.2 or 6.5.
 

Attachments

2INSANE

Well-known member
725
824
93
Location
Belgrade, Montana
Today is my Sons birthday! 13 years old! I will not do much today to the motor so I can spend some time with him.

What I did do is put the lifters in. I used blue thread lock and tightened the bolts hand tight.

Turning the crank in front of the motor to make sure they go up and down without getting stuck on the lifter plates.

1 lifter was not going down after it went up. Simple adjustment of the plate fixed that problem.

Also one thing that is very important to address. Whenever the head gets taken off the block, the heads and block start to immediately rust. After 24 hours of exposure you will easily see light surface rust. It is always smart to get the head bolted to the block ASAP. Within 24hrs.

Since I am leaving the head off the block longer then 24 hours. I put some additional WD-40 on the deck and in the cylinders to help keep the rust down. I had already put oil on the cylinders but it did not work as well.

Here is some pictures of just a few days of exposure. The surface rust can be removed with a Scott’s pad which is what I will do when I am ready to put the head on.
 

Attachments

Last edited:

2INSANE

Well-known member
725
824
93
Location
Belgrade, Montana
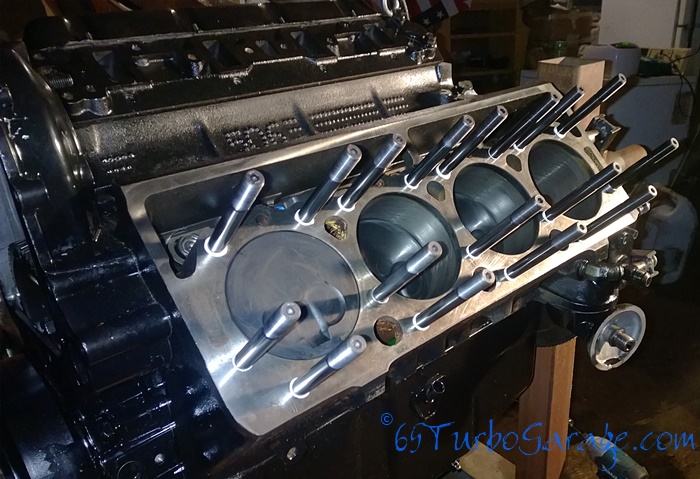
Today I refurbished the Arp studs. I Cleaned the rust out of the cylinders and got all the Wd-40 off the deck.

Using optimum black I coated the end of the studs and put them in hand tight.

Then I took them back out, added more optimum black and put them back in hand tight.

Cleaned up the excess with paper towel.

And here they are:) Again...
 

Attachments

2INSANE

Well-known member
725
824
93
Location
Belgrade, Montana
On with the head gasket. And head.

I put the Arp nuts and washers in a bag with 10w-40, mixed them up and put them on the studs. Using just the socket, I got the nuts hand tight and started my torque at 25, then 35,45,55,65,75,85,95,105 and the final 115. In sequence according to Arp. Yes I intentionally went to 115 foot pounds with motor oil since I do not have Molly lube.

In the morning I will check the torque and make sure they are all 115.
 

Attachments

2INSANE

Well-known member
725
824
93
Location
Belgrade, Montana
I am so glad I checked the torque on the Arp studs this morning. It seems the gasket settled within just 8-10 hours that I was able to feel about 5 pounds of torque lost from the settlement of the gasket.

Note: All final torquing needs to be done before the Optimum Black cure time expires.
 
Last edited:

2INSANE

Well-known member
725
824
93
Location
Belgrade, Montana
Now I would like to talk A LOT about Cast Iron Rockers for the 6.2., failure points, how to correct failure points and my experience with them over the many years of running them on every 6.2 I had opened up.

Here is some info I had stored away that is useful.


“With the high compression ratio of the pre-chamber diesel, there is minimal valve-to-piston clearance. Because it is important to have a rigid valve train that insures a precise valve train motion through the speed range, a shaft supported valve rocker arm design is used. Nodular iron rocker arms with a steel backed bushing are used. The shafts are bolted to case stanchions on the cylinder head. The design has a steel backed bronze alloy bushing in the rocker arm which is final bored after being press fit into the cast arm. This bushing uses a performed circumferential oil groove and 2 cross oil grooves for directing lubrication to the mating shaft surface. Oil is supplied to the rocker arm via the hollow push rod and the arm in turn has drilled passages that provide a flow path for oil to the bushing.
The 1982 engine used a hardened steel spacer and a metric washer at the rocker shaft attachment. The 1983-84 engine uses an unhardened spacer and a steel cleat. The steel cleat has a large gap 90? to the bolt. This prevents any closure, and the cleat spreads the load”

“ROCKER ARM SHAFT INSTALLATION, 6.2L DIESEL
Rocker arm shafts may break if installed improperly. Uneven torquing causes stress at bolt holes.
The proper method to install rocker shafts is as follows:
1. Set engine balancer timing mark at TDC mark on engine.
2. Rotate engine 31/2 ? counter clockwise (measured on balancer) or to first lower water pump bolt (See Figure 2-9).
This procedure will position the engine so that no valves are close to a piston head. This is 30? BTDC.
3. Before installing bolts through shaft be certain that ring around shaft is installed with ? split? at bottom (See Figure 2-10) on 1982 models. On 1983 and later the split is 90? to the right. On 1985 and later no split ring is used.
4. Snug both bolts on each shaft.
5. Tighten bolts evenly to 55 N.m. (40 lb. ft.) torque.”
 

Attachments

2INSANE

Well-known member
725
824
93
Location
Belgrade, Montana
Thanks to Steelsoldiers.com member Hawkman for selling me these beautiful cast iron rockers!!


Got off work and cleaned up the rockers with paint thinner and brake cleaner.

(Picture 4) A Failure point on the cast iron rockers are the sharp edges around the arm. They have been known to crack and break. Prevention is to use a dremel and remove all sharp edges around the arm.

(Picture 5) The retaining spring has been known to break. Prevention is do not over rev the motor and always monitor your oil levels and have a routine oil change. But when it goes, it goes! Buy a new one if they still make them?

(Picture 6) The cotter pin has been known to break. Prevention is not to over rev, pop the valve cover every 100k and replace it.

(Picture 7) It has been documented that the push rod will wear down the hole that the push rod goes into and make the push rod get stuck causing lifter failure and bent push rods. Prevention is to keep your oil clean and changed regularly to prevent unnecessary wear.

(Picture8) The wear from the ends of the valves look great! No known failures.

In a nutshell...

I have had 1 set, yes 1 set of cast iron rockers in 3 different 6.2 diesel motors. 2 motors with 200+k miles and the 3rd recently rebuilt 2 years ago and has another 24,000k on them. In fact, just last week I saw the lucky bastard (Friend of mine) drive down the interstate at 70mph, smiled and waived. I have never had any failures on cast iron rockers!

I love them! I believe they fit tighter on the push rod, have less to ZERO side play and I believe they make the motor quieter because of less chatter.

The sets with the split cleats are the more superior cast iron rockers. The first versions have been known to crack.
 

Attachments

Last edited:

2INSANE

Well-known member
725
824
93
Location
Belgrade, Montana
Back at the farm...

I got the push rods in. Checked to make sure they were straight and on the lifters.

Then I did a little shake and bake with the rocker arms in a 1 gallon baggie and 15w-40 oil to lube them up.

Installed... Torqued them to 40 foot pounds with blue thread lock on the ends of the bolts.

Cleaned off the valve covers old rtv and the blocks rtv with the angle grinder, wiped off the valve covers with some oil and paper towel, cleaned the threads on injectors and injector holes and added anti seize to injector threads. I installed the injectors at 50 foot pounds, glow plugs and sensor after putting thread tape on the sensor. Put cheap sandwich bags with rubber bands over the injectors to prevent stuff going in the ports while I work on the other side of the block.
 

Attachments

2INSANE

Well-known member
725
824
93
Location
Belgrade, Montana
After work today I opened up the Driver side of the motor. I got the valve covers off, rockers, push rods, Arp nuts and bolts and the head.

I identified 2 Arp studs that where leaking from the threads.

Also one of the freeze plugs has a small leak.


The head gasket looks great! It was a pita to get off because of that copper spray bonding it tighter.


Looking at the head, you can see the discoloration where the cylinders go with the head. The areas where there is lack of carbon buildup shows me which valves were not opening and closing properly from the lifters that had failed.


Cylinder 2 shows some whiteish brownish build up. Not really sure what would cause that? The coolant in the cylinder is from me removing the head with coolant still in the head.

Cylinder 8 has some of that same build up. I did have the timing advanced quite a bit on the injection pump. Could be over fueling?
 

Attachments

chevymike

Well-known member
597
463
63
Location
San Diego, CA
I am just surprised by how many 6.2/6.5 engines that people have put ARP head studs in, that leak. I have used head studs in other engines (not the 6.2/6.5 series) that the studs run into the coolant ports and have never had any issues with leaking. What is it about these engines that causes them to leak and why don't head bolts have this same issue?
 

2INSANE

Well-known member
725
824
93
Location
Belgrade, Montana
I am just surprised by how many 6.2/6.5 engines that people have put ARP head studs in, that leak. I have used head studs in other engines (not the 6.2/6.5 series) that the studs run into the coolant ports and have never had any issues with leaking. What is it about these engines that causes them to leak and why don't head bolts have this same issue?
Great question!

The early 6.2 was never built from GM to have a turbo. Because of the lack of power and torque it produced, people complained.

Because of the many early 6.2 diesels in production and complaints, there became a demand for a turbo. That’s when Banks introduced their turbo kit and ATS I believe.

The high compression on the early 6.2 with a turbo kit tends to stretch the bolts holding the heads causing head gasket failure.To fix that problem others use the Arp studs to prevent stretching.

Even with the Banks Sidewinders turbo kit only producing between 5-10 psi, over time there has been known and reported head gasket failure with the TTY bolts. ARPs studs will correct that problem if installed right.

However, coolant is very corrosive! ARPs thread sealer is not up to the job. The coolant will slowly eat away ARPs sealer. Also I have seen coolant pressures get up to 20 pounds or more, pushing the ARPs thread sealer out of the threads as well.

ARPs instructions say to use only their sealer or it will void warranty even though it is a crap product. I think they might have updated their sealer but there are old new stocks of Arp studs for the 6.2/6.5 head floating around in the market.

In my case, I bought the cheapest Arp studs I could find. I picked up an old new stock product and got their crappy thread sealer.

If you google Arp stud failure, it’s not just in these old diesels. They are happening to many other different types of motors. In the hot rod world they are used a lot but with different applications such as ultra gray. Optimum Black is one of their newer sealers I thought I should try because of its oil resistance, high temp 500 degrees, corrosive resistance and its elasticity.

But we shall see!

Here is a great read! A must read for all interested in turboing a 6.2/6.5. He has a list of sealers that have been known to work.


To answer your other question, TTY bolts are great! On the lower compression 6.5 motors that don’t go repeatedly above 15psi boost especially! The TTY bolts stretch as it reaches its tty limit. As it stretches, the threads on the tty bolts tightly fill in the threads on the block making a super tight leak free bolt. Also with a clean flat surface from the bolt head, there is no washer or any gap for the fluid to seep threw.

Looking at this picture I provided, you can see the threads on the tty bolts have expanded which in return would fill in the thread gaps on the motor.

I do want to add that even the ARP studs can not stop a high compression motor from blowing a head gasket.

One of my friends that has tinkered many times with ARPs, 6.2’s and turbos informs me that the high compression and high boost 20+ will pull the Arp Studs right out of the block, damaging all the threads in the block.

So before turboing an early 6.2 one must know the limits of the 6.2’s boost pressure. I feel safe to say that any boost 8psi-15 psi the early 6.2 should have Arp studs in them.

I don’t know anyone that has over 100k + miles on a early 6.2 with TTY bolts and a turbo that has not had any head gasket problems.

If my information is incorrect and someone out there has an early high compression 6.2 with tty bolts and had been turboed a whole 100k+ miles with no head gasket issues, please chime in and correct me without prejustice.
 

Attachments

Last edited:

2INSANE

Well-known member
725
824
93
Location
Belgrade, Montana
Today I decided to spend 1/2 the day being lazy and went to the hot springs with the family to relax. The other 1/2 of the day was spent taking off the driver side head and cleaning it up along with the deck.


I got the new lifters in and chased all the head bolt holes with the tap. Did at least 5 passes and each pass I cleaned each hole with brake cleaner. I also cleaned out the cylinders like I did the passenger side and got them wiped with a small amount of WD-40. Before and after pics...

I then installed the refurbished Arp studs and used the Optimum Black.

Afterward cleaned the deck and head again with brake clean and then installed the 6.5 head gasket and head. I soaked the washers and nuts in 10w-40 like I did for the Passenger side and used just the socket to get them hand tight on the studs. Then I torqued them starting at 25 foot pounds, then 35,45,55,65,75,85,95,105 and final 115.

Will let the gasket settle over night and torque it one last time to 115 pounds in the morning before the Optimum black cure time expires.
 

Attachments

Top