• Steel Soldiers now has a few new forums, read more about it at: New Munitions Forums!

  • Microsoft MSN, Live, Hotmail, Outlook email users may not be receiving emails. We are working to resolve this issue. Please add support@steelsoldiers.com to your trusted contacts.

AC install on 923A2

Buffalobwana

Well-known member
Steel Soldiers Supporter
1,394
178
63
Location
Frisco Texas
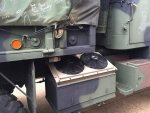
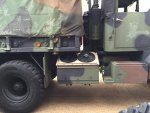
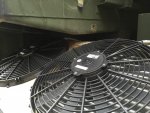
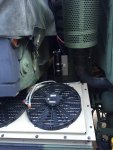
I installed the side bracket on the back of the condenser, after many blows with a hammer to make it conform to the shape needed. Set it on the tool box (after removing jerry can holder) mark holes and drill. Drill pilot holes in front for bolts. Set in place and cuss and sweat a lot and just before the sun set, it's done!

There is ample room for the frame to twist if going over extreme terrain and not contact the condensor. I know the bed can move, but ... Well, I guess I'll know it if it is too close!
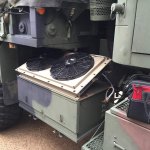
image.jpgimage.jpgimage.jpgimage.jpg
 

Buffalobwana

Well-known member
Steel Soldiers Supporter
1,394
178
63
Location
Frisco Texas
Anyone who has installed one of these, in anything, can speak up now! I think the directions assume some level of AC install experience, which I have none. Mechanically, I can see that a well trained monkey can put this together. Problem is I have not been well trained.

Hey "Over", if you are watching, I'm a bit stumped on something. Send me a pm if you wouldn't mind helping out. Thanks.
 

74M35A2

Well-known member
4,145
330
83
Location
Livonia, MI
You're doing great. Mount the compressor, condenser, and evaporator. Connect all 3 with hoses. Goes from compressor outlet to condenser, then from condenser to evaporator, finally from evaporator back to compressor. There will he a small black can called an accumulator on either side of the condenser or evaporator, and then wire it up. Condenser and blower fans should come on when system switched on, and compressor clutch engage. Vacuum the system down for 15 minutes, them charge it until you have approximately 30-40psi low side pressure, and 300'ish high side. Safety switches cut compressor feed if system pressure to low or high. Smaller hoses are high pressure side from compressor outlet to condenser amd to evap. Larger hoses are return from evap to compressor. You'll need custom lengths for all. Route evaporator drain tube out of cab. That's about it. Call or text me if you need help.
 
Last edited:

Buffalobwana

Well-known member
Steel Soldiers Supporter
1,394
178
63
Location
Frisco Texas
Ha, thanks. Yeah. You should write the instruction manual.

I did finally figure all of it out after I set the instructions down and picked up all the parts and went, oh, ok, that goes here and this connects to that. It's actually hard to put it together wrong 3 sizes of hose sort of force things together in the right way.
 
Last edited:

Buffalobwana

Well-known member
Steel Soldiers Supporter
1,394
178
63
Location
Frisco Texas
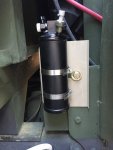
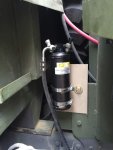
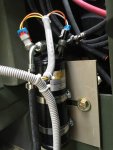
Mount receiver dryer bracket in a convenient location. Make sure wires from condenser reach and you can get in there to attach hoses. Lube O-rings on pressure ports and install pressure switches. Makes no difference which port they go into. Wires will only go into their respective ports. I left the wires unplugged until I installed all plumbing, to make working around them easier. Plus a slipped wrench could bugger up an electrical fitting.

image.jpgimage.jpg
 

Buffalobwana

Well-known member
Steel Soldiers Supporter
1,394
178
63
Location
Frisco Texas
Yeah, they are nice! I used the stock seat spring base, which isn't too different from an air ride, not quite as good, but good enough for now. Corbeau seats (Moab style). $550/pair of so. Worth it.
 

Buffalobwana

Well-known member
Steel Soldiers Supporter
1,394
178
63
Location
Frisco Texas
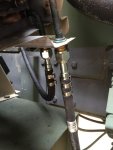
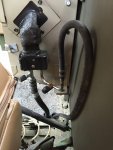
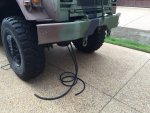
Ran #8 hose from engine compartment to condenser (to be hooked up to compressor when I install it. For now it's coiled up around the heater air intake)

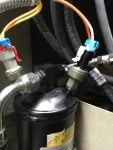
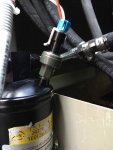
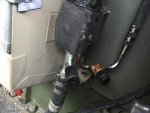
Then Ran #6 hose from condenser to receiver dryer. (Picture #2 is bottom of condenser with #8 coming in and #6 hose going out to dryer.)

Attached #6 hose to receiver dryer female "out" port, to be run into cab and attached to evaperator.

There are more fittings than needed, so sometimes you can choose between a straight and a 90 deg fitting. Some fittings are meant for a specific location.

There the are a lot of parts - nuts bolts and intended spare parts left over. That's always a bonus!

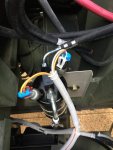
I have yet to zip tie all my wires and hoses up. As pictures here, there are rub points and loose wires that will be addressed before I connect the other end of these hoses to evap and compressor.

image.jpgimage.jpgimage.jpgimage.jpgimage.jpgimage.jpg
 
Last edited:

Buffalobwana

Well-known member
Steel Soldiers Supporter
1,394
178
63
Location
Frisco Texas
Thanks Rob, unless I bugger one up, I should be ok. Good to know someone has your back in case of a mistake. The kit comes with 3 sections of hose a (crimp tool??) don't know what the little bands are called, and a hose cutter so you can cut hose to the exact length. Very handy. The only thing not included was 11/16" drill bit and 1.25" drill bit.
 

Buffalobwana

Well-known member
Steel Soldiers Supporter
1,394
178
63
Location
Frisco Texas
Got under truck, scoped out the area to drill holes to run hoses in/out of cab for evap. A lot of open space down there. Plenty of good options. So I drilled two 1.25" holes in floor close to shift lever/parking brake, to run hoses (I have two individual seats, not the stock passenger bench so I had a lot of room to run hoses.)

Ran big #10 hose from evap to engine compartment to connect with compressor.
Ran small #6 hose from dryer to evap.

Holes were easy to drill with Milwaukee hole Dozer. I have one hole dozer in almost every size from 3/4 to 5.5" it seems. Except the 1.25"! Go figure. Home Depot run last night fixed that.
image.jpg
That big hose is a horse to wrestle through the hole. I should have waited to attach the fitting until I had completed the routing and zip ties it down. I had to cut some zip ties and twist the hose so the charging/vacuum nozzle was at a convenient angle.

image.jpgimage.jpgimage.jpg

Solved electrical wiring question. Need to fab a jumper harness from condenser to evap. No problem. I have an extra harness and some 14ga wire (looks like 14 they are using. Will check to make sure.) the rest of the wiring should
be "plug-n-play". Except I have to tap into master controlled DC power that runs to heater fan. Not sure why I can't run this to my 24v (+) power at the battery shutoff, since the battery shutoff is part of my shut down procedure anyway. (Old/ex/current pilots love shutdown procedures. The more switches and buttons to push, the happier we get.) Makes the process feel more important than it needs to.
 
Last edited:

Buffalobwana

Well-known member
Steel Soldiers Supporter
1,394
178
63
Location
Frisco Texas
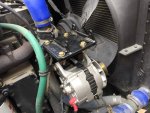
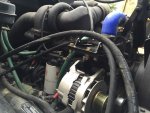
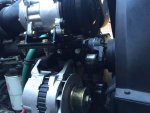
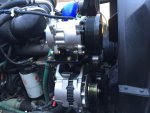
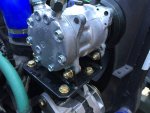
Started the install of 74M35A2's bracket.

After installing this I can't imagine why anyone would put the compresser on the other side. It's nice and handy and convenient right here. Easy install, good directions and support and advice, is a text away.
image.jpgimage.jpg
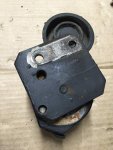
Easy install, except ... the two Allen key bolts that hold on the belt tensioner index plate almost whipped me. I twisted one wrench and was about to strip them if I pushed much harder, so I got a hammer and started whacking the top of the bracket. They came out very easily after that. So, whack the bracket nice and hard a few times to shake loose the paint and rust and hopefully they will back out without issues.

He (74M35A2) recommends re-indexing the tensioner bracket. Easy job, just drill a new hole for the indexing nub clockwise from the original. You can see the nub through the new hole bottom left corner of plate. (Looking at the backside, thus the appearance of being counter-clockwise)

I may have pushed it out a little, but, it's not too critical, still plenty of meat to hold it, even if it had a loose attachment screw.

Reindexing it it puts the belt tensioner in a better position since you added a belt driven component and I believe mimics the position of the commercial Cummins with AC.

image.jpg
 
Last edited:

Buffalobwana

Well-known member
Steel Soldiers Supporter
1,394
178
63
Location
Frisco Texas
Been reading up on charging, proper method of vaccuming down etc. lots of good info. Some really questionable info and some really blatant marketing BS. Which leads me to this question:

Do I need to add oil to the compressor before I charge the system? I have no idea if there is oil in it or not. It's NOS Red Dot (Sanden) compressor that could be 10-15 years old. It looks old.
 

Buffalobwana

Well-known member
Steel Soldiers Supporter
1,394
178
63
Location
Frisco Texas
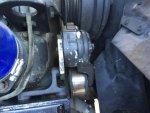
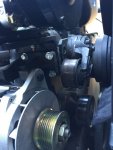
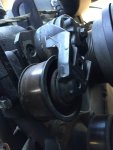
Mounted belt tensioner. You can see how the arm is now about 100 deg CW from where it usually stops. This is from the new index hole I drilled about 100 deg clockwise on the plate. It makes a lot more sense once you have the part in your hand and see how it works.
image.jpgimage.jpgimage.jpgimage.jpgimage.jpg
 

Buffalobwana

Well-known member
Steel Soldiers Supporter
1,394
178
63
Location
Frisco Texas
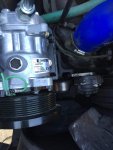
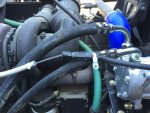
Mounted the compressor and cut hoses to length. Fitted hoses to fittings and tightened them on the compressor after I installed the hose bands. Make sure your hoses are all zip tied in place before you make this final cut. I do need to go through and add the spiral covering on any rub points, but that's easy to do.

image.jpgimage.jpg
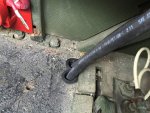
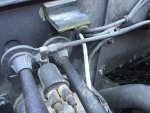
The compressor wire needs to be run into the cab. I ran it from the compressor by the horn and into the firewall through an existing grommet. Worked pretty slick that way. This attaches to the ACs switch wiring harness.

image.jpgimage.jpg
 

Buffalobwana

Well-known member
Steel Soldiers Supporter
1,394
178
63
Location
Frisco Texas
Mounted switch to transmission shifter bracket. Seems like a good spot. Wiring harness from switch will get routed under mat to the evaperator.
image.jpg
 

Buffalobwana

Well-known member
Steel Soldiers Supporter
1,394
178
63
Location
Frisco Texas
There is one wire I need help with. I need an ignition controlled positive wire (master controlled) in the Humvee, they used the fan wire, but i see there are about 4 or 5 wires coming off the fan. I need to pick a better hot wire, because I know one of these is set up for 12v, although I guess the + wire would always be 24v. Anyway, I don't want to mess with a bunch of black wires off the fan switch.

Would it be ok to run this wire to the + wire off of the battery shutoff? I use the battery shutoff switch to shut down everything, including the fuse panel I installed on the back wall that runs the backup camera, charging ports (cig lighter outlets) and a couple 24>12v converters. I shut it down when the truck gets shut down.

Not certain where this hot wire goes. Maybe to engage compressor clutch? The evap unit has its own +/- wires that run it and a internal 30a breaker. So compressor would be the only thing left to power right?

What if I put this + on a fuse panel or what if I gave it a dedicated DC breaker?

I don't quite understand the circuits on these trucks yet. Advice needed!
 
Top
AdBlock Detected

We get it, advertisements are annoying!

Sure, ad-blocking software does a great job at blocking ads, but it also blocks useful features of our website like our supporting vendors. Their ads help keep Steel Soldiers going. Please consider disabling your ad blockers for the site. Thanks!

I've Disabled AdBlock
No Thanks