• Steel Soldiers now has a few new forums, read more about it at: New Munitions Forums!

  • Microsoft MSN, Live, Hotmail, Outlook email users may not be receiving emails. We are working to resolve this issue. Please add support@steelsoldiers.com to your trusted contacts.

Advice needed - new guy with MEP004A

Guyfang

Moderator
Staff member
Moderator
16,766
24,074
113
Location
Burgkunstadt, Germany
Got the temp gauge on the panel working. Barely hit 120 *F before I shut her down - (Wrong!! Stopping it before it gets hot is wrong. Hot you want, as long as it stays in the engine temp parameters. ) don't want to wet stack it. This should not be one of your worry's. You have to run several days at no load, to see even a little bit of wet stacking.

I also think I may need a new radiator cap. After I ran it several minutes and it had warmed up.... after I shut it down, I could hear pressure hissing from the cap. While it was doing this, the radiator was still cool enough for me to lay my hand on without even discomfort. I was worried that what I was hearing was compression leaking into the cooling system thru a bad head gasket. So I ran it for another ~10 minutes with the radiator cap off and watched for bubbles in the radiator. No bubbles. Will have to keep an eye on it.

Check the solder around the radiator opening, where it mates to the radiator body. Check the rubber hose that is the overflow, and the nipple that goes into the radiator opening. And a cap is cheap. I would replace that without even thinking about it. Cheap insurance.
 

Back-in-Black

Well-known member
296
277
63
Location
Louisiana
Got the temp gauge on the panel working. Barely hit 120 *F before I shut her down - (Wrong!! Stopping it before it gets hot is wrong. Hot you want, as long as it stays in the engine temp parameters. ) don't want to wet stack it. This should not be one of your worry's. You have to run several days at no load, to see even a little bit of wet stacking.

I also think I may need a new radiator cap. After I ran it several minutes and it had warmed up.... after I shut it down, I could hear pressure hissing from the cap. While it was doing this, the radiator was still cool enough for me to lay my hand on without even discomfort. I was worried that what I was hearing was compression leaking into the cooling system thru a bad head gasket. So I ran it for another ~10 minutes with the radiator cap off and watched for bubbles in the radiator. No bubbles. Will have to keep an eye on it.

Check the solder around the radiator opening, where it mates to the radiator body. Check the rubber hose that is the overflow, and the nipple that goes into the radiator opening. And a cap is cheap. I would replace that without even thinking about it. Cheap insurance.

Ok, great info again. Wasn't aware that wet stacking took that long. Now that I have the temp gauge working and a tube fed oil pressure gauge, I feel more comfortable running it and won't be so nervous about letting it get hot.

Will do on the radiator. Is the cap something I should find in an auto parts store? Will get one tomorrow if so.

Will pass by the alternator shop tomorrow. Just looked up that alternator. Can buy a new one for ~$125 or less but will let the alt guy take a look first.
 

Back-in-Black

Well-known member
296
277
63
Location
Louisiana
I tried to set the engine RPM the other day using my Fluke set to frequency. Seemed like I was really running the RPM up there trying to get 60 Hz power out of it. Just seemed to my ears that the motor was running faster than 1800 RPM and I was only at ~48 Hz. So I quit and ordered a laser photo tach to provide a second source for RPM. It came in last night. Went out this morning and tried it out. If you've never seen one of these gizmos (and I never have before I started digging on the web) they're pretty cool. Basically, you just put a small piece of reflective tape on a spinning object and shine the laser dot on it as it's spinning and it gives you a digital readout of RPM. Anyway, stuck the piece of tape to the front of the crank pully, hooked my Fluke across L1 - L3 and cranked her up. Turns out my Fluke was dead on all the time, it was just my ears that were off. Got it adjusted to 1800 RPM via the "tach" and the Fluke reads 60 Hz +/- a tenth or 3.

I think this was my problem with making voltage and really why I started down the road of getting the running RPM set. It now makes power without throwing battery voltage in there (just via the voltage regulator and the Delco feeding the MEP field. Problem is, the voltage is all over the place, swinging wildly. Both the Fluke and the analog voltmeter on the front panel of the MEP are telling me this. I think I may have smoked my AVC (voltage regulator) screwing around with flashing the Delco field. Got a new regulator on the way. For $45, it's a cheap enough gamble.

I think my original problem was that the regulator needs to see at least 55 Hz to do anything and I was piddling with it around 30-40 Hz. Well now that I've got it at 1800 RPM/ 60 Hz, it makes power all by itself - no 24 volt flash required.

I'll wait till the new VR comes in and verify power output and then pull the motor / main alternator off the skids so I can get all that crap sandblasted.

I also discovered this morning that my water pump is leaking a small amount from the weep hole. Tiny drips but actively leaking. Going to keep watching it but I suspect that I will need to do something about that. Found a source for water pump rebuild kits for White D198ER for $160. Comes with new shaft, bearings, seals, impeller and gaskets. Basically everything but the housing. You guys think this kit will fit this motor? It is a White D198ER isn't it?

I ordered a new upper radiator hose and bypass hose. Couldn't get the lower radiator hose so I guess once I get it off the skids, I'll carry the old hose the the auto parts store and try to match it up with something.
 

Guyfang

Moderator
Staff member
Moderator
16,766
24,074
113
Location
Burgkunstadt, Germany
I also discovered this morning that my water pump is leaking a small amount from the weep hole. Tiny drips but actively leaking. Going to keep watching it but I suspect that I will need to do something about that. Found a source for water pump rebuild kits for White D198ER for $160. Comes with new shaft, bearings, seals, impeller and gaskets. Basically everything but the housing. You guys think this kit will fit this motor? It is a White D198ER isn't it?

Maybe you should at last take a look at the -12 TM?
 

Back-in-Black

Well-known member
296
277
63
Location
Louisiana
I also discovered this morning that my water pump is leaking a small amount from the weep hole. Tiny drips but actively leaking. Going to keep watching it but I suspect that I will need to do something about that. Found a source for water pump rebuild kits for White D198ER for $160. Comes with new shaft, bearings, seals, impeller and gaskets. Basically everything but the housing. You guys think this kit will fit this motor? It is a White D198ER isn't it?

Maybe you should at last take a look at the -12 TM?

Not understanding - 12TM?

Thanks
 

Back-in-Black

Well-known member
296
277
63
Location
Louisiana
Oh, gotcha. I knew I had read somewhere that it was a D-198ER. Couldn't remember where - that's where. I had been going thru that TM digging up values for oil and coolant sensors and such. Guess I just haven't got used to using the TMs yet. Thanks!

I checked it a little while ago and it wasn't leaking but I've seen this before. The last water pump on my truck (2nd one -426,000 miles so far) did this. Leaked a bit earlier in the year and then nothing for about 6 months. I think it was Sept. when it finally gave out and I had to install the 3rd pump.

My upper radiator and bypass hoses arrived a couple of hours ago. I think I'll order the water pump rebuild kit and do that while the motor is sitting on blocks for sandblasting.

The good news is that all the new gaskets I made seem to be holding.
 

Mullaney

Well-known member
Steel Soldiers Supporter
Supporting Vendor
7,716
19,766
113
Location
Charlotte NC
New VR came in. 15 minutes later I was making power. Had to adjust it a little (was initially doing 228 VAC) but now making a steady 240 VAC across L1-L3!

:) :) :) :) :)
.
That is great news!

We have a few pieces of equipment here in the printshop that needs 230v, some things need 208 and a few and 240. The solution to our building power from the street was installing our own transformers from 480, and we make our own power from that. A set of Buck Boost Transformers off our 240 transformers at each piece of machinery is how we handle that here.

Not really related to your generator - but to me anyhow - that would explain why the voltage could have been lower.
 

Back-in-Black

Well-known member
296
277
63
Location
Louisiana
The VR had a couple of pots to adjust things. 1 is voltage and the other is stability. Haven't messed with stability yet, figure it's probably better to adjust that with some kind of load. Just had to barely move the voltage pot to get it to 240. For right now, I have it hooked up where the voltage adjustment is on-board using the micro-pot on the VR. It can also be hooked up where the pot on the front panel of the MEP is used to adjust the voltage. I hooked that up for a minute or 3 and it VERY touchy. I was watching my meter while hooked across the MEP pot the other day and it seems to drop out when twisting the dial. Think the wipers / contacts on that pot are probably a bit corroded and such. Probably will just get a new 0 -1K pot to put on there before this is all over. How often does that need to be adjusted? Can't imagine it should need adjusting very often - if at all?

I checked outlet power here the other day too. Just a 120 V outlet in the shop. Right at 120 VAC so I guess 240 V setting on the generator should be fine. Don't really have anything that I know of the needs 208 or 230.


AVC63-4 voltage - stabilty adj.PNG
 
Last edited:

Back-in-Black

Well-known member
296
277
63
Location
Louisiana
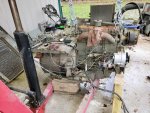
Drained the radiator again. Once again I had to pull the petcock drain out because it was completely clogged with gradeaux. Pulled the radiator and support off along with the control panel and that end of the case. Hope to get the engine and main alternator off the skids this weekend so I can drop some stuff with a place that does sandblasting.

While all that stuff is being blasted, I hope to start rewiring it.
 

Back-in-Black

Well-known member
296
277
63
Location
Louisiana
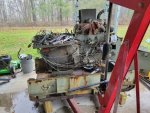
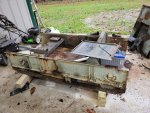
Well - a picture is worth a thousand words. Here's a few thousand.

20211218_130401.jpg

20211218_154120.jpg

20211218_154136.jpg

That damn skid assembly is HEAVY. My friend and I each tried to lift one corner. Neither of us were able to lift it more than about 1/4".
 

Back-in-Black

Well-known member
296
277
63
Location
Louisiana
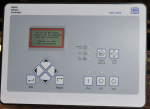
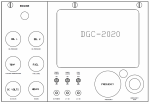
bought one of these off ebay for $225 ($1,000 new). https://www.basler.com/Product/DGC-2020-Digital-Genset-Controller.

DGC-2020 pic.PNG

It is basically a purpose-built Programmable Logic Controller for gensets. They come with several different options available. This one is set up for:

Mains monitoring and auto start / shutdown and transfer switch control on mains failure / restoration.

5 volt current transformers (for monitoring / displaying current on each leg).

Generator monitoring and protection for over / under current and frequency. This one has the enhanced package that adds overcurrent, phase imbalance, and loss of mains protection.

It also has the automatic synchronizer option which will synch it to the mains or I guess a second generator. Also for "closed transfer back to restored mains" - no momentary power loss during transfer) Something I'll probably never use.

1 dedicated emergency stop input (panic button) .

16 fully programmable input (dry contacts). For things like oil press, temp and anything else you care to monitor / program into it. I know the MEPs have a sender for oil pressure and one for loss of oil pressure (I'm guessing the first one was originally for the gauges on the control panel and the second one was for emergency shut off on loss of oil pressure. Pretty sure the coolant temp is set up the same way - 2 sensors.

3 dedicated output closures for fuel, start and run control.

12 programmable output contact closures.

Things like current, voltage, frequency and such are displayed on the LCD menu screen so that eliminates my problem with some of the analog gauges on the front panel of the MEP that don't work. It will also display engine info like temp, oil press, RPM (from the MPU) and such. Haven't spent much time on it but my volt meter doesn't work and my freq gauge is off a little according to my Fluke. (tried adjusting it - no joy) No clue if the % rated current gauge works as I have yet to put any load on it. Not sure that would really even mean anything after it was converted to single phase and such anyway.

The unit I bought also came with an LSM-2020 which is a Load Share Module to tie 2 gensets together. Don't really need that function but the LSM adds more relays, closure inputs and allows Ethernet access to the DGC. Not sure I will ever use LSM since the DGC has more I/O than I could dream up a use for already. You normally access / program the DGC via USB and unlike some of the other genset controllers out there, the I/O is truly programmable, not just check boxes for pre-configured options.

I can see the possibility of using the LSM to tie the DGC to the Ethernet network in my house and then I could access the DGC from my desk. That is a real possibility.

The guy I bought it from says it came off a military genset.

I've been reading the manual for the DGC-2020 on and off for several weeks now and playing in the software. I have a loooong way to go before I'm ready to program this thing.
 

Back-in-Black

Well-known member
296
277
63
Location
Louisiana
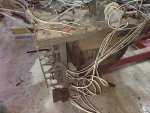
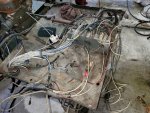
In the interests of cleaning up a hacked up mess, does anyone know a reason I can't cut some of this slack off these wires and make the connections on a couple of insulated lugs mounted to the tray rather than this crap where they spliced wires together and wrapped them with weather tape? I haven't actually traced them yet but pretty sure these are 2 of the leads from the main alternator legs L1 and L3 and the spliced in wires go into the control box to supply sensing and current to the voltage regulator. Any reason I shouldn't get rid of all that slack making a huge mess in there? Obviously I'll want to leave the wraps around the current sensing transformers but all that crap hanging down is just a mess.

20211218_163316.jpg

20211218_163323.jpg
 

Back-in-Black

Well-known member
296
277
63
Location
Louisiana
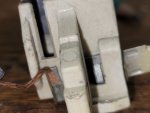
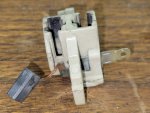
Thought I'd post this up. This is why this genset sat up for ~15 years. Broken brush cable in the Delco. I have the other brush somewhere, looks like the solder joint to the brush pack just gave way.

The whole brush pack is $12.99 on ebay right now. Was probably half that or less 15 years ago.

20211219_153724.jpg

20211219_153733.jpg
 

Back-in-Black

Well-known member
296
277
63
Location
Louisiana
I was waiting for that question LOL.

The second pressure gauge is mechanical, not electrical. I bought it a while back when I was first getting the motor going and didn't want to trust the electrical gauges (I've been watching temp with a laser type thermometer). Anyway, I have the gauge, it works well and it's probably more accurate / dependable that the electric one. But I need the electric one for the control system and low pressure auto shutdown so I decided to use both - one mainly for my eyeballs and peace of mind and the other for the control system with an easy way for me to verify it's working (gauge on front panel)

That make sense?

I also set up a toggle to use the fuel gauge on the day tank and/or an aux tank - which I fully intend on putting in place.
 

Scoobyshep

Well-known member
1,137
1,511
113
Location
Florida
I was waiting for that question LOL.

The second pressure gauge is mechanical, not electrical. I bought it a while back when I was first getting the motor going and didn't want to trust the electrical gauges (I've been watching temp with a laser type thermometer). Anyway, I have the gauge, it works well and it's probably more accurate / dependable that the electric one. But I need the electric one for the control system and low pressure auto shutdown so I decided to use both - one mainly for my eyeballs and peace of mind and the other for the control system with an easy way for me to verify it's working (gauge on front panel)

That make sense?

I also set up a toggle to use the fuel gauge on the day tank and/or an aux tank - which I fully intend on putting in place.
Little overkill, but nothing wrong with that.

Sent from my SM-G973U using Tapatalk
 

Back-in-Black

Well-known member
296
277
63
Location
Louisiana
My middle name is Overkill. I do almost anything and everything with "extra" built in. The compressor I put in my shop is 80 gal, 2 stage, 7.5 hp. 3 years old and has less than 8 hours on it. Not because I don't use, because it only takes about 2 minutes for it to fill an empty tank LOL. Even wide-open sandblasting with the little pot blaster I have, it only runs about 2 minutes out of every 10-15. That's just one, small example of my obsession with overkill.
 
Top
AdBlock Detected

We get it, advertisements are annoying!

Sure, ad-blocking software does a great job at blocking ads, but it also blocks useful features of our website like our supporting vendors. Their ads help keep Steel Soldiers going. Please consider disabling your ad blockers for the site. Thanks!

I've Disabled AdBlock
No Thanks