• Steel Soldiers now has a few new forums, read more about it at: New Munitions Forums!

  • Microsoft MSN, Live, Hotmail, Outlook email users may not be receiving emails. We are working to resolve this issue. Please add support@steelsoldiers.com to your trusted contacts.

All that plumbing under the hood

m1010plowboy

Well-known member
Steel Soldiers Supporter
3,912
2,723
83
Location
Edmonton, Canada
G749 Air Pak

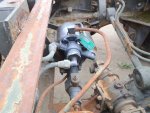
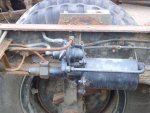
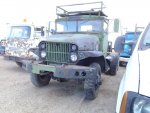
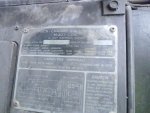
I missed this M207 at an auction a few years back and it had a re-built air-pak with a part # tag on it. It went for $1600.00 and the boys bidding had more doe or less sense, probably more doe.

The air pak came from Edmonton Brake and Clutch and looks a 37 64 (6) 0. Talked to Joe from EB&C and he has one on the shelf. We discussed dropping a few cores off and having him do a replacement parts list but I got distracted by something shiny so SND.....still not done.

A airpak bypass procedure would be a handy write up but I've never done it so time to learn.
 

Attachments

klunk

New member
61
0
0
Location
Niagara Falls, Kanada
Holy-!

thanks gentleman-that is exactly what I needed-the photos and manual reprint will make this far easier...

it's amazing how accessible things are without the cargo bed-but I ain't popping that off
 

klunk

New member
61
0
0
Location
Niagara Falls, Kanada
Stupid brakes...

I don't really need them, right?

i bypassed the the air pack and started bleeding and looking around...a couple days later the entire front axle is ripped apart

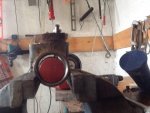
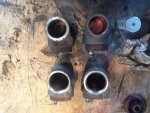
front left had US wheel cylinders ( rotted and seized)
image.jpgimage.jpg
front right had had new canadian wheel cylinders(completely clogged and nasty)

the he pics show all four cylinders....with one Canuck cylinder with a US piston in it
 
Last edited:

klunk

New member
61
0
0
Location
Niagara Falls, Kanada
And....

the outer dimension of the cylinders is identical but...I have noticed the 'piston pins' are different lengths.

the us pins are around 1/2 inch longer...do the longer pins need to used with the wider bore cylinders??
 

klunk

New member
61
0
0
Location
Niagara Falls, Kanada
So...
bypassing the air pack kinda works

the master creates enough pressure to check for leaks but ya sure can't drive it that way...it requires 5 to 7 full pumps to build pressure that will actually slow the truck

amazingly the air pack seems to function fine...although getting the brakes bled required about 3 litres of fluid

the fluid being bled looked like the foam on a fancy coffee...took forever to get it all out...I was concerned the air pack was aerating the fluid but it eventually cleared up and I now have brakes that bring that sucker to a instant stop
 

m1010plowboy

Well-known member
Steel Soldiers Supporter
3,912
2,723
83
Location
Edmonton, Canada
It's a lot of work going through the brake system and getting it working right. Nice goin',,,,, see you in Winnipeg for a coffee? We can take Cmpman for a ride.
 

hendersond

Well-known member
Steel Soldiers Supporter
1,171
29
48
Location
Galesville, WI
Good job on the brakes. It has always been my understanding the purpose of the air pack is to multiply the volume and pressure to each wheel cylinder.
 

klunk

New member
61
0
0
Location
Niagara Falls, Kanada
Good job on the brakes. It has always been my understanding the purpose of the air pack is to multiply the volume and pressure to each wheel cylinder.
i think it's the volume that's most important....the master cylinder alone creates lots of pressure but ya need to " pump up the volume" to get any braking effect
 

klunk

New member
61
0
0
Location
Niagara Falls, Kanada
One thing leads to another....

now that the truck stops I went for a road speed spin around the block

the tranny shifts nice and smooth BUT...it seems to shift from 3rd to fourth wayyyy too early leaving the truck lugging in fourth gear ( it does accelerate but slowly)

Also...it won't 'kick down' when accelrator is fully depressed

can this be adjusted with the throttle linkage going to the tranny?...I don't have the gauge tool for adjustment so is it safe to make adjustments and road test?

this thing is so close to getting a distance road test I'm going bonkers !!
 

m1010plowboy

Well-known member
Steel Soldiers Supporter
3,912
2,723
83
Location
Edmonton, Canada
You can hang onto third longer by pulling the
Shifter back to hilly once in second....waiting for rpm.....then slide
Shifter into level. I replaced pins, took the slop out of the linkages and the shifting
Got better the more I drove .
There is a section on trouble shooting transmission shifting that is real entertaining.
 

klunk

New member
61
0
0
Location
Niagara Falls, Kanada
Shifting back n forth between hilly and level scares the **** outa me....even though I know it's possible...

to clarify -wait until tranny shifts into third- pull shifter back to hilly (2nd) to hold in third?

i would really prefer it shifted properly without risking a screwed up shift from messing with the controls
 

m1010plowboy

Well-known member
Steel Soldiers Supporter
3,912
2,723
83
Location
Edmonton, Canada
Thats the pattern.....first/second......a sweet bang into third all in level , slide shifter to hilly and hold until you want it to shift instead of the trani deciding. Goose is happy not being shifted but does enjoy beating peterbilts so yes..... I shift on fridays.
It's in one of the manuals and would have helped get rpms up before the shift to 4 when fully loaded. I lengthened my linkages ......only to take the slop out.....and that helped the time between shifts. You could try that first but getting into the trani adjustment section is really the way to start. We should knock on some doors and see who kept the fancy bending tools, gauges and test stands.

The plan and design for the truck was to be used fully loaded and with the pedal to the floor. That may be all she's askin for.
 

klunk

New member
61
0
0
Location
Niagara Falls, Kanada
Nice! Very Nice!

Could you share the paint codes and source?
ok....but you can't tell anyone....

the paint is outdoor Matt latex....

the colors were matched to the krylon rattle can camo colors - green and tan

that way little pieces and touch ups can be performed with easily purchased spray cans

the colors aren't a perfect match to the true British colors but who would know

i sprayed the whole thing in the front yard....biggest model I've painted so far
 

klunk

New member
61
0
0
Location
Niagara Falls, Kanada
DSCF5214.jpgDSCF5215.jpg

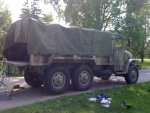
and canvas trimmed down with new grommets installed....fits good

Ohh...and its canvas for a m35....

cutting 2 strips out of it at the original seems with a shortening of 28 inches in total gives the fit shown(compare to all the excess in the earlier pics)

the bows were custom made outa steel and plug into the orginal seat brackets...with a bit of fiddling the canvas covers about 2 inches on each side of the box...a few extra grommets in the right spot and the tie-downs all get used...

saved me about $800 instead of buying a correct re-pop m135 tarp...!
 
Last edited:

klunk

New member
61
0
0
Location
Niagara Falls, Kanada
It looks very nice. I especially like the small window. Do you have a rear curtain?
I have front and rear curtains...they fit perfect and look good but I really like being able to see through the canvas when backing the truck...

heres a thought...do canvas tops hold up better when air can pass through (no curtains) or with curtains installed???

without the curtains the top appears to NOT flutter whatsoever...
 

cmpman

Member
85
7
8
Location
Manitoba Canada
And....

the outer dimension of the cylinders is identical but...I have noticed the 'piston pins' are different lengths.

the us pins are around 1/2 inch longer...do the longer pins need to used with the wider bore cylinders??
I am responding a little late to your question about the pins, but here goes.

I remember when we started getting the new larger wheel cylinders that a message came out warning us that we had to keep the proper pins with the cylinders, otherwise mixing them would cause a wheel to lock up.

Since the cylinders are different sizes, basic mechanical knowledge dictates that you had to change all four cylinders on an axle (especially the front axle) in order to keep braking even.

We used to change cylinders constantly on those old trucks, and the cylinders would get rebuilt again and again and again. I remember getting wheel cylinders that were honed so much you could see daylight past the cups. By the book, a little X was to be stamped on them each time they were rebuilt and after 3 rebuilds they were to be scrapped. Problem was nobody took the time to stamp them on rebuild.
 
Top
AdBlock Detected

We get it, advertisements are annoying!

Sure, ad-blocking software does a great job at blocking ads, but it also blocks useful features of our website like our supporting vendors. Their ads help keep Steel Soldiers going. Please consider disabling your ad blockers for the site. Thanks!

I've Disabled AdBlock
No Thanks