• Steel Soldiers now has a few new forums, read more about it at: New Munitions Forums!

  • Microsoft MSN, Live, Hotmail, Outlook email users may not be receiving emails. We are working to resolve this issue. Please add support@steelsoldiers.com to your trusted contacts.

Bus Bars Configuration Help PLEASE

jplace1011

Well-known member
462
489
63
Location
Santa Ana, CA
@Squibbly @cucvrus
@Keith_J

Today I installed a Pair of Used Bus Bars into my CUCV M1009. I labeled all the wires and Cables as to where they hook up. I think I made a Big Mistake. Video Below.

When I went to hook the batteries back up One cable sparked and the end of that cable fried plus the battery post was on fire for a second or two.

What I did first was connect the Red Cable to the Rear Battery Positive Post. Then When I went to Connect the Other Red Cable to the Negative Battery Post, of the Rear Battery, sparks flew and the post flamed up.

What have I done wrong? I’m thinking something isn’t hooked up properly. I apologize if I’m just being a genuine knuckle head.

Is there a Chart that illustrates how and where all the Cables and Wires should be hooked up to Both Bus Bars?

I do have a handful of other videos showing what’s currently hooked up to what if that helps?

Thank You again and I realize it may just be an obvious mistake. Doh!!


Here’s the Current Cable/Wire Configuration:


Positive Bus Bar
(Left to Right)
Post 1
Red Cable runs to Slave Port Grill/Front of vehicle.

Post 2
Red Cable runs to Starter.

Red Cable runs to Rear Battery Pos. Post.

Post 3
Blue & Orange Cables run to group of cables/wires.

Post 4
Black Cable crimped into Red Wire runs to group of wires.

Orange Wire (fusible link) crimped into Red Wire, runs to group of Wires.

Post 5
Red Cable runs to Neg Post of Front Battery.

Red Cable runs to Small Bus terminal near Master Brake Cylinder.

Red Cable runs back into Cab.


Neg. Bus Terminal
(Left to Right)
Post 1
Black Cable runs to Front Battery Neg Post.

Black Cable runs back into Cab.

Post 2
Small Black Wire runs to group of wires.

Black Cable runs to Slave Port at front Grill area.

Post 3
Black Cable runs to Engine Block.


Sent from my iPhone using Tapatalk
 
Last edited:

dstang97

Well-known member
1,859
31
48
Location
Clover, SC
Your bus bar does not have 2 voltages. It’s 24v the way you have it hooked up. The 12v wire that goes to you black diamond post needs to go to 12v. It’s hooked up to 24v now.
 

jplace1011

Well-known member
462
489
63
Location
Santa Ana, CA
Also you created a dead short. The + of the rear battery gets hooked up to the bus bar not the negative.
@dstang97 Hello there, thank you for the reply.

The Positive Cable for the Rear Battery is currently running from the Positive Post of the Rear Battery and the Other end is running to the Positive (Top) Bus Terminal Second Post/Screw from the Left. Is that incorrect, maybe I’m not understanding correctly.


Sent from my iPhone using Tapatalk
 

jplace1011

Well-known member
462
489
63
Location
Santa Ana, CA
Your bus bar does not have 2 voltages. It’s 24v the way you have it hooked up. The 12v wire that goes to you black diamond post needs to go to 12v. It’s hooked up to 24v now.
@dstang97 the Smaller Red Wire that is connected to the Black Diamond Post, where Extacly does the other end of that wire get connected to?
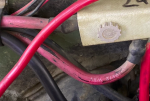
I have my finger on that wire in the Pic below. *There was another Red Cable hooked up to the same post on the Right. That’s the one I fried, so I removed it. It went from that Bolt to the Neg. Post of the Rear Battery.

The Previous Owner wrote 12Volt on the Right side (last bolt/stud). Not sure what that means or if it matters??


Sent from my iPhone using Tapatalk
 

Keith_J

Well-known member
3,657
1,323
113
Location
Schertz TX
@dstang97 the Smaller Red Wire that is connected to the Black Diamond Post, where Extacly does the other end of that wire get connected to?
I have my finger on that wire in the Pic below. *There was another Red Cable hooked up to the same post on the Right. That’s the one I fried, so I removed it. It went from that Bolt to the Neg. Post of the Rear Battery.

The Previous Owner wrote 12Volt on the Right side (last bolt/stud). Not sure what that means or if it matters??


Sent from my iPhone using Tapatalk
That wire is supposed to be connected to the front battery positive. The front battery positive is also the rear battery negative.
 

Keith_J

Well-known member
3,657
1,323
113
Location
Schertz TX
I see what happened. The wire you burned is supposed to go to the driver side 12 volt terminal block, not the 24 volt. You probably had the rear battery positive connected to the 24 volt bus, then tried to connect the back battery negative to the 24 volt bus.

Hopefully this is what happened which should mean you didn't do any other damage.
 

jplace1011

Well-known member
462
489
63
Location
Santa Ana, CA
I see what happened. The wire you burned is supposed to go to the driver side 12 volt terminal block, not the 24 volt. You probably had the rear battery positive connected to the 24 volt bus, then tried to connect the back battery negative to the 24 volt bus.

Hopefully this is what happened which should mean you didn't do any other damage.
@Squibbly @Keith_J @cucvrus

Someone made a really good point! Is it possible the Old Buss Bar was modified to 12Volts and the One I just installed is 24 Volts (stock)?

You can see 12 Volts written on the Firewall and a Black Line on the Right Side of the Cover. The Pics below are from before I changed the part out. Notice how the Red Cable runs from the Pos Post of the Rear Battery to the Top Buss Bar on the Right Side Marked 12Volt instead of running straight to the diamond black piece near the Master Brake Cylinder?

Maybe that’s a clue??

Is there a way to check the Old Buss Bar to see if it’s Modified?


Sent from my iPhone using Tapatalk
 

jplace1011

Well-known member
462
489
63
Location
Santa Ana, CA
@cucvrus Here’s the Old Buss Bar. Notice the longer piece only has 4 Holes, not 5?


Sent from my iPhone using Tapatalk
I could do two things:

1. The Old Buss Bar has a stripped Bolt, the First one on the Left. I could take the Buss Barr Apart and Replace the Bolt with one from the New Buss Bar. Then just put it all Back Together as is.

2. Or Install the Old Piece of Metal, with 4 Holes, into the current Buss Bar and remove the piece with 5 Holes.

I don’t know if these are Good Ideas, I’m just thinking out loud.

Stripped Bolt


To change the Bolt Out, I just loosen these 3 screws on the back?


Sent from my iPhone using Tapatalk
 

ezgn

Well-known member
650
1,039
93
Location
Lake Elsinore Ca.
I could do two things:

1. The Old Buss Bar has a stripped Bolt, the First one on the Left. I could take the Buss Barr Apart and Replace the Bolt with one from the New Buss Bar. Then just put it all Back Together as is.

2. Or Install the Old Piece of Metal, with 4 Holes, into the current Buss Bar and remove the piece with 5 Holes.

I don’t know if these are Good Ideas, I’m just thinking out loud.

Stripped Bolt


To change the Bolt Out, I just loosen these 3 screws on the back?


Sent from my iPhone using Tapatalk
You should replace them with the functioning ones you ordered.
 

Guyfang

Moderator
Staff member
Moderator
16,924
24,545
113
Location
Burgkunstadt, Germany
Now I am just an old generator guy. Trucks are not what I do all the time. But whenever I created a mini super nova, I found the very best thing to do is:

1. Get the schematic out. Look at it till your eyes hurt. Understand how it works, and what it shows you. Get help if need be.
2. Take off all the wires from the buss bar.
3. Trace back each wire on the schematic and by eye/hands on, if possible. KNOW where the wire comes from, (assuming will bite you in the butt) and re-hook it up in the right place. Checking twice has never hurt anyone.
4. Get things tight.
5 Connect the Pos cable to the battery first and then the Neg.

Something I tell people, is to never mark wires, or even worse, trust someone else's markings. Why, because if someone else makes a mistake, or makes a "Modification", you simply repeat it. Check everything yourself.
 

nyoffroad

Well-known member
946
692
93
Location
Rochester NY
No. The bolts on the back side hold the bus bar to the bracket. If those bolts went through to the buss bar, you would have a direct short to ground.
If you look closely you can see the bolts on the back of the mounting bar have nuts counter sunk in the plastic portion of the mount. I'd say yes, you can change it out but why? I'd just use the old bar itself in the new mount, it's not correct but if it works then who are we to judge? The PO has done a lot of modifying and unless you want to get into EVERYTHING I'd leave it alone.
 

Keith_J

Well-known member
3,657
1,323
113
Location
Schertz TX
You have the root cause identified. The prior owner cut the 24 volt bus to 4 terminals, using the 5th terminal to "make" a 12 volt. Why? Probably for a 12 volt conversion. 24 volt starters are available as well as 27SI isolated negative alternators. My bad luck with local auto parts reliability means I keep spares on hand. Ok, off my soap box.

I bet the starter is a 12 volt.
 

Squibbly

Well-known member
408
1,039
93
Location
Alabama
@cucvrus Here’s the Old Buss Bar. Notice the longer piece only has 4 Holes, not 5?


Here’s the New Buss Bar I installed, it has a piece with 5 holes


Sent from my iPhone using Tapatalk
The previous owner cut the metal piece (It's the conductor) down to 4 holes to isolate the 12V side of your top battery because he was too cheap to buy the proper cable for the truck. If you're the owner of said truck it's not an issue, because you know what you did. Edit: As @Keith_J just noted, you need to see where you starter + is connected. If it is the cable going in the downward position in the photo on that 5th post, yeah, its a 12 V starter, and the previous owner had a clever conversion to keep the 24V system and still get to use a 12V starter.

When you replaced it, and put the 5 hole bracket (conductor) on it, you connected all 5 posts (Instead of just the first 4) to the 24v and then took the negative side of the top battery and created a dead short. You essentially created a 24V welder and welded the negative cable to the post until it blew a hole through it. Normally you don't get to make that mistake and keep the skin on your fingers. Go get a lottery ticket because you're lucky.

I'm sure your generators weren't happy about it.

Replace the 5 hole plate with the original 4 hole one you took off and put it back in the same left 4 stud position, and you should be good.
I'm wondering how many other potential things got fried on the 12v side when that happened. Hopefully at worst, a fusible link.
 
Last edited:
Top
AdBlock Detected

We get it, advertisements are annoying!

Sure, ad-blocking software does a great job at blocking ads, but it also blocks useful features of our website like our supporting vendors. Their ads help keep Steel Soldiers going. Please consider disabling your ad blockers for the site. Thanks!

I've Disabled AdBlock
No Thanks