• Steel Soldiers now has a few new forums, read more about it at: New Munitions Forums!

  • Microsoft MSN, Live, Hotmail, Outlook email users may not be receiving emails. We are working to resolve this issue. Please add support@steelsoldiers.com to your trusted contacts.

CUCV - air conditioner transplant?

shkira

New member
50
0
0
Location
Central AL
Thats very cool! Much easier to not have to mess around reconfiguring the batteries to fit the evap. So when swapping over they eliminated the single 200A alt and replaced with two 100A?? Or is it now 1 200A but straight 12V? good luck
 

brazengoat06

Member
362
2
16
Location
Tulsa, OK
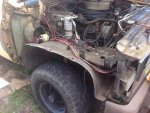
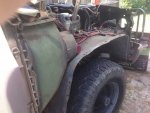
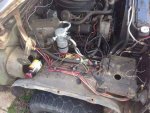
They just swapped over to the regular cucv setup including engine harness and everything. Looks identical except that the original ac hoses are sitting on the drivers side fender.
 

brazengoat06

Member
362
2
16
Location
Tulsa, OK
I'm trying to keep as close to original as I can based off of what I have. Would really prefer to have all the duvac but don't have any of that to start with.
 

shkira

New member
50
0
0
Location
Central AL
I don't know if you considered making the bracket yourself or if you don't have the time/tools I would try to find a decent metal/welding shop. When I did my reconfig to keep the twin alt and add the compressor I needed some fab work done. Don't recall the exact price I paid but he really enjoyed the project and I was happy paying a small business.
 

shkira

New member
50
0
0
Location
Central AL
SFC Deal I am sure the RV air conditioner would work. After they up armored the M998 and you couldn't put the windows down roof top units were added. I was trying to keep the look as close to original also, but I'll admit at times I was really frustrated with the PITA it was. I thought about why didn't I do down the RV air conditioner path but consider that you will have all the weight, reduced clearance height, you will have to build an internal frame to support the unit and added wind resistance from the unit hanging out in the airstream. Lastly, you will permanently have the top mounted on the back.
 
Last edited:

brazengoat06

Member
362
2
16
Location
Tulsa, OK
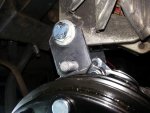
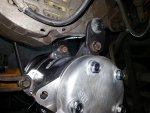
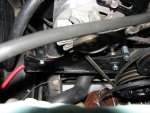
In the end the rv unit may be more of a hassle. Literally all I have to do is find a way to mount the compressor. I went to local salvage and pulled about 10 various brackets (some for specifically the compressor I bought) that I can cut and weld to hopefully come up with something
 

tbearatkin

Member
495
24
18
Location
SouthWestTennessee
I made this kind of AC for mine out of an old cooler. I had most of the parts laying around. Works well enough. Still drive with windows down but have cool air from this blowing on me. You can use a 5 gallon bucket as well. I made one for work out of bucket. The Navy base will not let us use 110 volt fans at our desk and the set point in the building is 78 (at the thermostat) so I use a five gallon bucket since it is smaller than the cooler. Of course PWD does not know I use the refrigerator at work to freeze the gallon jug of water and use their power to recharge my battery pack for my fan. However the fan is not plugged into 110V. http://www.youtube.com/watch?v=ITtlxjvLQis
 

ODFever

Madness Takes Its Toll...
Steel Soldiers Supporter
2,011
73
48
Location
Orlando, FL
My father-in-law and I had to rebuild my A/C system again. The gaskets on the back of my HR-6 compressor were shot, and blew out a substantial amount of R-12. :-(
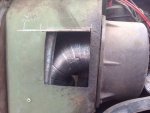
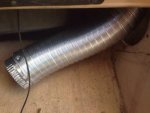
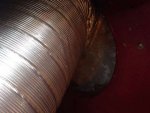
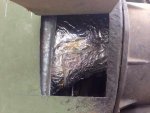
I wanted to use the 3 cans of Freeze 12 I had in my garage. We evacuated the system, and attempted to charge it with the Freeze 12. One of the gauges had a bad seal and leaked out over a can of Freeze 12. This led to another dilemma: order 4 cans of R12a, or convert the system to R134a. When we rebuilt the A/C system 3 years ago, we used oil compatible with both systems. We went with converting it to 134a to make it easier to work on in the future. After we got everything buttoned up, we discovered that the air was cold but not blowing hard. I replaced the blower motor ($30). Still didn't accomplish much. We pulled the blower motor off and discovered that there was no recirculate A/C setting. The air was being drawn from the passenger side cowl, and there was no cabin air circulating through the blower motor. This discovery led to a few major engineering projects and a couple trips to Home Despot. We installed a 4" x 6' flex dryer vent hose inside the blower motor, and ran it to the passenger side kick plate. This only solved half the problems. We hooked the vacuum lines up to a vacuum source, ran temporary power, and tested the blower motor. It still wasn't blowing a lot of air. We took the dash apart. It turns out the the geniuses that installed the ducts in the dash couldn't get the ducts to fit together in the center of the dash. They slapped a couple of strips of fabric duct tape to close the 3/8" gap between the upper and lower sections. My father-in-law ripped the duct tape off, installed some foam tape and screws to secure the ducts together, and sealed the edges with foil duct tape. He also discovered that the dampers inside the ducts were either hooked up incorrectly, or not hooked up at all. He figured out the correct duct positions and got it working!!
 
Last edited:

ODFever

Madness Takes Its Toll...
Steel Soldiers Supporter
2,011
73
48
Location
Orlando, FL
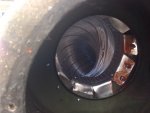
As you can see from the pictures, we cut a hole in the cowl with a Dremel to install the vent line. After we installed the dryer vent line, we insulated it. The A/C works so well that sometimes I actually have to set the fan to a lower speed because it's so cold! :)
 
Top
AdBlock Detected

We get it, advertisements are annoying!

Sure, ad-blocking software does a great job at blocking ads, but it also blocks useful features of our website like our supporting vendors. Their ads help keep Steel Soldiers going. Please consider disabling your ad blockers for the site. Thanks!

I've Disabled AdBlock
No Thanks