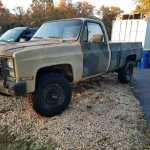
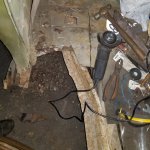
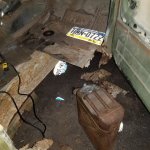
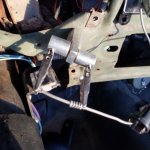
Thanks! I got the projects with these 2...most is getting it to not break as much as possible since these sat so much...I got the front and rear pans from a seller on Ebay hope I am allowed to post who but it was classicparts4u is the store name...it took several weeks to get them and they are huge so they will go all the way up to the fuse box plus all the way back to the back seat...0.40 steel thickness if I remember right too...I think if I was just wanting this to play with I probably would have at least attempted to find a new tub that wasn't bad at all...but that wasn't what I am doing with the blazer! The truck has minimal rust at best but a huge dent in the bed from the yard forklilft.Great thread so far. What company did you get the Blazer panels from? I am evaluating a new tub vs fixing mine currently.
-
Steel Soldiers now has a few new forums, read more about it at: New Munitions Forums!
CUCV Heaven, My build of a 1009 and 1008
- Thread starter WWRD99
- Start date

More options
Who Replied?Been an ok week getting a few small things done on both Ms right now...today is very rainy though so not much will get done today...the blazer got new eyelit ends crimped on so the original style clamps could be put on with the covers...the blazer got a harness donation from the one left in the truck in the form of getting rid of the stuck ford starter relay and used the original plug for the relay...so now it starts with the key and not touching the stuck relay with the solenoid wire run through the floor...ordered some studs and gaskets for the air cleaner housing which were stripped out...we'll get into the passenger side floor removal Sunday!
Question about the one pic with the engine harness has something taped up in it...is that the diode? Not sure why it's taped up...might look at getting one of those since I wasn't brave enough to remove the tape!


Sent from my SM-G955U using Tapatalk
Question about the one pic with the engine harness has something taped up in it...is that the diode? Not sure why it's taped up...might look at getting one of those since I wasn't brave enough to remove the tape!


Sent from my SM-G955U using Tapatalk
vanaisa
Well-known member
- 273
- 367
- 63
- Location
- Tallinn, Estonia
This should be water in fuel diode. In my 1008 it was burned. Removed it and put straight wire there. I dont remember, was WIF light worked before, but after diode removal light works as should - lights about half second when key in run position.
I thought it was a diode but couldn't remember for what! The WIF light does work now so it's probably ok then right!This should be water in fuel diode. In my 1008 it was burned. Removed it and put straight wire there. I dont remember, was WIF light worked before, but after diode removal light works as should - lights about half second when key in run position.
Sent from my SM-G955U using Tapatalk
So got a new toy for bodywork...the spot welder that attaches pins for a puller...I can't believe how great this thing worked...got a 6 inch smash on the truck pulled to about a quarter inch...little more to do tomorrow but it won't take much. Tires should be here Friday!


Sent from my SM-G955U using Tapatalk


Sent from my SM-G955U using Tapatalk
So the kiddo started cutting out the passenger side floor tonight...the structure is way better on this side but still has about 20 patches that were welded on top of the original floor...It'll be nice not to have to fabricate that stuff this time and just clean up and fit new floors...rockers are gone up to the front cab mount but it is fine as well as the rear mount...should be a straight forward repair. He ran out of cutting wheels so he's done for the night. The truck got it 5 tires Friday...of which 3 rims weren't bent to bad...the spare has about 15 ounces on the one side so I'll be getting it straightened...can see m the big dent in the drivers side looks much better from this angle too. So much fun!! He uses the gas can for a seat.


Ok...got a bunch done the last couple days...removed the old wiring for the lights that were on the plow...my lights worked kinda for a few times but never really came on good...dull...pointing to a ground issue...got to a point that they didn't work at all...anywhere...before the light harness removal...the ground under the dash looks good...low voltage drop...I found one on the left headlight that's ok too...what I found is the headlight switch gets power at several wires but once you pull the switch out the power goes away completely...I tested the blazer and it does not do that and all the lights work on it?? I swapped the light switch but it still does the same thing...I'm gonna have to hunt down why it does that!! Since these are simple circuits it shouldn't be to crazy to find I hope! Having another to test from certainly helps!! If you all have any ideas throw them my way too...got the rest of the floor cut out in the blazer as well...por-15 time!!


Sent from my SM-G955U using Tapatalk


Sent from my SM-G955U using Tapatalk
I found the issues with most of the lights! I managed to get the one under the dash to work...gauge lights still aren't on but I'll take the cluster out tomorrow and check the bulbs...there were many things wrong but the final fix was the back feed I played heck to find...turns out the left front turn signal socket was missing its ground...dang thing...the 194 bulb next to it had volts on both pins so it just took a few bulb pulls and I found it...brake lights and reverse are all in good shape...I'm in need of better headlight bulbs yet and hope to find a good led conversion kit...what's the common mount for a tag and light?? got 2 coats of por-15 on the floor too.


Sent from my SM-G955U using Tapatalk


Sent from my SM-G955U using Tapatalk
- 8,048
- 20,412
- 113
- Location
- Charlotte NC
.I found the issues with most of the lights! I managed to get the one under the dash to work...gauge lights still aren't on but I'll take the cluster out tomorrow and check the bulbs...there were many things wrong but the final fix was the back feed I played heck to find...turns out the left front turn signal socket was missing its ground...dang thing...the 194 bulb next to it had volts on both pins so it just took a few bulb pulls and I found it...brake lights and reverse are all in good shape...I'm in need of better headlight bulbs yet and hope to find a good led conversion kit...what's the common mount for a tag and light?? got 2 coats of por-15 on the floor too.


Sent from my SM-G955U using Tapatalk
Really interesting how a little corrosion will make life miserable.
Grounds.
We talk about them all the time and you definitely found the problem!
I should have known it was somewhere in the left light circuit!! The left signal on the dash was lit up...shows it was back feeding into the system...the dash lights turned out to be a haphazard install of the harness on the back of the cluster...a bunch of the printed circuit was crushed and not making contact with the harness...have to very careful installing it straight in and no other way or the ends of the circuit board get pushed out or even crossed...I found that the power loss at the light switch was from the fuse in the fuse box...was not rusted but corroded and not making contact when a load was put on it...I moved it around and now the lights work on the dash and outside all the time....I will file the contacts in the fuse box and replace all the fuses...the one fun thing I found was replacing the bulbs in the cluster...I have a box of bulbs that I thought were new but a few turned out not to be...dang ones I put in for the gen lights were both burned out...I think I had the cluster out 4 times...each time taking out the harness plug from the cluster which with the printed board that probably doesn't have much life in it left...another thing I found was a light that has a very small single pole bulb in it that had the center wire, tensioned by a spring, broken off behind the dash...I repaired the center wire but I don't know where it goes...I didn't take the best pic of it but I was thinking it goes in the cig box but really can't remember if they had it...I can't find it in the blazer...anyhow I have 2 more known projects left until I take the SF-97 in to get the tag and title work done...oil cooler lines and driveshaft...still not sure which way I am going to go with the tag yet or insurance...every step in one closer to driving it!.
Really interesting how a little corrosion will make life miserable.
Grounds.
We talk about them all the time and you definitely found the problem!

It's been a bit since my last actual known repair but finally got the last 3 done today...I replaced the oil cooler lines which actually went very easy...the lines are not bent the same as stock so I'll have to make my own mount for the back of the engine...the other was replacing the driveshaft as the old one had met the yard forklift several times...fun using the front grill as a bench clamped on with a furniture vice...ball joint press and worked fine...the final was replacing the very bent wheels with a new set of Ford 7 inch I found NOS for a huge sum of 50$...I don't think they knew what they fit...just had a ton of dust on them...2 balanced out with 2 ounces...the others were around 4 but not a big deal on a nobby tire...test drive tomorrow morning then off to get the registration and title work done!


Sent from my SM-G955U using Tapatalk


Sent from my SM-G955U using Tapatalk
- 8,048
- 20,412
- 113
- Location
- Charlotte NC
.It's been a bit since my last actual known repair but finally got the last 3 done today...I replaced the oil cooler lines which actually went very easy...the lines are not bent the same as stock so I'll have to make my own mount for the back of the engine...the other was replacing the driveshaft as the old one had met the yard forklift several times...fun using the front grill as a bench clamped on with a furniture vice...ball joint press and worked fine...the final was replacing the very bent wheels with a new set of Ford 7 inch I found NOS for a huge sum of 50$...I don't think they knew what they fit...just had a ton of dust on them...2 balanced out with 2 ounces...the others were around 4 but not a big deal on a nobby tire...test drive tomorrow morning then off to get the registration and title work done!


Sent from my SM-G955U using Tapatalk
Great!! Looking Good for Sure...
What bent drive shaft that was bent with a forklift at GP? Say it ain't so!
They bend them all!!! I don't understand it either since they all have the same key and they have the slave cable to jump start them...mine didn't have keys or batteries like the other 10 that they had that month! They spared none from being bent..
Great!! Looking Good for Sure...
What bent drive shaft that was bent with a forklift at GP? Say it ain't so!
I think we can see the end of the tunnel soon...getting the passenger side floor fit and painted is a great feeling...I have a heated gym so I just put down a pallet with plastic to paint on...to cold to paint otherwise...this is our second quart of por-15...we use a bunch wherever we can...weld time later this week!

Sent from my SM-G955U using Tapatalk

Sent from my SM-G955U using Tapatalk
Well...the passenger side is a little worse than the drivers side was...cut the mount and side out for the seat belt...the entire side was rusty about 5 inches up...so out it came...I build the replacement tomorrow from a new peice of steel I got today...I'm getting pretty good at fabricating body parts you can't buy! Good bit to make on this side!


Sent from my SM-G975U using Tapatalk


Sent from my SM-G975U using Tapatalk
acthomp781
Member
- 79
- 30
- 18
- Location
- Massillon, OH
Thanks for the updates and pics
The new part I made was painted early this morning and stitched in this afternoon...nice having a heated place to do that since it is pretty cold out...I'm going to put the door back on after I do just a few spots to hold the outer rocker in place to make sure everything lines up...having the middle body mount cut off makes the side move a good bit so now is the time to check! Then I can finally weld the floor pan in...which is very easy!

Sent from my SM-G975U using Tapatalk

Sent from my SM-G975U using Tapatalk
ezgn
Well-known member
- 650
- 1,039
- 93
- Location
- Lake Elsinore Ca.
It looks like a piece of art. Good job.The new part I made was painted early this morning and stitched in this afternoon...nice having a heated place to do that since it is pretty cold out...I'm going to put the door back on after I do just a few spots to hold the outer rocker in place to make sure everything lines up...having the middle body mount cut off makes the side move a good bit so now is the time to check! Then I can finally weld the floor pan in...which is very easy!
Sent from my SM-G975U using Tapatalk
Modern art right!! Gotta sand off the top of the weld dabs then put a nice bead down the entire stitch...I think we'll put seam sealer over all of them to dress it up nice...I'll get to welding more tomorrow!!It looks like a piece of art. Good job.
ezgn
Well-known member
- 650
- 1,039
- 93
- Location
- Lake Elsinore Ca.
Come on Man, Your killing me smalls.Modern art right!! Gotta sand off the top of the weld dabs then put a nice bead down the entire stitch...I think we'll put seam sealer over all of them to dress it up nice...I'll get to welding more tomorrow!!
- 112,443members
- 166,119threads
- 2,339,554posts
- 868online users
