• Steel Soldiers now has a few new forums, read more about it at: New Munitions Forums!

  • Microsoft MSN, Live, Hotmail, Outlook email users may not be receiving emails. We are working to resolve this issue. Please add support@steelsoldiers.com to your trusted contacts.

Dark Seas M1008 Project

DarkSeas

Well-known member
204
311
63
Location
Leland, N.C.
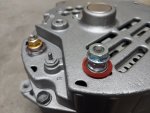
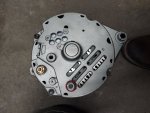
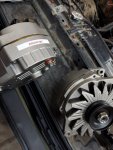
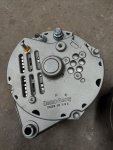
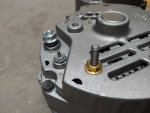
I've come with pictures, as promised. 2 angles of each alternator:
20220923_172806.jpg20220923_172820.jpg20220923_172850.jpg20220923_172835.jpg

Can anyone identify which is my passenger side (putting off 24V in series) and driver side (12V )?

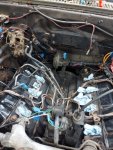
Also, pretty sure we put the vacuum pump back facing the right way, can anyone confirm?

20220923_173306.jpg

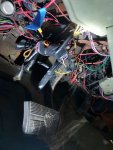
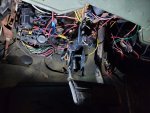
Oh and here's the other end of the GP harness that sits under the dash. That clumped bundle of wires in the center is where that harness ends. You know, where the card should probably be:


20220923_172933.jpg

Some more under-dash carnage...

20220923_172952.jpg

Somehow all of that kind of works. Works enough to get the motor to start from the key. I'm not really sure what all works on the dash or not. Problem 1 is getting her running again. Problem 2 will be sorting out this mess and making it right. I will probably have to pull everything out and do it from scratch again like I did the motor, that's okay with me.
 

87cr250r

Well-known member
1,267
1,991
113
Location
Rodeo, Ca
The alternator with the red insulator on the stud is the isolated ground alternator. That one goes on the driver side. As for the vacuum pump orientation, you can rotate it and orient it whichever way you want. If it won't drop back onto the oil pump drive shaft, just bump the starter until it does. You don't have a starter available to do this, put a wrench on the 24 mm bolt on the front of the crankshaft.
 

DarkSeas

Well-known member
204
311
63
Location
Leland, N.C.
The alternator with the red insulator on the stud is the isolated ground alternator. That one goes on the driver side. As for the vacuum pump orientation, you can pull it out and orient it whichever way you want. If it won't drop back onto the oil pump drive shaft, just bump the starter until it does. You don't have a starter available to do this, put a wrench on the 24 mm bolt on the front of the crankshaft.

I appreciate it.

Wait, the isolated-ground alternator is driver side? I thought the driver side one has the ground to engine while the passenger side has the isolated ground/internal ground? Or am I misunderstanding what an isolated ground is?
 

Keith_J

Well-known member
3,657
1,323
113
Location
Schertz TX
The alternator with the red insulator on the stud is the isolated ground alternator. That one goes on the driver side. As for the vacuum pump orientation, you can rotate it and orient it whichever way you want. If it won't drop back onto the oil pump drive shaft, just bump the starter until it does. You don't have a starter available to do this, put a wrench on the 24 mm bolt on the front of the crankshaft.
Backwards. Driver side is front battery.

Right side alternator is back battery. The red wire with white stripe goes to the negative terminal on the alternator, this is the one flush on the back end of the alternator.
 

87cr250r

Well-known member
1,267
1,991
113
Location
Rodeo, Ca
The alternator adds to whatever voltage it senses. The first alternator has its negative terminal connected to its case, so bolting it to the engine, attaches it to ground. If we say ground is zero volts, the alternator adds 12 volts and that charges the first battery. The second alternator has its negative isolated from its case. So it senses wherever that negative wire lands. The negative wire lands on the positive 12 volt terminal of the first battery and the alternator adds 12 volts for a total of 24 volts on the second battery.

As for which alternator is which, take Keith J's word for it, I'm attempting to do a single alternator conversion at the moment so I don't have a dual setup to look at.
 

DarkSeas

Well-known member
204
311
63
Location
Leland, N.C.
The alternator adds to whatever voltage it senses. The first alternator has its negative terminal connected to its case, so bolting it to the engine, attaches it to ground. If we say ground is zero volts, the alternator adds 12 volts and that charges the first battery. The second alternator has its negative isolated from its case. So it senses wherever that negative wire lands. The negative wire lands on the positive 12 volt terminal of the first battery and the alternator adds 12 volts for a total of 24 volts on the second battery.

As for which alternator is which, take Keith J's word for it, I'm attempting to do a single alternator conversion at the moment so I don't have a dual setup to look at.

No worries, I appreciate the input man. I'm still learning so I ask a lot of questions before I do stuff. Especially this charging system wiring, I've gone over the diagrams and traced all the charging routes about 20 times until it made sense.

Just looking at the alternators I kind of forgot which was which. As long as someone could tell me which one was isolated ground I knew that sucker went to the passenger side charging the rear battery while the other would charge the front battery. I thought Tom or Jr might know which was which and they looked at me and said "we told you you shoulda put a label on one of them..." hahaha. They did, I didn't. But the backs seem unique enough to distinguish.
 

DarkSeas

Well-known member
204
311
63
Location
Leland, N.C.
Backwards. Driver side is front battery.

Right side alternator is back battery. The red wire with white stripe goes to the negative terminal on the alternator, this is the one flush on the back end of the alternator.
Keith, do you mean the one with the red ring on it? That's gen 2 charging the rear battery going to bus bar then rear batt?
 

Keith_J

Well-known member
3,657
1,323
113
Location
Schertz TX
Keith, do you mean the one with the red ring on it? That's gen 2 charging the rear battery going to bus bar then rear batt?
Yes, the alternator with the red ring on the outer terminal is isolated negative.

The other alternator has this terminal without any isolation so the case is now negative, making it a negative ground which is the driver side. The large black wire connecting to this terminal has its other end connected to a stud on the intake manifold.

Careful on the passenger side alternator, there are two large red wires with ring terminals. One is solid red, the other red with a white stripe. Best to test and make sure. Multimeter set to ohms, lowest scale. The solid red should be a direct connection to the top firewall bus bar, +24 volts. The red with white stripe connects to the engine harness "diamond" block near the glowplug solenoid.
 

DarkSeas

Well-known member
204
311
63
Location
Leland, N.C.
Yes, the alternator with the red ring on the outer terminal is isolated negative.

The other alternator has this terminal without any isolation so the case is now negative, making it a negative ground which is the driver side. The large black wire connecting to this terminal has its other end connected to a stud on the intake manifold.

Careful on the passenger side alternator, there are two large red wires with ring terminals. One is solid red, the other red with a white stripe. Best to test and make sure. Multimeter set to ohms, lowest scale. The solid red should be a direct connection to the top firewall bus bar, +24 volts. The red with white stripe connects to the engine harness "diamond" block near the glowplug solenoid.
Perfect keith, thank you so much. Yeah, definitely don't want to mix up those red/red and white wires. That would be pretty catastrophic. I have both labeled with tape right now but I will label the alternators in the morning and double check my tape labels to your comment to make sure I didn't mix those up.
 

DarkSeas

Well-known member
204
311
63
Location
Leland, N.C.
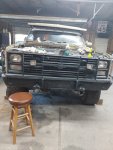
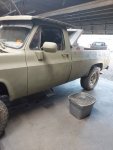
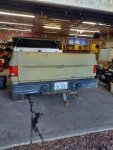
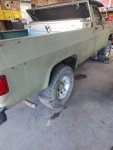
Because everyone here is so kind (and because I've been away for too long) I decided to take a few more glamour shots of the old girl as she currently sits.

20220923_173834.jpg

20220923_173854.jpg20220923_173911.jpg

Yes I see that trail of fluid above. The new PS pump had some residual fluid in its lines. Left a lovely little snail trail for us hahaha.

20220923_173923.jpg

I swear, she leaks but a lot of those stains aren't mine! The guys do a lot of side work on motorcycles, trucks, and family vehicles in this garage.

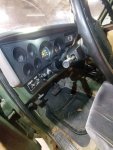
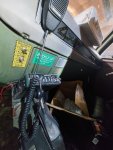
I took some pics of the inside of the cab too to show some of the quirks off. He's got a nice CB radio hooked up, and the 4x4 logo on the dash is actually a small led cluster that works as a cab light. Another switch is for the LED blocks on the front grille... he told me before he sold it that he couldn't get the headlights to dim, they were always on high, and people constantly flashed their beams at him. So he went ahead and got two small pod LEDs so when people flashed his eyes he could show them something a little more bright. Bright in this case meaning lumens not IQ related. The GP button is the small black button left of the steering column.

20220923_173108.jpg
20220923_173143.jpg

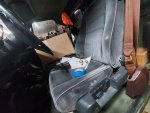
I almost forgot the piece de resistance... memory foam power seats out of a volvo. They're actually pretty nice, all things considered. Don't mind the pile of parts back there.

20220923_173220.jpg
 

cucvrus

Well-known member
11,474
10,441
113
Location
Jonestown Pennsylvania
I've come with pictures, as promised. 2 angles of each alternator:
View attachment 880256View attachment 880257View attachment 880258View attachment 880259

Can anyone identify which is my passenger side (putting off 24V in series) and driver side (12V )?

Also, pretty sure we put the vacuum pump back facing the right way, can anyone confirm?
View attachment 880260

Oh and here's the other end of the GP harness that sits under the dash. That clumped bundle of wires in the center is where that harness ends. You know, where the card should probably be:

View attachment 880261

Some more under-dash carnage...

View attachment 880262

Somehow all of that kind of works. Works enough to get the motor to start from the key. I'm not really sure what all works on the dash or not. Problem 1 is getting her running again. Problem 2 will be sorting out this mess and making it right. I will probably have to pull everything out and do it from scratch again like I did the motor, that's okay with me.
Strange thing is I see vehicles like this all the time. Everyone is a mechanic and excels at stereo installation. The add this and add that and then they wonder why things go south quickly. When I bought used vehicles for daily drivers, I would never buy one that had anything changed from stock. I saw my share of hacked up stereo equipment, exhaust modifications, and emission systems that were by passed and disconnected. When I get a vehicle that I feel like fixing and selling the first thing I do is get the trash can and wire cutters out. I eliminate the hacked wiring and repair what I can. Then I head to the YOUPULLIT and get the correct items I need to make it nice again. It sells nice quickly. If I can't fix it, I sell it to the YOUPULLIT . I have a season pass ticket and front row seat at the YOUPULLIT. Take Care Good Luck. Happy Days are ahead. Ripping thru the mud, crud and back woods in a CUCV is loads of fun. Ask me how I know. I pushed several CUCV's to the maximum level of Off Road. I found the weakest link is deep water and soupy mud.
 

DarkSeas

Well-known member
204
311
63
Location
Leland, N.C.
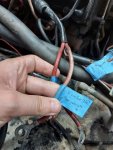
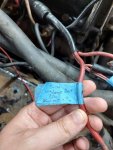
@Keith_J I told you I'd double check it! I had it labeled right, but always good to check it.

Red/white to bus bar, red to harness block.

20220924_140923.jpg
20220924_140939.jpg

I also labeled BOTH alternators. Yanno, at this point I just anticipated that if I only labeled one, the day would come to install the alternators and the label would have fallen off by then.... and I'd be back digging through my thread re-sorting them out. I labeled both, only one label needs to survive and I'm good :grd:

20220924_141212.jpg

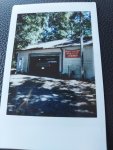
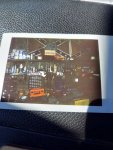
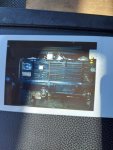
Also, side note. Took some pictures of the garage on a mini polaroid camera I had lying around. It's Jr's birthday cookout today, and I am putting a little display box together for his dad's last beer he's been carrying around loose for almost 10 years. He and his dad used to work on cars and trucks together in the garage where I've got my CUCV sat. He was a big Chevrolet fan, I'm sure he would have been proud to see the old CUCV sitting in his garage.

I'm a little late to the party, just trying my best to channel my inner kindergarten arts and crafts skills.... and not glue my fingers together with gorilla glue...

Have a great weekend everyone!


20220924_143154.jpg20220924_143143.jpg20220924_143206.jpg20220924_144504.jpg
 
Last edited:

DarkSeas

Well-known member
204
311
63
Location
Leland, N.C.
Hurricane (tropical storm) Ian interrupting my plans to go work on the CUCV. It's about to start coming down and it's gonna be a little rough tomorrow. Shouldn't hit us too hard (SE-coastal NC), the garage and the CUCV will live. I'm still pondering about battery cables... I want to do these as best I can so I don't have to redo it later.

Any recommendations for measuring how long I need each cable? These are my guesses for the cables I'm looking to replace:

1. Between the batteries (12V) - I'm thinking 2ft
2. Between the batteries and bus bar (24V) - I'm thinking 3ft
3. Between the bus bar and starter (24V) - I'm thinking 3ft-4ft
4. Between the bus bar and resistors (24V) - 2ft
5. Between the resistors and GP relay block (12V) - 3ft
6(?) I might need to replace the wire between the engine wiring harness block to the neg post of the back battery (12V, charging circuit for front battery), or is this something already on the harness?

Stay safe, fellow southeastern folks.
 

ezgn

Well-known member
650
1,039
93
Location
Lake Elsinore Ca.
Hurricane (tropical storm) Ian interrupting my plans to go work on the CUCV. It's about to start coming down and it's gonna be a little rough tomorrow. Shouldn't hit us too hard (SE-coastal NC), the garage and the CUCV will live. I'm still pondering about battery cables... I want to do these as best I can so I don't have to redo it later.

Any recommendations for measuring how long I need each cable? These are my guesses for the cables I'm looking to replace:

1. Between the batteries (12V) - I'm thinking 2ft
2. Between the batteries and bus bar (24V) - I'm thinking 3ft
3. Between the bus bar and starter (24V) - I'm thinking 3ft-4ft
4. Between the bus bar and resistors (24V) - 2ft
5. Between the resistors and GP relay block (12V) - 3ft
6(?) I might need to replace the wire between the engine wiring harness block to the neg post of the back battery (12V, charging circuit for front battery), or is this something already on the harness?

Stay safe, fellow southeastern folks.
Get a Temco Hammer Lug Crimper at Amazon, buy the wire at your favorite supplier by the foot, get the copper connectors, and make your own. The Temco crimper is inexpensive and is as good a crimp as you can get. Also get the Military style battery connectors so you don't have to remove the connector everytime you want to disconnect the batteries.
 

DarkSeas

Well-known member
204
311
63
Location
Leland, N.C.
Get a Temco Hammer Lug Crimper at Amazon, buy the wire at your favorite supplier by the foot, get the copper connectors, and make your own. The Temco crimper is inexpensive and is as good a crimp as you can get. Also get the Military style battery connectors so you don't have to remove the connector everytime you want to disconnect the batteries.
Love an opportunity to learn. Looks easy enough, I'll get it done! It'll feel better doing it myself.
 

ezgn

Well-known member
650
1,039
93
Location
Lake Elsinore Ca.
Love an opportunity to learn. Looks easy enough, I'll get it done! It'll feel better doing it myself.
I own one and have made all my battery connections and other type connections. You will own the tool for life. I started out making one connection and then cut it apart and the wires becomes one solid piece of material. You can not distinguish the individual wires. Great tool, you will be impressed. Get the military lugs for the batteries.
 

DarkSeas

Well-known member
204
311
63
Location
Leland, N.C.
I own one and have made all my battery connections and other type connections. You will own the tool for life. I started out making one connection and then cut it apart and the wires becomes one solid piece of material. You can not distinguish the individual wires. Great tool, you will be impressed. Get the military lugs for the batteries.
I also picked me up a klein crimper/cutter and irwin wire strippers. Figure they will also come in handy. What do you mean by military lugs? Are those for a specific kind of battery, cause right now I just have two old diehard gold batteries with top posts
 

ezgn

Well-known member
650
1,039
93
Location
Lake Elsinore Ca.
I also picked me up a klein crimper/cutter and irwin wire strippers. Figure they will also come in handy. What do you mean by military lugs? Are those for a specific kind of battery, cause right now I just have two old diehard gold batteries with top posts
https://a.co/d/doktX1v
 

ezgn

Well-known member
650
1,039
93
Location
Lake Elsinore Ca.
I also picked me up a klein crimper/cutter and irwin wire strippers. Figure they will also come in handy. What do you mean by military lugs? Are those for a specific kind of battery, cause right now I just have two old diehard gold batteries with top posts
You bolt the lug down on the battery and you connect your cables with ring terminals. If you need to disconnect the battery you don't have to disconnect the lug from the battery all the time and the lug will remain in tact forever.
 
Top
AdBlock Detected

We get it, advertisements are annoying!

Sure, ad-blocking software does a great job at blocking ads, but it also blocks useful features of our website like our supporting vendors. Their ads help keep Steel Soldiers going. Please consider disabling your ad blockers for the site. Thanks!

I've Disabled AdBlock
No Thanks