• Steel Soldiers now has a few new forums, read more about it at: New Munitions Forums!

  • Microsoft MSN, Live, Hotmail, Outlook email users may not be receiving emails. We are working to resolve this issue. Please add support@steelsoldiers.com to your trusted contacts.

Finally bought a MEP-831a

AfghanVeteran2010

Active member
Steel Soldiers Supporter
293
29
28
Location
Odessa/Texas
Hello all,

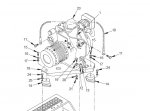
I've decided to fashion a engine lifting cable and mount it. Reason being I'm going to go threw this unit with a fine tooth comb. I'm going to test every part according to the TM 9-6115-639-13&P. I am on page WP 0078 I have already pulled muffler assembly as part of equipment condition. I am on repair or replace procedure its the only step for installing the lifting cable after step one ill go to removal procedurs. Repair or replace procedure states "1. Replace engine lifting cable (Figure 1, Item 10) on generator set engine assembly (23) using screws (11)."
Figure .1 WP0078.jpg
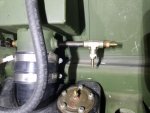
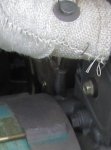
Its hard for me to tell where the mounting screw for the cable is on rear on engine so I looked at pictures on other sets for reference.
rear cable area.jpg
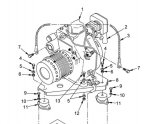
Is it possible to mount with the PMA attached? It states screws (11) thats a M6x20mm the rear is a different size M8. The TM says in parts information WP0088 that it the exact same part.
partsdia.jpg

parts list.jpg
Is this a error on my part or a TM error?

Thanks
 

AfghanVeteran2010

Active member
Steel Soldiers Supporter
293
29
28
Location
Odessa/Texas
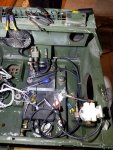
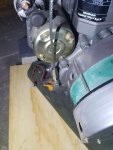
I attempted to remove rear mounting bolt and was unable to remove due to tight clearance. I'm thinking about placing the cable next to the bolt on rear dip stick, would there be any issues doing this?
20161122_074522.jpg20161122_074714.jpg
Thanks
 

AfghanVeteran2010

Active member
Steel Soldiers Supporter
293
29
28
Location
Odessa/Texas
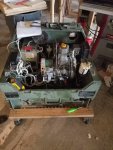
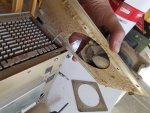
Pulled the engine out today I bolted the rear cable right above rear dip stick. The chain hoist was a wise investment, beats manually lifting it. I also placed a leftover hose that has been bent and tapped on the injection pump to help prevent anything from getting in it.

20161123_185736.jpg20161123_185800.jpg

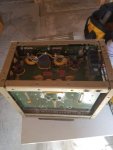
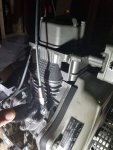
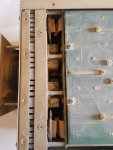
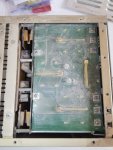
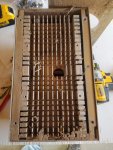
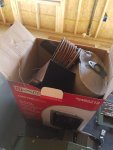
I also pulled the Frequency Converter, this thing built like a tank. I'm going to have to clean out the dirt, mud, grass, bugs, out of this thing. A lesson learned don't put this set near crab grass, just don't do it lol. Had a shoot of it going threw bottom of fan to the voltage selector switch. Has anyone tore one of these down. Biggest question is there caps in this box I don't want to find out the hard way. I did take of the side and bottom to take a look, really dirty inside. I keep thinking that this dirt will hold on to moisture and cause it to not work properly.

20161123_122554.jpg20161123_122544.jpg20161123_123510.jpg20161123_123520.jpg

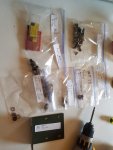
I have been storing the small parts in zip locks with a label on it, including WP number.
20161123_124651.jpg20161123_124711.jpg

Thanks
 

Guyfang

Moderator
Staff member
Moderator
17,029
24,888
113
Location
Burgkunstadt, Germany
You look like its all under control. Do not forget, if a part is wet, a zip lock will keep moisture in, so maybe leave the bag open a while.
 

Guyfang

Moderator
Staff member
Moderator
17,029
24,888
113
Location
Burgkunstadt, Germany
I just posted in the manuals upload section simple instructions on how to setup and adjust the governor for the MEP-831A. I think its easier to follow then the TM, and if you print it out, (its one page) easier to look at then the TM or computer screen. Got it from a "friend". Thanks dude!
 

AfghanVeteran2010

Active member
Steel Soldiers Supporter
293
29
28
Location
Odessa/Texas
Thanks Guyfang for the "simple Governor setup and adjustment instructions", going to be using that soon. I have completely reassembled the gen set, I ended up changing the fuel return line to a 3/16" line. Wanted to change to a more common fuel line size and I had it on hand, bought some fitting need for change.
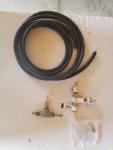
20161128_121034.jpg20161128_144307.jpg20161128_173619.jpg20161202_095345.jpg


I replaced the filters on the pumps as well, and replaced the oil pressure switch due to it leaking. Fuel level switch was replaced too, the low fuel was not working on the float. I cleaned out the frequency converter as well.
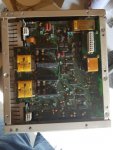
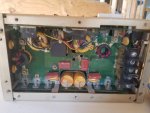
20161128_112955.jpg20161128_113014.jpg20161128_115415.jpg

After I had it all put back together I pulled out the PMCS check list. I reattached the battery and disconnected the primary fuel pump. Hooked up aux fuel to a fuel can and filled tank to about 1/2 after that, I reconnected the primary fuel pump and observed for leaks. I allowed this to prime for about 5 mins, during this process i was going threw check list. Turned it over fired right up, governor system needs some adjusting kinda likes to surge a bit. This is to be expected after pulling the engine, I went ahead and allowed the unit to run for around 10 mins. Then I applied a 2800 load to see if it will hold the load, it holds it the load. Now to the remaining issue this was present before the tear down, when under load it puts out black smoke. The TMs says:


18. ENGINE EMITS BLACK SMOKE (Unit-Level Troubleshooting)(TM 9-6115-639-13&P*)

Black smoke is emitted from exhaust pipe.

Troubleshoot in accordance with TM 9-2815-257-24.

Note: before i jump to that TM lets see what Direct Support Level says.


8. ENGINE EMITS BLACK SMOKE (Direct Support Level Troubleshooting)(TM 9-6115-639-13&P*)
a. Check for clogged, sticking, or worn fuel injector nozzle.

b. Check fuel injection timing.

Adjust in accordance with TM 9-2815-257-24.


8. ENGINE EMITS BLACK SMOKE (Unit-Level Troubleshooting)(TM 9-2815-257-24)
a. Check for clogged or dirty air filter. Remove and replace air filter (Para. 3-16).

b. Check for clogged, sticking, or worn fuel injector nozzle. Remove and replace fuel injector (Para. 3-14).

c. Refer trouble to direct support maintenance level.

Air filter is clean as can be, brand new.


7. ENGINE EMITS BLACK SMOKE (Direct Support Level Troubleshooting)(TM 9-2815-257-24)

a. Check injection timing (too slow) (Para. 4-11). Adjust fuel injection pump timing by removing shims (Para. 4-11).

b. Refer trouble to general support maintenance level.


After reading that seem like it points to an injector issue. Looks like I'm going to watching some Youtube on how to check a injector. The fuel I'm using is Diesel #2 around 8 months old, no treatment. Any help would be greatly appreciated.
 

Korgoth1

New member
191
5
0
Location
radford, va
How many hours on that injector and pump? I believe around 1000 they are supposed to be replaced. Also check all filters including air filter. It probably needs to be loaded down for a few hours solid to cook the carbon out.
 

AfghanVeteran2010

Active member
Steel Soldiers Supporter
293
29
28
Location
Odessa/Texas
Hour meter reads 16, doesn't mean that's the real hours on engine. Air filter is brand new. The two fuel filters that are on fuel pumps are new as well, the fuel water separator is the one that came with it. As for cooking out carbon you might be right its probably the same muffler that was with original engine.
 

Guyfang

Moderator
Staff member
Moderator
17,029
24,888
113
Location
Burgkunstadt, Germany
I will say it again. Full load, 6-8 hours and then see if you have a problem. Yeah, you got to put up with the noise and cost of fuel. But the only way to be sure, other then maybe installing a new muffler, is to burn it out. You can try and clean out the muffler. I tried lots of ways. None worked real well, and some damaged the muffler. Some provided comic relief. But nothing ever worked out like I wanted it to.

And at the end of the day, when the set had been run 6-8 hours and ran like a top, i simply felt better about the reliability of the set. When we sent a $255,000 dollar turbine engine down range to a Patriot unit, even the thought of the engine self destructing in just a few hours, kept me awake for many a night.
 

AfghanVeteran2010

Active member
Steel Soldiers Supporter
293
29
28
Location
Odessa/Texas
Made it to 45min under 2800 watts, set shut its self down under no fuel fault. I looked at fuel gauge it was at 1/4, I reset the fault the to see if it remained illuminated. No light on no fuel, so I filled it up with aux fuel pump to 3/4 thinking maybe the vibration is setting it off since it might be close to switch trip point. Fired it up and same fault after about 5 mins of running. Open up the TM to troubleshooting to operator troubleshooting visually verified that fuel was in tank good and nearly full of fuel. Moved to Unit-Level troubleshooting

b. Check fuel level switch (FL1) as follows
1) Connect positive (+) probe of multimeter
to P4-10.
(2) Connect negative (-) probe to terminal
board (TB3), test point (TP31).
(3) Place START/RUN/STOP switch in
RUN position.
(4) Multimeter reading should be
20 to 32 VDC.

It only took me an hour to find P4, lol zip tie that has label was turned just right were I didn't see it. After running threw the steps there is no voltage, I'm positive at a 3/4 fuel level for this to be correct condition. After resetting the fault the no fuel goes away so it not a constant effect happening. To simulate my theory I jumped the plug for the low fuel float sure enough the low fuel light lit up. Also I ohm out the low fuel sensor no connectivity at 3/4 tank as it should be. I installed the float in the orientation same orientation it was removed, the replacement was tested according to TM. I concluded that it maybe in incorrect orientation, possibly the switch is susceptible to the vibration of the engine running. Plan of action for tomorrow is to disconnect the low fuel plug and place a ohm meter of it and set it to record and see what it does.

Also the throttle when its at 2800 watts, the linkage's spherical nut is lifted off of the engine's throttle lever. It was putting out 279Hz, is this expected for a wet stacked engine to act like this. This was taken a few days before today. Full throttle should be 317Hz(3600 RPM) the Mechanical governor set for 3750 RPM maximum at factory.

Thanks for the feedback, ill probably be lost with out ya all.
 

Guyfang

Moderator
Staff member
Moderator
17,029
24,888
113
Location
Burgkunstadt, Germany
Your fuel level fault is perhaps the most common fault seen in this series, 802 and 803 gen sets. I have seen any number of reasons this happens. Will list some here.

1. Fuel level switch not properly adjusted. (Distance from bottom of tank to bottom of switch too small, or to high in the tank.)

2. Fuel level switch not properly oriented. ( I could never figure this one out. Sometimes it was the problem, and sometimes not.

3. Fuel tank not properly secured to set. (the tank hold down was missing or lose, and the tank vibrated so bad, it set up wave action in the tank.)

4. Vibration isolators, front and back. (Don't laugh, the darn thing vibrated so bad, it made the set shut off for low fuel)

5. Fuel level sending unit. (A fuel level sending unit float, that had broken off, floated around in the tank for years, I guess. It would bump the fuel level switch floats. Or the metal arm would attach itself to the float magnets. I once opened up a fuel tank that had two floats bobbing around in the tank!)

6. Trash in the tank. (The fuel level floats would stick when trash and dirt got into them. I once found a fuel level switch float coated with metal filings. There are three magnets in each float.)

7. A-9, Float switch module. (seldom, but not to be ruled out.)

8. The float switch itself. (Sometimes, the fuel used was not conducive to use with the fuel level switch floats. Sounds stupid, but sometimes I would pull a switch, and the floats looked like they had been soaked in acid, just ate totally up, or looked like the hogs had chewed on them. Could also have been someone used some type of cleaning fluid/compound on the switches, and that's what destroyed them. Its not uncommon to find 3,6 or even 9 small, round magnets in the bottom of the tank. )

9. Last but not least, the A-2 Malfunction Indicator. (Saw this once for fuel level, once for oil pressure.)

Several of these faults are long shots. I think it's in the top 3-4. But after sitting here for almost an hour thinking back, this is the list of things I can remember.
 
Last edited:

AfghanVeteran2010

Active member
Steel Soldiers Supporter
293
29
28
Location
Odessa/Texas
An important lesson was learned today, checking what grade of fasteners to use in parts manual is a must. Search the NSN numbers and figure out what it is. The muffler was missing its engine mounting bolts for its bracket, i placed M6 8.8 bolts on it thinking its plenty strong. I was wrong one on them broke off, I discovered this after running it a few hours today. The proper bolt to use with the NSN number on google, is a 12.9 M6 x 20mm bolt. Removing the broken off bolt is the plan for tomorrow, center punch and a easy out. I dont know if its worth mentioning the black smoke has stayed about the same. When I pulled muffler to inspect shared bolt the exaust port where the muffler bolts up to the engine looked way more sooty than before. On the top on exaust valve and exaust pipe leading to muffler. When I resove the current issue I plan to continue the 6-8 hour run.

Thanks again
 

Guyfang

Moderator
Staff member
Moderator
17,029
24,888
113
Location
Burgkunstadt, Germany
Normally, putting the NSN into your browser will bring up several sites that will give you all the info you need to know about a fastener. If you can't find anything, send me a PM, and I just might be able to help you.
 

AfghanVeteran2010

Active member
Steel Soldiers Supporter
293
29
28
Location
Odessa/Texas
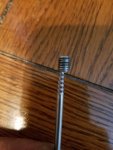
Manged to extract the bolt, automatic center punch made it so much easier to get the drill bit started. I managed to accomplish this in a few hours, fired it up found a small pin hole exhaust leak on the gasket. I tightened the nut didn't seem to help much about a quarter turn, didn't want to tightened to much with out first loosening muffler mounting bolts. I'm thinking that the gasket needs to be replaced. Has anyone tried Seafoam on their set?

20161212_120355.jpg

Thanks
 

AfghanVeteran2010

Active member
Steel Soldiers Supporter
293
29
28
Location
Odessa/Texas
Today I ran it at full load for 6 hrs. Unit bogged down after 15 mins and dropped load, it repeated this during the full 6 hrs every 2-8 mins. I gave it a few mins a placed load back on unit. I have confirmed that the actuator is not causing it to bog down. Can this be caused by old bad fuel? I'm going to try new fuel tomorrow for two hrs maybe more. if problems is still there injection timing is what I plan to look at next, the injector is new. I really hope I don't have to replace muffler seems to like it going to be a pita to get a new one, I put in a NSN request from vendor to see what the damage would be.

If I haven't made it clear I am very grateful for every ones help.


I forgot to mention that the unit has black smoke when at full load.
 
Last edited:

Guyfang

Moderator
Staff member
Moderator
17,029
24,888
113
Location
Burgkunstadt, Germany
This sounds like a fuel problem. What kind? Let's list them
1. Old/bad fuel
2. Dirty fuel. Not the same as #1.
3. Fuel line with a pin hole.
4. Fuel pump problem.
5. Trash in the fuel tank. Several times I have had such problems. The fuel pickup, would suck up something, but could not pass it through the tube. The engine "dies out", the trash comes unstuck and floats away. You restart the set, and it happens again. Don't laugh, it's a killer to find such a problem.
6. Trash in the fuel filter.
 

AfghanVeteran2010

Active member
Steel Soldiers Supporter
293
29
28
Location
Odessa/Texas
Just finish draining fuel tank until the fuel pump couldn't pick up any more fuel, the pump has a very good rate of flow. I disconnected the fuel line right before the water separator filter, there is a bit of fuel left in the tank probably 1/8 gal in there. I filled the set up to 1/2 tank, I allowed the set to prime up for around 5 mins, fired it up same issues as before, black smoke. This time the set would only take 50% load 1500W.

List
1. Old/bad fuel - New fuel being used
2. Dirty fuel - when I went threw the set in December I cleaned out the fuel tank as best as I could. Gold flakes of metal probably from fuel gauge float were present. Not going to rule this out, maybe something was left in a fuel line.
3. Fuel line with pinhole - all fuel line were replace 6 months ago. no leaks are visible, but I'm sure your referring to a vacuum leak.
4. Fuel pump problem - seemed to have a great flow rate
5. trash in fuel tank- tank was cleaned.
6. Trash in the fuel filter - I never replaced that spin-on filter, going to NAPA tomorrow for that.

What is the best way to clean a fuel tank in your opinion? I may of not cleaned it well enough.

Thank you, Guyfang.
 
Last edited:
Top
AdBlock Detected

We get it, advertisements are annoying!

Sure, ad-blocking software does a great job at blocking ads, but it also blocks useful features of our website like our supporting vendors. Their ads help keep Steel Soldiers going. Please consider disabling your ad blockers for the site. Thanks!

I've Disabled AdBlock
No Thanks