• Steel Soldiers now has a few new forums, read more about it at: New Munitions Forums!

  • Microsoft MSN, Live, Hotmail, Outlook email users may not be receiving emails. We are working to resolve this issue. Please add support@steelsoldiers.com to your trusted contacts.

FLU419 SEE HMMH HME Owners group

General Hood

Member
712
2
18
Location
Fort Towson, OK
Some progress to report, finally.

Got to use the crane to unload a 6' snowblower.

Finished the battery hold down (painted, but not waxed) and test drove the SEE. Not sure what difference the batteries could've made, but it absolutely purred.
That worries me, since vehicles often run really well before they break.
Either way, now I have to figure out why it overcharges (upwards of 30 Volts) after start-up, unless I fiddle with the disconnect switch.

And today, finally, the 7' snowblower arrived, allowing me more quality HMMH time.View attachment 646148View attachment 646149View attachment 646150

Oh, and yesterday I bought a SEE in parts (not a parts SEE, but in parts), from Australia.
Jimmy, you really do have a FLU farm. How many SEEs can you squeeze into your barn?
 

peakbagger

Well-known member
734
360
63
Location
northern nh
Another off the wall observation, this time the spare tire. I was filing my tires getting ready for a road trip this weekend and decided to check the air pressure in my spare. The valve stem was not accessible from the side of the truck behind the cab as the mounting bracket blocked it. I figured I had to start the truck, rotate the backhoe to working position and then get to it from the back of the truck. I could reach it but not easy to get to and very difficult to get a gauge on it. Not a problem I thought, just remove the clamp bolt on the spare and tilt the tire forward. About 20 minutes later after soaking the threads of the clamp bolt with WD 40 and then a dose of lithium spray and short cheater bar I got the clamp bolt loose. Its a tough spot to get a cheater on as the clamp is recessed inside the rim so a long cheater wouldn't work. I don't think anyone would be able to apply enough torque with their hand to break it loose. I finally got the tire tilted and rotated it so the stem is more accessible from behind the cab. I then checked the pressure and it read zero. The tire looked full and pushing on the sidewall it felt like it was full but it wasn't. I got out my compressor and filled the tire which took awhile. I expect if I was using the engine compressor it would have taken a lot more time.

Learning from this experience, check the air pressure in the spare and make sure the clamp bolt will unscrew, then apply lithium grease to the threads liberally.

For those who haven't taken a tire off yet, a breaker bar and a long cheater bar is about the only way to break the bolts loose on the rim while on the road unless someone has the handy dandy HMMH impact wrench. (I picked up 4' breaker bar so I don't need the cheater anymore).
 

The FLU farm

Well-known member
Steel Soldiers Supporter
3,342
1,329
113
Location
The actual midwest, NM.
So true, Peakbagger, the time to undo the spare is NOT when you need it. Mine fought me quite a bit before it finally came off.
Luckily, time was not an issue as I simply wanted it off the SEE, to lose some weight and improve visibility.

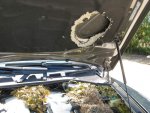
On a different subject, I think Ahab is onto something with rodents and German vehicles. Not only do I find mouse droppings in the FLUs only (so far), but the two German cars in the family (no, they're not mine) are the ones with telltale IMG_2719.jpgIMG_2721.jpgtracks on the wheels, and/or dead rodents found underneath them.
Then I remembered a VW Touareg from a few years back, a daily driver, that the wife asked me to check the oil on.
Pictured is what I found after opening the hood.
Yes, the domestic and British vehicles also showed signs of rodent activity from time to time, but nothing like this.
 

Skidpad

New member
55
0
0
Location
Nashville, Tennessee
Peakbagger (and everyone else talking about the air lockers maintenance), here is a picture I snapped last night. This is taken looking towards the rear of the vehicle on the passenger side of the rear diff. You can see the drain on the underside of the axle housing (red circle) and the air line going into it (green circle). I'l going to attempt unscrew the air line to put in air tool oil into the housing. This ought to be made much easier by raising the backhoe into working position and getting to it from above. Progress will be reported...

airlockerdrain.jpg
 

peakbagger

Well-known member
734
360
63
Location
northern nh
Good Luck, when I tried to unscrew the top air line it is stuck to the fitting so the air line twists with the fitting. Obviously that's going to stress the line to fully unscrew the fitting. I believe I have seen an air line repair kit somewhere but would prefer not fixing it. I would suggest taking a sharp scraper and scraping the paint off the drain plug as mine was painted in.

Peakbagger (and everyone else talking about the air lockers maintenance), here is a picture I snapped last night. This is taken looking towards the rear of the vehicle on the passenger side of the rear diff. You can see the drain on the underside of the axle housing (red circle) and the air line going into it (green circle). I'l going to attempt unscrew the air line to put in air tool oil into the housing. This ought to be made much easier by raising the backhoe into working position and getting to it from above. Progress will be reported...

View attachment 646290
 

Skidpad

New member
55
0
0
Location
Nashville, Tennessee
Peakbagger, I am definitely going to scrape and try to loosen it up first. I may also try this CRC Freeze Off stuff they have at the parts store. Someone on an older forum had mentioned the Wurth Rost Off that operates from a similar strategy of cooling the joint and then letting it warm back up to expand and break free any stuck joint. I hope that between that, PB blaster, and an ample application of verbal persuasion I can get it off without air line gastric bypass...
 

Skidpad

New member
55
0
0
Location
Nashville, Tennessee
So I have a question from the noob here, the hydraulic levels are a little lower than I'd prefer on one side. What is everyone's best bet to add and is it a big deal is there is a mixed hydraulic fluid composition? I know that the lube chart states OE/HDO-10 which is basically 10 weight oil. I've seen a few of you guys refer to using AW32 in the tanks. so, what's the conclusion? I'd like to top them off tomorrow before I start a long day's work. Thanks!
 
46
1
0
Location
Tulsa
If it was a top off, I'd use the Lucas Hydraulic Booster in it. Beyond that, I'd use standard hydraulic oil. I think it's supposed to have stuff in it to neutralize acidic build up. I thought mine were low, went to dumping in a gallon, and couldn't get all of it in before it was over filled. Luckily, I made some leaks while working on that trailer house I remodeled, so now I may be able to fit the rest of my jugs in there.
 

General Hood

Member
712
2
18
Location
Fort Towson, OK
So true, Peakbagger, the time to undo the spare is NOT when you need it. Mine fought me quite a bit before it finally came off.
Luckily, time was not an issue as I simply wanted it off the SEE, to lose some weight and improve visibility.

On a different subject, I think Ahab is onto something with rodents and German vehicles. Not only do I find mouse droppings in the FLUs only (so far), but the two German cars in the family (no, they're not mine) are the ones with telltale View attachment 646220View attachment 646221tracks on the wheels, and/or dead rodents found underneath them.
Then I remembered a VW Touareg from a few years back, a daily driver, that the wife asked me to check the oil on.
Pictured is what I found after opening the hood.
Yes, the domestic and British vehicles also showed signs of rodent activity from time to time, but nothing like this.
Yikes! Might even need some air freshners mounted under that hood
 

88FLU419

Member
41
1
8
Location
Eastern Ct
88FLU, did you notice the difference primarily on road or off? My big complaint is the bobbing and weaving it does when I'm just driving across the hill where there are some bumps and uneven ground. I'm not even going fast AT ALL. Also, do the 365/80R20s fit onto the stock rims and do they fit with the fenders still affixed? I'm not opposed to removing some bodywork if it will really solve the boat-like feel to driving around. I've been talking to Atkinson-Vos about getting their HD springs but they will cost as much a new set of tires...:mad:
I noticed the difference most on the road, however off road was also better. It was unbelievable how much better it got for only changing tires. As I said before, it drove like there were no shocks before changing the tires. They fit perfectly on the stock wheel and no clearance issues other than slightly rubbing the front sway bar when turning all the way.
 

The FLU farm

Well-known member
Steel Soldiers Supporter
3,342
1,329
113
Location
The actual midwest, NM.
So I have a question from the noob here, the hydraulic levels are a little lower than I'd prefer on one side. What is everyone's best bet to add and is it a big deal is there is a mixed hydraulic fluid composition? I know that the lube chart states OE/HDO-10 which is basically 10 weight oil. I've seen a few of you guys refer to using AW32 in the tanks. so, what's the conclusion? I'd like to top them off tomorrow before I start a long day's work. Thanks!
If you're eventually going to switch to hydraulic fluid, you might as well start pouring it in now.
 
Top
AdBlock Detected

We get it, advertisements are annoying!

Sure, ad-blocking software does a great job at blocking ads, but it also blocks useful features of our website like our supporting vendors. Their ads help keep Steel Soldiers going. Please consider disabling your ad blockers for the site. Thanks!

I've Disabled AdBlock
No Thanks