• Steel Soldiers now has a few new forums, read more about it at: New Munitions Forums!

  • Microsoft MSN, Live, Hotmail, Outlook email users may not be receiving emails. We are working to resolve this issue. Please add support@steelsoldiers.com to your trusted contacts.

HMMWV Heating System Upgrade

kcpstudio

Member
43
5
8
Location
Fleetwood, PA
Greetings members,

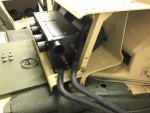
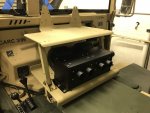
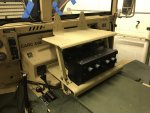
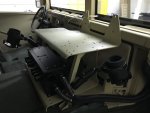
First, I like to apologize for the long delay in getting this video completed. Because of the file size, I placed it on Youtube. I filmed the video in 4K to make sure you can see any important detail you may need to assist with the mods. This is a 60,000 BTU heating system which, at medium heat, gives you around 119 degrees F in the front cabin area and around 98 degrees F in the back area behind the rear seats. This is more than enough heat to take the chill away.... sepecially for you gents living in colder climates.

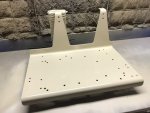
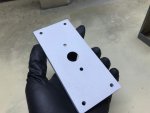
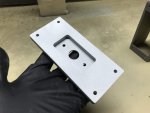
Originally, I was going to produce a kit to include an enclosure but have since decided to just upload the information and let this be a DIY project for you all. There are a couple things I designed and manufactured here in my shop, and I'm happy to make those parts for those that don't want to tackle them.

It is extremely important to note that you do a full inspection of your cooling system and repair or replace any items critical to the existing heating system because that will have a huge impact on the performance of this mod. If your current heater core is old, clogged, etc etc.... replace it. You can then make the mods to the new core before re-installing. If you radiator is in poor shape.... fix it. Make sure to flush any old coolant and start with new fresh preoperly mixed coolant. Period! HMMWV's heating system is a poor design to begin with without adding more issues into the mix. We will be keeping the factore heating system in place and that will be used only for windshield defrosting.

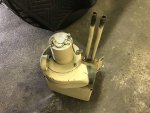
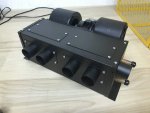
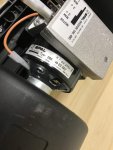
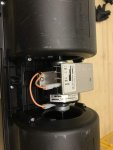
1. The main unit is a: SPAL Type 006-B46-22 24V 60,000 BTU Heating unit (you can find these on Ebay from time to time).
2. The next item you will need are 2 Bypass hoses from NAPA Auto Parts. The part number is 9812. They are approx 36" long with a 90 degree bend at one end.
3. Next you will need 2 Goodyear 5/8" E-Z Coils. The part number is GY58UBP. You can find these at Pep Boys.
4. Another item you will need are 2 90 degree heater Hose Elbows. They are made by "Dorman Help" and the part number is 47062.
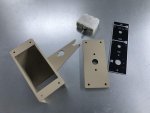
5. You will also need is a 4 gang switch box offered by "federal-military-parts" 612-440-8877. You only need the box. No switches.
6. Next, you will need an assortment of HMMWV electrical connectors and wire. This is a 24 volt system! Do not use crap! You have been warned. You can get the parts needed to complet this through Erik's Military and Industrial Surplus. 760-520-1523. NOTE: you will need a special tool to crimp the connectors. Again... 24 volts... do not use crap! I will offer the mini wiring harness to members if you do not feel comfortable making your own.
7. You will need hose clamps. I use factory crimp clamps on some of the truck and screw type to make repairs on the road easy. Keep in mind very few auto shops would even know where to begin to work on these vehicles. Keep a care package in your truck at all times... especially if you do long road trips like i do.... 1,400 round trips.
8. You will need duct hosing. I used Blo-R-Vac Flexible Duct Hosing from McMaster-Carr. The part number is 53145K28. Keep in mind this is for 1 3/4" outlets found on the SPAL unit I have. Your outlet diameter may differ.This is the best replacement hose for your HMMWV. It will not rot and break down like the factory crap. I replaced all my hoses with this or similar in various diameters.
9. Next up is High Temp Expanding Sleeving for your wiring. I use it throughout my truck to protrect my wiring. It's a factor sleeving. It 1/4 ID with a 1/2" ID expanded. The part number is: 2656K11.
10. The two main custom parts I made were a front machined aluminum cover for the switch box and a insulated wrap for the two heater hoses. Again, I will offer these up to the members if they want.
11. You will need a Heater Fan Switch. You can get this from the Hummer Parts Guy. His phone 920-216-6898. The part number is: 00-226-6429.
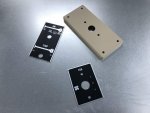
12. Next you will need a Heater Data Plate. This is the sticker associated with your existing heater/fan controls. Again, you can get these from the Hummer Parts Guy.

This is pretty much the main parts you will need. Please grab a cup of coffee and watch the entire video. I tried to keep moving and not bore you to death. Besides... I took the time to do this listing and shoot the video and wait God aweful long for Youtube to upload it..... it's the least you can do. :) ha ha But, seriously... if you guys have any questions, please don't hesitate to hit me up.

Enjoy the video. https://youtu.be/FhrYGG8V8yA
Cheers,
Ken
 

kcpstudio

Member
43
5
8
Location
Fleetwood, PA
The next thing I would like to touch base on is this tool by DMC. It is a vital tool if you are doing electrical work on these trucks. Having properly made connections are not only safe but give you a good seal to protect against the elements. The tool is not cheap but you can find them on ebay from time to time at good prices.

https://www.youtube.com/watch?v=gemlR-40m1I
 

kcpstudio

Member
43
5
8
Location
Fleetwood, PA
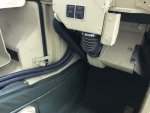
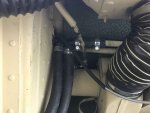
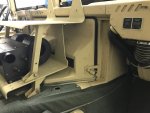
I guess the first part of the job would be to drain enough coolant out of engine so you can remove the existing factory heater core. I explain in the main video where the drain plug is and how to properly draing enough of the system prior to removing the core. In the following pics, you can see the two holes in the passenger foot well where the inlet and outlet coolant tubes run to the factory core. After draining coolant, you need to remove the heater box assembly holding the heater core. It's not as bad as you think. A pain.... but certainly not the worse thing you can do on these trucks. You need to inspect the core and replace it if it needs. Don't mess around here. You want great heat in your truck. A clogged or dirty or "on its last leg" core will have an impact on the performance of the new heater. ****, I would even flush the entire system before starting.

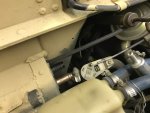
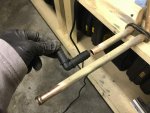
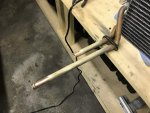
Next, you are going to cut down the inlet tube going into the core like I have done. You then need to use a flaring tool to flare the end enough to create a strong good seal. Again, do things right.... especially if you travel with your truck.

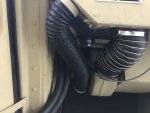
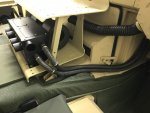
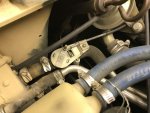
You will use the two elbows to tap into the inlet side of the system running to the factory core. One elbow will go through the rubber gromit in the firewall out to the coolant control valve. You then install a short piece of coolant hose and two clamps. I used screw clamps in case I need to do repairs on the side of the road. I then inslled the first long bypass hose on the other end of the elbow inside the footwell.

Next install the 2nd elbow to the inlet pipe connected to the core where you cut and flared it. Use another short piece of hose and 2 clamps.

I would then install the heater core and heater box back into the truck. If your existing heater hose running over to the driver side footwell is rotted, replace it. You have to remove sections of the dash, but its not too bad. Again, you want great heat. Leaks will take away from the performance.

I'll post additional segements following this one with supporting pics.

IMG_5270.jpgIMG_5291.jpgIMG_5290 (2).jpgIMG_5289 (2).jpgIMG_5288 (2).jpgIMG_5287 (2).jpgIMG_5285 (2).jpgIMG_5284 (2).jpgIMG_5274.jpgIMG_5271.jpgIMG_5209.jpgIMG_5228 (2).jpgIMG_5227 (2).jpgIMG_5220 (2).jpgIMG_5219.jpgIMG_5218.jpgIMG_5215.jpgIMG_5206.jpgIMG_5208.jpg
 

kcpstudio

Member
43
5
8
Location
Fleetwood, PA
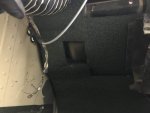
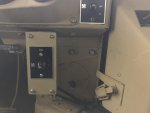
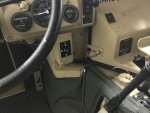
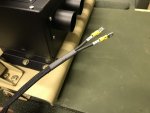
And this should be the final post to wrap up the install. Next you need to install the electrical side of things. This post will only support the main video so please make sure to watch it. First thing you'll need to do is grab your hot and ground. I did this by hooking up a "Y" fitting. I ran the hot going to the center post of the existing fan switch on the dash to the inlet of the "Y". I then ran one leg out to the existing switch and then a 2nd leg out to the new switch for the new neater blower. The ground I connected to the ground post found on the Temp gauge behind the instrument panel. I have enclosed another video explaing that.

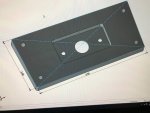
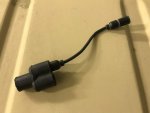
I machined a cover for the switch box so I could mount the switch and I modified a new heater data plate to stick over that. Again, that's all explained in my videos. Last, you need to make a small harness to run the "Lo" and "High" legs from the new switch to the new blower. I can't stress enough to make your connections professional. If not.... that's where grounding and electrical problems cause havock.

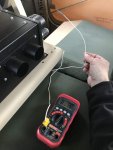
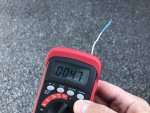
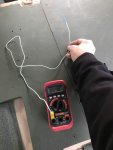
That's pretty much it for the posts. The pics and videos should give you most of what you need to know. If you have questions, please feel free to post. I included a couple pics of my temperature probe to show you what I was getting after the finished install on my lowest setting. The first pic shows 47 degrees. That was the outside temp that day. The front driver and passenger ares, were showing 119 degrees F and the rear passenger areas were showing 98 degrees.


https://www.youtube.com/watch?v=LDSghZanoN4
 

Wire Fox

Well-known member
1,252
161
63
Location
Indianapolis, Indiana
Excellent write-up! Lots of details and it should cover any questions someone should have. I also fully agree with it being essential to start with a fully functional radiator and good-health coolant system. I went through and repaired mine last year and found the difference from just some maintenance to be phenomenal. I think anyone with a 4-man truck would really appreciate this upgrade, but a 2-man truck in anything less than subzero conditions would probably be fine with the stock system at full performance. Indianapolis gets pretty cold come January and February, but my heater keeps up just well enough to be fine with the non-insulated 2-man cab. Everyone has different ideas of what's too cold, though, so I'm sure that there's some that would sit in my HMMWV and demand I set my seats on fire so we don't freeze to death...so they'd be big fans of this upgrade of your's!
 

kcpstudio

Member
43
5
8
Location
Fleetwood, PA
Thanks bro, I agree that certain states this upgrade would be overkill for sure. I think the northern states will benefit from this as it gets pretty nippy. We drive up to Michigan from time to time and the last time we were there... the average temp during our stay was 10 degrees F. It was worse with the wind chill. So this upgrade was definitely appreciated. But you’re correct... not everyone would need to go to this level. But, I thought it was worth posting for the members. Maybe it will give them some ideas for other setups.

My latest thought... was to look at pulling the engine and doing an ev conversion. Lol Just thinking about it right now. Lol
 

Wire Fox

Well-known member
1,252
161
63
Location
Indianapolis, Indiana
Thanks bro, I agree that certain states this upgrade would be overkill for sure. I think the northern states will benefit from this as it gets pretty nippy. We drive up to Michigan from time to time and the last time we were there... the average temp during our stay was 10 degrees F. It was worse with the wind chill. So this upgrade was definitely appreciated. But you’re correct... not everyone would need to go to this level. But, I thought it was worth posting for the members. Maybe it will give them some ideas for other setups.

My latest thought... was to look at pulling the engine and doing an ev conversion. Lol Just thinking about it right now. Lol
I've been thinking about EV, too. It'd be very neat to see a truly green HMMWV silently creeping along more urban settings! I'm sure there's a commercial driveline out there that could be adapted for use within the HMMWV chassis.

Sent from my Nokia 6.1 using Tapatalk
 

overthere

New member
1
0
1
Location
Regina
Greetings members,

First, I like to apologize for the long delay in getting this video completed. Because of the file size, I placed it on Youtube. I filmed the video in 4K to make sure you can see any important detail you may need to assist with the mods. This is a 60,000 BTU heating system which, at medium heat, gives you around 119 degrees F in the front cabin area and around 98 degrees F in the back area behind the rear seats. This is more than enough heat to take the chill away.... sepecially for you gents living in colder climates.

Originally, I was going to produce a kit to include an enclosure but have since decided to just upload the information and let this be a DIY project for you all. There are a couple things I designed and manufactured here in my shop, and I'm happy to make those parts for those that don't want to tackle them.

It is extremely important to note that you do a full inspection of your cooling system and repair or replace any items critical to the existing heating system because that will have a huge impact on the performance of this mod. If your current heater core is old, clogged, etc etc.... replace it. You can then make the mods to the new core before re-installing. If you radiator is in poor shape.... fix it. Make sure to flush any old coolant and start with new fresh preoperly mixed coolant. Period! HMMWV's heating system is a poor design to begin with without adding more issues into the mix. We will be keeping the factore heating system in place and that will be used only for windshield defrosting.

1. The main unit is a: SPAL Type 006-B46-22 24V 60,000 BTU Heating unit (you can find these on Ebay from time to time).
2. The next item you will need are 2 Bypass hoses from NAPA Auto Parts. The part number is 9812. They are approx 36" long with a 90 degree bend at one end.
3. Next you will need 2 Goodyear 5/8" E-Z Coils. The part number is GY58UBP. You can find these at Pep Boys.
4. Another item you will need are 2 90 degree heater Hose Elbows. They are made by "Dorman Help" and the part number is 47062.
5. You will also need is a 4 gang switch box offered by "federal-military-parts" 612-440-8877. You only need the box. No switches.
6. Next, you will need an assortment of HMMWV electrical connectors and wire. This is a 24 volt system! Do not use crap! You have been warned. You can get the parts needed to complet this through Erik's Military and Industrial Surplus. 760-520-1523. NOTE: you will need a special tool to crimp the connectors. Again... 24 volts... do not use crap! I will offer the mini wiring harness to members if you do not feel comfortable making your own.
7. You will need hose clamps. I use factory crimp clamps on some of the truck and screw type to make repairs on the road easy. Keep in mind very few auto shops would even know where to begin to work on these vehicles. Keep a care package in your truck at all times... especially if you do long road trips like i do.... 1,400 round trips.
8. You will need duct hosing. I used Blo-R-Vac Flexible Duct Hosing from McMaster-Carr. The part number is 53145K28. Keep in mind this is for 1 3/4" outlets found on the SPAL unit I have. Your outlet diameter may differ.This is the best replacement hose for your HMMWV. It will not rot and break down like the factory crap. I replaced all my hoses with this or similar in various diameters.
9. Next up is High Temp Expanding Sleeving for your wiring. I use it throughout my truck to protrect my wiring. It's a factor sleeving. It 1/4 ID with a 1/2" ID expanded. The part number is: 2656K11.
10. The two main custom parts I made were a front machined aluminum cover for the switch box and a insulated wrap for the two heater hoses. Again, I will offer these up to the members if they want.
11. You will need a Heater Fan Switch. You can get this from the Hummer Parts Guy. His phone 920-216-6898. The part number is: 00-226-6429.
12. Next you will need a Heater Data Plate. This is the sticker associated with your existing heater/fan controls. Again, you can get these from the Hummer Parts Guy.

This is pretty much the main parts you will need. Please grab a cup of coffee and watch the entire video. I tried to keep moving and not bore you to death. Besides... I took the time to do this listing and shoot the video and wait God aweful long for Youtube to upload it..... it's the least you can do. :) ha ha But, seriously... if you guys have any questions, please don't hesitate to hit me up.

Enjoy the video.
Cheers,
Ken
I can fie the dual fan for sale online but where did you get the heater core housing where with the 4 air outlets ?
 

kcpstudio

Member
43
5
8
Location
Fleetwood, PA
I can fie the dual fan for sale online but where did you get the heater core housing where with the 4 air outlets ?
Sorry for the delayed reply. The housing was part of the core when I purchased it. It was an all-in-one unit. As of late, I have seen slight variations in the box design being offered. You’ll just have to search for the correct one that i used. Unfortunately, they all have the same exact part number i provided. Sorry i couldn’t be more help. I’ve also seen the core being offered by itself and that too has the exact part number. You would think there would be various part numbers for the different setups.
 

par0thead151

Member
65
4
8
Location
wisconsin
Excellent write-up! Lots of details and it should cover any questions someone should have. I also fully agree with it being essential to start with a fully functional radiator and good-health coolant system. I went through and repaired mine last year and found the difference from just some maintenance to be phenomenal. I think anyone with a 4-man truck would really appreciate this upgrade, but a 2-man truck in anything less than subzero conditions would probably be fine with the stock system at full performance. Indianapolis gets pretty cold come January and February, but my heater keeps up just well enough to be fine with the non-insulated 2-man cab. Everyone has different ideas of what's too cold, though, so I'm sure that there's some that would sit in my HMMWV and demand I set my seats on fire so we don't freeze to death...so they'd be big fans of this upgrade of your's!
any tutorials on what to do to overhaul the radiator and the likes?
i put in a new heater core as mine had corroded out last fall
 

CapePrep

Active member
266
195
43
Location
MA
Reviving this great tutorial. Need to do this to my rig. Anyone had any luck finding this unit? Have searched all over the web and can't find it. Thanks
 
Top
AdBlock Detected

We get it, advertisements are annoying!

Sure, ad-blocking software does a great job at blocking ads, but it also blocks useful features of our website like our supporting vendors. Their ads help keep Steel Soldiers going. Please consider disabling your ad blockers for the site. Thanks!

I've Disabled AdBlock
No Thanks