• Steel Soldiers now has a few new forums, read more about it at: New Munitions Forums!

  • Microsoft MSN, Live, Hotmail, Outlook email users may not be receiving emails. We are working to resolve this issue. Please add support@steelsoldiers.com to your trusted contacts.

M1009 Little Red Riding Hood.

WWRD99

Well-known member
Steel Soldiers Supporter
1,117
1,715
113
Location
York Pa
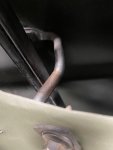
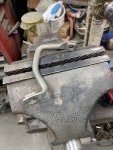
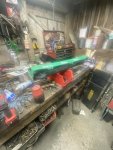
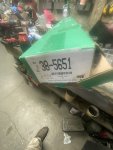
I assume you took all that stuff out of that bin and separated them all in that box. I got another one for you...the push clip that holds the bar on the outside door lock. Had one go on a flying trip in the yard. That window looks perfect!

Sent from my SM-S906U using Tapatalk
 

cucvrus

Well-known member
11,473
10,432
113
Location
Jonestown Pennsylvania
I assume you took all that stuff out of that bin and separated them all in that box. I got another one for you...the push clip that holds the bar on the outside door lock. Had one go on a flying trip in the yard. That window looks perfect!

Sent from my SM-S906U using Tapatalk
Easy. Yes. Dorman 75510 can be bought on Amazon the great river has everything. Google 1984 GM door lock pawls. it has the bars and the clips you desire.
 
Last edited:

WWRD99

Well-known member
Steel Soldiers Supporter
1,117
1,715
113
Location
York Pa
Easy. Yes. Dorman 75510 can be bought on Amazon the great river has everything. Google 1984 GM door lock pawls. it has the bars and the clips you desire.
I need the little one that holds the lock bar to the lock. I haven't been able to find that yet. I'll hunt more!

Sent from my SM-S906U using Tapatalk
 

cucvrus

Well-known member
11,473
10,432
113
Location
Jonestown Pennsylvania
After all my struggles to get the OEM black rear window crank together and trying to find a lock cylinder that I could have coded or a coded cylinder I was able to find one in a cabinet drawer in my barn. A brand new GM uncoded cylinder. I bought one from YOT on line but it had the old school octagon key and that was not my pick for this build. But I would have sailed on with it if I had the gate assembled. Tomorrow I am going to take it to a locksmith and have it coded to the OEM key. Today I am going to Maryland fishing. That is light duty recovery activity that is good for the soul. Take care and Be Safe.
 
Last edited:

1love

Active member
120
126
43
Location
CA
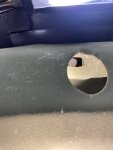
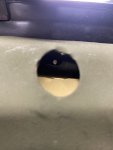
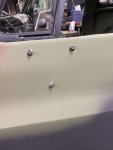
Those doors are so perfect! I'm currently working on mine and trying to fix the oil canning issue near the door handles with a MIG welder, but I blew a hole right through it. I'll admit, I’m a rookie. On a positive note, I was able to fix the oil canning, haha!
 

WWRD99

Well-known member
Steel Soldiers Supporter
1,117
1,715
113
Location
York Pa
Those doors are so perfect! I'm currently working on mine and trying to fix the oil canning issue near the door handles with a MIG welder, but I blew a hole right through it. I'll admit, I’m a rookie. On a positive note, I was able to fix the oil canning, haha!
The entire blazer is like that. Looks better than new. What welder and wire size are you using? I've found using the 035 wire with a touch volts welds body panels pretty well with not so perfect hot spots. I have a 220 volt welder that is miles ahead of the 110 miller I have doing body welding. Doing roset welds is extremely easy with it. Did you put a peice of metal behind it to weld to? You should ask about the fender he has in a box too...wild story on that one!

Sent from my SM-S906U using Tapatalk
 

cucvrus

Well-known member
11,473
10,432
113
Location
Jonestown Pennsylvania
My fishing trip was a success as far as getting out and doing something relaxing. I arrive at the river at 0900 and fished till 1600. I only caught 1 18” Flathead Catfish. That species is considered an evasive species by Maryland DNR so I gave it the death sentence and feed it to the vultures that hang out in the area. Catching more fish would have been great as I bought 6 dozen works and only used 2 dozen of them. Oh well. My chair was a comfortable seat all day and I did catch up on some beauty sleep. IMG_2684.jpeg
IMG_2682.jpeg nice view
IMG_2688.jpeg good fighter
IMG_2691.jpeg wanted dead or alive. New sheriff in town. Captured. Buzzard bait now. Take Care and Have a Great Day.
 

1love

Active member
120
126
43
Location
CA
The entire blazer is like that. Looks better than new. What welder and wire size are you using? I've found using the 035 wire with a touch volts welds body panels pretty well with not-so-perfect hot spots. I have a 220 volt welder that is miles ahead of the 110 miller I have doing body welding. Doing roset welds is extremely easy with it. Did you put a peice of metal behind it to weld to? You should ask about the fender he has in a box too...wild story on that one!

Sent from my SM-S906U using Tapatalk
Oh, brother I am using an elcheepo Harbor Fright welder Mig, I think .35 wire. I just wanted to remove the oil canning and made a big mistake and hit the switch to hi and boom big ol hole. I was trying to fix it via tac welding but made it worse so now I am going to try and fix it via a patch with 22 gauge cold rolled steel. Rick I legit only did all of this because of you! You don't know how much of what you do inspires people, I happen to be one, thanks, brother!
 

Attachments

WWRD99

Well-known member
Steel Soldiers Supporter
1,117
1,715
113
Location
York Pa
Oh, brother I am using an elcheepo Harbor Fright welder Mig, I think .35 wire. I just wanted to remove the oil canning and made a big mistake and hit the switch to hi and boom big ol hole. I was trying to fix it via tac welding but made it worse so now I am going to try and fix it via a patch with 22 gauge cold rolled steel. Rick I legit only did all of this because of you! You don't know how much of what you do inspires people, I happen to be one, thanks, brother!
Ugh!!! I'd cut that into a square and tack around until you get it all welded in with a new square piece. Have to do it slow so it won't get to hot. Sand it smooth. Top it off with a thin skim coat of leveling putty. I have the 170 from hf. It's the dual voltage 110/220. Use gas. Welds very well in 220 ok in 110. My miller is nice too but won't lay the dimes like the hf one. Rick's definitely a motivator with a high level of work quality. The ones he's working on outside is getting work that money can't buy. Really goes above and beyond. The pics of the one he is restoring don't do it justice. It looks better in person. Almost need a high end camera to really get the pics right.

Sent from my SM-S906U using Tapatalk
 

cucvrus

Well-known member
11,473
10,432
113
Location
Jonestown Pennsylvania
IMG_2695.jpeg
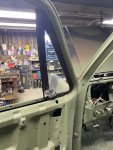
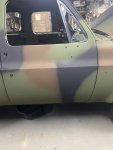
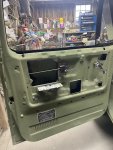
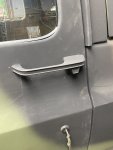
I finished the driver's side door with a freshly painted handle and new gaskets. The white specks are paper towel residue.
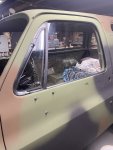
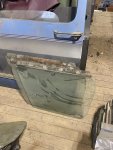
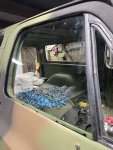
I was looking thru my selection of right windows and came across some with rough sashes. IMG_2696.jpeg I chose the best one I had and installed it in the door without the weather strip run. IMG_2700.jpeg That was always the easiest way for me. Getting the 3 roller guides into the tracks is much easier this way. With back track not installed that gives you a lot of wiggle room with the glass and new run seal.
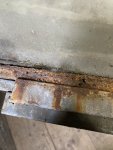
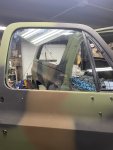
Like most CUCV's this truck at one time had a loose window regulator and waddled the holes out at the shaft and a few of the other bolt holes. I used a track bolt with the larger washer. That is normally anchoring down an adjustment point in the door or rear gate glass tracks. IMG_2701.jpeg
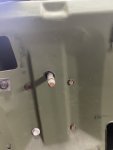
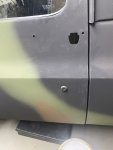
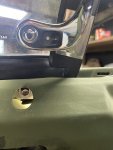
IMG_2702.jpeg IMG_2703.jpeg IMG_2704.jpeg This bolt and J nut is located below the wing vent window. It is very important that it be in place and tightened. Not so tight that it dents the outer door skin. But tight. It is a 5/16" drive head and you can reach in an tighten till it almost touches the outer door skin with the point. I have used an air gun once and guess what happened on a new paint job. All this reassembly I am doing with a 1/4" rachet and sockets. No race and it makes things look better and you can relax and pay attention to details. There is a J nut clipped into the inner part of the door. Mine fell off during the wing vent installation and I spent an hour getting it back in place. Part of the half fast work process. I am in the process of loading more pictures. Take Care. Thank you for the support.
 
Last edited:

cucvrus

Well-known member
11,473
10,432
113
Location
Jonestown Pennsylvania
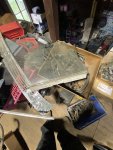
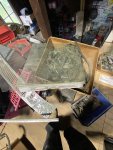
I went upstairs in the barn and sorted thru the glass I had IMG_2697.jpeg and found a near perfect candidate for the job at hand. IMG_2698.jpeg IMG_2699.jpeg This is the drive screw that holds the door together under the wing vent. IMG_2705.jpeg And this is the J Nut. This type of J nut is found thru out the truck on taillamp's and side marker lamps. Nothing special. IMG_2706.jpeg IMG_2709.jpeg I hope this helps. This will really strengthen the door skins along with the mirror supports that are right and left specific. More later. I am resting and will prep and paint a right outside door handle tomorrow. I also brought in a pair of door vent baffles to clean up before installing them. Take care and Thank you for the Support.
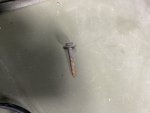
 
Last edited:

cucvrus

Well-known member
11,473
10,432
113
Location
Jonestown Pennsylvania
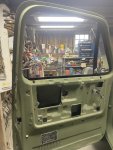
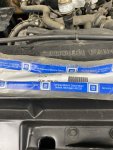
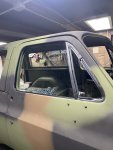
Right door glass is in place with the run seals all in place. I need to install the outer belt molding seal. IMG_2710.jpeg Genuine GM one I bought 20+ years ago. IMG_2711.jpeg Door glass is all in place and seals are installed. IMG_2713.jpeg Another successful day complete. May work on it tomorrow. I will see how I feel. Take Care.
 
Last edited:
Top