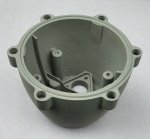
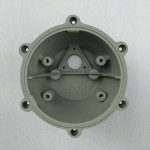
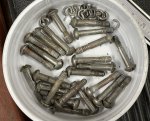
My 1954 M37 restoration project has been on the back burner for a long time, and I'm finally getting around to working on it again. I did quite a bit of work on it years ago, so I already have a very good start. I've had it stashed away in a shipping container, and now it's residing in a storage unit a short distance from our house in Brunswick. We plan to build a second garage this year, and if/when that happens, I want to move it out of the storage unit and into my workshop/garage. In the meantime, my plan is to haul components of the M37 over to my workshop to work on them, since I don't believe that we're allowed to work on vehicles inside the storage units.
The photo below shows what my M37 looks like at present. It's a really solid truck with VERY little rust. I've removed most of the body parts, and all of the pieces are in the storage unit.
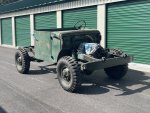
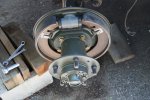
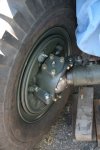
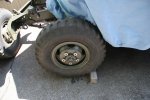
To get the momentum going again, I thought I'd start by continuing work on the brake system. I already replaced/rebuilt all of the brake components for all four wheels some time ago at the same time that I overhauled the hubs and wheels/rims, so that much of the brake system is done. I went to a lot of trouble to find five rims and split rings that were in excellent or NOS condition, which I then sandblasted, primed, and painted. Here are a few photos of the brakes and wheels.
A couple of weeks ago, I brought the frame member (running board support) that holds the brake master cylinder over to my workshop. The original master cylinder could probably be rebuilt, but as a safety upgrade I've decided to convert the brakes to a two-circuit (front-rear) system, using a tandem master cylinder. Shown below is the old master cylinder after cleaning it up.
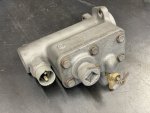
The replacement master cylinder (see below) is the tandem type, which, IF I recall correctly, is used in the late WM300 4x4 or maybe W300 4x4 Power Wagon. It has the same bore diameter as the original master cylinder, so the braking effort should be about the same.

The new master cylinder doesn't have the vent connections like those on the original master cylinder, but I don't plan to do any deep-water fording, so I'm not concerned about that. I'll keep the old master cylinder on hand, just in case I ever sell the vehicle and someone wants to 'purify' the restoration and go 100% stock.
The main difference as far as installation goes, is that the original master cylinder had a three-bolt mount, whereas the tandem master cylinder is a two-bolt mount, so I had to alter the frame member a bit by drilling two new mounting holes, and just because I tend to over-engineer things a bit, I fabricated two adapter plates. The new master cylinder has to be mounted with its mounting boss almost touching the mounting flange of that frame member, and because there is some radius in the bend of that flange, I made one plate with a radiused edge to conform to the flange bend radius. That allowed me to avoid having to grind a radius into the master cylinder mounting boss. I made the other adapter plate as a backing/reinforcing plate, simply because I wanted to make sure that the frame member didn't lose any strength from the extra mounting holes, but instead would actually gain some extra strength from the plates. I could have welded these plates on, but I didn't want to make the installation too 'invasive.'
Here are the two adapter plates that I fabricated (one is 3/32" thick and the other is 1/4" thick):

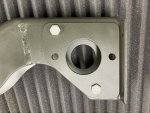
The images below show the frame member with the adapter plates attached, after sandblasting, priming with self-etching primer, and painting in Marine Corps green alkyd enamel. BTW, the weld you see wasn't done by me; it's the original weld.

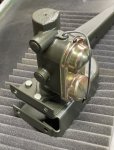
I tried the new tandem master cylinder for fit. So far so good. It won't be permanently mounted until after the frame member is reinstalled on the truck.
As time (and available workspace) allows, I plan to work on many different components and update this thread periodically.
Stay tuned...
The photo below shows what my M37 looks like at present. It's a really solid truck with VERY little rust. I've removed most of the body parts, and all of the pieces are in the storage unit.

To get the momentum going again, I thought I'd start by continuing work on the brake system. I already replaced/rebuilt all of the brake components for all four wheels some time ago at the same time that I overhauled the hubs and wheels/rims, so that much of the brake system is done. I went to a lot of trouble to find five rims and split rings that were in excellent or NOS condition, which I then sandblasted, primed, and painted. Here are a few photos of the brakes and wheels.


A couple of weeks ago, I brought the frame member (running board support) that holds the brake master cylinder over to my workshop. The original master cylinder could probably be rebuilt, but as a safety upgrade I've decided to convert the brakes to a two-circuit (front-rear) system, using a tandem master cylinder. Shown below is the old master cylinder after cleaning it up.

The replacement master cylinder (see below) is the tandem type, which, IF I recall correctly, is used in the late WM300 4x4 or maybe W300 4x4 Power Wagon. It has the same bore diameter as the original master cylinder, so the braking effort should be about the same.

The new master cylinder doesn't have the vent connections like those on the original master cylinder, but I don't plan to do any deep-water fording, so I'm not concerned about that. I'll keep the old master cylinder on hand, just in case I ever sell the vehicle and someone wants to 'purify' the restoration and go 100% stock.
The main difference as far as installation goes, is that the original master cylinder had a three-bolt mount, whereas the tandem master cylinder is a two-bolt mount, so I had to alter the frame member a bit by drilling two new mounting holes, and just because I tend to over-engineer things a bit, I fabricated two adapter plates. The new master cylinder has to be mounted with its mounting boss almost touching the mounting flange of that frame member, and because there is some radius in the bend of that flange, I made one plate with a radiused edge to conform to the flange bend radius. That allowed me to avoid having to grind a radius into the master cylinder mounting boss. I made the other adapter plate as a backing/reinforcing plate, simply because I wanted to make sure that the frame member didn't lose any strength from the extra mounting holes, but instead would actually gain some extra strength from the plates. I could have welded these plates on, but I didn't want to make the installation too 'invasive.'
Here are the two adapter plates that I fabricated (one is 3/32" thick and the other is 1/4" thick):

The images below show the frame member with the adapter plates attached, after sandblasting, priming with self-etching primer, and painting in Marine Corps green alkyd enamel. BTW, the weld you see wasn't done by me; it's the original weld.


I tried the new tandem master cylinder for fit. So far so good. It won't be permanently mounted until after the frame member is reinstalled on the truck.

As time (and available workspace) allows, I plan to work on many different components and update this thread periodically.
Stay tuned...
Last edited:


