- 3,967
- 6,435
- 113
- Location
- MA
Colt do you want the OEM pad for your machine? I have one extra I can just drop in the mail. Let me know.
Steel Soldiers now has a few new forums, read more about it at: New Munitions Forums!

After the second time I took a front end off, that's the only way I would do it. Saves mucho time and effort. Like I wrote, the misalignment is a common problem. You can do the back side of the set the same way. And the back side is a pita, if you compleatly disassemble it. Having said that, a compleat disassembly is good to gain knowledge and experance. Get to know your set. Or really clean up a pig pen set. But if you only do one in your life, you will never figure out how to pull the whole thing.I just got done with a front oil seal replacement on an 802... I left the entire front end together and just unbolted along the bottom edges and slowly took the entire radiator end out in a single piece. I feared with the sheer amount of fasteners, that misalignment was almost assured. Glad I did it that way.
View attachment 741925View attachment 741924
What part number did you use for the front seal and where did you get it from? I've got a unit coming in with a front leak and wanted to price some seals before it got here.I just got done with a front oil seal replacement on an 802... I left the entire front end together and just unbolted along the bottom edges and slowly took the entire radiator end out in a single piece. I feared with the sheer amount of fasteners, that misalignment was almost assured. Glad I did it that way.
View attachment 741925View attachment 741924
Yup, and this machine came with the manuals for said heater too.After the second time I took a front end off, that's the only way I would do it. Saves mucho time and effort. Like I wrote, the misalignment is a common problem. You can do the back side of the set the same way. And the back side is a pita, if you compleatly disassemble it. Having said that, a compleat disassembly is good to gain knowledge and experance. Get to know your set. Or really clean up a pig pen set. But if you only do one in your life, you will never figure out how to pull the whole thing.
Hey! Heater kit!! You don't see many around.
Thank you sir,Jimmy... as luck would have it, I bought two seals (one 6 months ago, and one a month ago to replace the one I lost... turns out my wife just hides things real well "for me"). PM me your address and I'll send it down as a thank you for that gasket.
That's a real good idea... wish I thought on that! I may back track & do this if it ends up being a huge hassle.I just got done with a front oil seal replacement on an 802... I left the entire front end together and just unbolted along the bottom edges and slowly took the entire radiator end out in a single piece. I feared with the sheer amount of fasteners, that misalignment was almost assured. Glad I did it that way.
View attachment 741925View attachment 741924
Do you recommend loosening all the body bolts from the skid up, getting the radiator into it's proper place, then tightening from the bottom up?All TQG' have this problem. When re assembling them you often need to loosen things up a bit, get everything centered, and then hand tighten all the screws, before running them down. For the top covers and doors, I often used 4-5 old punches, I ground down a bit. Then put the top on, shove the punches in, in a few places all over, top center my million holes. Then screw all the screws in, before tightening them.
Sure, that would be great! I will send you a PM. Thanks.Colt do you want the OEM pad for your machine? I have one extra I can just drop in the mail. Let me know.
No, not all, got to eyeball it, see which ones impact what you are doing. Like I said, the first two time convinced me there has to be a better way. Hence, pulling the whole front end off at once. Sometimes, you loosen just one thing, and it all falls in place. I wish I wasn't locked up here, so I could copy a page from the -24P and highlight the one that should correct it. The nurses cut me a lot of slack here, but using their printer and computer might be pushing it. It not hard, take a look see.Do you recommend loosening all the body bolts from the skid up, getting the radiator into it's proper place, then tightening from the bottom up?
Not looking forward to doing a bunch of work again, but I want it done right so I can just use it as needed & add fuel.
Contemplating using acoustic ceiling tiles (fire-resistant), cut to fit, drill out holes.I have used fat mat before. Just use the old piece as a template.


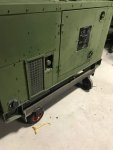
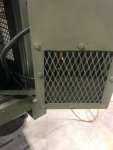
You could also use 1" acoustical fiberglass to replace the radiator sound deadening foam. Just spay the face of it with clear flex seal as the rubberized coating will create a rubberized film over the face of the fiberglass. This will keep the face from fraying from the exhaust air. Also check to see if your storage door (right side under the control panel) door actually touches the air inlet and blocks most of the air coming in. You will probably see where the sound deadening foam leaves a pattern on the face of the storage box. And does a really good job of blocking most of the air flow on that side of the unit/ I have fixed this on every 80X unit I have sold. You may be lucky. Screen off the air intakes to keep wasps, bees, and rodents out as they will destroy your generator.
View attachment 743321View attachment 743320
