• Steel Soldiers now has a few new forums, read more about it at: New Munitions Forums!

  • Microsoft MSN, Live, Hotmail, Outlook email users may not be receiving emails. We are working to resolve this issue. Please add support@steelsoldiers.com to your trusted contacts.

MY Airpack Rebuild with Photos!

stb64

Member
162
15
18
Location
hohenfels germany
Dot 5 for all parts that come in contact with brake fluid. Mineral oil based lubricants would ruin the seals.
For the air side, the prescribed lubricant is OHT, a mineral oil based hydraulic fluid. Soak the felt seal before assembly. Also, a few squirts are to be added periodically through the hole on the rear, there is a little plug.
Some air packs do not have that plug, the air pipe must be removed to add the lubricant.
When i can´t get OHT, i use air tool oil, or 10wt in a pinch. I also like to put a very light coat of grease on the inside of the air cylinder, as the felt seal will not wipe the oil over the entire surface, and i put silicone grease under the dust boots on the master cyl and wheel cylinders to stop rust.
 

DeucesWild11

Active member
1,265
12
38
Location
Putnam County, NY
When I did the rebuild I used mainly Air tool Oil for lubrication and a some Dot 3 only because that's what was in the Deuce when I got it. I don't want to get into a Dot 3 vs. 5 discussion here there are plenty of threads on that but I plan on bleeding my brakes at least yearly and with Dot 3 I should be just fine..
 

RangerDave

New member
91
0
0
Location
Bar Harbor, ME
This was a very useful thread and I thank you for the time to have done it! I rebuilt my Master Cylinder and Air Pack last year and much to my chagrin, the remote brake fluid reservoir started lowering and the brakes started fading.... only a 100 miles or so on the truck and only warming it up and "exercising" the brakes from time to time as it sits... So, I pulled it and rebuilt it - again - yesterday.... and Thanks Again for all your comments!!!

So, the burning question that I have, "where does all of the crap in the air lines come from and how can I prevent more crap from getting into the airpack to ruin my seals and corroding the surfaces????"

Because when I opened it up, I was horrified at the amount of rust and gunk from the water migration into the air pack - not to mention the pitting from water sitting in some of the chambers... The two worst places (chambers) were where the "J" tube enters the rear of the airpack and the small stainless? piston with the two gaskets (brake fluid side that pushes against the larger brass piston that controls the air valving).

Two possibly significant notes about what I did...
1. I failed to blow out the air lines leading to and away from the airpack - my bad
2. I flushed the old dot 5 out with denatured alcohol as some had recommended doing and then purged that out with new dot 5... - is it possible that some of that denatured alcohol could have pooled around the airpack seal where the stainless double piston cup is - collecting water and causing it to fail? I was just flabbergasted at how much corrosion had happened from last year and virtually no use...
 

dubnali

New member
15
0
0
Location
Hickory, NC
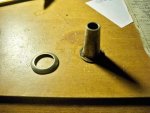
Quick question: my dad and I are in the final stages of reassembly on our air pack rebuild and we have a couple parts left out that we can't figure out where they go. We've searched the forums and TMs several times to no avail, including your photos. The one piece is a hefty conical piece approximately 2" long. The other is what appears to be a stainless cup washer that is dished out on one side. Do you remember where these go? BTW, nice write-up.
 

DeucesWild11

Active member
1,265
12
38
Location
Putnam County, NY
All I can say is that I used all the pieces in the rebuild Kit. Do you have a pic of what's left over? That may help. I was in the middle of mine and had a few pieces left over until I took apart a few more things. They are a little hidden sometimes.
 

dubnali

New member
15
0
0
Location
Hickory, NC
I don't have pictures handy, but these parts weren't in the rebuild kit. They are original parts that fell out during maneuvering will disassembling.
 

DeucesWild11

Active member
1,265
12
38
Location
Putnam County, NY
RangerDave, sorry I missed your post earlier. I think since the air pack is like an air tank it just collects condensation. Also you could be getting moisture through your air lines from the air tanks as they collect moisture as well. I think since you said you don't use it much you probably got allot of condensation from sitting around. But that's just my thoughts.. Drain your air tanks after every use to help with this, not suggesting that you don't already.
 

DeucesWild11

Active member
1,265
12
38
Location
Putnam County, NY
Wow, that does not look familiar at all. I am surprised it came out of there as it's a pretty good size. Not sure where that would go.

Anyone else seen something like that??
 

dubnali

New member
15
0
0
Location
Hickory, NC
I don't know if it makes any difference, but this airpack is off of our 67 Kaiser and appears to be original and hadn't been functional in a while given the amount of interior corrosion. It didn't appear to have ever been apart as I had one helluva time getting the "cage" out of the compensator assembly.
 

63C20

Member
32
0
6
Location
South Miami, FL
Consider New Airpacks

Those parts are the spring guide and washer on the hydraulic side. The best set of instructions that I have found is the Bjorn Brandstedt article on SS, Heck I'll attach it. The diagrams are not 100% accurate, but give you a good overview. That being said, after screwing with dual airpacks for a month we went ahead and bought some new ones from Eric and did not look back.

Also Extra parts are BAD


View attachment Air-Pak Bjorn Brandstedt June 2002.pdf
 

Sapper55

New member
25
0
1
Location
Huntsville, Alabama
Awesome job! I also rebuilt my airpack, but did not hone the air cylinder. It was in real good shape. I think I will have to re-do it soon. Just an oversight. This is my first time and I appreciate your posting and efforts. Thanks, Sapper
 

dubnali

New member
15
0
0
Location
Hickory, NC
Those parts are the spring guide and washer on the hydraulic side. The best set of instructions that I have found is the Bjorn Brandstedt article on SS, Heck I'll attach it. The diagrams are not 100% accurate, but give you a good overview. That being said, after screwing with dual airpacks for a month we went ahead and bought some new ones from Eric and did not look back.

Also Extra parts are BAD


Air-Pak Bjorn Brandstedt June 2002.pdf
According to Picture A on page 4, the conical piece is the spring seat that sits inside the end cap on the slave cylinder. I'm still confused as to where this washer came from. If it is slid over the conical seat, it won't ride in the recess with in the endcap. When our air pack was disassembled, all old parts were removed from the air cylinder end because we couldn't get the end cap to break free at the time. Both of these pieces fell out when we rotated the hydraulic assembly for inspection. Thanks for the help and the link, 63C20. Now to figure out the location of the washer. I have a few days to figure it out, because the cup expander on the air piston broke during removal and I am waiting on the new one to arrive.
 
Last edited:

JCKnife

Well-known member
1,367
46
48
Location
Kentucky
When I remove the airpack do I need to cap off the brake lines with something or is a plastic baggie with a rubber band enough? I know I will need to bleed the system anyway but my deuce is in the garage right now and I want to minimize the mess.
 

DHennon

Member
Steel Soldiers Supporter
364
16
18
Location
Orlando, Fl
Very Informative. Pics help a lot. It certainly will help those needing details on rebuilding an air pack. Thanks!
 

JCKnife

Well-known member
1,367
46
48
Location
Kentucky
Answering my own question: a lot of brake fluid comes out of the air pack when you disconnect the lines, but not much comes out of the lines. Easier to clean up than capture, mostly.

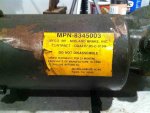
Uh oh, mine says do not disassemble!
ImageUploadedByTapatalk1367162959.651837.jpg
 

JCKnife

Well-known member
1,367
46
48
Location
Kentucky
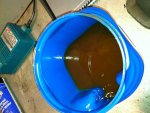
Nice-looking stuff inside!

IMG_0875.jpg


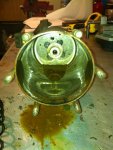
Isn't this supposed to be the "air" side?

IMG_0881.jpg

To add something useful to the thread: Getting the "plug" off the fluid end (where the brakelight switch used to be) was the toughest thing I've done so far. Couldn't accomplish anything in a vice. Put a box-end wrench on the nut and an open-end wrench on the airpack body and literally had to STAND and BOUNCE with a foot on each wrench to get it to break loose--and I run about 280 lbs. So it was pretty stuck. :grin:
 

JCKnife

Well-known member
1,367
46
48
Location
Kentucky
According to Picture A on page 4, the conical piece is the spring seat that sits inside the end cap on the slave cylinder. I'm still confused as to where this washer came from. If it is slid over the conical seat, it won't ride in the recess with in the endcap. When our air pack was disassembled, all old parts were removed from the air cylinder end because we couldn't get the end cap to break free at the time. Both of these pieces fell out when we rotated the hydraulic assembly for inspection. Thanks for the help and the link, 63C20. Now to figure out the location of the washer. I have a few days to figure it out, because the cup expander on the air piston broke during removal and I am waiting on the new one to arrive.
Could the washer be your spring retainer from the air piston side? Mine is a little different but also much newer. Looks like maybe about the right size, though--just a guess!
 

NMSMITTY

Member
62
0
6
Location
Elephant Butte/NM
Well did mine Sunday after my brakes failed completely Saturday night. I sure wish I could have my computer out in the garage with me so that I could have seen the details you posted in here. I saw one post that it took about 3 hrs to rebuild well I tell you my three hours lasted about 9 lol but that's what happens when you take a break in the middle and the break lasts longer than the memory. Anyway brakes are hard as a rock now and nothing out of the slobber tube. Now my rear brakes seem to binding a bit so need to figure out what is causing that.

Thanks for the great write up.
 

Scar59

Active member
Steel Soldiers Supporter
2,811
41
38
Location
Mt. Eden, KY
Great info, I knew I joined this forum for a reason...got an air pack pending rebuild. This info will help greatly.
JC
 
Top
AdBlock Detected

We get it, advertisements are annoying!

Sure, ad-blocking software does a great job at blocking ads, but it also blocks useful features of our website like our supporting vendors. Their ads help keep Steel Soldiers going. Please consider disabling your ad blockers for the site. Thanks!

I've Disabled AdBlock
No Thanks