• Steel Soldiers now has a few new forums, read more about it at: New Munitions Forums!

  • Microsoft MSN, Live, Hotmail, Outlook email users may not be receiving emails. We are working to resolve this issue. Please add support@steelsoldiers.com to your trusted contacts.

MY Airpack Rebuild with Photos!

JCKnife

Well-known member
1,367
46
48
Location
Kentucky
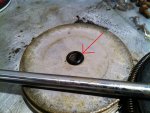
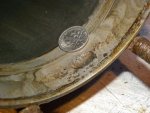
I have discovered this little bit of corrosion inside my air cylinder, but it seems apparent that it is NOT in the path of the moving piston--too close to the "lid" for that. Would you fill it with JB Weld and sand it down, or just ignore it? It's not really rusty now, just missing some metal, obviously.

DSCN2391.jpg
 

JCKnife

Well-known member
1,367
46
48
Location
Kentucky
Any comment on the above? (this is the problem with using old threads, they tend to be ignored after a while...)
 

DeucesWild11

Active member
1,265
12
38
Location
Putnam County, NY
I would hone down the cylinder and then smooth out that area as much as possible. Is that some grey RTV sealant on the end? I had to use that to seal up the end since the small gasket I had snapped before I could get it in place. So far it has worked out fine. I have used that stuff for my axle shaft seals as well on the rear end and have never had a problem.
 

welldigger

Active member
2,602
15
38
Location
Benton LA
I have discovered this little bit of corrosion inside my air cylinder, but it seems apparent that it is NOT in the path of the moving piston--too close to the "lid" for that. Would you fill it with JB Weld and sand it down, or just ignore it? It's not really rusty now, just missing some metal, obviously.

View attachment 425753
If it isn't in the path of the piston then I would ignore it. Well I take that back....I would tape off around it and hit it with some of the rust treatment stuff that turns rust into a black primer. Can be found at most auto parts stores. This would be just to keep it from pitting further. Again mask off anywhere you don't want the paint...say anywhere the piston travels.
 

JCKnife

Well-known member
1,367
46
48
Location
Kentucky
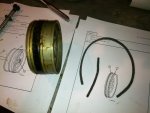
Moving on with this, I've got the nut off the big piston but the halves didn't separate. I guess I need to pry them apart? Also, the TM calls for a "felt ring" but my rebuild kit came with just a strip of felt. Is this correct or is mine torn?

IMG_0914.jpg
 

reloader64

Active member
377
138
43
Location
Liberty Hill, Texas
I ran into that problem. Go to your local hardware store and buy some wooden wedges used to level door frames. Use 1 or 2 of the wedges to separate the halves. A couple of light taps with a hammer on the wedge, and my piston halves popped right apart. The felt strip is the right one. It only holds some lubricating oil, it doesn't seal anything.
 

JCKnife

Well-known member
1,367
46
48
Location
Kentucky
Dot 5 for all parts that come in contact with brake fluid. Mineral oil based lubricants would ruin the seals.
For the air side, the prescribed lubricant is OHT, a mineral oil based hydraulic fluid. Soak the felt seal before assembly. Also, a few squirts are to be added periodically through the hole on the rear, there is a little plug.
Some air packs do not have that plug, the air pipe must be removed to add the lubricant.
When i can´t get OHT, i use air tool oil, or 10wt in a pinch. I also like to put a very light coat of grease on the inside of the air cylinder, as the felt seal will not wipe the oil over the entire surface, and i put silicone grease under the dust boots on the master cyl and wheel cylinders to stop rust.
The online sources for new-old-stock OHT that I can find state that it is a PETROLEUM-based oil, not mineral.
 

JCKnife

Well-known member
1,367
46
48
Location
Kentucky
I was able to get the piston halves apart by cutting back the old rubber cup with a knife and then sticking a small screwdriver in between, carefully, so as not to mar the metal.

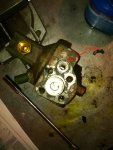
I seem to have found 2 o-rings that are NOT in the rebuilt kit. The one between the piston halves is beveled to fit in the recess there. I doubt that is something I can find elsewhere--reuse the old one?

The other one, from where the housing meets the big cylinder, looks like something I could probably find at NAPA?
IMG_0886.jpgIMG_0915.jpg
 

sidel2426

New member
22
0
1
Location
Cypress, TX
Those two o-rings weren't in my rebuild kits either. The o-ring that is beveled I believe was round at one time but conforms to the shape of the parts when they are bolted back together. Of course I could be wrong. In both cases I just found o-rings that were approximately the same size as the old ones and put it together. Just make sure the orings aren't smaller in diameter than the original ones. My airpak has been working fine since I rebuilt it.
 

JCKnife

Well-known member
1,367
46
48
Location
Kentucky
Went to NAPA today and found a couple of parts towards plumbing in the switch on the air side but still a few pieces short. Would help if I knew what I was looking for instead of just picking up and test-fitting everything I see. But getting there!

Edit: the ladies working NAPA on a Saturday were zero help, and actually just let me dig through stuff on my own, but tomorrow I'll take it to AirHydro. I'm sure they'll help me find what I need.
 
Last edited:

JCKnife

Well-known member
1,367
46
48
Location
Kentucky
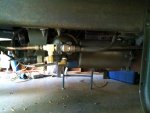
Update: I got all the correct fittings at AirHydro, and my airpack is reinstalled. BUT when I'm trying to bleed the system, the Master Cylinder is leaking at the cap. I took the copper washer out and sanded it a little but no dice, it is still leaking when I pressurize the system. So I need to find a copper washer or an O-ring to fit in there. And being that it's Sunday I know I won't be able to, today, so maybe I'll focus on some painting instead today. Sheesh, always something!

IMG_0961.jpg

Edit: My neighbor had an o-ring! But now the brake lights are not coming on. I've had enough for today, gonna go clean the chicken coop for fun instead!
 
Last edited:

Sapper55

New member
25
0
1
Location
Huntsville, Alabama
Great job and very professional. I rebuilt mine, reinstalled it in the deuce, refilled the system with new brake fluid using a pressure bleeder and the pedal goes all the way to the floor. Made sure that the master cylinder is topped off and I searched for leaks or kinked lines etc. Still no improvement. Any ideas, I'm stumped. Thanks for the pics.
 

Sapper55

New member
25
0
1
Location
Huntsville, Alabama
I rebuilt my hydrovac and both front wheel cylinders. Re-bled the system with a pressure bleeder and have no pump pressure. It just goes to the floor when pressed. The pedal does rebound on its own though. How'd the chicken coop go?
 

JCKnife

Well-known member
1,367
46
48
Location
Kentucky
Ha ha the coop cleaning was easy, predictable, and no surprises! I got the result I expected from the effort put in. Wish I could say the same for the deuce!

RE bleeding I would honestly say try it again. The first time I bled my brakes I ended up with a soft pedal. It sat for a few days and got firmer. I don't know if it was bubbles migrating back to the master or what. Then I bled it again and after a few more days it was perfect.

I'm never in a hurry with this truck; I know not everyone has that luxury.
 

welldigger

Active member
2,602
15
38
Location
Benton LA
If you are using DOT 5 brake fluid it can easily get impregnated with tiny air bubbles that will drive you mad while attempting to bleed the brakes. Let it sit a day and try again. Also be sure to bleed the brakes in the correct order. Air pack first, then right rear, left rear, right middle, left middle, etc.
 

armyvet67

New member
19
0
0
Location
Bonaire, GA
This is great. Thanks so much. I plan to rebuild my airpack soon. Can you just BLEED the airpack when you reinstall it? Is it necessarty to BLEED all of the brakes?

Thanks very much.
armyvet.
 

reloader64

Active member
377
138
43
Location
Liberty Hill, Texas
It's almost impossible to replace a major component in the brake system without getting air into the system. I would highly recommend bleeding the whole system. I built a pressure bleeder out of a cheap chemical sprayer, and bleeding the entire system is a one man job that takes about 15 minutes.

Scott
 

armyvet67

New member
19
0
0
Location
Bonaire, GA
Thanks. I have tried my brakes with air pressure built up and with NO airpressure and I can't tell any differance in stopping. So I am sure my airpack needs overhauling. Can you give me any info on how you made your bleeder? I would like to make one if possible. I wish there was a place you could send your airpack to ger overhauled and mailed back for install. My brakes probably need bleeding and adjusting after I get the airpack fixed.
Thanks for your help.
 

JCKnife

Well-known member
1,367
46
48
Location
Kentucky
Can you give me any info on how you made your bleeder? I would like to make one if possible.
http://www.steelsoldiers.com/showthread.php?3229-Deuce-Power-Bleeder-R4x4-Style


I wish there was a place you could send your airpack to ger overhauled and mailed back for install.
If money is not a problem (and it sounds like maybe it isn't) you can just buy a new airpack. http://www.memphisequipment.com/PartsDetail.aspx?id=10000259
(Memphis is just one parts dealer, I'm sure others have them)
 
Top
AdBlock Detected

We get it, advertisements are annoying!

Sure, ad-blocking software does a great job at blocking ads, but it also blocks useful features of our website like our supporting vendors. Their ads help keep Steel Soldiers going. Please consider disabling your ad blockers for the site. Thanks!

I've Disabled AdBlock
No Thanks