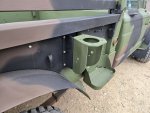
• Steel Soldiers now has a few new forums, read more about it at: New Munitions Forums!

  • Microsoft MSN, Live, Hotmail, Outlook email users may not be receiving emails. We are working to resolve this issue. Please add support@steelsoldiers.com to your trusted contacts.

My M715 'rework' project

M813rc

Well-known member
Steel Soldiers Supporter
4,206
3,188
113
Location
Near Austin, Texas
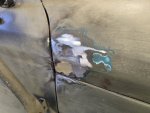
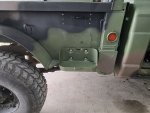
So, having poked one rust bubble, I decided to poke and scratch at a few more little ones, and they too revealed nastiness beneath. Nothing near the scale of the bed, but definitely needing attention. There were only a few, mostly below and behind the doors, and one ahead of the passenger side mirror.

These were cleaned up and Jason brazed them over, then they were ground down and primed.
Since I think it is still illegal to deface US currency, I won't go into how I know that quarters make excellent brazing material, they leave a lovely golden repair patch. ;)

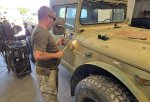
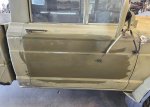
While all this was going on, I took a finishing sander to the doors and obliterated the last remnants of the Mifflin Fire Department lettering and badge that could just be seen through the old paint.
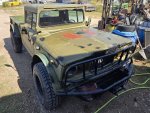
Once all the surface blemishes were attended to, the 715 was given a good wash and left out to dry, which happens pretty quickly even though the weather has cooled a bit.

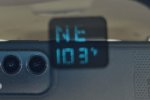
One of the things I was waiting on to work on the truck was cooler weather, the last picture shows the 'cooler' afternoon temperature. We had previously been dealing with 110-112 most days over the summer.

Cheers

180 - Copy.jpg 181 - Copy.jpg 182 - Copy.jpg 183 - Copy.jpg 184 - Copy.jpg 185 - Copy.jpg 186.jpg
 

M813rc

Well-known member
Steel Soldiers Supporter
4,206
3,188
113
Location
Near Austin, Texas
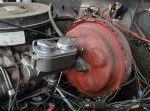
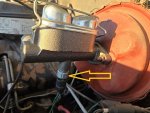
During the course of moving the truck about, I had discovered that the new master cylinder, put in during the previous brake work, had failed already. It was still under warranty, so the replacement was free, but it was still annoying to have to replace it so soon.

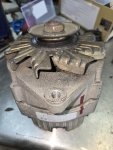
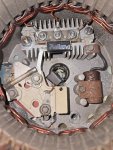
I also found that the alternator was not charging, so I rebuilt that. It was older, so no complaints to the quality control department there.

The entire truck was rubbed down with sandpaper and scotchbright pads to give the paint a good surface to attach to.
This was followed by another rinse, then when completely dry, the entire body was wiped down with lacquer thinner to make sure there were no oils or other crud on the surface. Always do this outside, and wear chemical-resistent gloves!

Meanwhile the winch and most of the lights had been removed, those that were left were masked, along with the windows. The mirrors were very cooperative, as the glass is held in place by a rubber gasket, so all that can be removed thus there is no need to mask them. :)

The sharp eyed among you will notice that the tailgate has sprouted Jeep lettering!
My bride requested that the name be on this truck, which she intends to drive in parades and such, rather than on my as-yet-unrestored M715, so I swapped tailgates between them. The 'new' tailgate looked pretty grubby, but cleaned up well. What looked like surface rust again turned out to just be deteriorated paint. The picture of the inside shows it partially rubbed down, with the lower layer of green paint still in good shape.
The thick US NAVY lettering on that tailgate was apparently put on with Marines in mind, because that stuff resisted everything I threw at it, and refused to be obliterated! I decided that it would be amusing to have the Navy lettering barely showing through the new paint and USMC markings, so I just left it in place. Marines have been known to "reallocate" Navy resources from time to time. :grin:

The truck then got two coats of grey primer. It actually looks quite Naval that colour!

Cheers

187a.jpg 187b.jpg 187c - Copy.jpg 188.jpg 189.jpg 190.jpg 191.jpg 192.jpg 193.jpg 194.jpg 194b.jpg 195 - Copy.jpg 196 - Copy.jpg
 
Last edited:

M813rc

Well-known member
Steel Soldiers Supporter
4,206
3,188
113
Location
Near Austin, Texas
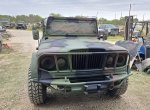
On with two coats of 383 green. The side panels/troop seats also got painted and put in place.

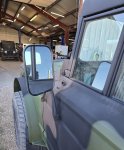
I had found the mirror mounts difficult to paint around when priming, so undid the top strap to fold them out a bit.
This showed that the lower parts were held on by sheet metal screws, and not very well. These were replaced with nutserts (rivnuts, take your choice) and bolts. Much easier to paint with them out a bit and moveable.

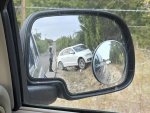
On the way home, I was following a car that was weaving (turned out she was texting). She veered slowly to the left into the ditch, hit a driveway culvert and launched herself to the ditch beyond it, taking off her oil pan and wrecking the transmission in the process, then swung across the road and into the fence and trees. The yellow arrow points to the stream of oil and transmission fluid she left across the road.
She was shaken up but not injured, fortunately, and I stayed with her until her dad arrived. Hopefully she learned a lesson there.

Cheers

197 - Copy.jpg 198.jpg 199.jpg 200.jpg 201a - Copy.jpg 201b.jpg
 

Mullaney

Well-known member
Steel Soldiers Supporter
Supporting Vendor
7,698
19,725
113
Location
Charlotte NC
On with two coats of 383 green. The side panels/troop seats also got painted and put in place.

I had found the mirror mounts difficult to paint around when priming, so undid the top strap to fold them out a bit.
This showed that the lower parts were held on by sheet metal screws, and not very well. These were replaced with nutserts (rivnuts, take your choice) and bolts. Much easier to paint with them out a bit and moveable.

On the way home, I was following a car that was weaving (turned out she was texting). She veered slowly to the left into the ditch, hit a driveway culvert and launched herself to the ditch beyond it, taking off her oil pan and wrecking the transmission in the process, then swung across the road and into the fence and trees. The yellow arrow points to the stream of oil and transmission fluid she left across the road.
She was shaken up but not injured, fortunately, and I stayed with her until her dad arrived. Hopefully she learned a lesson there.

Cheers
View attachment 934277 View attachment 934278 View attachment 934279 View attachment 934280 View attachment 934281 View attachment 934282
.
Yeah, it is lucky she didn't end up up-side-down.

The 383 looks REALLY good!
And the troop seats too...
 

Mullaney

Well-known member
Steel Soldiers Supporter
Supporting Vendor
7,698
19,725
113
Location
Charlotte NC
Looking good. This ”cooler” weather sure does feel hot in the afternoons the last week or so.
.
Agreed. Spent a little bit of time this afternoon out in the yard - cranking trucks and taking them around the block. It is definitely sunny, with clear blue sky. It wears on you. Huffing and puffing up and down...
 

M813rc

Well-known member
Steel Soldiers Supporter
4,206
3,188
113
Location
Near Austin, Texas
.
Yeah, it is lucky she didn't end up up-side-down.

The 383 looks REALLY good!
And the troop seats too...
Thanks!

Yes, she did a pretty spectacular "Dukes of Hazard leap" over that culvert, lots of dust and flying debris. The car looked way worse in person than in the picture, the whole front end was trashed and all the fluids were either out or still leaking. Better to learn that way than a head-on with another vehicle.

Yep, it's been averaging a 'chilly' 94-96 most afternoons here, with clear skies. Great for painting, though! It dries and bakes on well.

Cheers
 

M813rc

Well-known member
Steel Soldiers Supporter
4,206
3,188
113
Location
Near Austin, Texas
So, onwards with the paint.

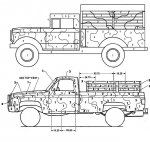
During the break in actually working on the truck, I drew out the camouflage pattern for it. I used the manual diagrams for the M1008 for the basic pattern, adjusted in size and shape a bit to suit the M715 body. I referred to the M1010 pattern to extrapolate onto the troop seats/side rails. I tweaked it and tweaked it until it looked right to me, then showed it to Reloader64 and Pawnshop for their opinions. Both gave a thumbs up.
Left side example is attached.
If I were smarter and more computer savvy, I'd have probably found some excellent drawing program to do this, but I'm barely computer literate, so I draw it out line by line in Paint with an electronic pencil.

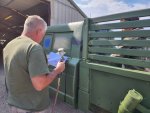
Following my diagrams closely, I painted on the edges of the pattern with the touch-up gun, while Courtney followed me and filled them in with the bigger gun, this worked well.
Transferring the pattern from the paper onto the full sized truck twists my brain, and entails a lot of reference to printed copies of the pattern, but I'm pretty happy with how it came out.

First on was the black, because it defines the pattern, and then brown because it is only 15% of the final colour and just sort of fills in corners.

Once the black is on, I always look at a truck and think "Oooh, I've messed up, that does not look right...", but when the brown goes on, it ties everything together.
I'm actually pretty pleased with this one, and it is very close to my diagrams, so BIG sigh of relief!

I didn't paint the inside of the bed with black and brown, because it will be painted with 383-coloured bed liner in couple of weeks when the paint is thoroughly dry. It will likely remain plain green after that because regular paint tends not to stick well on top of liner.
I may paint the insides of the troop seats though, the more I look at them plain green, the more I think I should.

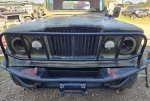
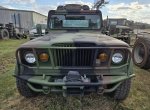
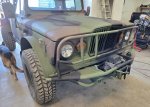
Painting the front would have been much easier without the grill guard in the way, but it is an integral part of the bumper, so that whole thing would have had to come off. Manipulating that big heavy item would have created problems in its own right, including matching the camo lines, so it was left in place.

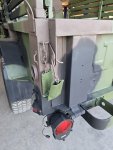
I did finally find my good metal tail lights, so these were masked up and painted because both areas where they mount are black.
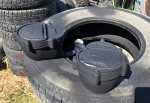
I had taken the jerry can holders off during prep to clean them up, and then primed them with rust converter. These will get a rattle-can paint job that matches the camouflage before they go back on.
I'm using Gillespie paint from Rapco, so the stuff in the spray cans exactly matches the gallons of paint. I've used their paint for 20+ years and really like it.

I know that the USMC on the jerry can holders stand for US Metal Company, but I do like that on a Marine truck. :)

Lots of detail work still to do, putting all the lights and small bits back on.

Cheers

202a.jpg 202b.jpg 203a.jpg 204.jpg 205 - Copy.jpg 206 - Copy.jpg 207 - Copy.jpg 208 - Copy.jpg 209 - Copy.jpg
 
Last edited:

Barrman

Well-known member
5,254
1,762
113
Location
Giddings, Texas
Reading this it finally dawned on me. My M715 is going to go from the only m715 that sometimes shows up every few years at club events. To a very ugly duckling. I’m going to have to tell my truck about your progress. It may never run again.

Looking good. The humids came back this morning with chances of rain later in the week. Your window of painting might be getting smaller.
 

M813rc

Well-known member
Steel Soldiers Supporter
4,206
3,188
113
Location
Near Austin, Texas
Tim, your M715 is definitely NOT an ugly duckling! It will be nice to see two of them together.
Maybe if Temple can get their act together, that can be our big gathering again. I hope so.

Fortunately, the major painting on mine is pretty much done. I'm doing things like tailgate chains and other bits from rattle cans today, they should be good and dry by the time the rain gets here. (Hoping the rain does get here!)
Since the bed interior is fully painted up and protected, the bed liner application can wait for favourable conditions.

The dew at night and having the PEC truck yard next door to Jason's means everything is now covered in a heavy coat of dust, but that won't hurt anything. It makes the black paint look really weird in that last picture, though.

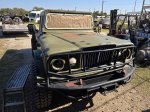
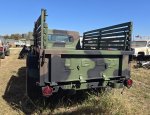
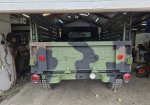
The masking is now all pulled off, and the lights are back on. Starting to look like a real truck! I forgot to take a picture of the back with the tail lights. Still need to put the reflectors on.

The old tailgate chains had rubber sleeves on them, which obviously held water because they are rusted about half through. I saved the hooks and replaced the rest of the chain, so they are shiny silver in the pictures.
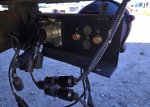
The winch is just sitting in the front bumper, not bolted down or wired back up yet.

I'm very happy with how the hood panels (that replaced the louvred panels) look under the paint.

Cheers

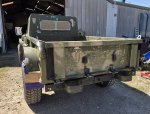
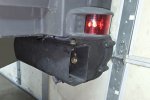
Edit - attached a picture with tail lights on. Some of the wires are still hanging down, and the guff on the lenses is protective plastic, yet to be removed.


210 - Copy.jpg 211 - Copy.jpg 212 - Copy.jpg 213 - Copy.jpg 214 - Copy.jpg
 
Last edited:

M813rc

Well-known member
Steel Soldiers Supporter
4,206
3,188
113
Location
Near Austin, Texas
I added a tail light picture to post 90 above.

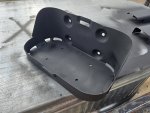
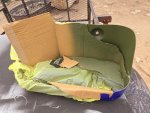
The jerry can holders cleaned up well. They were primed and painted the colour appropriate for the part of the truck that they go on, one black, one green.
The black one needed a green corner, and I find it difficult to get a clean line on a small area with a rattle can, so rather than get the detail spray gun out, I made a cardboard mask and used the spray can.

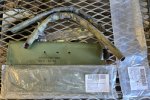
The jerry can straps that came with the M715 were badly deteriorated canvas webbing with rusty rivets. Buddy Mike made me a new set, with hardware that allows them to be removable, but using the original tightening clips. He does great work.

An upside down cattle trough on a trailer makes a great paint table, by the way! I'm not worried about the new trough having a green and black bottom. :)

Cheers

215 - Copy.jpg 216 - Copy.jpg 217 - Copy.jpg 218 - Copy.jpg
 
Last edited:

M813rc

Well-known member
Steel Soldiers Supporter
4,206
3,188
113
Location
Near Austin, Texas
A slight delay from paint curing completely, then rain, then birthing some late calves.

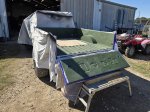
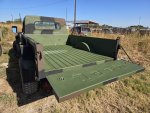
So, finally time to put the bed liner on. This entailed removing the troop seats, and a lot of masking, then wrapping the whole truck in a cocoon. No chance of overspray! :D
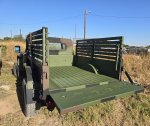
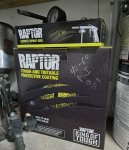
The liner is the tintable, you just add 10% of whatever colour paint you want to (as long as it isn't water based), so I added the Rapco 383 green I had painted the truck with. After two good heavy coats, I'll call it done. The colour is a near exact match, there is just a slight sheen to the liner now. It takes five to seven days to cure fully, I imagine the colour will be a near perfect match once it's dried.

With liner, the masking needs to be removed as soon as you are finished painting, to make sure the edges are smoothly down and you don't lift any pulling tape off later. Most of that was pretty easy, but unmasking the tie-down swivels in the bed was...entertaining...
The liner in it's wettish form is probably one of the stickiest substances on the planet! That stuff goobers up and sticks your fingers and the removed masking tape together like crazy. Fortunately, I was bright enough to wear rubber gloves for this evolution, but I went through two pairs, the fingers of the first pair bonded for all eternity.

After a couple of hours of baking in the sun, we put the troop seats back on. These will be needed to hold a tarp up if it rains tomorrow, as the liner can't be subjected to any water for at least 72 hours after application.. The truck can spend the nights inside Dr Jay's shop, but will need to be out during much of the day so the paying customers' vehicles can go in and out, and we have a 75% chance of rain tomorrow.

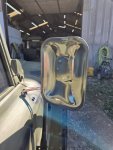
I got the mirror glass, most of the reflectors, and the last of the lights back on. I also got the winch bolted back down and wired up. I still need to pull some of the cable out and rewind it properly, it got a bit unruly while it was unrestrained. The tailgate chains got their new covers too, teh old rubber ones were in deplorable condition, and had held water anyway.

I may just have the truck ready to debut at the Veterans Day parade on Monday.

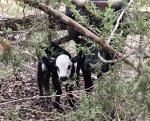
The little gal in the last picture was born Monday night. Momma cow is behind that branch on the right, her nose is about level with the baby, her horns are at the very top of the picture.

Cheers


219 - Copy.jpg 220 - Copy.jpg 221 - Copy.jpg 222.jpg 223 - Copy.jpg 224.jpg 225.jpg 226 - Copy.jpg 227 - Copy.jpg
 
Top
AdBlock Detected

We get it, advertisements are annoying!

Sure, ad-blocking software does a great job at blocking ads, but it also blocks useful features of our website like our supporting vendors. Their ads help keep Steel Soldiers going. Please consider disabling your ad blockers for the site. Thanks!

I've Disabled AdBlock
No Thanks