• Steel Soldiers now has a few new forums, read more about it at: New Munitions Forums!

  • Microsoft MSN, Live, Hotmail, Outlook email users may not be receiving emails. We are working to resolve this issue. Please add support@steelsoldiers.com to your trusted contacts.

My new 1992 M998 Avenger

springer1981

Well-known member
844
1,150
93
Location
Maine
Good enuff.......... rims can be widened ......... the world is full of fake nuts, a few more will not hurt a thing!
There are many different ways it could be done. None of them are going to be easy and there are many things to consider. For a road vehicle the rims have to be DOT approved or at least marked. The overall structural integrity of the finished wheel is a major concern also. The way I am doing it retains the entire original structural integrity of the military wheel. Using only the bead seal portion of the donor wheel and putting it over the military wheel from the inside makes it so the integrity of the wheel is not reliant on the welding. The bead seal of the military rim prevents the donor rim bead seal from ever being able to come apart or off the military rim, it physically traps it. The weld will essentially just seal it from leaking and hold it concentric.

Widening rims, cutting out centers and welding back together introduce a lot of possible failure points. For off road and race tracks etc, that is less important and a ton less liability than on road wheels.

I'm not a fan of fake stuff either like the 24 bolts per wheel for looks ... 120 bolts and nuts that in the end would not match the studs and nuts of the real wheels. I do appreciate the suggestion and it made me think about the idea for a while before ruling it out for all the above mentioned reasons. I am always open to alternative suggestions. Thanks
 

TNDRIVER

Well-known member
Steel Soldiers Supporter
333
508
93
Location
Cleveland,TN
There are many different ways it could be done. None of them are going to be easy and there are many things to consider. For a road vehicle the rims have to be DOT approved or at least marked. The overall structural integrity of the finished wheel is a major concern also. The way I am doing it retains the entire original structural integrity of the military wheel. Using only the bead seal portion of the donor wheel and putting it over the military wheel from the inside makes it so the integrity of the wheel is not reliant on the welding. The bead seal of the military rim prevents the donor rim bead seal from ever being able to come apart or off the military rim, it physically traps it. The weld will essentially just seal it from leaking and hold it concentric.

Widening rims, cutting out centers and welding back together introduce a lot of possible failure points. For off road and race tracks etc, that is less important and a ton less liability than on road wheels.

I'm not a fan of fake stuff either like the 24 bolts per wheel for looks ... 120 bolts and nuts that in the end would not match the studs and nuts of the real wheels. I do appreciate the suggestion and it made me think about the idea for a while before ruling it out for all the above mentioned reasons. I am always open to alternative suggestions. Thanks
In the late 70's I learned to epoxy the inside of the weld. They would always leak, whether my welding or the "pro welder" . And NO they were not DOT certified. MY BAD.
 

springer1981

Well-known member
844
1,150
93
Location
Maine
Tomorrow I start the 4L80/242 conversion. I've been collecting parts now for a couple of years leading up to this. I have everything I think I need but we'll find out soon. The easy part is bolting it in. The hard part is making it drive again. Hopefully it will only take a couple days.

I also have plans to switch out the fuel tank for a new one and put in an updated fuel level sending unit. I'm swapping out the hand brake lever for one with lock/release button.

Every time I'm under the truck I look at the rear hubs and think I want rear steering. I have come to the conclusion that after the this conversion is complete the rear steering will be the next project. Unfortunately I want it to be a fully functional system and not just all or nothing steering. This significantly complicates the project but I have a few ideas.
 

Mario

Active member
315
87
28
Location
Rio Rancho, NM
Please keep detailed pics or video of the process and tools/parts needed.
I’ve been meaning to do mine for few years but other life properties get in the way.
I do not have any parts other than frame takeout of the TD power train
 

springer1981

Well-known member
844
1,150
93
Location
Maine
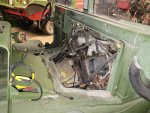
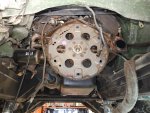
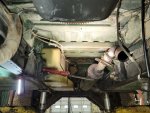
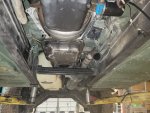
Day 1, on paper everything seems easier than it is LOL. Actually it didn't go to bad. Pulled the Y pipe and since it was new the bolts came out pretty easy. Previous owner put the new Y pipe in and didn't tighten much and left a few bolts out so that made it easier. Cross member came out easy and at least it was tight. Wish I could say the same for the driveshafts bolts. They were so easy to remove I almost didn't need a wrench and on a couple I didn't need a wrench, finger tight at best. Glad I am doing the transmission swap now and found them before they removed themselves.

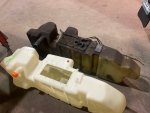
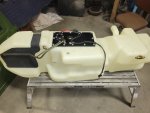
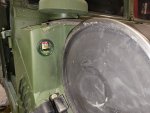
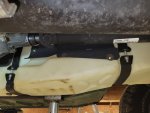
Pulled the fuel tank and while that was pretty straight forward it's a messy job. It has been in there for probably 30 years untouched and now it's getting a nice shiny new one. Not a moment too soon either, a lot of the rubber pieces were old and crumbly.

Swapped out the hand brake lever for the later style locking lever. Again, it was straight forward and simple.

Note: the starter is HEAVY when you aren't expecting it to drop in your hands. I think it weights as much as some 4 cylinder Toyota engines!

Here's a few pictures from today adventure
1.jpg


2.jpg


3.jpg
 

springer1981

Well-known member
844
1,150
93
Location
Maine
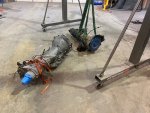
Old Transmission (back with green strap on it) TH400 with 218 Transfer case
New Transmission (front) 4L80 with 242 Transfer case

5.jpg

Old fuel tank and New fuel tank. Hope it fits, trying tomorrow.

4.jpg
 

springer1981

Well-known member
844
1,150
93
Location
Maine
Day 2 Transmission Swap, rebuilt front driveshaft with new U-joints and seal cap. Put the new fuel tank together with new sending unit and mostly new parts. The new tank also has seems to have a spot for an additional shield so I'm going to look into that.
6.jpg

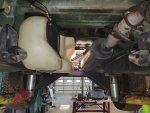
Here's the tank all mounted in place. It's definitely a tighter fit.
7.jpg
 

springer1981

Well-known member
844
1,150
93
Location
Maine
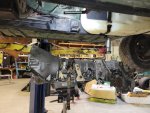
After the tank install and some prep work on the transmission it is was time to install it. Much tighter as I mentioned above. Had to tilt it and put the tail of the transmission up in between the tank and muffler and feed the tail in as we raised the bell housing end. Worked good and then we bolted it all in. Also had to change the yoke on the rear differential for the larger 12K driveshaft. Of course since we are right there everything got new seals.

8.jpg

And here she is all bolted in. Still lots more to do but that finished off the day. Here you can see the new 4 speed shifter lever in place. I have added the parts for the reverse light switch and those will be wired at a later time.
9.jpg
 

springer1981

Well-known member
844
1,150
93
Location
Maine
Day 3 Transmission Swap, spent the whole day doing detail work and installing the transmission controller (TCU). First I needed to install a TPS and move the fan switch. I chose to use a Hummer H1 style TPS for ease of mounting. Also used a fan switch relocation bracket and extended the wires. I made a wiring harness for the transmission and routed all the wiring under the dash. I plan to mount the TCU behind the dash and make the display visible and the function knob accessible where the Air Filter metering gauge is. Because the Air Filter metering gauge is relatively low on the importance scale I am going to move it near the air filter under the hood.

I never really considered what a Dual Voltage Alternator did other than figured it supplied 12v tap for 12v power however it doesn't really do that. So now what I intended to use for power isn't available so I'm going to get a 24v to 12v 10 amp converter to power the TCU.

Other tasks included installing the shifter and TC linkages, installing the transmission line regulator, etc. If everything goes well tomorrow I hope to take a test drive by days end.
 

springer1981

Well-known member
844
1,150
93
Location
Maine
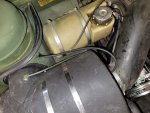
Day 4 Transmission Swap, finished the install of the TCU and set the TPS sensor. As mentioned above I mounted the TCU in the dash so the display and function knob are visible and accessible. I moved the Air Filter gauge to under the hood next to the air filter, pictures below. I could have just done away with the gauge as it isn't a big deal for me. But having it under the hood where you can easily see it from time to time gives you a good idea of the condition of the air filter seemed like a good solution.

I made all the wiring harnesses I needed, the reverse lights, plate light, TC high lock light and electric speedometer harness. I also ran the back up camera cable.

Saturday is the next free day I have to work on it and hope to finish it enough for a test drive. Remaining work is reinstalling the starter, the front drive shaft, dipstick and tube, the exhaust Y pipe and figuring out the muffler mounting on the transfer case bracket. Then finish the wiring, hooking up the TC lock light, speedometer, tachometer, reverse lights etc.

airmeter1.jpg

airmeter2.jpg
 

springer1981

Well-known member
844
1,150
93
Location
Maine
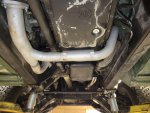
Day 5 Transmission swap, I ordered a fuel tank shield after I found out the new fuel tank had mounts for it. It showed up yesterday so that got mounted first thing today. Installed the starter and front drive shaft then moved on to the Y pipe. The prior owner had replaced the Y pipe and I could tell he was mechanically challenged. The drivers side manifold connection was missing the gasket and the passenger side was missing bolts. I didn't notice why when I took it apart but now trying to assemble it, it was clear the Y pipe didn't fit correctly. It was about 1/2" off, to narrow. We mounted the passenger side and the rear then put a porta-power from the frame to the front drivers side pipe and applied some torch heat. Once hot the pipe spread easy and is now a perfect fit. In the picture below you can see the gray area on the pipe, that's where we heated it. Nothing like custom fit!

Last was the transmission dipstick tube. I have a brand new tube and dipstick somewhere but I have not been able to find it. So I figured we would try to reuse the TH400 dipstick and tube. The bends are in the wrong place, the entry angle is wrong and it just doesn't fit. So back to the torches and a little creative bending and it fits like a charm now. Someday I will find my brandy new one and install it but for now this will have to do.

Changed the fluids in the transfer case and transmission. Whoever last changed the fluids on the transmission must have used an impact gun to put the drain plug on. The head was stripped and it was exceptionally tight. After a little persuasion it came out and in went a new one. It took about 2.5 gallons of transmission fluid. After doing a once over and checking all the bolts and wires it was time for some test runs.

Started it up on the lift and checked the controller and all looked good. Ran through the gears and the test was a success !!! Ran it for a couple more minutes and checked for leaks then shut it down. Tomorrow I'll check again for leaks in the morning and then it goes on its first road test. So far every thing is looking good.

10.jpg


Tank shield
11.jpg
 

Hum to the Vee

New member
11
18
3
Location
Cedar Rapids, Iowa USA
I am curious if the 4 speed will make it noticeable quieter in the cab. I do not have a need for the performance of a 4 speed, but I would consider it if the noise reduction is substantial. I underestimated how much louder my truck would become when I replaced the soft doors and top with X Doors and an armored roof (it was the cheapest route at the time).
 

springer1981

Well-known member
844
1,150
93
Location
Maine
I am curious if the 4 speed will make it noticeable quieter in the cab. I do not have a need for the performance of a 4 speed, but I would consider it if the noise reduction is substantial. I underestimated how much louder my truck would become when I replaced the soft doors and top with X Doors and an armored roof (it was the cheapest route at the time).
I have not driven it yet but I doubt that it will help much if any with noise. I don't think it is much of a performance upgrade as it is a usability upgrade. The 3 speed is practically useless except for around town at less than 45 mph. With the 4 speed it will allow me to be able to drive on secondary roads that have speed limits of 55 without people getting upset at me for driving below the speed limit.
 

TOBASH

Father, Surgeon, Cantankerous Grouch
Steel Soldiers Supporter
Supporting Vendor
3,587
3,498
113
Location
Brooklyn, NY
I have not driven it yet but I doubt that it will help much if any with noise. I don't think it is much of a performance upgrade as it is a usability upgrade. The 3 speed is practically useless except for around town at less than 45 mph. With the 4 speed it will allow me to be able to drive on secondary roads that have speed limits of 55 without people getting upset at me for driving below the speed limit.
Well said.
 

Mogman

Moderator
Staff member
Moderator
Steel Soldiers Supporter
6,947
9,606
113
Location
Papalote, TX
Day 1, on paper everything seems easier than it is LOL. Actually it didn't go to bad. Pulled the Y pipe and since it was new the bolts came out pretty easy. Previous owner put the new Y pipe in and didn't tighten much and left a few bolts out so that made it easier. Cross member came out easy and at least it was tight. Wish I could say the same for the driveshafts bolts. They were so easy to remove I almost didn't need a wrench and on a couple I didn't need a wrench, finger tight at best. Glad I am doing the transmission swap now and found them before they removed themselves.

Pulled the fuel tank and while that was pretty straight forward it's a messy job. It has been in there for probably 30 years untouched and now it's getting a nice shiny new one. Not a moment too soon either, a lot of the rubber pieces were old and crumbly.

Swapped out the hand brake lever for the later style locking lever. Again, it was straight forward and simple.

Note: the starter is HEAVY when you aren't expecting it to drop in your hands. I think it weights as much as some 4 cylinder Toyota engines!

Here's a few pictures from today adventure
View attachment 853156


View attachment 853157


View attachment 853158
This should be a lesson to everyone, those loose drive line bolts should have been found on the very first time routine maintenance was done, having a driveshaft get loose can be a very damaging and expensive experience so careful inspection on them every time maintenance is done is a must!
 

Action

Well-known member
3,576
1,558
113
Location
East Tennessee
I am curious if the 4 speed will make it noticeable quieter in the cab. I do not have a need for the performance of a 4 speed, but I would consider it if the noise reduction is substantial. I underestimated how much louder my truck would become when I replaced the soft doors and top with X Doors and an armored roof (it was the cheapest route at the time).
A 4-speed would make a quieter ride at higher speeds. Not from the transmission, but from lower rpm of the engine.
As for noise...do you have all of the factory tunnel and floor pads in place? There are also 2 black rubber pads that fit the area around the washer fluid tank. Is the inside of your roof bare metal (to allow sound to bounce around)? Or does it still have the factory 1" thick headliner on it?
 

Mogman

Moderator
Staff member
Moderator
Steel Soldiers Supporter
6,947
9,606
113
Location
Papalote, TX
I am curious if the 4 speed will make it noticeable quieter in the cab. I do not have a need for the performance of a 4 speed, but I would consider it if the noise reduction is substantial. I underestimated how much louder my truck would become when I replaced the soft doors and top with X Doors and an armored roof (it was the cheapest route at the time).
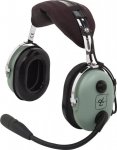
It would be next to impossible to make any HMMWV quiet, frame mounted differentials, straight cut gears in the hubs to total lack of any effective sound isolation between the wheels, suspension, frame and cab, you can use sound deadening materials on everything, roof, walls, floor etc. but in the end it will still be noisy, the best I have found so far are these.
DC headsets.jpg
and an intercom system...
EDIT, everyone SHOULD be wearing hearing protection, remember the rule if you have to raise your voice to be heard it is time for hearing protection!!
In my helmet top I can barely yell loud enough to be heard by the Commander.
 
Last edited:

TOBASH

Father, Surgeon, Cantankerous Grouch
Steel Soldiers Supporter
Supporting Vendor
3,587
3,498
113
Location
Brooklyn, NY
I won’t argue with the fact that a four-speed transmission will allow the engine to turn at lower RPM, however even at lower RPM our engines create a cacophony of sound. It’s like saying the jet engine makes less sound at lower speeds. It’s still a jet engine. Lol
 

springer1981

Well-known member
844
1,150
93
Location
Maine
Test Drive Done! The test drive was just around the shop lot. We got about 3-4" of snow last night and all the roads are wet and salt covered. I have no intention of driving on salt water covered roads so we kept it in the lot. It did shift through 3 gears and reverse and no issues at all. Ran great and can't wait to get it out on the road and see how OD does. I'll probably drive it home on Tuesday after the roads dry up and then get to see how top end is. I suspect it will be like night and day compared to the old 3 speed. Still a few loose ends to finish up but those can be done over the winter in my garage.
 

Mogman

Moderator
Staff member
Moderator
Steel Soldiers Supporter
6,947
9,606
113
Location
Papalote, TX
Test Drive Done! The test drive was just around the shop lot. We got about 3-4" of snow last night and all the roads are wet and salt covered. I have no intention of driving on salt water covered roads so we kept it in the lot. It did shift through 3 gears and reverse and no issues at all. Ran great and can't wait to get it out on the road and see how OD does. I'll probably drive it home on Tuesday after the roads dry up and then get to see how top end is. I suspect it will be like night and day compared to the old 3 speed. Still a few loose ends to finish up but those can be done over the winter in my garage.
Glad to hear it is going well!!!
 
Top
AdBlock Detected

We get it, advertisements are annoying!

Sure, ad-blocking software does a great job at blocking ads, but it also blocks useful features of our website like our supporting vendors. Their ads help keep Steel Soldiers going. Please consider disabling your ad blockers for the site. Thanks!

I've Disabled AdBlock
No Thanks