• Steel Soldiers now has a few new forums, read more about it at: New Munitions Forums!

  • Microsoft MSN, Live, Hotmail, Outlook email users may not be receiving emails. We are working to resolve this issue. Please add support@steelsoldiers.com to your trusted contacts.

PEASHOOTER's M109A3 CAMPER Build Thread

peashooter

Well-known member
1,038
205
63
Location
Hanover, minnesota
Hey, peashooter; great progress and as always great summary here. Your projects are the best!

I'm not sure what sheet metal you're using where the rain gutter fits, but dissimilar metals should have a separation to prevent galvanic action at point-of-contact (which is corrosive). But I'm guessing you know that. Did I guess lucky!?
thanks for looking out for me Ahab, The last thing I want to do is to put extra work into something only to find out I introduced a problem worse than the one I originally tried to fix. I did know of Galvanic corrosion and have read up as much as I can on how to prevent it in a reasonable fashion. My plan is to prime/paint the areas on the frame and new sheetmetal prior to assembly, use Tremco Vulkem sealant between all joints and on rivets. I'm also using painted rivets. Hopefully this will

Shoot all your seams wet just like an airplane, I use GE black "Paintable" RTV (silicone sealant/adhesive) it was invented for use in jet engines , only thing to look for is a quick sniff, if it smells of vinegar, don't use it , its corrosive to metal BUt youve been at this a long time and I like your work "First rate: am sure you know the wet seam solution Called a "faying" surface in AF jargon, good for steel to Aluminum lap joints . If you get bored you could start doing 109 shack rebuilds !
"wet seam" and "faying" are some new terms to me so I appreciate the pointers. I'll read up more on them. I find that one of the greatest challenges I come across in these projects, (and mainly at work) is finding the right search term. I usually know what I'm after, but not always what its officially called, so searches can be fruitless until coming across the right terminology first. Thanks again.
 

Another Ahab

Well-known member
17,999
4,556
113
Location
Alexandria, VA
"wet seam" and "faying" are some new terms to me so I appreciate the pointers. I'll read up more on them. I find that one of the greatest challenges I come across in these projects, (and mainly at work) is finding the right search term. I usually know what I'm after, but not always what its officially called, so searches can be fruitless until coming across the right terminology first. Thanks again.
I hear you; it's sometimes kind of a Catch-22 of the internet. But there's usually a few ways to come at it "sideways" until you triangulate your way in.
 

peashooter

Well-known member
1,038
205
63
Location
Hanover, minnesota
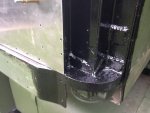
well I got some items done in the last week. Took all the passenger side panels off and removed all the loose rust and painted POR15 rust converter on all the framing. I forgot to take a picture before putting the panels on but here are the corners:
IMG_3264.jpgIMG_3266.jpg
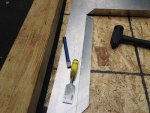
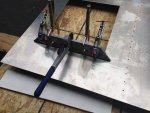
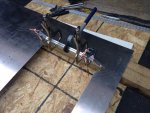
Picked up the sheetmetal and put the 3 pieces on the passenger side. Had to bend the window cutout edges to shape which wasnt easy. I'm using 5052 aluminum which is formable (unlike 6061), but its still hard to bend when one doesnt have a brake. I did the best I could and made some aluminum sandwhich pieces that I clamp on the lip to be bent and then bend them up. It didnt work that great on the first window so on the second one, I scored a bend line on the inside and then used a chisel to deepen the scored line for the bend. This helped a lot with making a nicer bend, just need to finish 1 more window cutout, and rework the first one:
IMG_3269.jpgIMG_3268.jpgIMG_3267.jpg
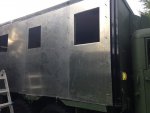
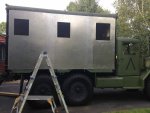
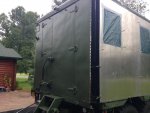
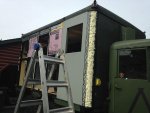
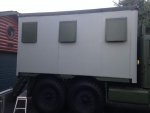
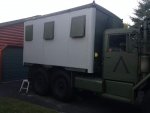
Here are some pics of how it looks now with the panels temporarily on. I think I'm going to save the driver's side until next spring.
IMG_3263.jpgIMG_3262.jpg
 

peashooter

Well-known member
1,038
205
63
Location
Hanover, minnesota
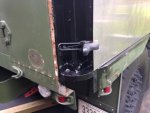
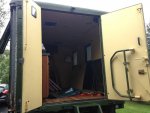
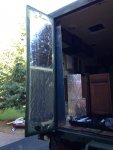
Anyone know how much the back van-box doors weight?
I need to figure out a way to take them off to replace the back sheet metal and re-skin the narrower door. I dont have any equipment for something like this so I'm open to clever ideas on how to handle the doors once the hinges are unbolted. I suppose the weight of the doors will narrow down the options, but I'm guessing the big one is a good 200#'s
IMG_3270.jpgIMG_3271.jpg
 

SLOrazorsedge

Member
415
5
18
Location
San Luis Obispo, Ca
Aaron, if you haven't used that POR 15 system before, your going to love it! They have it in spray cans now too for tight places.

I've got the same doors on my M146, I can't imagine two guys not being able to man handle them off, but mine are aluminum skinned though...
 

peashooter

Well-known member
1,038
205
63
Location
Hanover, minnesota
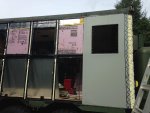
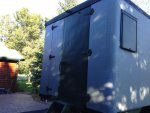
Here are some pics of how I finished up the truck for the year. I ended up getting the passenger side and rear skins replaced and decided that was good enough for this year. I'll finish up the drivers side in the spring (hopefully) and then re-insulate the walls and probably end up repainting the inside again since I had to remove most wall panels to get to all the rust spots.
I ended up having the door frame sandblasted and then painted it (along with all the other van box ribbing) with POR-15. For the aluminum, I learned about ALODINE 1201. Its sort of like an anodizing process but you can do it at home easily and it was WAY cheaper than having the big panels anodized. This way the aluminum panels wont oxidize (a couple pieces that were stacked outside in the rain started oxidizing really fast). The Alodine process also gives the aluminum a nice 'rough' surface for the paint to stick to.
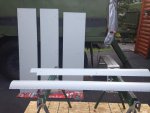
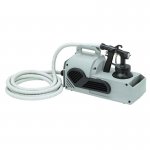
So first I cleaned the aluminum with ALUMIPREP 33, and then did the ALODINE 1201 process to it which turns it sort of a gold color. I then painted everything with some rustoleum grey primer using a Harbor freight 44677 HVLP sprayer that worked well spraying these larger items. I used black Vulkem 116 caulking as sealant between everything, and riveted it with shaveable head Olympic Rivets in most places, and in other places used painted aluminum pop rivets with pressed in mushroom caps after (so they all look like solid rivets when done).

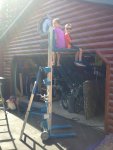
I borrowed this material lift from work to get the rear doors on & off the truck:
IMG_3281.jpg

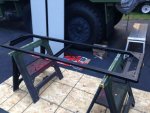
Here are some pictures of the small door's frame, rear primed panels, and a couple of the box's corner sheet metal pieces:
IMG_3367.jpgIMG_3286.jpgIMG_3285.jpg

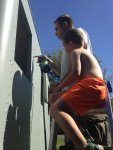
Here are some pics of riveting the side (with my helper), and the sprayer I used to make painting a snap:
IMG_3288.jpgIMG_3287.jpgIMG_3299.jpgIMG_3289.jpgIMG_3302.jpgIMG_3301.jpgIMG_3365.jpgAlodine.jpgHarbor freight 44677 sprayer.jpg
 

rustystud

Well-known member
9,280
2,988
113
Location
Woodinville, Washington
Thanks for the heads-up on the "Alodine 1201" and "Alumiprep 33" ! Where did you get them from ? I need to start "squirreling" away parts and supplies for my Trailer project.
 

peashooter

Well-known member
1,038
205
63
Location
Hanover, minnesota
Thanks for the heads-up on the "Alodine 1201" and "Alumiprep 33" ! Where did you get them from ? I need to start "squirreling" away parts and supplies for my Trailer project.
While reading about Alodine and general prep of aluminum, it seems that the aircraft guys were the experts on it and I saw lots of references to "Aircraft Spruce". That company also appeared to have one of the best prices and didn't charge the hazardous shipping add on that a lot of other places did. Apparently the Alodine has a shelf life also (around a year or 2 I think) so people recommended this company since they frequently replace the inventory.
http://www.aircraftspruce.com/catalog/cspages/alodine1201.php
http://www.aircraftspruce.com/catalog/cspages/alumiprep.php?clickkey=4992
 

TrailLifeBill

Member
Steel Soldiers Supporter
178
4
18
Location
Brunswick, GA
This thread will be one of my prime textbooks if/when I ever take the leap and do a build!! (Wife is already doing interior planning, so.....)

Thanks for your tips and documentation - maybe we'll cross paths some day at an RV park, or MV rally!!

Blessings,
Bill
 

Another Ahab

Well-known member
17,999
4,556
113
Location
Alexandria, VA
I used black Vulkem 116 caulking as sealant between everything, and riveted it with shaveable head Olympic Rivets in most places, and in other places used painted aluminum pop rivets with pressed in mushroom caps after (so they all look like solid rivets when done).
Where do you get these "mushroom caps"; got a pic?
 

peashooter

Well-known member
1,038
205
63
Location
Hanover, minnesota
Where do you get these "mushroom caps"; got a pic?
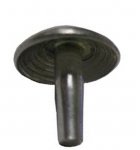
I think I just got them from Amazon. They are made by Stanley/POP rivet, the part number was MPA-6, and I think they were about $30 for a bag of 500. Once you are done installing the blind/POP rivets, you can just hammer these things into them and it makes it look like a solid rivet. I added a dab of sealant to them before putting them in.. just in case.
Here is a picture of the rivets again.
In the first picture (Left to Right) Aluminum Pop rivet with mushroom cap, Olympic Shaveable head rivet (prior to shaving), another pop rivet with cap, shaved Olympic rivet. Second pic is the backside

WIN_20160822_20_34_26_Pro.jpgWIN_20160822_20_34_48_Pro.jpgMPA-6.jpg
 

Jericho

Well-known member
1,180
69
48
Location
Landaff NH
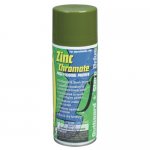
Alodine is a common Aircraft coating used on "RAW" aluminum parts that arn"t primed or painted in a traditional sense as a coating to prevent exfoliation /oxidation, It is usually used in areas that are covered, inside panel areas for example , on longerons, internal skin. Its fumes can be hazardous and direct contact with skin is not recommended. It is applied in "thin" coats and isn't a built up surface like multiple coats of paint , It is also applied over the raw surface with just an alodine prep solution wash. A better surface treatment if you plan to paint after treatment is Zinc Chromate, its trade mark is a baby crap yellow , its considered "hazardous" to spray and a good mask set up is needed. Its an MSDS product and seldom seen in the field in the scale pre 80s when we ordered it by the 55 gallon drum and sprayed it with wild abandon, Hard to get a rattle can of it now if your not in Corrosion Control AFSC. Each product has its advantages, I ve found a more acceptale solution, I spray Rustoleum , "Rusty Metal Primer " straight and allow a good drying period, generally a week in the heat. Then you can top coat it with about anything, Its a fish oil based product and has a hardy life span. Would love to just shoot Zinc Chromate and top it with a few coats of "DEATH in A CAN " two part aircraft POLY , stuff drys ROCK HARD and last forever , but oh well Good luck and great work !
 

peashooter

Well-known member
1,038
205
63
Location
Hanover, minnesota
Alodine is a common Aircraft coating used on "RAW" aluminum parts that arn"t primed or painted in a traditional sense as a coating to prevent exfoliation /oxidation, It is usually used in areas that are covered, inside panel areas for example , on longerons, internal skin. Its fumes can be hazardous and direct contact with skin is not recommended. It is applied in "thin" coats and isn't a built up surface like multiple coats of paint , It is also applied over the raw surface with just an alodine prep solution wash. A better surface treatment if you plan to paint after treatment is Zinc Chromate, its trade mark is a baby crap yellow , its considered "hazardous" to spray and a good mask set up is needed. Its an MSDS product and seldom seen in the field in the scale pre 80s when we ordered it by the 55 gallon drum and sprayed it with wild abandon, Hard to get a rattle can of it now if your not in Corrosion Control AFSC. Each product has its advantages, I ve found a more acceptale solution, I spray Rustoleum , "Rusty Metal Primer " straight and allow a good drying period, generally a week in the heat. Then you can top coat it with about anything, Its a fish oil based product and has a hardy life span. Would love to just shoot Zinc Chromate and top it with a few coats of "DEATH in A CAN " two part aircraft POLY , stuff drys ROCK HARD and last forever , but oh well Good luck and great work !
I should have talked with you before I started this aluminum project! I do like the Zinc-Chromate in a can but its not always easy to find it for under $10 a can. When I can find it, I buy a few cans of it but lately its been $20+ each which is why I went the Alodine route.

I have never heard of those caps, but those are great.

Can you get them for all their rivets, do you know; even their 1/8" ones?
I could only find them for the 3/16" aluminum rivets. I was trying to find them for the 1/8" also but not sure if they exist or not.
 

Attachments

Top
AdBlock Detected

We get it, advertisements are annoying!

Sure, ad-blocking software does a great job at blocking ads, but it also blocks useful features of our website like our supporting vendors. Their ads help keep Steel Soldiers going. Please consider disabling your ad blockers for the site. Thanks!

I've Disabled AdBlock
No Thanks