• Steel Soldiers now has a few new forums, read more about it at: New Munitions Forums!

  • Microsoft MSN, Live, Hotmail, Outlook email users may not be receiving emails. We are working to resolve this issue. Please add support@steelsoldiers.com to your trusted contacts.

PEASHOOTER's M109A3 CAMPER Build Thread

Valence

Well-known member
Steel Soldiers Supporter
2,112
555
113
Location
Davis County, UT
I haven't given my truck much attention lately but I have been following "LINO" and his well done projects. One of his upcoming projects is to install a higher output air compressor (double the output) and extra air tank. His info on this starts HERE.
So with the idea and info from LINO, I found an air compressor that should fit. Of course our Deuces use a somewhat odd one in that they are considered a "4 hole, base mount" compressor but the kicker is they are also "base oil fed". So their is a hole on the bottom base of the compressor flange where the oil is supplied to from the engine.
I got lucky and found a compressor with this, Lino found a compressor without the base oil hole so he will probably be drilling the hole. I'll post pics of that oil routing in another post incase they help anyone else out.

Below are some pics of the compressor when I got it (all black). Then I bought what I hope to be the best suited manifold kits for the deuce: outlet manifold (Haldex SN3711AH), I chose a filtered intake manifold for now (Haldex KN19040) but those who are doing the fording kits will want something different. I added the manifold kits, and then painted it green. I found the new/rebuilt compressor on ebay for $100 shipped, unfortunately I ended up spending about that for the set of manifold kits since I couldn't find any deals on those.

The compressor I got was a Midland KN13060 but I think Midland sold off this division to Haldex so that's who has them now. Lino and I are hoping these EL1300 series compressors are a good fit. You can find the Haldex compressor catalog HERE

-Stock compressors are about 7.4 cfm
-These EL1300 units are 13cfm.
-There are also EL1600 units that are supposedly high output versions of the EL1300 and they put out 16cfm.

The last picture is the larger air tank that I plan on adding to the truck. ($60 shipped off ebay!, another find by Lino)
Mr. Peashooter, did you finish installing the larger air compressor? Any information on fitment/alignment or anything else you had to do to get it to work would be appreciated.
 
Last edited:

peashooter

Well-known member
1,038
205
63
Location
Hanover, minnesota
Mr. Peashooter, did you finish installing the larger air compressor? Any information on fitment/alignment or anything else you had to do to get it to work would be appreciated.
I'm afraid its still sitting on my work bench slowly getting buried by other projects. I did "Check things out" again maybe a month or 2 ago just to verify that everything should physically fit, and it still looks like it will. Its one of those projects that will have the deuce out of commission for a little bit though since you have to remove the old one, then put the new one on, and now add a coolant circuit to it (since its water cooled and not air cooled). Like Lino, I'm not too sure when I'll get around to this project with the other ones that are in front of it (started and unfinished).
 

Another Ahab

Well-known member
18,006
4,577
113
Location
Alexandria, VA
I'm afraid its still sitting on my work bench slowly getting buried by other projects. I did "Check things out" again maybe a month or 2 ago just to verify that everything should physically fit, and it still looks like it will. Its one of those projects that will have the deuce out of commission for a little bit though since you have to remove the old.
It's funny how projects get buried like that, and then you need to go "archaeologist" and sift through the layers to find that one little effort that got lost. I run into that ALL the time.
 

someoldmoose

New member
583
2
0
Location
Lancaster, PA
:beer: I honestly do not even know where to begin. I am psyching myself up to do exactly what you have done but with an M820 (my avatar). The deposit has been placed with the seller and I am now trying to wait patiently for them to do their thing so I can pick it up and start my journey. I am, quite literally, bedazzled by the work you have accomplished. Several wonderful members pointed me to Rayzer's build of his trailer ( outstanding ! ) and I found your thread by chance. I was enthralled and have read every word. You could easily assemble your posts as a How-to book. I can only hope that my deconstruction and refitting go well as yours. Bravo, Kudos, and Congratulations on your fine machines.
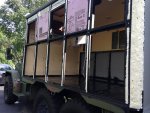
I have decided that Job 1 is making the chassis and it's components as safe and reliable as possible. Updating things as much as possible while keeping the basics, well . . . basic. Second priority will be complete disassembly of the van body to facilitate " starting from the foundation " with a clean and rust free carcass. I have many ideas already about how I want mine to end up. Your works and Rayzer's have already reinforced some of them. I have only just joined this group a very short time ago and already have seen the wonderful goodness of the members. Questions asked get answers. Help requested is given whenever possible. It does my heart good ( long, long story ) and helps restore my belief that not everyone on the planet (myself included) is a total "jerk" ( being nice ).

So, thank you Peashooter, and thank you to all the others whose wisdom and help I plan to utilize in the coming years. This is truly an incredible thing and I hope It continues long after I am no longer around.
 
Last edited:

QUADJEEPER

Member
Steel Soldiers Supporter
797
6
18
Location
Winter Springs, FL
:beer: I honestly do not even know where to begin. I am psyching myself up to do exactly what you have done but with an M820 (my avatar). The deposit has been placed with the seller and I am now trying to wait patiently for them to do their thing so I can pick it up and start my journey. I am, quite literally, bedazzled by the work you have accomplished. Several wonderful members pointed me to Rayzer's build of his trailer ( outstanding ! ) and I found your thread by chance. I was enthralled and have read every word. You could easily assemble your posts as a How-to book. I can only hope that my deconstruction and refitting go well as yours. Bravo, Kudos, and Congratulations on your fine machines.
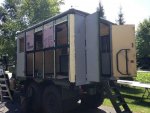
I have decided that Job 1 is making the chassis and it's components as safe and reliable as possible. Updating things as much as possible while keeping the basics, well . . . basic. Second priority will be complete disassembly of the van body to facilitate " starting from the foundation " with a clean and rust free carcass. I have many ideas already about how I want mine to end up. Your works and Rayzer's have already reinforced some of them. I have only just joined this group a very short time ago and already have seen the wonderful goodness of the members. Questions asked get answers. Help requested is given whenever possible. It does my heart good ( long, long story ) and helps restore my belief that not everyone on the planet (myself included) is a total "jerk" ( being nice ).
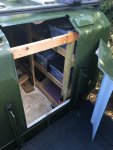
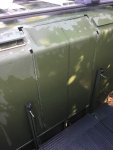
So, thank you Peashooter, and thank you to all the others whose wisdom and help I plan to utilize in the coming years. This is truly an incredible thing and I hope It continues long after I am no longer around.
Might pick up some idea's from my build thread, " Survival 109 Build". Been laying low for a bit, but still in progress.
 

peashooter

Well-known member
1,038
205
63
Location
Hanover, minnesota
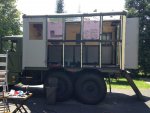
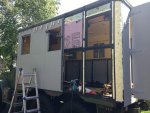
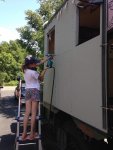
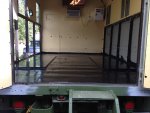
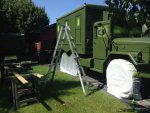
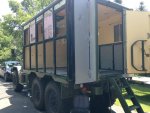
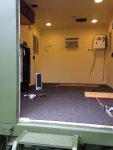
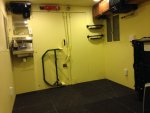
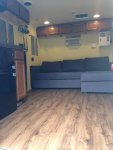
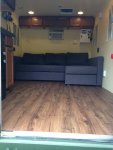
Its been a while since I posted on here, but there has been some progress since last summer. I was able to finally finish re-skinning most of the van box with aluminum skin (both sides, rear sides and small door). The front of the box, roof, and large door still have the original steel skin.
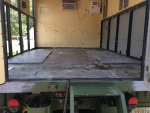
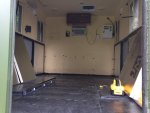
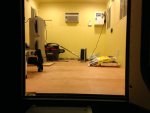
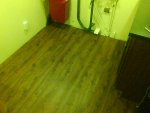
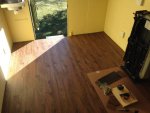
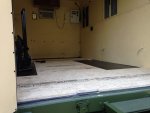
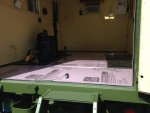
Also tore up the old wood floor and treated all the rust (wasnt as bad as I expected). I put down new flooring and installed heated floors while I was at it (see next post).
I used lots of grinder wheels, olympic shaveable head rivets, alodine, vulkem caulking, etc. Much of the work I had already done once shortly after buying the truck. This was the second time I hurculinerd the roof and repainted the whole truck now.
Apparently I've gotten much older since the first time doing it since it took me 20 months this time around rather than the 4 months the first time.
 

Attachments

peashooter

Well-known member
1,038
205
63
Location
Hanover, minnesota
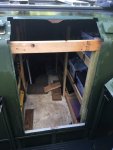
We have enjoyed the "camper" but when using it in spring and fall it can get cold. We had been using an electric ceramic heater that kept us warm but the floor was still super cold. While reskinning it, I had decided to pull up the floor. I couldnt get many of the old floor screws out so I gave up trying to do it cleanly and just cut the oak wood close to the screws and pry'd up the boards. Then came back with a sledge hammer and sheared off all the screws.
I then got some flap sander discs and paint stripper discs for my angle grinders and went to town on the floor. After cleaning it up, I painted all the metal with POR15 rust converter/inhibitor.
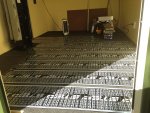
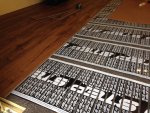
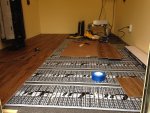
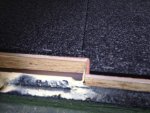
I added some 1" pink poly foam as insulation to all areas other than the wheel well humps, covered everything with 3/4" OSB subfloor, then 1/4" luan board to even it all out. Finally I put a 1/4" layer of synthetic cork called "Cerazorb" that I got from a local floor heater place called "Heat my Floors" where I also got the floor heating element, a gentleman named Dennis helped me out and was super helpfull.
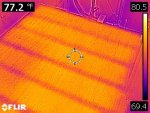
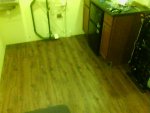
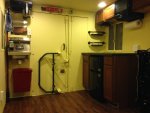
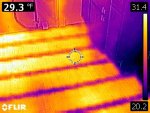
I had been looking for some floor heat product that would work well. I found this stuff called "Step Warm Floor" that runs off 24v (same as the truck) and is essentially the same material as whats used in heated seats of cars. Its not cheap per square foot, but the van box is also not very big. I got 44 linear feet of the heating mat, and stapled it down on top of the cerazorb and directly under the vinyl plank flooring. When turned on its enought to keep the floor warm and the whole camper warm. If the outside temp gets below 50 deg then I cant really count on the floor heat to keep the camper warm and will need to get the electric space heater back out.
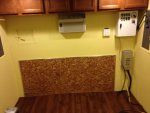
I also bought a 4x8 sheet of Aromatic Cedar chipboard, and hid pieces of it in different areas to make the camper smell nice (under & behind the couch, behind the fridge, under the cabinets, etc).
 

Attachments

Last edited:

tobyS

Well-known member
4,832
833
113
Location
IN
Great job on the rebuild!

Another possibility than electric might be hot water tubing. I'm sure a small water heater and circulation pump could be added. Maybe use engine heat.
 

Mrmag1

Head of Stuff N' Things
Steel Soldiers Supporter
602
14
18
Location
Hereford Arizona
Here is a massive Load of pictures I've taken since I purchased the truck a little over 2 years ago. I wasn't too interested in taking pictures along the way because it can be tough to make time to take and post them. The good news is they are all bunched together at the beginning here and you don't need to go through dozens of pages to find the pictures!

All pictures on this first post (besides the last one) is how the exterior of the truck looks today. I'll continue to add posts down the line as I do more work, but the next few pages are likely to be the bulk of the work that this truck will see.

BACKGROUND
My wife and I bought this to convert it into a camper for our family. I need a hobby to keep sane and thought this would be a good hobby that could be enjoyed by the whole family not just me. My original expectation was to have the truck ready for camping in 2 weeks! I thought I'd just put a bunk bed setup in the van box and mount an air conditioner……….. but as things go, I quickly learned all the maintenance that these trucks need.
Another major obstacle was my own personality. I get a little obsessive about things and have learned the consequences of cutting corners so I try to fix problems when I see them. As an example, I went to put a missing screw into the van box’s ceiling sheet metal, the screw wouldn’t bite though since the internal support it was going into had some rust there. I started taking things apart and the more I took apart the more I found to fix because I didn’t want to leave rust untreated, and I thought “while I’m in here I should really do this or that”.
First order of business was getting the truck mechanically to a point where I felt comfortable driving it and not in fear of breaking down somewhere and needing a big $ tow. I started by tracking down leaks, fixing the dual brake circuit warning system, fixing the parking brake, changing the fluids, etc.
It wasnt until 4 months later that we took our first camping trip! I had put WAY TOO MUCH TIME into this thing during those 4 months, including countless weekends and evenings as well as a couple days off of work in order to paint it all (when the weather was appropriate). At this point we were all sick of this "hobby that we could all enjoy" :)

Overall in the end (now after all the conversion has been completed) we were/are able to have a fun and unique camper for our family that still cost us less than a 15 year old used rv of the same length that we perhaps would have purchased instead.
Wait wait wait...... is your invasion chevron on the door the Stargate symbol?
 

peashooter

Well-known member
1,038
205
63
Location
Hanover, minnesota
I managed to get one more project done on the truck (trailer) this year. I've been wanting to put a door on the front of the trailer's CBC (cargo box cover) for some time so we can get into it easier from the truck side. Originally I had thought of putting some panto graph hinges on it like I spoke about back on post 263 here but decided it would be easier to get one of the roll up doors like you see on the sides of fire trucks or pepsi trucks and the like. I ended up buying one from Gortite / Dynatect.
Cutting the front panel off the fiberglass CBC box, it also cut one of the support ribs so I made an aluminum frame for the door assembly out of 3/4x3/4x1/8 aluminum tube. I have always wanted to learn to weld aluminum so I purchased a spool gun for my welder earlier this year and had a reason to use it now. I never got good with it, but certainly got better with it the more I did it. Next year I'll probably put some herculiner on the trailer roof and repaint the trailer and new door.

The original plan was to use pantograph hinges to open a door so that it wouldnt open to wide and hit the m109 camper box's door when that was open like this:pantograph hinge door concept closed.jpgpantograph hinge door concept open.jpg

But here is the (almost) final result using the rollup door:
 

Attachments

Last edited:

rustystud

Well-known member
9,297
3,070
113
Location
Woodinville, Washington
I managed to get one more project done on the truck (trailer) this year. I've been wanting to put a door on the front of the trailer's CBC (cargo box cover) for some time so we can get into it easier from the truck side. Originally I had thought of putting some panto graph hinges on it like I spoke about back on post 263 here but decided it would be easier to get one of the roll up doors like you see on the sides of fire trucks or pepsi trucks and the like. I ended up buying one from Gortite / Dynatect.
Cutting the front panel off the fiberglass CBC box, it also cut one of the support ribs so I made an aluminum frame for the door assembly out of 3/4x3/4x1/8 aluminum tube. I have always wanted to learn to weld aluminum so I purchased a spool gun for my welder earlier this year and had a reason to use it now. I never got good with it, but certainly got better with it the more I did it. Next year I'll probably put some herculiner on the trailer roof and repaint the trailer and new door.

The original plan was to use pantograph hinges to open a door so that it wouldnt open to wide and hit the m109 camper box's door when that was open like this:View attachment 737746View attachment 737747

But here is the (almost) final result using the rollup door:
That's looking real good Aaron !!!
 

chucky

Well-known member
Steel Soldiers Supporter
6,640
19,014
113
Location
TN .
I managed to get one more project done on the truck (trailer) this year. I've been wanting to put a door on the front of the trailer's CBC (cargo box cover) for some time so we can get into it easier from the truck side. Originally I had thought of putting some panto graph hinges on it like I spoke about back on post 263 here but decided it would be easier to get one of the roll up doors like you see on the sides of fire trucks or pepsi trucks and the like. I ended up buying one from Gortite / Dynatect.
Cutting the front panel off the fiberglass CBC box, it also cut one of the support ribs so I made an aluminum frame for the door assembly out of 3/4x3/4x1/8 aluminum tube. I have always wanted to learn to weld aluminum so I purchased a spool gun for my welder earlier this year and had a reason to use it now. I never got good with it, but certainly got better with it the more I did it. Next year I'll probably put some herculiner on the trailer roof and repaint the trailer and new door.

The original plan was to use pantograph hinges to open a door so that it wouldnt open to wide and hit the m109 camper box's door when that was open like this:View attachment 737746View attachment 737747

But here is the (almost) final result using the rollup door:
Thats the coolest door ive seen so far !! Great job Great trailer
 
Top
AdBlock Detected

We get it, advertisements are annoying!

Sure, ad-blocking software does a great job at blocking ads, but it also blocks useful features of our website like our supporting vendors. Their ads help keep Steel Soldiers going. Please consider disabling your ad blockers for the site. Thanks!

I've Disabled AdBlock
No Thanks