• Steel Soldiers now has a few new forums, read more about it at: New Munitions Forums!

  • Microsoft MSN, Live, Hotmail, Outlook email users may not be receiving emails. We are working to resolve this issue. Please add support@steelsoldiers.com to your trusted contacts.

Post blasting / sanding flash rust elimination tests

asstor

New member
35
0
0
Location
Austin, TX
Sanity check!

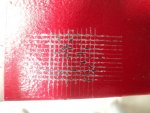
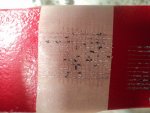
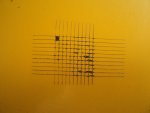
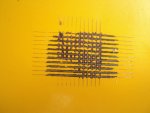
Since the Panel 1 test showed no paint adhesion loss, I wanted to make sure that the test was valid in that it would in fact remove paint from a marginally prepared surface.

As a sanity check I performed the exact same test on a red trailer I built a couple of years ago. I know that the paint on the trailer chips easily as I did not clean the steel very well before painting. I just wiped down the mill oil with lacquer thinners and lightly sanded prior to painting. I also performed the same test on the side bed panel of my M37. This was painted yellow by the Tennessee forestry department before I bought the truck, and I can tell that it was just sprayed over the old OD green without much surface prep.

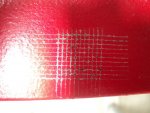
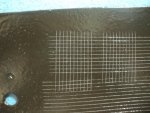
The results verified that the tests are valid as you can see in the pictures below the crosshatch pattern before and after the tests. There is significant paint loss - especially on the yellow paint.
 

Attachments

Last edited:

asstor

New member
35
0
0
Location
Austin, TX
Panel 2 and three tests.

To refresh - panel 2 was sand blasted, then rinsed with clean water and blow dried with compressed air. This panel did develop a slight flash rust bloom from the water rinse. Panel 3 was sand blasted, then rinsed with the Hold Tight 102 solution and then dried with compressed air. This panle did not develop any flash rust.

I performed the same adhesion test on panels 2 and three with the same results as panel 1 - no paint adhesion loss that I could see under a magnifying glass.

What do I conclude from this test?

1. I conclude that the MasterSeries and TM9Ordnance polyurethane is a good combination and sticks to sand blasted surface very well.
2. I also conclude that rinsing with water (and resulting light flash rust) or Hold Tight 102 did not appear to negatively effect the paint's adhesion - in the short term at least.. The test was done 7 days after the panels were painted, so I do not know what the long term affects may be.

I just want to add a note that The MasterSeries Silver primer is specifically been developed to be used on rusted surfaces, which may be why the light flash rust had no apparent negative impact on adhesion.

Also, I am in no way associated with the makers of MasterSeries or TM9Ordnance paints, I merely used what I though to be the best paint for the job, and from what I can tell so far I made a good choice.

Below are pictures of panels 2 and 3 before and after the tests.
 

Attachments

Last edited:

asstor

New member
35
0
0
Location
Austin, TX
What's next?

Next I will test whether using Metal Ready, PickleX 20 or plain phosphoric acid and resulting flash rust has any negative impact on the paint adhesion. These tests will be conducted over the next couple of weeks.

Hopefully this helps someone out there. I know I feel better that my combination of primer and paint sticks well to the metal, and to each other for that matter.

Thanks,
Louis
 
Last edited:

68427vette

New member
101
1
0
Location
ohio
your thinking WAY to hard on this,, i sand blast for the local hot rod shops from 200k cars to simple parts,,, the key is to get the parts/ or whole cars into epoxy primer, asap, and not to wait overnight. even if your going to be doing metal work,, just mask off those area with 3m tape. and shoot the whole part or car, in epoxy to seal the car. BUt remember to wipe and blow out the car/ or parts off.. those other products are for long term storage.

here s a road runner i just did: blast -clean out, wipe down(prepsol), epoxy prime

1969 Road Runner pictures by meatball427 - Photobucket

and my M20 has been in epoxy for 2-3 years: i used POR15 in the joints,, but this product must be RUFFED up (to get some teeth) before you put primer on it.

M20 RESTORATION pictures by meatball427 - Photobucket

and my M16 halftrack, for a year... ( the boggies and tracks are coming off)


two ways to do it
1, sandblast, wipe down- epoxy - start body work, repair panels etc..... sand etc

2. sandblast, wipe down, ****, do metal work, fill pits etc, sand, sand epoxy prime, sand, sand,, Shoot slick sand, (heavy sandable primer) sand sand, guide coats, sand sand

the ****, is were you could apply your "storage metal flash material" but not need in a dry enviroment. - remember,, less chemicals,, means less problems.... i dont use it!!!!!! either do the hot rod shops....

a thread on paint and expoxy will live forever.. remember, temperture, and humidity have more impact that anything. and follow the recommended products.... per manufacturer.
 
Last edited:

68427vette

New member
101
1
0
Location
ohio
TM9Ordnance paints are the best paints,, PAUL has spent alot of time , for the hobby, to develop the "correct shades". now that topic will go on forever also, "correct shade of wwii paint" LOL

:deadhorse:

i use all TM9Ordnance paints.. they have a nice correct crysislis low absorbing sheen:beer:
 

68427vette

New member
101
1
0
Location
ohio
Panel 1 test:

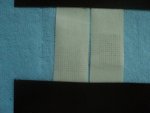
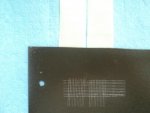
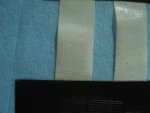
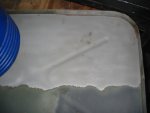
Per ASTM D3359 I cut thru the paint to the base metal in a crosshatch pattern using the scraping tool. I then applied the tape and performed the test. The shots below show the following:

1 Panel 1 after the crosshatch created
2 Panel 1 with the tape applied
3 Panel 1 again after the tape removed
4 The tape showing the debris removed during the test

The results show that the primer and paint combination worked very well on the sand blasted surface, with no perceptible paint being removed by the tape. The only debris on the tape is from the scratch lines. I inspected the crosshatch area with a magnifying glass and there is no sign at all of any paint lifting or coming off.
turn your air down,, your shooting air bubbles into your paint!! and i think you have to have an epoxy under TM paints,, i dont know what MasterSeries Silver primer is etc..??? but your test paint tabs look , lets just say, not so good,, there's dirts/dust or air on your tabs,,, which allows water/moisture to penetrate your surface...and lets just say,, the paint is not adhearing to the surface correctly.... :confused: -- stick to the manufacture guide lines.. are you using spray can TM paint?
 
Last edited:

asstor

New member
35
0
0
Location
Austin, TX
68427vette,

Thanks for your reply, and yes you are right, I am thinking WAY too hard on this. This is my first restoration project though, and I am not in the auto or restoration business so I have no past experience to draw on. There is also so much conflicting information and advice out there that I thought that I would do some tests for myself.

I guess this is how one gets "experience" bu trying something and seeing if it works.

The challenge I have had has always been having to work in drips and drabs because this is a hobby. I might find myself cleaning and prepping a part for painting, but not being able to paint it for a week or two, so I always end up with parts that have flashed over or have rut pits, which seem to promote new rust.

Thanks for your advice, and I like your Road Runner and M20 - great job.

Louis
 

asstor

New member
35
0
0
Location
Austin, TX
68427vette,

The test panels were not sprayed, I applied the MasterSeries Silver (which is a moisture cured urethane) with a sponge roller, and the TM9 was also applied with a roller. I knew it would leave a "less than perfect" finish, but in this test I was not concerned with looks, rather with how well the paint sticks.

Thanks,
Louis
 

68427vette

New member
101
1
0
Location
ohio
Just a bit of my personal experience on wetblasting.........:-?

I also watched all the videos on youtube and heavily researched the method before buying the wet sandblasting attachment for my pressure washer..... I thought it looked like an awesome way of doing it! I was very much less than impressed!

For one, getting sand all over the place is allready a big hassle of sandblasting. But now, you have WET sand stuck all over absolutely everything! And one of the most irritating things is, the wet sand sticks all over your face shield or goggles and you can not see a freaking thing after just a few seconds. You go to wipe the sand off of your face shield, and because it's wet, all it does is scratch the heck out of your face shield and then you have a very scratched up face shield that still has wet sand stuck all over it!

Two..... You can not reuse the sand because now it is all soaking wet all over the ground.

Three....... you have to be very careful not to let any water get in the bucket from which you are drawing the sand with your wetsandblaster, or the sand will clog up and not go through the tube.

Four...... you have to be extremely careful when using the wetblaster attachment, to always keep the nose of it pointed down, because if you don't, water runs back down the siphon tube and gets all the sand in the tube wet, and again clogs up and will not feed through.

Five...... when they say in the instructions for the wetblaster attachment that it is best used with a 5gpm 5000psi pressure washer, what they really mean, is it won't work worth a crap with anything less than that, and 5000psi pressure washers are freaking expensive!

So yeah.......Don't get me wrong......It is a pretty cool little invention, and I did get a little use out of mine, but holy cra p what a freakin pain in my a$$! It is not something I would be likely to go around suggesting to people.
6.) EPA,, and clean-up!!! water drain bins, EPA separator socks etc,, regular sand,, is easy clean-up, poundage in, must = poundage out or more, per month(to the dumpsite)

i applaud your attempt to test these,:beer:, but manufactures spend millions of dollars testing... lots of errors in a small time test(temp/humidity, clean envirmonet) etc ... and i'll stick to experience... as my test...
 

68427vette

New member
101
1
0
Location
ohio
68427vette,

The test panels were not sprayed, I applied the MasterSeries Silver (which is a moisture cured urethane) with a sponge roller, and the TM9 was also applied with a roller. I knew it would leave a "less than perfect" finish, but in this test I was not concerned with looks, rather with how well the paint sticks.

Thanks,
Louis

like i said, i applaud you for ,spending this amount of money,, and time,, but,, rolling paint on with pieces of sponge, allows air/ and mositure to penetrate to the raw metal surface underneith..., air+moisture= rust/paint lifting.. and not sticking...

2cents
 

asstor

New member
35
0
0
Location
Austin, TX
68427vette

The MasterSeries MCU ( http://www.masterseriescoatings.com )I used is designed to be applied with a sponge roller, so long as at least two coats are applied a minimum of 3 1/2 half hours apart. I followed the manufacturers instructions to the letter. I know applying the Tm9 urethane via sponge roller is not correct, but again I applied two coats an hour apart. I applied first coat of TM9 12 hours after the second primer coat, so all within manufacturers recoat windows. :)

Thanks,
 
Last edited:

68427vette

New member
101
1
0
Location
ohio
68427vette,

Thanks for your reply, and yes you are right, I am thinking WAY too hard on this. This is my first restoration project though, and I am not in the auto or restoration business so I have no past experience to draw on. There is also so much conflicting information and advice out there that I thought that I would do some tests for myself.

I guess this is how one gets "experience" bu trying something and seeing if it works.

The challenge I have had has always been having to work in drips and drabs because this is a hobby. I might find myself cleaning and prepping a part for painting, but not being able to paint it for a week or two, so I always end up with parts that have flashed over or have rut pits, which seem to promote new rust.

Thanks for your advice, and I like your Road Runner and M20 - great job.

Louis
get yourself set up, blast the parts,, and then DA them down, or scotchbrite pad them, prep/ (prepsol), dry , then shoot epoxy primer.. do smaller batches of parts,, get into a assemble line routine,, HECK, i've brought parts inside overnight(sorry wifey) when i couldn't get the job done,, for fear of flash over... just have your paint gun handy.. work to get a pile of parts done... prepped,, then hung for painting.. you'll get the system down!! i live in OHIO,, its HUMID!! heck i have a pile of parts, flashed over right now, thanks to my back, going out!! LOL - just have to redo them..... LOL
 

68427vette

New member
101
1
0
Location
ohio
68427vette

The MasterSeries MCU I used is designed to be applied with a sponge roller, so long as at least two coats are applied a minimum of 3 hours apart. I followed the manufacturers instructions to the letter. I know applying the Tm9 urethane via sponge roller is not correct, but again I applied two coats an hour apart. I applied first coat of TM9 12 hours after the second primer coat, so all within manufacturers recoat windows. :)

Thanks,


man oh man,
" MasterSeries MCU I used is designed to be applied with a sponge roller"

wow,, a roller... i'd scratch that one off my list, to use... clean parts, clean, surface, clean AIR, to paint with.. roller???fat lady sings leaves stuff behind,, as we can tell by your test...
 

asstor

New member
35
0
0
Location
Austin, TX
68427vette

Man oh man you are missing the point completely. You are concerned about the look of the panels when I stated that was not the object of this exercise and that I knew that it would not look good. Do you think I am going to use a sponge roller to paint my M37? I think not........

:deadhorse:

The point is that the paint stuck very well to the cleaned surface, supporting what you are trying to tell me.

I do appreciate your comments and feedback though, discussion and exchange of ideas is always a good thing.

Thanks,
Louis
 

68427vette

New member
101
1
0
Location
ohio
LOL,, well,, i read,, "first restoration" and otehr stuff,, and "roller"" and thought ,, oh dear!! :p

yes,, discussion is great,, !! learn something new everyday!!! !! like not to use a roller!! :doghead:

well i knew that!!:beer:
 

asstor

New member
35
0
0
Location
Austin, TX
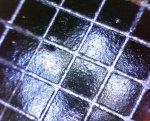
Here is a close up picture of Panel 1 after the test. You can see the scribed lines are clean with only very small pieces being removed from some of the scribed line intersections. Each line is 1.5mm or 0.047" apart. (I do seem to be beating this dead hose myself now...LOL.......)
 

Attachments

Last edited:

jasonjc

Well-known member
5,326
290
83
Location
Gravette Ar.
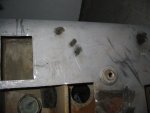
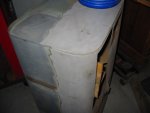
Here are some pic of a fuel tank I sand blasted years ago. It's been sitting in the shop waiting for me to get around to cleaning out the inside so I can weld in patches. It has got bumbed down on the list of things to do. It has almost no new rust on it. And I've touch the top side of it alot moving it around over the years. I've got other parts that have been siting for years too with no rust. Am I just lucky or are you guys in a swamp or what.
 

Attachments

35Z-SGM

Member
39
3
8
Location
East Central, Iowa
I managed a refurbishment project on military equipment in Taiwan. The humidity there is around 90% all the time. We would blast using aluminum oxide, then blast the surface with just air to clean up the blast material. Then give it a wash primer coat using MIL-C-5814 or DOD-P-15328. We had to wash prime within 24 hours or we would have flash rust to deal with.

Like the booth! Wish I had room for one.
 

asstor

New member
35
0
0
Location
Austin, TX
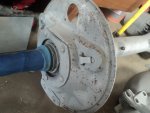
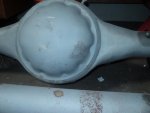
I am in Austin Texas. The humidity in my shop has been averaging around 50% over the past couple of months. Not too humid, but enough to get spot rust on cleanly blasted items after a couple of weeks. I had my front and back axles professionally (whatever that means) blasted about a month ago, and have not gotten around to spraying them yet. They were spotless when they came back from the blaster, now they are sporting spots of surface rust all over.

This is exactly what this thread is all about - how to handle this type of situation. All the gurus say not to monkey around with any "magic surface prep potions" after it has been blasted. That is, unfortunately, not always possible.
 

Attachments

Last edited:

asstor

New member
35
0
0
Location
Austin, TX
For anyone still interested in the original goal of this thread, to test how to eliminate or reduce the occurrence of flash rust after a part has been blasted, today I blasted the rest of the test panels and applied phosphoric acid, Metal Ready, PickleX 20 and Hold Tight 102 to the panels.

The pictures show the panels right after blasting with nothing applied, and then with the various potions applied. They will now sit for a week or two to see how or if the flash rust develops. They will then be painted and the same crosshatch test performed on them.
 

Attachments

Top
AdBlock Detected

We get it, advertisements are annoying!

Sure, ad-blocking software does a great job at blocking ads, but it also blocks useful features of our website like our supporting vendors. Their ads help keep Steel Soldiers going. Please consider disabling your ad blockers for the site. Thanks!

I've Disabled AdBlock
No Thanks