I just did the this modification to my 1989 M293A2. I went to participate in two Memorial Day parades this past weekend. The truck wouldn't maintain speed on modest hills - so I figured why not? I only made two changes - the governor spring and the full-fuel adjustment on the back of the pump. I'd like to thank
nevrenufhp and Young Gun for all the posts on the subject.
interesting is that my access screws were secured with safety-wire - there was no security nut that I had to chisel or vise-grip off. I just pulled the three safety-wires off - one for the rear cover, one across the governor spring access cover and one for the idle.
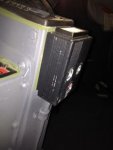
Step one - disconnect electrical connector and remove two 10mm bolts securing the fuel cut-off solenoid to the valve cover.
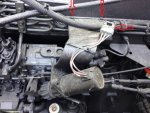
When you are done it's going to look like this - lots of room to get to what you need to:
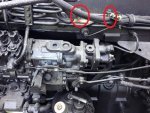
Step two - rotate the fuel cutoff until you can get an 8mm socket on the nut. Remove nut and pull the lever out of the way to get a socket on the cover. Do NOT remove the cutoff lever from the shaft fully. There is a small spline key which WILL go missing. If you do take the lever off, just remove the spline and place is a safe place. The truck won't shutoff if that key is missing from the shaft... I had to recreate mine from a hardened washer.
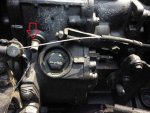
Note the key (before it went missing). I used a 7/8" 12-point socket for the cover.
When the cover is open you either will or you will not see a governor spring. I used a 18" breaker bar with a 7/8" socket on the alternator nut and rotated the engine by rotating the alternator nut clockwise (tighten by raising the bar and rotating toward the engine when standing on the passenger side) until a governor spring was visible. Rotating the alternator rotates the engine. Don't rotate the alternator by pulling down on the nut which might loosen it...
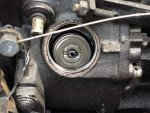
Using a flat-bladed screw driver in the notch, I initially tightened the spring three clicks / detents. You will feel and see the notches move. Mine took some persuading. After driving the truck, I didn't like the idle - I couldn't adjust it down below 900, so I backed off one click for only 2 clicks of adjustment. With two clicks to each spring the engine stops revving at 2350 RPM and the idle was better at about 750-800.
I initially tried to do video of the adjustment but needed both hands to move it a click. I like what someone else here did - on the modified 10mm they used for full-fuel adjustment - they ground down the socket edge on either side to make two prongs that would fit in the detent allowing you to put your socket on it and turn it with more control. What happens if you don't do the same adjustment on each side? Does anyone know?
When you have made your adjustment to one spring, go back to your breaker bar and continue to rotate the engine until the other spring appears. Make the same adjustment. Screw the cover back on. CAREFULLY place the fuel cut-off lever back on the shaft, ensuring that the key is still in the key way (or put it back if you put it in a safe place). Tighten the 8mm bolt. A drop of blue loctite on the bolt prior to installation would not go amiss.
Okay - now on to the Full Fuel adjustment.
This is the cover with the two bolts.
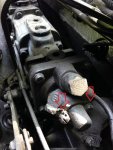
Do what you need to do to remove the two bolts. If you have a anti-tamper bolt, then cut a notch, use a chisel to loosen it, vice-grips - whatever. Remove the two bolts. You will end up with a plate with a threaded hex adjustment and a lock nut. Lever that plate off - there is small tab that sticks out from the side of the plate which allows you to pop it off.
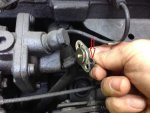
The mail fuel adjustment is UNDER that cover. See the arrow?
This is what you see underneath:
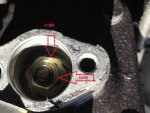
a 10mm nut and a 14mm nut. I used a 10mm 1/4" socket which a friend shortened and fit it inside a 14mm 3/8" socket. Holding the 14mm in place, I loosened and then rotated the 10mm nut several turns - backing it off until I reached the end of the shaft. While holding the 10mm from rotating further, I then backed off the 14mm nut until it reached the 10mm nut - and snugged them together locking the new fuel setting in place. Sorry for no pictures of the tool itself - I forgot to take one apparently.
Here is the view after I backed off the nuts:
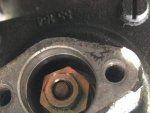
Place the cover with the adjustment back over the hole. Place the cover over that and snug down your two cover bolts. Reinstall the fuel cutoff solenoid - you will have to hold the solenoid back to fit it in place again the lever. Reconnect the electrical connector for the solenoid. Did you pull the breaker bar off the alternator?
Close things up and take it for a spin. I came back from my spin, picked up the wife and took off - she was impressed! No longer quite the dog... I'll be doing the same thing to a friends truck - I figure about 30 minutes tops. It took me over an hour with needed to replace the shaft key I lost.
If anyone needs help in the South-East PA area, I'd be happy to show how the work is done.
-Clarke
Ok..Lets see if I can clear it up.
The full fuel stud with 2 nuts:
On the very back of the pump there is 2 screws, which one is tamper proof(round head). The first hard part is getting that screw out. Vice grips or chisel works. Get those 2 screws out, and pull off the tin cover, and the screw with the jamb nut on it. That screw is the pre-boost fueling(I dont bother with that one). Once those are out of the way, you will have access to the full fuel nuts. With a flashlight you can see them in there, which are recessed in a round hole by about an inch. That's why wrenches wont fit, because of it being so recessed. Since Bosch didnt put big plungers in the MW pump, you can back out the nuts all the way. Loosen up the 10mm nut to the end of the threads, then hold that socket still. Back out the 14mm nut into the 10mm nut and snug them up together. You could possibly do it with no special tools, but it's the 14mm socket that's the hard part/ tight fit. You can simply make your own by drilling out the center of a 3/8 drive 14mm deep socket to fit a 1/4 drive 10 mm deep socket. A good grunt tight(German torque) is all it needs, no breaker bars. Then, put it back together and test drive.
I can edit in more if you want, like the links to the videos on gov spring tightening, and the low rpm/excess fuel screw(one on the top).


