• Steel Soldiers now has a few new forums, read more about it at: New Munitions Forums!

  • Microsoft MSN, Live, Hotmail, Outlook email users may not be receiving emails. We are working to resolve this issue. Please add support@steelsoldiers.com to your trusted contacts.

Supplemental Electric Air Compressor

Valence

Well-known member
Steel Soldiers Supporter
2,112
555
113
Location
Davis County, UT
Have you considered using this setup basically as is? Mount the switch in your truck and use it manually. Maybe add a bright light for a reminder that it's on?
I have thought about it, but I really don't want to manually turn on and off the air compressors, each and every time they need to run. Besides, that wouldn't add the 100 times complexity that wheelspinner said it would. :razz:

Now that I know that the breakers are auto resetting, it does make me want to use them - that's a LOT nicer than a fuse, but I would still like a power distribution box for my various electronics (fans, light bar(s), air compressors, interior lights etc) to clean up my battery box and numerous in-line fuses (future and current)!

I will update this list (as long as I am able to) with product links or as the design changes:

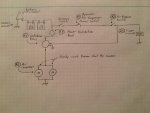
Here is my current design. I'm no gringeltaube to make very nice, precise, digital schematics. When needed, I just hand draw my schematics.
Note: This depicts electrical connections only. Air connections are implied.
2017-02-16 05.13.58.jpg

As can be seen by this design, my intent is two fold, 1) The operator has the ability to turn on/off the electrical air compressors at will, 2) The ability to control/power the electrical air compressors can only happen when the in-cab Accessory Switch is switched on.

Parts list:

#1: Operator Manual Control
What I want here is to be able to turn on or off the air compressors as desired. Example: I don't want the air compressors to turn on when I'm trying to start the truck. However, I don't want a simple on/off switch like what came with the compressor assembly; I want this switch to always start in the off position so any operator cannot forget and leave the air compressors powered (assuming the operator turned off the Accessory Power lever switch). This means that a simple toggle switch will not do. I need a switch that will self turn off when it looses power.

Said function was harder to find than I expected, and I wasn't able to find it integrated into a single lever switch.

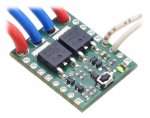
So I ordered this Pololu board that will perform my required operation, rated for 4.5V through 40V:

Big Pushbutton Power Switch with Reverse Voltage Protection, HP
https://www.pololu.com/product/2813
"The Pololu Pushbutton Power Switch is a compact, solid-state power switch that features built-in reverse-voltage protection and is controlled by a momentary pushbutton: one push turns on power and another push turns it off. This is a patented design initially created for use in our own products as an alternative to bulky mechanical switches. Because the switched current does not flow through the mechanical switch, a large variety of small, low-power switches can be used to control a substantial amount of power. The use of momentary switches also allows multiple switches to be used in parallel to control the power to one load."
0J6930_1200.jpg


A momentary pushbutton is needed to turn the control on or off, and when power is lost to the Pololu HP board, at 28V it should start in the "off" state.

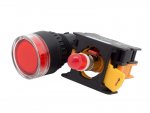
I had considered a button and a military indictor lamp, but I wanted a self-lit, LED button. The LED would only be powered when the Pololu HP board's "VOUT" is powered.

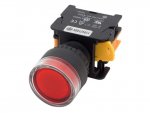
I liked the following button because it had screw terminals and an interesting modular design. It even appears to have a replaceable LED lamp.

Alpinetech LXG-22 Red 22mm 1NC Momentary Push Button
https://www.amazon.com/gp/product/B00FOU7H0M/
51dqOvgLQWL__SL1024_.jpg 51qv40HonbL__SL1024_.jpg

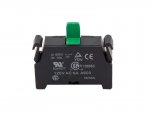
However, I couldn't find the above in both red and NO (Normally Open). A feature of the modular design is that I can replace/add the default NC (Normally Closed) portion of the above switch with this NO contact block:

Alpinetech Normally Open NO Contact Block
https://www.amazon.com/gp/product/B00IJ4FIZ6/
51rP2rbLjGL__SL1024_.jpg

I will seal the circuit board with:
CRC Urethane Seal Coat Viscous Liquid Coating, 250 Degree F Maximum Temperature, 11 oz Aerosol Can, Clear
https://www.amazon.com/gp/product/B000IC7ZQ2/


#2: Air Pressure Switch
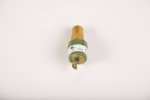
The air pressure switch will toggle itself as the air pressure changes, but electrical control will only flow to the (#4) Continuous Relay if the (#1) Operator Manual Control is enabled.

85 PSI on, 105 PSI off Pressure Switch Part# 002-105
https://www.extremeoutback.com/product/55/105psi+Pressure+Switch+++++Part#+002-105.html
105psi_pressure_switch_55.jpg

It would be easiest to mount this on an airline in the cab due to the (#3) Timer (less wire routing).


#3: Timer
I want to know how long the air compressors have run, so as problems/wear occurs I can get an accurate runtime measurement. I do not believe the above Pololu board or the truck's Accessory switch would have any problems powering the addition of the timer.

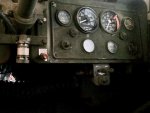
I want the timer collocated with the (#1) Operator Manual switch, near the instrument cluster. I believe I will mount the button, small circuit board, and timer to the left of the front axle engage lever.
dash_pic.jpg

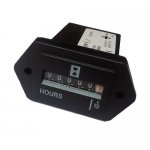
Neecooler Hour Meter DC 10V-80V Mechanical Hourmeter Gauge [SYS-1 ]
https://www.amazon.com/Neecooler-10V-80V-Mechanical-Hourmeter-Motorcross/dp/B01EJFEFH0/
41W490pQn4L.jpg 41snRNaV-vL.jpg 41C9WVGKUZL.jpg

A round option:
Round Hour Meter Gauge Quarzt OZ-USA® 12-24-48 Volt Golf Cart 48V 24V 12V Cat Komatsu RV
https://www.amazon.com/gp/product/B00C0SQUZE/


#4: Continuous Relay
Since I do not want to manually control each and every run of the electrical compressors via the large, manual switch that came with the air compressor cage, a relay is needed to supply the necessary current to the air compressors' electrical motor. The said relay needs to be able to continuously operate at the steady, maximum amperage draw of the air compressors (24A single, 48A pair)

I ordered Extreme Outback's nice, sealed version:
100 Amp Continuous Relay Part# 002-240, $36.95
2A activation/control draw
NOTE: The below link is the 12v version:
https://www.extremeoutback.com/product/97/100+Amp+Relay+Part#+002-103.html
100_amp_relay_97.jpg

For note for others: a possible cheaper option:
85A Solenoid for Golf Cart & Heavy Duty Industrial Applications 24 Volt Continuous Duty
https://www.amazon.com/gp/product/B004V3FGOC/


#5: Power Distribution Panel
It would be nice to have all accessories lead back to one box, instead of an ungainly mess bolted onto one battery terminal with inline fuses everywhere.

Albeit pricy, this sort of 2-in-1 fuse block combines both heavy current and lighter current applications. PERFECT for this and my other electrical needs.

Blue Sea Systems SafetyHub 150 Fuse Block
https://www.amazon.com/Blue-Sea-Systems-SafetyHub-Block/dp/B0053BTSEK/
81HBeKwIiBL__SL1500_.jpg

Due to Amazon's price, I actually ordered from here:
http://www.defender.com/product.jsp?path=-1|328|2290021|2290030&id=1527942

I decided on a 70A fuse for the relay, even though the motors should never pull more than 48A continuous. Just so there was a enough peak buffer.
Blue Sea Systems AMI/ MIDI Fuses
https://www.amazon.com/gp/product/B004ZJ0RL4/

Overall Specifications:
http://catalog.bluesea.com/#65/z
Amperage Max. Operating (combined) 280A
Minimum Cable Size to Meet Ratings 4/0 AWG (120 mm²)
Recommended Ring Terminal M8 (5/16") Stud Size

M8 MIDI® or AMI® Fuse Block
Amperage Max. Operating (per block) 280A
Amperage Max. Operating (per circuit) 170A
Fuse Amperages Available 30A–200A
Minimum Cable Size to Meet Ratings 2/0 AWG (70 mm²)
Screw Size M5

ATO® or ATC® Fuse Block
Amperage Max. Operating (per block) 50A
Amperage Max. Operating (per circuit) 25A
Fuse Amperages Available 1A–30A
Screw Size #8-32

A lower cost alternate option that would require two relays:
Blue Sea Systems ST Blade ATO/ATC Fuse Blocks
https://www.amazon.com/dp/B000THQ0CQ/

#6: Air Compressors
To complete the air compressors and make them functional with the system:

Two of High Temperature Check Valve Part# 002-097
https://www.extremeoutback.com/product/61/High+Temperature+Check+Valve+Part#+002-097.html
one_way_check_valve_61.jpg

New, foam, pre-oiled air filters Part#: 002-102 ($24.94 each)
I was told the following:
These military compressors are a bit different than the ones on the website with the pre-cleaner. You must call to order the foam air filter. Use only foam filter oil (not K&N oil), but chainsaw bar oil would work too. The foam filters cannot be too oily as the excess will only drip away. If the filter is dry, then it's not working. Even if it's muddy, if its still oily, it's fine.​


Notes
I spoke with George Carousos. He was very, very personable, and helpful in everyway.
EXTREME OUTBACK PRODUCTS
www.extremeoutback.com
866-447-7711 Toll Free
707-447-7711 Direct
707-447-7722 Fax
 
Last edited:

Jbulach

Well-known member
Steel Soldiers Supporter
2,672
2,220
113
Location
Sunman Indiana
Great information!

I'm about 99% positive the two fitting in the manifold are check valves, now that I can see directional arrows on them. Unloading the head pressure may not be necessary depending on the application or design of the pump. As far as unloader holes check the nylon tube, fittings in the compressor head and also the plugs that are in the other ports in the head. I doubt an unloader is designed into the pump, but it would be possible.

I'm kind of surprised to see what appears to be typical 3/8" DOT nylon tube used that close to the compressor, due to the heat it would likely experience. Maybe it's special high heat?
What is the relief pressure on the pop-off valve?
Or, maybe these units where only used in a low pressure application, which could also possibly eliminate the need for an unloader? I sure wish I knew what the military used these for???

Also have you been able to verify the model number of the individual motor/compressors, as what the seller had posted?

Great job on the electrical design!
Looks good to me, but what do I know? You might want to research and see if there are any adjustable pressure switches, similar to what a shop compressor uses. Some of those are adjustable for both on and off instead of just moving a certain range up and down. These will likely get bulky and need to be plumbed into a dry location as well.

Keep up the good work and great documentation!
 

Valence

Well-known member
Steel Soldiers Supporter
2,112
555
113
Location
Davis County, UT
Great information!

I'm about 99% positive the two fitting in the manifold are check valves, now that I can see directional arrows on them. Unloading the head pressure may not be necessary depending on the application or design of the pump. As far as unloader holes check the nylon tube, fittings in the compressor head and also the plugs that are in the other ports in the head. I doubt an unloader is designed into the pump, but it would be possible.

I'm kind of surprised to see what appears to be typical 3/8" DOT nylon tube used that close to the compressor, due to the heat it would likely experience. Maybe it's special high heat?
What is the relief pressure on the pop-off valve?
Or, maybe these units where only used in a low pressure application, which could also possibly eliminate the need for an unloader? I sure wish I knew what the military used these for???

Also have you been able to verify the model number of the individual motor/compressors, as what the seller had posted?
Thanks.

I will check the hose for additional marking, but yes, it is 3/8" DOT nylon tube from the air compressors to the manifold with push-on connectors at either end. It looked just like the 1/4" air brake line hose I have used previously.

Edit: As answered later, there is no unloader on the air compressors and above is a link to the direct, bolt on check valves that also serve as unloaders.

The pressure relief valve is only 30 PSI.

2017-02-13 17.19.29.jpg 2017-02-13 17.20.06.jpg

The label on the aluminum rack that these air compressors were bolted to said "Ground Expedient Refueling System". So they were used in a refueling application. The fellow I talked to said the air compressors were used with aircraft and Abrahams refueling. Picture a large, long cigar shaped rubber tube, 2' in diameter. Inside were two flexible chambers. These air compressors would pressurize one chamber and push out jet fuel from the other up to 20 gallons per minute, but the program died due to President Obama's budget cuts.

I did not find any label on the air compressors, other than the whole assembly was made by "Extreme Outback Products". Visually, besides a different air filter, they can be identified as "ExtremeAire High Output 24 Volt Compressor Part# 007-120". Extreme Outback makes a higher volume 24V air compressor that are 16" in length, but these are 14" to the end of the air filter (I did measure).
https://www.extremeoutback.com/prod...Output+24+Volt+Compressor++Part#+007-120.html


Great job on the electrical design!
Looks good to me, but what do I know? You might want to research and see if there are any adjustable pressure switches, similar to what a shop compressor uses. Some of those are adjustable for both on and off instead of just moving a certain range up and down. These will likely get bulky and need to be plumbed into a dry location as well.

Keep up the good work and great documentation!
Thanks again!
I would prefer adjustable pressure switches so I could fine tune it, but I am trying to avoid the bulky shop compressor's switches (most of those expect AC input anyway).
 
Last edited:

Valence

Well-known member
Steel Soldiers Supporter
2,112
555
113
Location
Davis County, UT
I sent an email to Extreme Outback Products over the weekend, and received a reply this morning! Great customer service.

As already easily found on their website, Tips & Instructions:
http://www.extremeoutback.com/tips_instructions.html

They do stock replacement filters, they are P/N: 002-102, $24.94 each and come pre-oiled. Must call to order.

There is no unloader on the military units. Their documentation reads:
Check Valve: For systems that incorporate an air tank, you must use our high temperature check valve, part# 002-097 and install the check valve directly into the cylinder head air outlet port. The check valve does two things, it keeps the air from back bleeding into the compressor over time and also acts as an unloader valve between fill cycles. It is imperative that you install the check valve directly into the output port of the compressors cylinder head…..do not install it in the air tank!! Failure to follow these instructions will void your warranty.
https://www.extremeoutback.com/product/61/High+Temperature+Check+Valve+Part#+002-097.html
So that gem will fulfill both needs, the check valve mentioned earlier in the thread and unloader for the air compressors! Sweet.

They also sell 90/125 PSI or 85/105 Pressure Switches. As noted earlier, I decided to go with the 85/105 pressure switch. Probably a little pricy, but it's also nice to get things you were looking for.

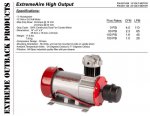
And further Amp draw / CFM specification:
ExtremeAir_High_Output_Specifications.jpg
 
Last edited:

Jbulach

Well-known member
Steel Soldiers Supporter
2,672
2,220
113
Location
Sunman Indiana
More great info!
85/105 sounds good to me.
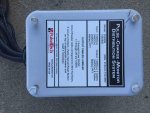
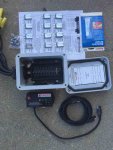
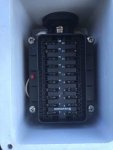
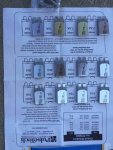
Also, you might want check these distribution boxes out. IMG_2329.jpg IMG_2330.jpgIMG_2331.jpgIMG_2332.jpg I have pictures of the manual/instructions as well if you would like. Trying not to muddy up your tread too bad!
PM sent
 

Valence

Well-known member
Steel Soldiers Supporter
2,112
555
113
Location
Davis County, UT
More great info!
85/105 sounds good to me.
Also, you might want check these distribution boxes out. I have pictures of the manual/instructions as well if you would like. Trying not to muddy up your tread too bad!
PM sent
Those are neat, thank you for sharing. A lot of expandability options too! But I'd like to have the heavy fuses too.
 
Last edited:

rustystud

Well-known member
9,297
3,070
113
Location
Woodinville, Washington
I have thought about it, but I really don't want to manually turn on and off the air compressors, each and every time they need to run. Besides, that wouldn't add the 100 times complexity that wheelspinner said it would. :razz:

Now that I know that the breakers are auto resetting, it does make me want to use them - that's a LOT nicer than a fuse, but I would still like a power distribution box for my various electronics (fans, light bar(s), air compressors, interior lights etc) to clean up my battery box and numerous in-line fuses (future and current)!

I will update this list (as long as I am able to) with product links or as the design changes:

Here is my current design. Forgive me, I'm no gringeltaube to make very nice, precise, digital schematics. When needed, I just hand draw my schematics.
Note: This depicts electrical connections only. Air connections are implied.
View attachment 666340

As can be seen by this design, my intent is two fold, 1) The operator has the ability to turn on/off the electrical air compressors at will, 2) The ability to control/power the electrical air compressors can only happen when the in-cab Accessory Switch is switched on.

Parts list:

#1: Operator Manual Control
What I want here is to be able to turn on or off the air compressors as desired. Example: I don't want the air compressors to turn on when I'm trying to start the truck. However, I don't want a simple on/off switch like what came with the compressor assembly; I want this switch to always start in the off position so any operator cannot forget and leave the air compressors powered (assuming the operator turned off the Accessory Power lever switch). This means that a simple toggle switch will not do. I need a switch that will self turn off when it looses power.

Said switch was harder to find than I expected.

This Pololu board will do exactly as I need though, rated for 4.5V through 40V:
Big Pushbutton Power Switch with Reverse Voltage Protection, HP
https://www.pololu.com/product/2813
"The Pololu Pushbutton Power Switch is a compact, solid-state power switch that features built-in reverse-voltage protection and is controlled by a momentary pushbutton: one push turns on power and another push turns it off. This is a patented design initially created for use in our own products as an alternative to bulky mechanical switches. Because the switched current does not flow through the mechanical switch, a large variety of small, low-power switches can be used to control a substantial amount of power. The use of momentary switches also allows multiple switches to be used in parallel to control the power to one load."​

So a momentary pushbutton will turn the control on or off, and when power is lost to the circut, it starts normally in the off state.
This pushbutton seems adequate, and should fit the asthetics of the truck. Its LED would only be powered when the board's "VOUT" is powered.
Ulincos Momentary Push Button Switch U16F1 1NO1NC Black Metal Shell with Red LED Ring Suitable for 16mm 5/8" Mounting Hole (Red)
https://www.amazon.com/gp/product/B01I9KDV2Q/

I believe I will mount the button and small circuit board somewhere on the left side of the dash. Perhaps to the right of the Accessory switch or to the right of the windshield wipers control knob.
View attachment 666338

I will seal the switch and circuit board with:
CRC Urethane Seal Coat Viscous Liquid Coating, 250 Degree F Maximum Temperature, 11 oz Aerosol Can, Clear
https://www.amazon.com/gp/product/B000IC7ZQ2/


#2: Air Pressure Switch
The air pressure switch will toggle itself as the air pressure changes, but electrical control will only flow to the (#4) Continuous Relay if the (#1) Operator Manual Control is enabled.

I ordered:
85 PSI on 105 PSI off Pressure Switch Part# 002-105
https://www.extremeoutback.com/product/55/105psi+Pressure+Switch+++++Part#+002-105.html

It would be easiest to mount this on an airline in the cab due to the (#3) Timer (less wire routing).


#3: Timer
I want to know how long the air compressors have run, so as problems/wear occurs I can get an accurate runtime measurement. I would want this mounted near or with the instrument cluster, or below the dash for less less visible holes. Actually, collocating the timer with the (#1) Operator Manual switch may make the most logical sense. Maybe I'll go on the steering column with an EGT gauge.

I do not believe the above Pololu board and the truck's Accessory switch, would have any problems powering the addition of the timer. I need to update the drawing and wire this in parallel to the relay control.

A round option:
Round Hour Meter Gauge Quarzt OZ-USA® 12-24-48 Volt Golf Cart 48V 24V 12V Cat Komatsu RV
https://www.amazon.com/gp/product/B00C0SQUZE/

A rectangular option:
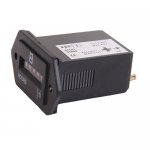
Neecooler Hour Meter DC 10V-80V Mechanical Hourmeter Gauge [SYS-1 ]
https://www.amazon.com/Neecooler-10V-80V-Mechanical-Hourmeter-Motorcross/dp/B01EJFEFH0/

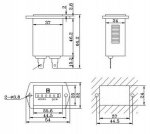
#4: Continuous Relay
Since I do not want to manually control each and every run of the electrical compressors via the large, manual switch, a relay is needed to supply the necessary current to the air compressors' electrical motor. According to Extreme Outback, a continuous relay is needed.

I ordered their nice sealed version:
100 Amp Relay Part# 002-240, $36.95
NOTE: The below link is the 12v version:
https://www.extremeoutback.com/product/97/100+Amp+Relay+Part#+002-103.html
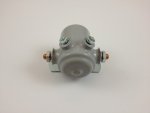
For note for others: a possible cheaper option:
85A Solenoid for Golf Cart & Heavy Duty Industrial Applications 24 Volt Continuous Duty
https://www.amazon.com/gp/product/B004V3FGOC/


#5: Power Distribution Panel
It would be nice to have all accessories lead back to one box, instead of an ungainly mess bolted onto one battery terminal with inline fuses everywhere. As linked earlier, this fuse panel may suffice, but with its low ratings (100A max, 30A per circuit), I'd need to run two separate relays:

Blue Sea Systems ST Blade ATO/ATC Fuse Blocks
https://www.amazon.com/dp/B000THQ0CQ/

Or I could use the above fuse box for other items in my truck (cab fans, CB, interior lights etc) and just run from the "power in" screw over to the relay and then the Bussman ShortStop auto reset breakers. That would leave the relay unprotected, unless I, again, used two relays.

Edit:
Albeit pricy, this sort of 2-in-1 fuse block combines both heavy current and lighter current applications. PERFECT for this and my other electrical needs!
Blue Sea Systems SafetyHub 150 Fuse Block
https://www.amazon.com/Blue-Sea-Systems-SafetyHub-Block/dp/B0053BTSEK/
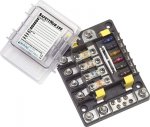
Actually in stock here:
http://www.defender.com/product.jsp?path=-1|328|2290021|2290030&id=1527942

Overall Specifications:
http://catalog.bluesea.com/#65/z
Amperage Max. Operating (combined) 280A
Minimum Cable Size to Meet Ratings 4/0 AWG (120 mm²)
Recommended Ring Terminal M8 (5/16") Stud Size

M8 MIDI® or AMI® Fuse Block
Amperage Max. Operating (per block) 280A
Amperage Max. Operating (per circuit) 170A
Fuse Amperages Available 30A–200A
Minimum Cable Size to Meet Ratings 2/0 AWG (70 mm²)
Screw Size M5

ATO® or ATC® Fuse Block
Amperage Max. Operating (per block) 50A
Amperage Max. Operating (per circuit) 25A
Fuse Amperages Available 1A–30A
Screw Size #8-32


#6: Air Compressors
To complete the air compressors and make them functional with the system:

Two of High Temperature Check Valve Part# 002-097
https://www.extremeoutback.com/product/61/High+Temperature+Check+Valve+Part#+002-097.html
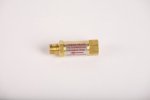
New, foam, pre-oiled air filters Part#: 002-102 ($24.94 each)
I was told the following:
These military compressors are a bit different than the ones on the website with the pre-cleaner. You must call to order the foam air filter. Use only foam filter oil (not K&N oil), but chainsaw bar oil would work too. The foam filters cannot be too oily as the excess will only drip away. If the filter is dry, then it's not working. Even if it's muddy, if its still oily, it's fine.​


Notes
I spoke with George Carousos. He was very, very personable, and helpful in everyway.
EXTREME OUTBACK PRODUCTS
www.extremeoutback.com
866-447-7711 Toll Free
707-447-7711 Direct
707-447-7722 Fax
OK, how much is all this going to cost you ? A simple "stainless steel" air tank can be bought for under $120.00 to $150.00. Never rust, needs no electricity to run, takes up minimum space. At this point I gotta ask, are you doing this just "because" ? If so that's OK. It's your truck and how you "trick" it out is your business.
 

Valence

Well-known member
Steel Soldiers Supporter
2,112
555
113
Location
Davis County, UT
OK, how much is all this going to cost you ? A simple "stainless steel" air tank can be bought for under $120.00 to $150.00. Never rust, needs no electricity to run, takes up minimum space. At this point I gotta ask, are you doing this just "because" ? If so that's OK. It's your truck and how you "trick" it out is your business.
Most of my reasons were provided earlier, in post #27. And adding electrical items for me is easy. It'll cost as much as I want it to. I like providing detailed information as a reference for myself because I tend to forget, with the hope that maybe it'll be of use to someone else - even if they don't like it, so they can choose differently. I could have use the air compressors, switch, and Bussman ShortStop breakers as-is off the cage, but if I'm going to have it, I want them to operate a certain way. Then I should add a proper DC subpanel....
 
Last edited:

Jbulach

Well-known member
Steel Soldiers Supporter
2,672
2,220
113
Location
Sunman Indiana
Perfect!

Somebody should have asked every last one of us this question "OK, how much is all this going to cost you ?" before we bought our trucks!!! I wonder how many would have changed their mind, or regretted the too much time and money that we spent?
 

Jbulach

Well-known member
Steel Soldiers Supporter
2,672
2,220
113
Location
Sunman Indiana
Albeit pricy, this sort of 2-in-1 fuse block combines both heavy current and lighter current applications. PERFECT for this and my other electrical needs!
Blue Sea Systems SafetyHub 150 Fuse Block
https://www.amazon.com/Blue-Sea-Systems-SafetyHub-Block/dp/B0053BTSEK/

Actually in stock here:
http://www.defender.com/product.jsp?path=-1|328|2290021|2290030&id=1527942

Overall Specifications:
http://catalog.bluesea.com/#65/z
Amperage Max. Operating (combined) 280A
Minimum Cable Size to Meet Ratings 4/0 AWG (120 mm²)
Recommended Ring Terminal M8 (5/16") Stud Size

M8 MIDI or AMI Fuse Block
Amperage Max. Operating (per block) 280A
Amperage Max. Operating (per circuit) 170A
Fuse Amperages Available 30A–200A
Minimum Cable Size to Meet Ratings 2/0 AWG (70 mm²)
Screw Size M5

ATO or ATC Fuse Block
Amperage Max. Operating (per block) 50A
Amperage Max. Operating (per circuit) 25A
Fuse Amperages Available 1A–30A
Screw Size #8-32.....
Very nice, you really seem to know your way around the electrics. Is there some sort of low voltage, cutout switch, you could easily add to kill the compressors, if your battery voltage drops below a certain point?
 

rustystud

Well-known member
9,297
3,070
113
Location
Woodinville, Washington
Most of my reasons were provided earlier, in post #27. And adding electrical items for me is easy. It'll cost as much as I want it to. I like providing detailed information as a reference for myself because I tend to forget, with the hope that maybe it'll be of use to someone else - even if they don't like it, so they can choose differently. I could have use the air compressors, switch, and Bussman ShortStop breakers as-is off the cage, but if I'm going to have it, I want them to operate a certain way. Then I should add a proper DC subpanel....
I know you want a way to air your truck up in the garage. You stated that unhooking the air-compressor was a pain, but isn't this more of a pain ? You still have to get in the truck and start up your compressor then start up the truck. I know it's your truck and all and your doing a great job. I'm more of a "get the job done" kind of guy. The easiest and most dependable way is my way.
 

Valence

Well-known member
Steel Soldiers Supporter
2,112
555
113
Location
Davis County, UT
Very nice, you really seem to know your way around the electrics. Is there some sort of low voltage, cutout switch, you could easily add to kill the compressors, if your battery voltage drops below a certain point?
I just did a Google search for "24V low voltage cutoff" and there are a lot of different kinds. If I were to add this to my setup (which I don't intend to at this time), I suppose the easiest location would be to insert before the air pressure switch. Here's an example:

Low Voltage Battery Disconnect, 20A, 12V/24V Auto Detect
https://www.amazon.com/Voltage-Battery-Disconnect-Auto-Detect/dp/B0147DYUN8
The GPC-1005-R is a low voltage disconnect load switch.
• It prevents battery from over-discharge by disconnecting the attached load if the battery voltage drops below a predefined threshold.
• It reconnects the load when the battery is recharged.

For install instructions and other details, please go to
http://www.galleypower.com/store/p9/Low_voltage_disconnect.html

Ten threshold options set by rotary selector
• For 12V battery: 2, 9.3V; 3, 9.7V; 4, 10.1V; 5, 10.5V; 6, 10.9V; 7, 11.3V; 8, 11.7V; 9, 12.1V
• For 24V battery: 2, 18.6V; 3, 19.4V; 4, 20.2V; 5, 21.0V; 6, 21.8V; 7, 22.6V; 8, 23.4V; 9, 24.2V
• When switch is at 0, OFF: Disconnect power from the load. (When rotated to location 2~9, the switch will stay off until reconnect threshold is reached.)
• When switch is at 1, ON: Connect power to the load if there is no pending fault. (When rotated to location 2~9, the switch will stay on until cutoff threshold is reached.)
• Recessed rotary swtich for better setting protection. See GPC-1005-F for flushed rotary switch option with easy access.

Features
• Ultra low pass-through impedance 4.5mΩ
• Ultra low standby current 0.26mA in 12V mode and 0.65mA in 24V mode
• Low normal operating current 3.5mA in 12V mode and 5.8mA in 24V mode
• Automatic 12V/24V battery detection
• Rotary switch provides 10 threshold options
• Recessed rotary selector for enhanced setting protection
• Max continuous current: 20A under full temperature range -40~130⁰F
• Red-Green dual color LED display for battery monitoring and fault reporting
• Low noise and low interference by solid-state switch
• Complete protections including input over voltage, under voltage protection, temperature, over-load detection, reverse polarity (w/ external inline fuse)
• Dimension: 80x40x20mm w/ flanged lid
• 1-year limited warranty.​

Here's another example that has an output line that you could use to turn on a low voltage warning indicator light.
http://www.powerplanted.com/24vss.html
 
Last edited:

Jbulach

Well-known member
Steel Soldiers Supporter
2,672
2,220
113
Location
Sunman Indiana
Cool, I need to do a little more digging on those. I have a 12v solar powered fence that would benefit from something like that.
 

Valence

Well-known member
Steel Soldiers Supporter
2,112
555
113
Location
Davis County, UT
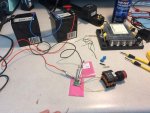
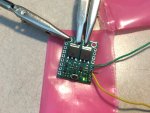
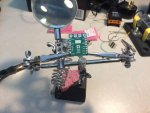
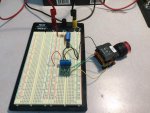
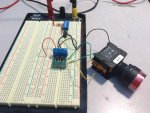
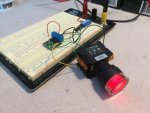
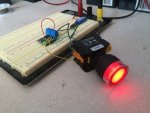
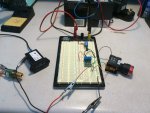
A little bit of geeking around with a bench top test of the control circuit.

2017-02-26 10.54.01.jpg 2017-02-26 10.54.26.jpg 2017-02-26 11.10.23.jpg 2017-02-26 11.35.29.jpg 2017-02-26 11.35.44.jpg 2017-02-26 11.38.00.jpg 2017-02-26 11.37.52.jpg 2017-02-26 11.56.32.jpg

Of course, not shown, to actually power the air compressors will be another line from the pressure switch to the 24v relay control.

I also took a video with poor audio!
https://youtu.be/alhk0cSzkOA
 
Last edited:

Valence

Well-known member
Steel Soldiers Supporter
2,112
555
113
Location
Davis County, UT
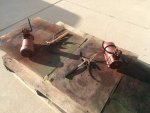
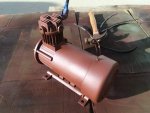
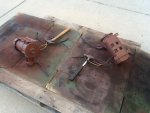
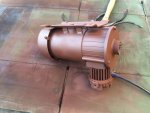
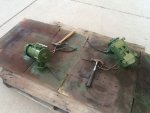
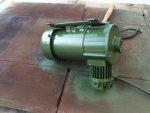
I didn't want to leave the air compressors yellow, even though the paint was fine. They'll match the deuce a lot better now. I'm not 100% sure how well the paint will last, long term, on the compressor head heat sink fins, but I think it'll be fine as I doubt they get HOT like the exhaust that would burn off non-high temperature paint.

All the angles and crevices were very tedious to try and clean. A wet rag and a screwdriver worked satisfactorily.

I still primered the units first, as some of the original paint did flake off during cleaning, leaving bare metal and so the green would have a uniform, muted base color.

image.jpg image.jpg image.jpg image.jpg image.jpg image.jpg

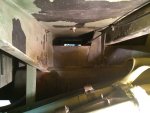
I am going to try and mount the pair of air compressors below the bed, in the dead/unused space above/behind the pioneer tool rack. My current measurements estimate it might prove a tight fit to get out the axe, and may require removing the shovel first. I'm okay with that. That'll still leave the compressors protected yet in an easily accessible location to service the air filter. Though I'll have to be careful to not over oil the filters to avoid/reduce oil dripping oil on the tool handles...

That'll leave the area above the fuel tank available for other things if I so choose (such as mounting jerry cans sideways) -- at a later date, or never.

image.jpg
 
Last edited by a moderator:

Valence

Well-known member
Steel Soldiers Supporter
2,112
555
113
Location
Davis County, UT
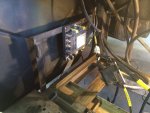
Wiring cleanup in progress! The Blue Sea Systems Safety Hub 150 fit very nicely to the left of the battery box. It's bolted to the top support rail and the angled cross member, so only 3 bolts but it feels very solid. I have a Battery Tender on the other side of the compartment (which has more room for me to see the status indicator lights), otherwise it would have went there.
http://www.steelsoldiers.com/showthread.php?83831-Battery-Maintainer-Installed-(w-pics)

2017-03-18 12.58.45.jpg

I copied to paper the mounting foot print for the air compressors used on the aluminum cage and used that template to decided where to drill the holes in the bed. One unseen difficulty was the large 1/2" bolt that was right where I wanted to put the air compressors. This bolt holds down one of the feet for the bed mounted Knaack toolbox. With the bolt there, I could either mount the air compressors less than 1/2" from the frame or about 3" from the frame. I wanted there to be at least 2" of space between the frame and the back of the compressors so the cooling fans would have enough space to pull in air, so I picked the later, farther out, location. This may make getting the axe out of the pioneer tool rack more difficult, but we'll see (plus, I think I'll have an easier time actually bolting the things down since my arm can fit between the frame and air compressor). I could have reversed the direction of the air compressors and had the air filter closer to the frame rails as that would eliminate tool rack difficulties, but it would make it quite difficult to inspect and service the air filter, which I didn't think was worth it.

I also removed the pioneer tool rack and spare tire, which made access *so* much easier. This would have been much more difficult with a fuel tank in the way had I chosen the passenger side!

2017-03-18 22.07.53.jpg 2017-03-18 23.19.46.jpg 2017-03-18 23.19.14-1.jpg 2017-03-18 23.19.28 HDR.jpg 2017-03-19 00.45.02.jpg 2017-03-19 00.45.08.jpg 2017-03-19 00.45.31.jpg 2017-03-19 00.55.19.jpg 2017-03-19 00.59.01.jpg 2017-03-19 00.59.20.jpg
(for the record, the paint runs seen on the side of the air compressor were from the original paint job)

As can be seen in the last picture, I plan on attaching a hose on the manifold with a quick disconnect fitting so I won't have to use the emergency glad hand. :)
 
Last edited:

Valence

Well-known member
Steel Soldiers Supporter
2,112
555
113
Location
Davis County, UT
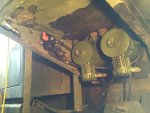
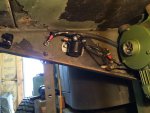
I added the Bussman ShortStop self-resetting circuit breakers, relay, high amperage power supply wire (not fully secured down, yet), and the clip for an air hose attachment. Besides the relay, air hose attachment borrowed for fitment measurments, and a 90 degree air fitting on the compressors, everything you see here came with the units, even all the wiring! Not pictured, the long time I spent thinking and thinking about how I wanted to route the wiring. The relay control wire will just piggyback with the high amperage wire that came from the slave cable.

I need to take these accessories back off though, because I should paint the bolt heads so they don't stand out so much on the front side of the bed.

2017-03-19 16.49.23.jpg 2017-03-19 16.36.10.jpg 2017-03-19 16.36.34.jpg
 
Last edited:

Valence

Well-known member
Steel Soldiers Supporter
2,112
555
113
Location
Davis County, UT
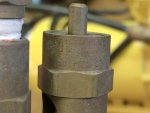
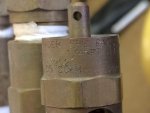
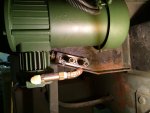
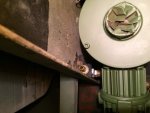
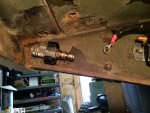
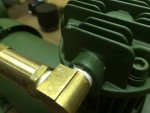
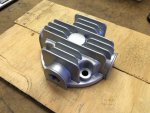
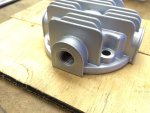
For the record, don't over tighten the fittings on the air compressor head. Apparently these are older style heads and they were prone to cracking. The good news though is that Extreme Outback Products sells upgraded replacement heads (P/N: 002-450) with gasket and cylinder o-ring for $30.00 + s&h. The new designed heads have more material around the fitting to help prevent cracking.

2017-03-18 19.05.57.jpg 2017-03-24 11.08.48.jpg 2017-03-24 11.08.54.jpg
 
Last edited:

red

Active member
1,988
25
38
Location
Eagle Mountain/Utah
For the record, don't over tighten the fittings on the air compressor head. Apparently these are older style heads and they were prone to cracking. The good news though is that Extreme Outback Products sells upgraded replacement heads (P/N: 002-450) with gasket and cylinder o-ring for $30.00 + s&h. The new designed heads have more material around the fitting to help prevent cracking.

View attachment 672590 View attachment 672588 View attachment 672589
oops
 
Top
AdBlock Detected

We get it, advertisements are annoying!

Sure, ad-blocking software does a great job at blocking ads, but it also blocks useful features of our website like our supporting vendors. Their ads help keep Steel Soldiers going. Please consider disabling your ad blockers for the site. Thanks!

I've Disabled AdBlock
No Thanks