• Steel Soldiers now has a few new forums, read more about it at: New Munitions Forums!

  • Microsoft MSN, Live, Hotmail, Outlook email users may not be receiving emails. We are working to resolve this issue. Please add support@steelsoldiers.com to your trusted contacts.

Supplemental Electric Air Compressor

Valence

Well-known member
Steel Soldiers Supporter
2,112
555
113
Location
Davis County, UT
Originally I had planned to tap into the Aux Power switch on the dash to control the circuit and relay (~5A). However, I thought I would get back to finishing my Air Dryer, and it has a heating element that needs to be powered (5A) on an ignition circuit. I haven't looked to see what gauge of wire is running to the Aux Power switch, but do you think the switch can that switch handle up to 10 additional Amps?

I don't want to overload it, so I may just tap into the power wire for the cab fans, then add another switch to flip on, which will power the air dryer and then I can use the big pushbutton for the electric air compressors. Still, using the Aux Power switch would be preferred...
 

Valence

Well-known member
Steel Soldiers Supporter
2,112
555
113
Location
Davis County, UT
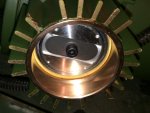
I replaced the cracked head. Inside, the piston wall was very shiny and clean:

2017-03-25 15.08.16.jpg

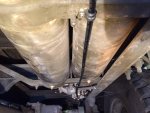
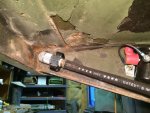
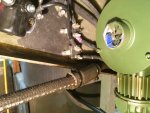
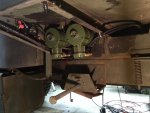
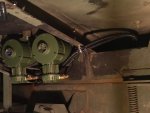
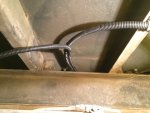
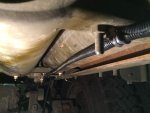
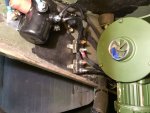
I've decided to run the power cable in front of the bed, and then under the front left edge:

2017-03-26 16.55.37.jpg 2017-03-26 16.55.25.jpg

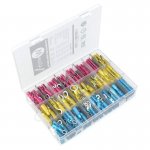
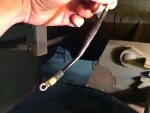
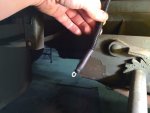
A butt-joint splice pulled apart on the rear compressor's ground wire. I was then able to break in my new, high quality heat shrink connectors, with adhesive sealant and crimping tool! Sure, this isn't the Packard connectors, but these things are AWESOME. I'll never use my old automotive connectors again.
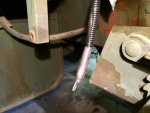
You can see the heat activated adhesive oozing out and sealing the ends. Make sure you have a proper heat gun. I just use one I bought at Ace Hardware.
2017-03-26 16.40.11.jpg

For reference:
Wirefy, 270 PCS Heat Shrink Wire Connector Kit ($30)
https://www.amazon.com/gp/product/B01GXQMP66/

Titan Tools 11477 Ratcheting Wire Terminal Crimper ($25)
https://www.amazon.com/gp/product/B0069TRKJ0/

The 24v air compressors came with a 7-port 3/8" manifold (3/8" internal and end fittings, 1/4" face fittings). Both of the electric and the engine air compressor feed into the manifold, which then runs to the air drier "supply" port, and then from the air drier "delivery" back to the tank. Even though the air routing is slightly more complicated, the manifold is awesome. Maybe a 1/2" manifold would have been better, but we're only talking about 10-11 CFM here.

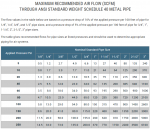
For technical reference of the ratings for air flow through pipe, 1/4" pipe would have been sufficient even after suffering 10% loss over 100 feet (which I don't have). So, I don't believe a couple 1/4" fittings will have any noticeable, let alone measurable, affect. With that said, I still maintained the 1/2" diameter line from the engine compressor all the way to the manifold (I used a 90 degree compression union on the hard line that previously connected to the air tank, to 1/2" air brake line routed to the manifold) . The engine air compressor is the largest air source and doing so minimized line loss, but surely by a very trivial amount.
http://www.jgbhose.com/technical-reference-literature/maximum-recommended-air-flow.asp
ansi_air_flow_pipe_rating.png

2017-03-26 16.52.27.jpg

The manifold ports are filled as follows (left to right):

  • (left end) hose for quick disconnect fitting
  • 165 PSI safety relief (there's now 3 safety reliefs in the system: one each on the tanks, drier, and manifold)
  • from rear Extreme Aire compressor
  • none (plugged)
  • from front Extreme Aire compressor
  • from engine air compressor
  • (right end) to air drier

Air drier delivery (out, to reservoir) routing:

2017-03-25 18.17.24.jpg 2017-03-25 18.17.05.jpg 2017-03-26 17.54.33.jpg 2017-03-26 17.54.53.jpg 2017-03-26 17.55.09.jpg
 
Last edited by a moderator:

dmetalmiki

Well-known member
5,523
2,028
113
Location
London England
I have air assisted steering on my deuces. And the M45 530C fire truck. I have an additional deuce air tank underneath, and have the ability to 'lock to lock' steer (stationary) on hard standing with two fingers.
OK, it takes longer to air up, but that is well within the pr-warm up and walk round before I drive off anyway. All pressures set to 120 P.S.I.
 

red

Active member
1,988
25
38
Location
Eagle Mountain/Utah
I have air assisted steering on my deuces. And the M45 530C fire truck. I have an additional deuce air tank underneath, and have the ability to 'lock to lock' steer (stationary) on hard standing with two fingers.
OK, it takes longer to air up, but that is well within the pr-warm up and walk round before I drive off anyway. All pressures set to 120 P.S.I.
For on road driving the stock air compressor is adequate. When we were offroading the stock setup could not keep up with his air requirements in the more technical areas. Never ran out but was low enough to be a concern.

No clue why so many of yall are irritated by this mod. It's to supplement the air requirements, not replace the mechanical compressor.
 
Last edited:

rustystud

Well-known member
9,266
2,962
113
Location
Woodinville, Washington
For on road driving the stock air compressor is adequate. When we were offroading the stock setup could not keep up with his air requirements in the more technical areas. Never ran out but was low enough to be a concern.

No clue why so many of yall are irritated by this mod. It's to supplement the air requirements, not replace the mechanical compressor.
I'm not irritated, but I was just wondering why he went this much more expensive route instead of just adding an extra air tank.
 

red

Active member
1,988
25
38
Location
Eagle Mountain/Utah
I'm not irritated, but I was just wondering why he went this much more expensive route instead of just adding an extra air tank.
Added volume doesn't eliminate the need to stop often to re-supply when offroading. Reduces the amount of stops required yes but doesn't eliminate it and makes those stops longer. There's alot of technical offroad terrain here where you will turn from lock to lock repeatedly within the length of the truck moving forward. Even at just 1st gear, low range, 1000rpm driving speed it was a problem for him. There is much more technical trails in this area to explore as well. A higher output air compressor is what's necessary here. Could find a way to mount a more powerful engine driven compressor, 2nd one, or electric to meet those requirements.
 

Valence

Well-known member
Steel Soldiers Supporter
2,112
555
113
Location
Davis County, UT
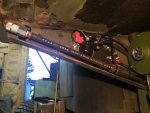
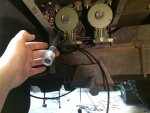
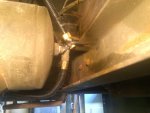
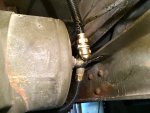
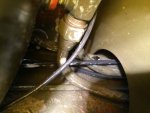
I've finished with the air hose connect. I will freely admit I messed up and mounted the lower Bussman ShortStop breaker too close to the bottom edge, partially in the way of this hose. Oh well, I'm not drilling new holes. So I added a bit of old heater hose around to protect from rubbing damage, and I cut the new hose just slightly "too long" so that it won't sit tight or flush against the front of the bed but tends to bow away so it won't actually rub anyway.

2017-03-29 19.53.42.jpg 2017-03-29 19.55.37.jpg 2017-03-29 19.53.56.jpg 2017-03-29 19.54.15.jpg


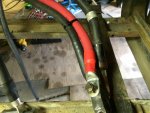
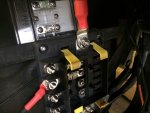
The 00 gauge battery cable arrived that I ordered premade from eBay user gaugewireandcable:
  • The positive cable is 36" and the negative (not pictured) is 24"
  • crimped ends with made-to-order terminal sizing (5/16" one end, 3/8" on the other)
  • heat shrink with heat activated glue to seal
It's a little over kill because it can support the entire DC sub panel at its rated 285A continuous, and I won't be using anywhere near that capacity. The good news, both cable and sub panel could probably support an electric winch! lol

2017-03-26 17.59.20.jpg 2017-03-26 17.59.41.jpg
 
Last edited:

Valence

Well-known member
Steel Soldiers Supporter
2,112
555
113
Location
Davis County, UT
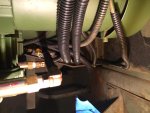
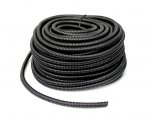
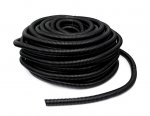
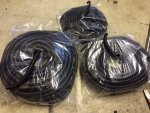
I've completed the new air brake hose routing to the air drier from the manifold. For added protection, I've covered each of the hoses in plastic split-loom.

2017-04-21 19.28.49.jpg 2017-04-19 20.29.07.jpg 2017-04-19 20.29.07_zoom.jpg 2017-04-19 20.16.25.jpg 2017-04-19 20.17.04.jpg 2017-04-17 20.34.23.jpg 2017-04-19 19.53.26.jpg

The plastic split-loom I used:

Absolute USA SLT14 1/4-Inch x 100-Feet Split Loom Tube
https://www.amazon.com/gp/product/B00PLY92TA/
91xCEjOEIdL._SL1500_.jpg

Install Bay Split Loom Tube 3/8 Inch100 Foot Roll - SLT38
https://www.amazon.com/gp/product/B00542XWXG/
71nWWiNMW6L._SL1500_.jpg

Absolute USA SLT12 1/2-Inch x 100-Feet Split Loom Tube
https://www.amazon.com/gp/product/B00PLY92NG/
81NeeFRHAyL._SL1500_.jpg

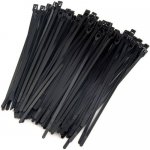
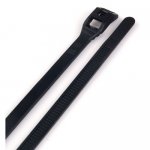
Also for reference, the zip-ties pictured here are 7" JEGS 10670 Cobra, low-profile, or what I call, lay-flat. I find them more difficult to pull tight in restricted spaces, but no more sharp corners cutting up my hand/arm when reaching past them! It's a shame they're so expensive.
https://www.amazon.com/gp/product/B0081ZY3FO/
51MFyF6RCML.jpg 41hpfPUu0ML.jpg

Here's a handy tip for working with the loom:
Don't take it out of the bag. Just put a small hole in the center, use side-cutters through the hole to cut the twist-ties holding the bundle together, then use the hole to pull out the split-loom. It'll be a little twisted, but it unravels easily enough, and also feeds back in just as easy if you pull too much out.
2017-04-19 20.12.17.jpg

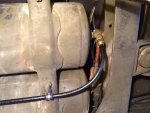
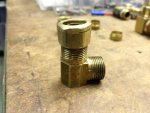
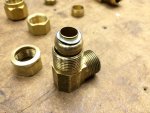
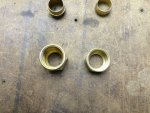
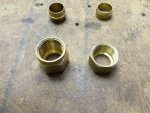
I need to fix the 90 degree 1/2" compression union at the air tanks from the engine air compressor though. During a leak test I heard a slight hissing and found that I broke the nut (from over tightening, I'm sure). However, I had used a water union from the hardware store (I did buy a brass insert sleeve for the hose), but the nut is obviously no where near as stout as a similar nut from a DOT union. The DOT union nut is below, in the last two pictures, on the left side.
2017-04-25 20.13.06.jpg 2017-04-25 20.13.29.jpg 2017-04-25 20.12.28.jpg 2017-04-25 20.12.31.jpg

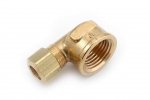
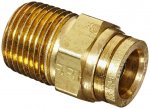
I'm replacing this union with a 90" degree elbow and a push-to-connect.

Anderson Metals 50070 Brass Compression Tube Fitting, 90 Degree Elbow, 1/2" Tube OD x 1/2" NPT Female Pipe
https://www.amazon.com/gp/product/B006PKJO8S/
716ea1d9nCL._SL1500_.jpg

Legris 3115 62 22DOT Nylon & Nickel-Plated Brass Push-To-Connect Fitting, Complies with DOT, Inline Connector, 1/2" Tube OD x 1/2" NPT Male
https://www.amazon.com/gp/product/B009PT7YF6/
91epyTgD6QL._SL1500_.jpg
 
Last edited:

Valence

Well-known member
Steel Soldiers Supporter
2,112
555
113
Location
Davis County, UT
I removed two layers of the plastic loom on the air-dryer electrical power wire and installed a thick piece of rubber hose instead for increased longevity.

2017-05-03 20.07.32.jpg

I installed the replacement 90 degree elbow and 1/2" push-to-connect, and was optimistic and zip tied the ensemble back together. The zip ties are to keep the overhead electrical wires from flopping around and to keep the elbow on the hard line from doing the same.

2017-05-03 19.49.13.jpg

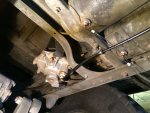
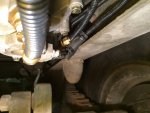
I performed a second leak test and still heard a slight hissing! After careful listening, and trusting of my ears, I discovered that there was indeed another leak and it was coming from the front of the outside air tank, on the line that runs to the air-pack. I believe from my work (rebuild, failure, and subsequent replacement) on my air-pack last year, that line got pulled on and bent just enough to leak. As can be seen, it does make an immediate 90 degree bend after the compression fitting.

2017-05-03 19.36.54.jpg 2017-05-03 19.36.54-1.jpg

I went to bed last night thinking just to leave it as it was so minor. When I woke up this morning I knew I would be fixing it (it was such a beautiful day that I took a vacation day) :)
It took me about 3 hours in total to get the 4 bolts off the straps and then realize I needed to undo both hard line connections on TOP of the outside tank and then also remove the line from the air-pack. All of that just so I could move the air tanks enough to get a wrench on the leaking fitting. I got a lot of movement out of this fitting, but it tightened up very well. In retrospect, perhaps I should have disconnected the driveshaft to give myself more room, but I managed to work around it, at the expense of awkward positions and arm fatigue.

2017-05-04 12.03.36.jpg 2017-05-04 12.03.32.jpg

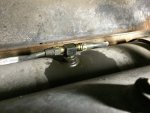
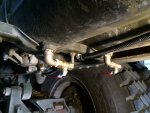
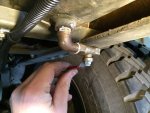
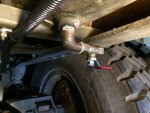
After both tanks were bolted back together, and I answered a 30-minute trouble call from work while sitting under the deuce, I decided that I had had enough of the pull-to-drain valves. They drained very slowly and would almost never re-seat properly, thus leaking slightly. I had to wiggle the little center piece by hand to get them to stop. This completely defeated their purpose of not needing to crawl under the deuce to drain the air tanks! I purchased from the local Ace Hardware store and installed 1/4" 90 degree elbows and ball valves. The handle of the ball valve points rearward when closed and has to pull forward to open. They'll also be fairly well protected by their height (over 30" from the ground) and the spare tire.

2017-05-04 14.35.26.jpg 2017-05-04 14.35.51.jpg 2017-05-04 14.35.45.jpg

A third leak test resulted in NO leaks, and I disconnected the shop air from the truck. Three hours later the needle on the air pressure gauge in the cab still (nearly) read 120 PSI. SUCCESS!
 
Last edited:

Valence

Well-known member
Steel Soldiers Supporter
2,112
555
113
Location
Davis County, UT
I moved onto some more electrical work. I decided I better address to power wire on the front-most electrical air compressor. It was only just barely long enough and I didn't want too much force presented to the Bussman ShortStop circuit breaker and having its electronics separate and short out on the bed, and generally creating a royal mess. I butt joined on 2-3" of additional wire. I have to say, so far I'm really impressed with the Wirefly wire connectors that are also heat shrinkable and have heat activate glue sealant!
https://www.amazon.com/gp/product/B01GXQMP66/
71ub21aZsDL._SL1500_.jpg

And this Titan Tools 11477 Ratcheting Wire Terminal Crimper is just top notch too. It makes reliable, double crimps every time.
https://www.amazon.com/gp/product/B0069TRKJ0/
71FG5DFa2jL._SL1500_.jpg

That didn't stop me from over-killing the setup with additional heat shrink over the butt joint and the split wire loom, matching the original appearance.

2017-05-03 20.31.46.jpg 2017-05-03 20.37.44.jpg 2017-05-03 20.38.23.jpg 2017-05-03 20.40.34.jpg


I then moved onto investigating how I wanted to get power to the control circuit in the cab. I removed the big plug from the back of the 3-lever light switch so I could lay eyes on the back of the Accessory Switch, but I found it had 4 wires running to it, and it was going to be rather difficult to get to. I thought to myself "Which of those should I use? Which would be best to pull power the air drier and 100A relay?" I consulted the AD-9 Air-Drier specs (3rd picture in post #88): 5A @ 24V. I called Extreme Outback Products and asked how many amperes did it take to control their 24V 100A continuous relay: 2A, so 7A total.

I recalled the M35A2 Wiring Diagram and during the review it hit me: I could pull power from the instrument cluster! It's far more accessible, controlled by the Accessory Power switch, and I had already installed the air pressure switch on the back of the air gauge (pictures: TBD).

Upon instrument cluster removal I saw 3 wires in sorry shape. Well, I couldn't leave them like that...

2017-05-04 17.13.20.jpg 2017-05-04 17.47.49.jpg

Old ends cut off and new joined (the 2 plugs at the bottom are actually reused plugs off a stock headlight that had taken a rock to the face. The wiring was still in good shape and I had saved them before disposing of the light over a year ago). And Y-splittler in place at the instrument panel power-in on circuit #27 (circled in BLUE below). All these wires (from the Accessory Switch, to the instrument cluster) use 14 gauge wire and I do not believe the additional draw of 7A will overload it. My favorite wire gauge, ampacity reference: http://www.powerstream.com/Wire_Size.htm

2017-05-04 18.21.37.jpg 2017-05-04 18.22.08.jpg wiring_schematic.jpg

Rubber Shell "Y" Connector MS27147-1
http://www.eriksmilitarysurplus.com/rushycoms.html
yhst-59523690850641_2267_42027783.jpg

Expensive, but I find these quick and easy for when splicing off and existing female plug.
Bulkhead Connector For Rubber Shell Connectors, 8741492
http://www.eriksmilitarysurplus.com/hebuco87.html
yhst-59523690850641_2268_29261843.jpg

During the heat shrinking of the butt connectors, I devised a way to keep the hot tip of the heat gun away from damaging me or anything else in the cab, without needing to get out of the truck each time or a "Soldier B".

2017-05-04 17.57.33.jpg

Finally, I think I also found (and cleaned) the reason my oil gauge was still having problems reading (it was bouncing around, an obvious ground issue, and the sending unit had already been replaced). The back of the instrument panel was corroded where the sharp points of the mounting bracket secured the gauge:

2017-05-04 18.23.05.jpg
 
Last edited:

rosco

Active member
Steel Soldiers Supporter
2,102
30
38
Location
Delta Junction, Alaska
Very nice work. Not at all to be critical, but an observation that I have been guilty of. Its possible to run about any truck out of air. Even those fitted with oversize compressors & extra storage. There can be several reasons responsible: Your vehicle is not running anywhere near rated engine speed resulting in low compressor performance - its only idling. Brakes also too, can be largely responsible or at least contribute to the problem. The operator using 100 PSI application pressure, instead of the 10 to 15 PSI needed to stop the wheels. Why? All kinds of reasons for it - too fast to be in any gear on steep slope, especially backing off steep ice covered, blocked roadway with a semi grossing 110,000, with impaired visibility, -50*F, extremely elevated pucker factor, aggravated by incessant low air buzzer. Some of us had a push nob on the dash, "camoed" with something like PTO on the nob - the purpose was to cut-off the brakes on the steering axle, because a skidding steering axle doesn't steer. This was still in the days before we knew it was fashionable to drive up there.
 

Jbulach

Well-known member
Steel Soldiers Supporter
2,656
2,176
113
Location
Sunman Indiana
....I have to say, so far I'm really impressed with the Wirefly wire connectors that are also heat shrinkable and have heat activate glue sealant!
https://www.amazon.com/gp/product/B01GXQMP66/
View attachment 679154....
Excellent work as always!
If you like those connectors, try some solder seal connectors if you get a chance. Thats all I use now, even as direct burry splices when the dog fence gets cut annually. Oldest splices are going on 10 yrs with no failures yet.
 

Valence

Well-known member
Steel Soldiers Supporter
2,112
555
113
Location
Davis County, UT
After some thinking and research, I decided to include on the panel a manual reverse light switch. I have the automatic one to install yet from Peashooter, but I still wanted the ability to manually turn on the reverse lights, such as if I were hooking a trailer up in the dark, by my self, or loading/unloading cargo.

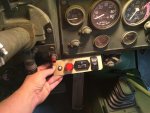
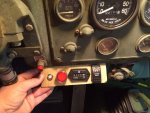
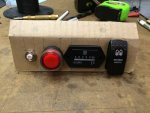
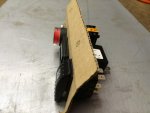
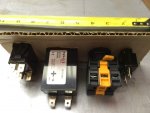
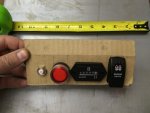
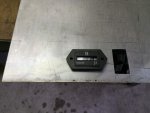
I started with a cardboard proof-of-concept, and to see if I liked the layout. The cardboard panel below is 2" tall x 7" wide, with a 1" mounting lip. From left to right: 20A manually resetable breaker (a smaller 10A or perhaps 15A would be more appropriate, but I stole it from my overhead console, so it will do for now), momentary pushbutton, hour meter, reverse lights toggle switch.

2017-05-05 15.01.14.jpg 2017-05-05 15.38.12.jpg 2017-05-05 15.37.54.jpg 2017-05-05 15.42.52.jpg 2017-05-05 15.43.27.jpg 2017-05-05 15.44.00.jpg 2017-05-05 15.44.13.jpg

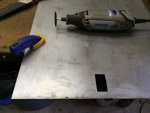
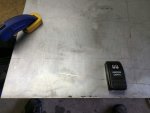
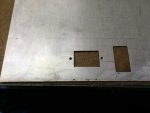
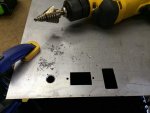
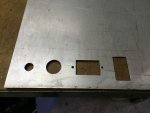
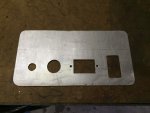
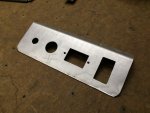
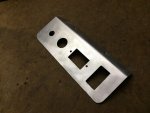
I liked it! But it needed to be a bit larger with more material top and bottom and additional space on either side of the hour meter. There was room for a total of about 8" to the left of the transfer case, front axle engage, air-switch lever, so the final dimensions were increased to 2-1/2" tall x 8" wide with a 1-1/2" mounting lip. The components were placed 7/8" from either end with about 7/8" between each, and centered vertically. I used 16 gauge steel (0.060"). The square holes were made, as pictured, with a Dremel 3000 and a metal cutting blade. I then used a 10" bastard file to clean up the inside corners, edges, deburr, and widen where needed. I used an electric bench grinder to round all 4 exterior corners.

2017-05-06 12.32.57.jpg 2017-05-06 12.39.34.jpg 2017-05-06 13.36.08.jpg 2017-05-06 13.46.32.jpg 2017-05-06 14.12.28.jpg 2017-05-06 14.26.16.jpg 2017-05-06 15.07.57.jpg

For reference, the step drill bit pictured above made very nice, perfectly circular holes and was mostly self de-burring. 3/8" shank
Drill Hog Step Drill Bit 1/4"-1-3/8" Molybdenum M7, $29.99
https://www.amazon.com/gp/product/B010WEZ5YO/
51wa2tI8q4L._SL1008_.jpg

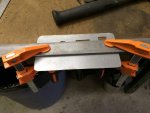
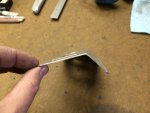
I don't own a press or bending machine, so I had to invent a way to make a uniform bend. I scored the back of the plate with a razor blade, to encourage the bend point, but the bench method didn't work very well as it wasn't holding the plate tight enough:

2017-05-06 16.09.57.jpg

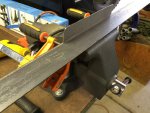
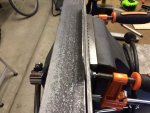
I then I used a 2" x 2" steel angle with the flat steel bar behind it and the edges clamped - all placed in the vise and a 2lb sledge to slowly bend the plate. This worked very well.

2017-05-06 16.23.01.jpg 2017-05-06 16.22.53.jpg 2017-05-06 17.23.36.jpg 2017-05-06 17.23.54.jpg
 
Last edited:

Valence

Well-known member
Steel Soldiers Supporter
2,112
555
113
Location
Davis County, UT
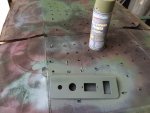
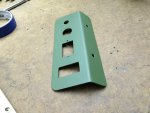
I was able to reuse one hole in the bottom of the dash. I did a final test fit then I used a wire wheel on a drill to prepare the surface for paint. First Dupli-Color Self-Etching Primer and then Rapco 383 Green CARC Substitute.

2017-05-06 17.08.54.jpg 2017-05-06 17.09.06.jpg 2017-05-06 17.38.32.jpg 2017-05-06 17.47.06.jpg 2017-05-06 20.52.14.jpg

I'm not a huge fan of metal work (hot metal and SHARP edges), but I'm really pleased at how well it turned out.
 
Last edited:

Valence

Well-known member
Steel Soldiers Supporter
2,112
555
113
Location
Davis County, UT
A third leak test resulted in NO leaks, and I disconnected the shop air from the truck. Three hours later the needle on the air pressure gauge in the cab still (nearly) read 120 PSI. SUCCESS!
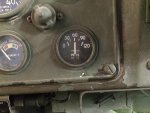
I also wanted to report, that after two days and one press of the brake pedal, the truck still registered 60 PSI in the system. :)

image.jpg
 
Last edited:

Valence

Well-known member
Steel Soldiers Supporter
2,112
555
113
Location
Davis County, UT
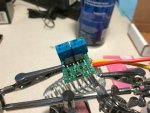
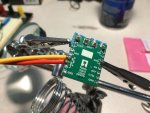
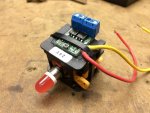
I took the second Pololu board and soldered on the VIN and VOUT block terminals and the push button switch wires. I wish it had been designed for larger wires for the control switch. I then coated both sides of the board in the sealant I purchased earlier. I then zip-tied and super-glued the board to the Alpinetech switch.

Obviously the Pololu board was meant to be used on a bread board so I'm not sure how long it'll last in my configuration since I didn't build a specific enclosure for it. Though it is secure, insulated, and I didn't route wires directly to it so there's no wires pulling on it - I first routed power (VIN) to one side of the normally closed contact block on the switch, then over to the Pololu board, then from the board (VOUT) to the LED block and from the same side of the LED light block over to the air pressure switch. It sounds complicated but it's still very simple, it is only the addition of some short wires as I made use of the switch's contact blocks as convenient power junction points.

However, if it fails I'll just buy an Alpinetech latching switch block or one of their 22 mm selector switches which will fit the existing panel hole exactly. Or I could just use the Normally Closed contact block that already came with my switch - I would just need to press and hold the switch in when starting the truck, which would disable the control circuit and thus the air compressors wouldn't try to run.

IMG_9324.jpg IMG_9327.jpg IMG_9334.jpg

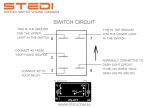
Last night I sat in the truck for 3 hours, measuring, cutting, stripping, crimping, routing and heat shrinking the various wires to the controls and behind the dash. I need to clean up and zip-tie all the added wires in place, so no pictures of that mess yet ;). The rocker switch sure has a lot of wires that run to/from it (5!) as it has an upper light (switch power on) and lower light (dash lights on, ie: for night time). I used another y-splitter on an instrument light for the "lower" light. We'll see how it handles the dim/bright light function, but I'm not too worried about it.

IMG_9330.JPG

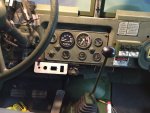
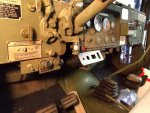
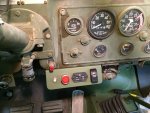
But the panel and switches are complete and fully installed. Besides wire clean up I only need to route the three wires (power for air drier, air compressor relay control, reverse light control) down and out of the cab.

IMG_9353.jpg IMG_9352.jpg

(You can still see that some air pressure registers on the gauge, it's been over 5 days, hehehehe - granted, it isn't as well sealed as my shop air compressor, but the air system is far more complicated with dozens of fittings, junctions, and components)
 
Last edited:
Top
AdBlock Detected

We get it, advertisements are annoying!

Sure, ad-blocking software does a great job at blocking ads, but it also blocks useful features of our website like our supporting vendors. Their ads help keep Steel Soldiers going. Please consider disabling your ad blockers for the site. Thanks!

I've Disabled AdBlock
No Thanks