• Steel Soldiers now has a few new forums, read more about it at: New Munitions Forums!

  • Microsoft MSN, Live, Hotmail, Outlook email users may not be receiving emails. We are working to resolve this issue. Please add support@steelsoldiers.com to your trusted contacts.

tim292stro's M1009 (formerly math1960's)

CUCVLOVER

Active member
Ok.
It's a clean truck, so I guess it just needs the standard cucv stuff? Tires, window/door rubber, paint, floor mat, batts, minor electrical work, oils change, that sort of stuff?
What's the over plan for the truck?.
Thanks
 

tim292stro

Well-known member
2,118
41
48
Location
S.F. Bay Area/California
As I posted earlier, I'm trying to keep it original or OEM CUCV. Any modifications away from something OEM will either be MIL-SPEC or removable/reversible.

Yes for the short term, I ordered the missing wing vent latch last night and I'm changing out the lock cylinders to secure the truck (already have all of those parts in hand, that'll be today's project), and basic PM to keep the truck happy as it begins its role as my daily driver are on the immediate to-do list. No leaks to ground after it was parked for five hours after I drove it following delivery, but I do note that there is wetness around the wire harness by the Hydroboost, that'll need a rebuild and cleanup. I have all new light fixtures coming, the front fender lights are sun-bleached, front turn signals are crazing (cracked), and the rear light fixtures have over spray from the last Green 383 CARC application. Also whoever painted the bumpers black didn't mask the blackout lights - so I have to put my replacement fixtures in (they do work, I scratched the paint off the lenses and they were lit when turned on).

The Roscommon 12V mod was done to the truck, this will be reversed, though I do want to point out how clean the wire harness relocations were :goodjob:. One alternator has been removed (brackets remain in place) and the second battery is wired in parallel for more cranking/glow Amps (group 27, I'll change to group 31) - Wally did a killer job keeping the parts that were removed, so that makes my restoration a h3ck of a lot easier. I've been talking to Kubotaman about re-acquiring the radio mounts, and I'm going to have to replace battery cables as there is some cracking/wear on the high-current wires and the battery terminals are about ready to go (brittle cracking failure noted starting on two lugs). I also have a solargizer for this truck, but I need to do the 24V restoration first.

If you look at the picture in post #18, you'll note that the slave port is bent and the grille pushed in - this appears that someone left a slave cable plugged in when one of the vehicles started driving away... I have a NOS grille I was going to use on the XM1027, and several slave ports and CUCV slave port mounts in my parts box to pull a replacement from.

The top in the rear has been silicone sealed, so that tells me the seals are shot, I'll pull the top if it leaks this winter, but I'm going to defer that for next year when I start thinking about paint. Last night the wife sat in the truck and was visibly dismayed at the interior, so that has subsequently turned into the next attention item after mechanical concerns for the pre-winter action list.

Other than that, yes: fluids, tires, gaskets/seals, weather stripping, and PRI-D in the fuel (Total Solutions 654 Diesel Fuel Anti-Gel also in the winter). When I get it painted, I'll probably put it up on the MVOTM...


My friend Mat who was in the 129th ANG at Moffett FAF until last November saw it last night and yelled "Nooooooooooooooooooooooooooo...". Sitting it in the driver's seat brought back memories of sitting on the flight line watching planes on guard duty all night for him. :beer:


[EDIT:] For paint what I'm thinking is a full take down to bare metal, repairing the corrosion and dents with lead-fill, then doing a CARC factory type paint job (3-color or just 383 green) under a 686A Tan CARC paint job. The interior color will remain only 383 green with maroon components. Glass will get a 3M Crystalline 90 "tint" (it only cuts UV/IR, no effective visible light cut) [/EDIT]
 
Last edited:

tim292stro

Well-known member
2,118
41
48
Location
S.F. Bay Area/California
CARNAC has already looked up the VIN info for this truck thanks to math1960 - copied here to centralize the record:

Thanks for the help CARNAC. I will make a donation the first of the month.

M1009 1986 Blazer
Vin: 1G8ED18J5GF184009
Registration: NFOKVM
NSN: 2320011232665
Bought at Rea Brothers Mid-South Auction Pearl, MS, last November , US Government-GSA public auction.
Can't find bumper numbers.

Thanks again.
Organization: ALARNG ELEMENT, JF HQ
Location: MONTGOMER ALABAMA
Nomenclature: TRUCK UTILITY 3/4TON
Model: M1009
NSN: 2320011232665
Serial Number: J5GF184009
Registration Number: NF0KVM
Year of Mfg: 1986
Manufacturer: 93219
Contract Number: DAAE07-82-C-4060
Usage Miles: 67350 Dec 03
 

tim292stro

Well-known member
2,118
41
48
Location
S.F. Bay Area/California
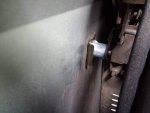
Got the tailgate crank and lock in, and lubed up the rear window regulator assembly:
0913151644.jpg
This one has a unique key, not the common key:
0913151645.jpg

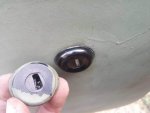
Popped in new lock cylinders for the Driver's side (which was REALLY worn out):
0913151730b.jpg
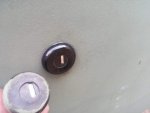
And passenger's side:
0913151730a.jpg

I'm keeping the original cylinders should some future owner feel the need to make their truck easy to steal [thumbzup]. These locks are comically easy to change out, they are just held in with a single compression spring:
0913151730.jpg

Well I didn't get to the ignition cylinder, as I do not have a steering wheel puller, I'll have to borrow one from Autozone this week to get that done.

ALL of the window gaskets and felt guide-ways are totally shot - they look original too.


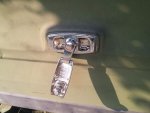
My dad couldn't help himself while I was working on the Blazer, so despite my professing that I had ordered a wing vent latch, he had an excuse to fire up the drill press and cut some steel to jamb a carriage bolt through the lock's hole.
0913151915.jpg

None the less, I can now say it's more or less secure against honest people :beer: except for the fuel filler...
 
Last edited:

fitz

Member
268
13
18
Location
Mass
Before you install your new ignition lock, you can have a locksmith rekey it to match your new door locks. Now the same key will match your doors & ignition, just like the way GM built it.
 

Another Ahab

Well-known member
18,003
4,564
113
Location
Alexandria, VA
Good work.
I didn't know that they made a steering wheel puller. (I guess I never asked).
I just used plenty of wd40 and a rubber hammer. It's not the best way but works.
It will be a WHOLE lot easier for you the next time when you use a puller to yank a steering wheel.

And you don't need them often, but when you need them that's the tool to use. You might be able to rent them from some rental shops.
 
Last edited:

Recovry4x4

LLM/Member 785
Super Moderator
Steel Soldiers Supporter
34,012
1,808
113
Location
GA Mountains
All of my CUCVs have the original keys. It doesn't make them easier to steal but it does make them easier to enter. After a local produce farmer had a number of his CUCV field trucks stolen and recovered without front axles, I learned that a few extra safeguards might be warranted. It will take much more than just a 73Y2 key to drive away with any of my junk.
 

Another Ahab

Well-known member
18,003
4,564
113
Location
Alexandria, VA
All of my CUCVs have the original keys. It doesn't make them easier to steal but it does make them easier to enter. After a local produce farmer had a number of his CUCV field trucks stolen and recovered without front axles, I learned that a few extra safeguards might be warranted. It will take much more than just a 73Y2 key to drive away with any of my junk.
That was a dirty trick. Were the "perps" ever caught and convicted?
 

Recovry4x4

LLM/Member 785
Super Moderator
Steel Soldiers Supporter
34,012
1,808
113
Location
GA Mountains
That was a dirty trick. Were the "perps" ever caught and convicted?
No, they were not. At last count, several years ago, there were 4 trucks parked in the back with no front axles. He has long since got out of CUCVs and the trucks are all gone (found 2 in junk yards) but I surely remembered and implemented a few security measures with my stuff.
 

tim292stro

Well-known member
2,118
41
48
Location
S.F. Bay Area/California
It will be a WHOLE lot easier for you the next time when you use a puller to yank a steering wheel... ...You might be able to rent them from some rental shops.
Autozone if you have one in your area, will let you borrow one if you have a credit card. I've borrowed a gear puller from them before - as Ahab says, you will appreciate the difference between the right way and the hard way 2cents


Before you install your new ignition lock, you can have a locksmith rekey it to match your new door locks. Now the same key will match your doors & ignition, just like the way GM built it.
That's weird, most GMs I drove had a round body key and a square ignition key, and they weren't the same. Personally I don't really care if I have five keys to drive the same truck (fuel cap, tailgate, front doors, steering wheel lock, and ignition key). Makes it more likely I'll be the only one in the family driving it, and keeping it empty should keep people from breaking in.


All of my CUCVs have the original keys. It doesn't make them easier to steal but it does make them easier to enter. After a local produce farmer had a number of his CUCV field trucks stolen and recovered without front axles, I learned that a few extra safeguards might be warranted. It will take much more than just a 73Y2 key to drive away with any of my junk.
Indeed, I have an idea for that, OpSec will prevent me from sharing... :shrugs:
 

fitz

Member
268
13
18
Location
Mass
I was referring to the way GM built your CUCV with 1 key for the door & ignition.
Don't forget that you will also need a lock plate removal tool to change the ignition lock.
 

tim292stro

Well-known member
2,118
41
48
Location
S.F. Bay Area/California
Bought a new glow plug card from HillBillyWizard (SS Vendor), will try to get that system back to normal, 28MT gear reduction starter in 24V trim, and I'm going to look at the 27SI CUCV alternator math1960 left in the back seat for me. If I have to rebuild that, I will. I picked a replacement slave port from my collection, and I'm going to need to swap out the passenger's side headlight bucket which is a little warped, I have one of those too.
 

tim292stro

Well-known member
2,118
41
48
Location
S.F. Bay Area/California
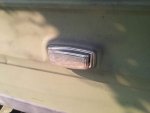
Didn't get much done today - got home from work and due to the cloud cover it got dark REALLY fast. Put in the new light fixture housings and LED bulbs in the front fenders and taillights, front fender fixtures were very bleached:
0914151940_small.jpg

I'll have to take a picture of the rear fixtures when it's light again...

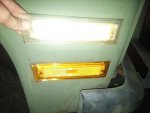
On that note, since it rapidly went pitch black and I wasn't about to dig out extension cords and flood lights to do 20 minutes of steering column work, I figured I'd tackle scraping, sanding and re-polishing the existing black out lights to see if they were salvageable. Used 1200grit to wet-sand the plastic lenses. Everything but the blackout drive should be able to be saved, the lens on the blackout drive light is cracked and mostly opaque around the bulb (little bit melted too).
0914151950_small.jpg

0914151955_crop.jpg

Going to try to knock out the ignition switch in the morning...
 
Last edited:

Another Ahab

Well-known member
18,003
4,564
113
Location
Alexandria, VA
On that note, since it rapidly went pitch black and I wasn't about to dig out extension cords and flood lights to do 20 minutes of steering column work, I figured I'd tackle scraping, sanding and re-polishing the existing black out lights to see if they were salvageable. Used 1200grit to wet-sand the plastic lenses. Everything but the blackout drive should be able to be saved, the lens on the blackout drive light is cracked and mostly opaque around the bulb (little bit melted too).
Is there any trick to that sanding at all to get the final "like new" look?

What I mean to ask is, the 1200 grit alone (using water, and presumably a regular circular motion) gets the job done? So if you got some 1200 grit and the time (no special polishing powder required), then you're all good to go?

So you don't really need any over-priced "kit" that's packaged and sold specifically to do the same thing, is that right?

Did I ask the same thing enough different ways for you here????????!!!!!
 

tim292stro

Well-known member
2,118
41
48
Location
S.F. Bay Area/California
Oh don't be fooled it's not "like new" but it's clear enough that the individual LEDs can be made out at the appropriate distances to be effective. This meets the requirements for the fixtures, and saves me putting $100 worth of NOS blackout lights on (and messing with more plugs and wiring). Kind of the "ain't broke don't fix it" thing.

The "trick" I use is water, a really flat sandpaper holder, and patience. I'll take a picture of them today so you can see how "not new" they still look.

If I wanted to go nuts, I could pull them and take them to a plastic buffing wheel to polish them glass clear, but removing them was specifically what I wanted to avoid doing last night.

The Blackout Drive light is not salvageable, it'll have to be replaced, but I have a box of 5 LED TrukLite Blackout Drive lights I can pull one from.
 

tim292stro

Well-known member
2,118
41
48
Location
S.F. Bay Area/California
Today was a bust project-wise, just leaving the office now at 2120. More parts were delivered today apparently, and I ordered new battery cable terminals and lugs while I was stuck in meetings (say it with me, the internet is awesome!!). Primary battery and slave port cables will be 4/0. Zig-zag ground from battery to slave port to engine block to frame, and from battery to ground firewall terminal block. Positive 24V from battery to slave port to 24V firewall terminal block, and positive 12V from low battery (+) to high battery (-) to firewall 12V terminal block.

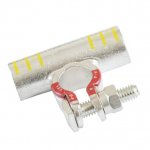
For the battery connections where it goes to two locations, I'm using pass-through flag connectors:
Flag_battery_terminal.jpg

These are heavy gauge solid copper will be crimped to tinned copper marine cable in black insulation, and dressed-in to be pretty and heat shrunk with color-coded/labeled ends: Black=Ground, Yellow=+12V, Red=+24V.
 
Last edited:
Top
AdBlock Detected

We get it, advertisements are annoying!

Sure, ad-blocking software does a great job at blocking ads, but it also blocks useful features of our website like our supporting vendors. Their ads help keep Steel Soldiers going. Please consider disabling your ad blockers for the site. Thanks!

I've Disabled AdBlock
No Thanks