• Steel Soldiers now has a few new forums, read more about it at: New Munitions Forums!

  • Microsoft MSN, Live, Hotmail, Outlook email users may not be receiving emails. We are working to resolve this issue. Please add support@steelsoldiers.com to your trusted contacts.

TNriverjet's M-1083 Thread

TNriverjet

Active member
Steel Soldiers Supporter
1,172
24
38
Location
Clifton, TN
Thanks suprman. I will check that angle as well.

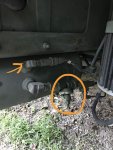
Oh, one other thing. The air dryer is exhausting very frequently 30-40 seconds when driving. It makes me think the air pump is running constantly and not being told to shut take a rest when adequate pressure is built in tanks. I've taken apart and cleaned the check valve on the wet (rearmost) tank (circled). There is also an electrical connection/switch there nearby (arrow) on the same tank. I haven't taken that apart yet. Makes me wonder of that is working properly to tell the pump what's going on?

FullSizeRender 12.jpg
 
Last edited:

Suprman

Well-known member
Supporting Vendor
6,861
696
113
Location
Stratford/Connecticut
The pressure protective valve right side of tank feeds the cab air springs. The switch under it is ctis pressure switch. Governor is on compressor. Remove a tank drain screw in a gage so you can see what your actual pressure is. Maybe you are over pressure and the safety is dumping.
 

TNriverjet

Active member
Steel Soldiers Supporter
1,172
24
38
Location
Clifton, TN
Your leaking air from air bag may be doing it.
Yeah, that's really the next item I need to tear apart and fix. So here is the list...

1. Cab air ride
2. Battery drain/charging issue (probably the fact that I used 3 old and one new battery)
3. Upgrade air dryer
4. Tires - starting with two decent MV/T's or XZL's on the front. Mix and match best of remaining XML's on rear axles.
 

TNriverjet

Active member
Steel Soldiers Supporter
1,172
24
38
Location
Clifton, TN
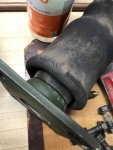
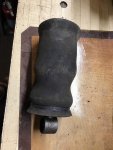
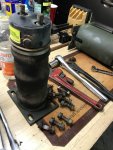
I had time yesterday to remove the drivers cab air spring. I have started disassembly, but have not got it completely apart. The bag is a bit dry and cracked on the surface, but the leak appears to be the seal at the bottom of the bag. I'll post more once I get it apart.
IMG_4638.jpgIMG_4639.jpg

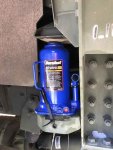
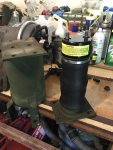
Here is how I supported the cab while the bag unit is out.

IMG_4640.jpg
 

TNriverjet

Active member
Steel Soldiers Supporter
1,172
24
38
Location
Clifton, TN
You need to get one from supraman or buy a new one from poweraid The bag is non repairable
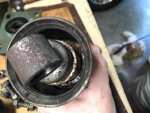
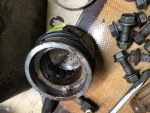
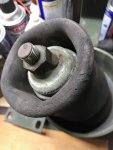
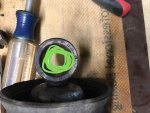
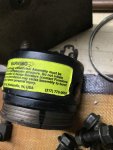
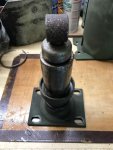
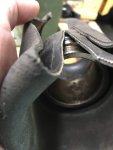
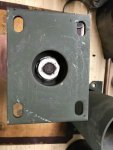
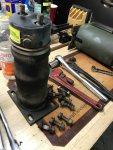
I got it apart and was not confident any of the rubber parts could be reused. So, I just ordered the PowerPacker # PP997900 repair kit for this unit from Ohio Hydraulics in Columbus. Once the order was placed, I received an auto generated email stating they were shutdown and on their annual family vacation from Aug 4-13... So I guess this project is on standby for now. Here are a few shots of the unit further disassembled.
IMG_4644.jpgIMG_4646.jpgIMG_4648.jpgIMG_4649.jpg
This air bag does not look old or overstretched... just dry rotted and cracked.

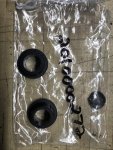
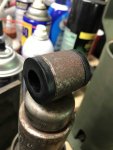
Also, the bushing in the shock mount came apart in small sticky rubber pieces. I don't think this is part of the kit, so let me know if anyone has a source for this. I will be calling Ohio Hydraulics to see if they also have this bushing.
FullSizeRender 13.jpg
 

TNriverjet

Active member
Steel Soldiers Supporter
1,172
24
38
Location
Clifton, TN
Ok, I made a call to PowerPacker today an spoke with a very helpful gentleman named, Wayne Turner. He did some digging and followed up with this PDF drawing of the bushings used for the shock end. PN 2010000272

View attachment 2010000272.pdf

At this point, I need to wait until the new parts arrive as I may be misunderstanding what all is included. In texting with one member who has done this, I think I am understanding that this whole end assembly is included with the new bag.
IMG_4642.jpg

Rest assured I will upload photos of the parts when they arrive.

Also another PDF drawing of the air ride/shock assembly itself.

View attachment PP938900-2G.pdf
 

TNriverjet

Active member
Steel Soldiers Supporter
1,172
24
38
Location
Clifton, TN
Wayne at Power Packer sent me this PDF of the PP997900 repair kit. I'm starting to see how this is going to work now! Still waiting on the guys from Ohio Hydraulic to get back from vacation and ship my order on Monday.


IMG_4681.jpg
 

Attachments

Last edited:

TNriverjet

Active member
Steel Soldiers Supporter
1,172
24
38
Location
Clifton, TN
Ok, updates needed.

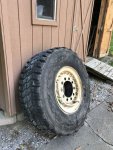
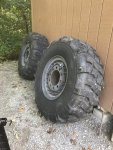
First I was able to pick up a few tires to replace the worst dry rotted ones. I got two fairly low use XML tires off a 1082 trailer and an evenly worn MV/T for a good spare.
IMG_4722.jpgIMG_4721.jpg

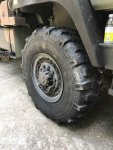
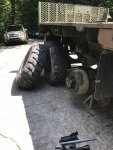
The two XMLs went on the front steer axle. I moved a decent XML to the intermediate axle and have 3 to discard.

IMG_4731.jpgIMG_4732.jpg

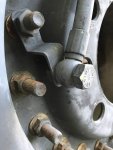
Note to self... trailer tires do not have banjo bolts in the CTIS hoses... must switch banjo bolts from old wheels!
IMG_4733.jpg

Trailer wheels do have an interesting bracket to "park" the CTIS hose... I've used it on my spare.

IMG_4724.jpg
 

TNriverjet

Active member
Steel Soldiers Supporter
1,172
24
38
Location
Clifton, TN
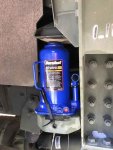
Also, I finally received my air bag rebuild kit from powerpacker via Ohio Hydraulic. While waiting for parts I had to support one side of the cab where air bag was removed. My bottle jack was the perfect size.

IMG_4640.jpg

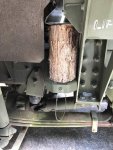
Then I needed the bottle jack for tire swapping detailed above, so I got out the chainsaw and made a suitable replacement...
IMG_4727.jpg

Yes, a bit redneck, but it worked!

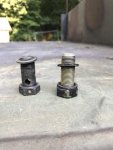
The power packer rebuild kit was really easier to install than it looked. I disassembled too much of the spring/shock unit. The airbag just slips on and off once you remove the "E" clips and pin. My shock-end bushings were also disintegrating, so needed replacing. There were two required at $22.50 each which was pricey, but I had them ship with the new airbag.
IMG_4638.jpgIMG_4682.jpgIMG_4684.jpg

You do do not need to remove this bolt to take apart the bottom mount.
IMG_4687.jpg

The new unit slips right over the internal shock and the pin slips through the black end cap through the new bushings.
IMG_4754.jpgIMG_4755.jpgIMG_4756.jpg
 
Last edited:

TNriverjet

Active member
Steel Soldiers Supporter
1,172
24
38
Location
Clifton, TN
Then to test it all out, we cut up a tree that fell against the house in storms last week. We loaded up the truck to haul 4-5' log sections to a friend's house for his firewood reserves.

IMG_4760.jpgIMG_4761.jpg
 
Last edited by a moderator:

Reworked LMTV

Expedition Campers Limited, LLC
Supporting Vendor
1,507
1,174
113
Location
TN
Also, I finally received my air bag rebuild kit from powerpacker via Ohio Hydraulic. While waiting for parts I had to support one side of the cab where air bag was removed. My bottle jack was the perfect size.

View attachment 696829

Then I needed the bottle jack for tire swapping detailed above, so I got out the chainsaw and made a suitable replacement...
View attachment 696830

Yes, a bit redneck, but it worked!

The power packer rebuild kit was really easier to install than it looked. I disassembled too much of the spring/shock unit. The airbag just slips on and off once you remove the "E" clips and pin. My shock-end bushings were also disintegrating, so needed replacing. There were two required at $22.50 each which was pricey, but I had them ship with the new airbag.
View attachment 696822View attachment 696823View attachment 696824

You do do not need to remove this bolt to take apart the bottom mount.
View attachment 696825

The new unit slips right over the internal shock and the pin slips through the black end cap through the new bushings.
View attachment 696826View attachment 696827View attachment 696828
Looks Great! Where did you get the black bushings from?
 

TNriverjet

Active member
Steel Soldiers Supporter
1,172
24
38
Location
Clifton, TN
Looks Great! Where did you get the black bushings from?
Bushings came from PowerPacker. A part number and PDF engineering drawing is shown in Post #30 on page 4 of this thread. They shipped them with my airbag rebuilt kit. They are proud of them at $22.50 each. Two are required for each shock!
 

TNriverjet

Active member
Steel Soldiers Supporter
1,172
24
38
Location
Clifton, TN
I hauled some landscape wall block today for the church. In addition to the pallets of block, there is also 36 bags (1/2 pallet) of gravel stacked on the other side. This is the heaviest load I have hauled. It handled the load fine, but I could definitely feel the change in center of gravity.
IMG_4798.jpgIMG_4797.jpg
 

Coffey1

Well-known member
Steel Soldiers Supporter
3,871
497
83
Location
Gray Court SC
I've been waiting on a update! Did you get cab lift back in and working? Did it help with the air issue.
 

Aernan

Member
510
19
18
Location
San Jose/California
I need to start a thread to chronicle repairs, upgrades, etc. on this M-1083.

Acquired at GovDeals auction from Houston Co. TN Sheriff's Office. Reserve price not met, but I threw a bid at the last minute and was contacted two days later with an offer to sell at my high bid (still under reserve).
This is not the best looking truck due to faded paint, but if you look past that and the dry rotting tires, it really is a pretty good find!

View attachment 688919

It had less than 700 miles on the odometer when picked up. There is paint marker on the dash showing another 3,900 miles previous. I believe it went through an overhaul right before being given to the HCS. This truck has the 290 HP 3116 Cat motor.

Recovery efforts took place on Friday June 30th and were assisted by tnmogger who graciously drove to the Nashville area the day prior in his M-1078.
View attachment 688913View attachment 688920
We did some tire swapping on site to get a badly dry rotted tire off the steering axle. tnmogger loaned me his spare for the trip home. See the empty spare rack on the photo above? The truck ran well on the return trip, but several items needing repair became evident.
1) CTIS seems to keep air in tires, but all lights are flashing.
2) Air ride cab not working
3) Fan clutch locked up and sounding like a freight train at high revs.

A few more photos upon arrival at home:
View attachment 688914View attachment 688915View attachment 688916
View attachment 688917View attachment 688918View attachment 688923View attachment 688924View attachment 688921
View attachment 688922
It has an interesting rear gate, and I believe we've determined that this truck had a shelter mounted most of its life. See the faded paint around the edge of the bed?
View attachment 688925
Ooh nice lift gate on rear. How do I get the part number?

Sent from my SAMSUNG-SM-G930A using Tapatalk
 
Top