• Steel Soldiers now has a few new forums, read more about it at: New Munitions Forums!

  • Microsoft MSN, Live, Hotmail, Outlook email users may not be receiving emails. We are working to resolve this issue. Please add support@steelsoldiers.com to your trusted contacts.

Valence's 1972 M35A2

Valence

Well-known member
Steel Soldiers Supporter
2,112
555
113
Location
Davis County, UT
I've resisted creating the usual, "everything I've done to my deuce thread", as I prefer each topic to have its own thread (more or less). It is my opinion that doing so it more useful to others who may be interested that particular item and it helps keep the thread more focused and on topic.

That said, I want to create a master thread to show the chronology of my work, learning, and ownership. Most importantly we tend to only see communication from folks when a problem arises, but what about all the good times in between? It tends to paint a picture of only constant problems and break downs. I want to use this thread to also document whenever I use/drive my truck (most of the time at least).

But first, here is the history and chronology of what I have recorded and could find.

----------

2010:
To start off, in January of 2010 one of my brothers showed me a link to two M35A3's for auction through GovLiquidation.com at Hill AFB in Utah. I've seen many WWII jeeps and other military vehicles, but it opened my eyes how readily one could own a military truck! It's probably not a very good life goal, but I've said since I was a kid that I wanted to own a tank, so what better place to start than with an MV that's in my price range? I inspected the A3's in person, crawled all over them, took pictures, and knowing what I know now, I'm positive they would have started and been drivable with just new batteries and 2-3 new tires (the infamous A3 CTIS had let the air out of a few on each truck, thus ruining them). The same brother pointed me here, to SteelSoldiers to continue my research. I made numerous phone calls to the Utah Department of Motor Vehicles (DMV), state troopers, weigh stations in Utah and neighboring states, and insurance companies so I would have a complete picture of my requirements and costs as an owner. I learned that I had much less to worry about than I thought. I didn't end up bidding on the A3s at Hill AFB as they went for over $6000 plus fees - then there would be towing and repairs on top of that.

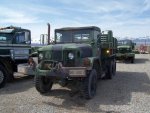
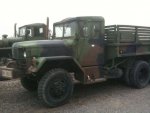
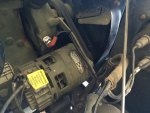
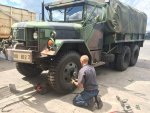
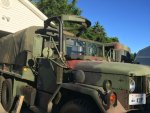
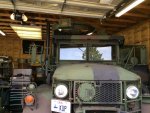
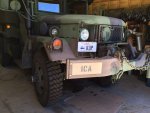
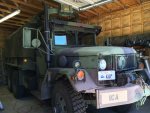
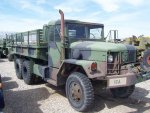
I started searching a very popular local, free classifieds page, KSL.com, and found an M35A2 for sell from a private seller located in Tooele, UT. On April 3rd, 2010 I purchased the truck from him for $4,800 - running, driving, and stopping. The fellow had a large, gravel yard with many work trucks (and a 1/2 dozen or so other MVs) and I believe it was a diesel repair shop. He said he purchased the truck at auction in Nevada for a pipeline project that fell through and no longer had use for the truck. He fixed the park brake for me and included an NOS air wiper motor to replace the driver's one that was non-operational, and even an NOS driver's side fender as mine has some cancer. At the time of this writing, I still haven't installed it as I'm not to the point of repainting the whole truck.

These are the original ad pictures:
20960.jpg 20961.jpg 20962.jpg

  • 1972 AM General M35A2
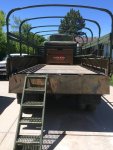
  • Hard top w/ gun ring cutout, winch, wooden troop seats, and wooden bows and uprights with corners in the bed

I talked another brother into driving my newly purchased deuce home for me while I rode shotgun. I needed to learn how to drive a manual transmission and had limited experience at that point and just wanted to get the truck home where I could practice on side roads and not the freeway!

The 60 mile drive home was successful.
20963.jpg

However, when we got to my place we discovered that the primary fuel filter had a serious leak. At the time I wasn't as gun-ho about fixing everything myself (I'm still not for any possible & future serious engine problems). During the safety inspection, I paid Boyce Equipment to replace my fuel filters and some rotten rubber hose for the windshield wiper motors.

I didn't do or use my truck much for the first two or three years that I owned it. Here's what I have documented or can find:

It appears I didn't change the oil until August of that year, 2010, and asked a question regarding the proper spring-cup orientation for the canister oil filters:
http://www.steelsoldiers.com/showthread.php?55951-Oil-Filter-change-spring-amp-cup

In the fall, I purchased and installed a new speedometer cable, but found that the old cable had actually broken off inside the old speedometer and I couldn't get the piece out. (It was broken at time of purchase). Of course, who knows how long it was like that. Original Odometer: 19709.3 miles

Unfortunately I don't have any record of the Hour Meter at time of purchase.

2011:
In March, the Engine Stop handle came off the cable:
http://www.steelsoldiers.com/showthread.php?67571-Reattaching-the-Engine-Stop-Handle
I'll have to dig up pictures. I ended up drilling a small hole through the handle and cable and installed roll pin. So far it has held.

One early morning when driving the deuce, I turned down a side street and with the angle of the sun on the windshields I couldn't hardly see out of them due to the sand blast pitting when the truck was poorly prepped for CARC decades before. I purchased replacements from Boyce Equipment and installed them right away.

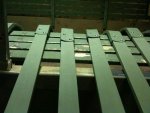
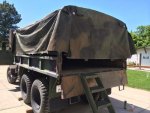
In May, one of my brothers sand blasted the rusty bow corners and his friend that did powder coating sold me a 1lb sample of 383 Green matching powder coat, Fed 34094, and I purchased a cargo cover that had 1 foot in the grave, still was $270 shipped. It took me 3 years (until 2014), until it was properly repaired (another $70) and is still in use at the time of this writing.

Also purchased from the same seller with the cargo cover were a pair of 8" round convex mirrors. The passenger one is cracked with a piece missing, but I still use it.

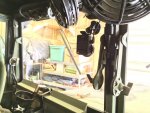
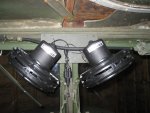
My first real modification was a pair of Fasco 24v interior cab fans. I love these things and use them every time I drive the deuce - unless its cold out.
http://www.steelsoldiers.com/showthread.php?72247-24V-fan-installation-w-pics!
IMG_1306.JPG

July 1st I added a "Danger" sticker to my tachometer and I decided to take cheaper route and just replace the speedometer with a new one, vs sending the old one out for repair. Odometer now: 00000.0 miles.

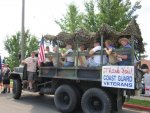
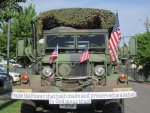
I started attending my city's 4th of July parade:
http://www.steelsoldiers.com/showthread.php?71969-Kaysville-(Northern-UT)-Independence-Day-Parade


2012:
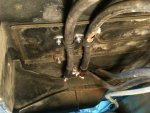
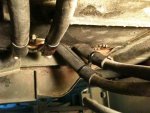
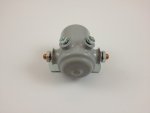
In February I installed a Battery Disconnect (and added hose to protect the slave port cables):
http://www.steelsoldiers.com/showthread.php?83830-Battery-Disconnect-Installed!
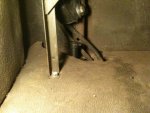
20948.jpg 20940.jpg 20941.jpg

And in March a Battery Tender:
http://www.steelsoldiers.com/showthread.php?83831-Battery-Maintainer-Installed-(w-pics)
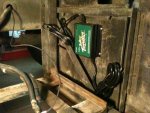
20943.jpg

March 10th was the first time I actually checked all the tire pressures and set them all to 50 PSI. The spare had the lowest pressure, but it was still 30 PSI.

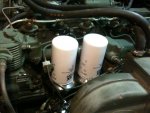
I changed the oil again, but split my home-made gasket on the top of the oil filter canisters and dumped a gallon of oil out of them on the driveway and garage when I started and moved the truck when finished. That prompted the purchase and installation (on March 14th) of a set of spin-on oil filter adapters and Wix filters. Oil pressure read 60-90 PSI.
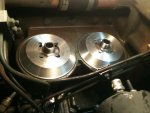
20955.jpg 20954.jpg

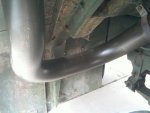
March 16th, new air reservoir drain valves (old ones were hard to turn), same manual screw-open style, and I paid Transtech Auto (which no longer exists) in Clearfield, UT to install a new lower exhaust "J-pipe" (mine was cracked and leaking in the bend, surely caused by rust and water collection) and a Dynomax muffler and to grease the chassis.

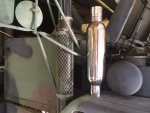
***What do I think about having the muffler after all these years? It's okay. I'm glad I have it but I want more sound reduction and am thinking of replacing it with an Aero Turbine AT3535 or the 6" longer one 3535XL (mounting fabrication needed on the larger one).

Dynomax Muffler P/N: 24216
http://www.summitracing.com/parts/WLK-24216/
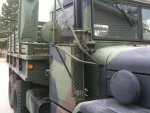
20953.jpg 20952.jpg
http://www.steelsoldiers.com/showth...ce-this-week&p=1090834&viewfull=1#post1090834


2013:
June 21st, I went to start the deuce and only got a clicking noise!
http://www.steelsoldiers.com/showthread.php?124577-Electric-problem&p=1551667&viewfull=1#post1551667

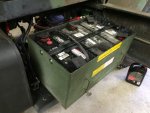
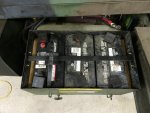
Even though I kept the stock 6TL batteries on a battery tender, one failed and I believe I sold the other to a recycler a year, or so, later. I also believe they were at least 5-6 years old. I purchased a new pair of Group 31 950 CC batteries from NAPA, P/N: 7235. $321
http://www.steelsoldiers.com/showth...dvice-please&p=1406876&viewfull=1#post1406876

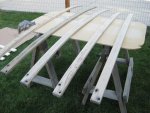
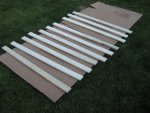
June 22nd, the uprights that came with my deuce were made taller than what would work for the stock 1-piece cargo covers. So I cut, sanded and painted new wood uprights (3/4" x 2-1/2" x 45") from poplar board I purchased from Lowes for about $45. (at the time of this writing in 2017, I'm considering getting thicker oak boards for more strength in the high winds that are somewhat frequent in my area.) I also sanded and glued the bows, saving and reused them. I could finally make use of those nicely restored bow corners!
http://www.steelsoldiers.com/showthread.php?108997-Replacing-refinishing-old-Cargo-Cover-Bow-Sides
IMG_2303.jpg IMG_2302.jpg new_bow_sides_01.jpg

June 28th, I asked for opinions from folks about the cargo cover configurations for parades. I ended up drilling additional holes lower in the newly made bow uprights to be able to raise the bow height and pin in place. This has become standard parade practice for me (if carrying people) and works well even with the 1-piece cargo cover, I only have to attach the rubber rope to the front most tie down loop and the nylon strap on the "tabbed" flaps at the front of the cargo cover I tie to a horizontal board on the headache rack..
http://www.steelsoldiers.com/showthread.php?109289-Parade-Cargo-Cover-up-or-no-cover&highlight
4th of July 2011:
IMG_0687.jpg IMG_0694.jpg

July 12th, I placed a hose around the positive battery cable that runs through the frame rail.
 
Last edited:

Valence

Well-known member
Steel Soldiers Supporter
2,112
555
113
Location
Davis County, UT
2014:
February:
With the help of one of my brothers, we installed an NOS air-assist steering kit. It is miles better than manual steering! However, what I don't like is that most of the natural "return to center" after a hard corner is gone, and it consumes a lot of air but at least it's there to help for the slow speed maneuvering required at parking lots and gas stations!
Strange that I never uploaded any of the pictures to SteelSoldiers...


March:
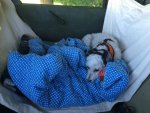
Similar to commercially available seat protectors for modern cars and trucks, my dear mother made a hammock for my dog for the passenger seat. She rides very comfortably!
https://www.steelsoldiers.com/showthread.php?136662-Passenger-Hammock-For-Small-Critter-Friends
image.jpg


April:
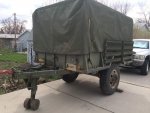
To go with my deuce, I purchased an M105A2 trailer from Alexsha, who I fount out was a member hear and lived, at the time, about 2 miles from me! I also had trouble seating the trailer plug, but all it needed was just a little bit of silicone lubricant.
https://www.steelsoldiers.com/showthread.php?122662-What-to-do-about-stubborn-M105-trailer-plug
ImageUploadedByTapatalk1396881129.462900.jpg

May 23rd:
Thanks to member nchittendon's thread:
http://www.steelsoldiers.com/showthread.php?123784-Electrical-fire

I had a further awakening about two weak spots with high wear and catastrophic failure potential in the deuce wiring harness: The inside frame rail in front of the cab firewall on both passenger and driver's sides. I covered both with hose to prevent further wear.
https://www.steelsoldiers.com/showt...ce-this-week&p=1550854&viewfull=1#post1550854

I installed a new 120 PSI oil sending unit (my instrument gauge read zero, indicative of sending unit failure - a max or "pegged" reading means a grounding problem). P/N MS24539-1 (replaced P/N replaces 7416363), NSN 6620009935546
http://www.eriksmilitarysurplus.com/oilprseun120.html

I also installed a springer seat shock from "ThoseMilitaryGuys". Pricey, but it *did* help the ride a lot. The seat cushion was still terrible, but the seat certainly didn't bottom out so easily on bumps, hurting my spine!
http://www.thosemilitaryguys.com/new-seat-shock/
http://www.steelsoldiers.com/showth...ce-this-week&p=1551215&viewfull=1#post1551215

May 24th:
I finally installed the NOS air filter the fellow gave me when I purchased the truck. The original probably wasn't filtering very well as it had cracks in the rubber. The NOS one was dated June 1983 (6/83), still new in the box.
NSN: 2940-00-804-7898
FSCM: 19207 MFR/FN W25001
DAAE07-82-2593 MS1188A

I noticed one of the air cleaner clamps' loop was broken. My brother welded the clamp for me and it has been holding up just fine!
https://www.steelsoldiers.com/showthread.php?124482-Fixing-Air-Cleaner-Pop-Up-clamp


Also May 24th:
I change the engine oil @262.6 Miles on the odometer. Spec says the engine takes 22 quarts, I only got 20 quarts of Shell Rotella 15W40 heavy duty diesel oil back in that time. I used Carquest oil filters #85458


May 31st:
I flushed the engine coolant. To do that, I drained everything that would come out of the radiator (it was green coolant, a little brown in it too of course), added some dawn (or cascade?) dish washer soap (I failed to record exactly what, or how much, but it wasn't a whole lot and I'm certain it was a liquid dish washer soap) and then I filled the radiator with distilled water. I drove the truck around the block a few times, came home and drained the radiator (a lot of green came out again). I refilled the radiator once again with distilled water and then drove the truck. I did this about 4-5 times over 2 days. I believe I used at least 20 gallons of distilled water. I could have used tap water, but I was trying to keep contaminants out of the system since draining the radiator wouldn't drain what was in the engine block. Of course each drain the water came out clearer and clearer.

Then I was presented with a small problem. The TM said the deuce coolant system held about 8 gallons. Yet, I'd only get about 5 out of the radiator. That meant I had 3 gallons of water in the engine block. So I added 3 gallons of straight orange coolant and the rest was 50/50 mixed. I didn't fully fill the radiator, only until I could just barely see the coolant. After driving yet again, and waiting for the coolant to cool down I sampled the coolant to see if I needed more water or coolant. At this point my memory fails me which way it went, but I want to say it was a bit watered down - but either way I topped off the radiator


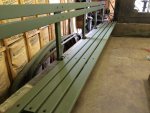
From February to May I restored the troop seats (actual disassembly began August of 2013). I went just about as detailed as one can get, without all new hardware.
https://www.steelsoldiers.com/showthread.php?123907-The-Long-Road
ImageUploadedByTapatalk1400434583.244913.jpg


May 27th:
I bolted to the bed the largest "site" tool box that one could fit without interfering with the operation of the troop seats. Though it does take up quite a bit of room and makes it hard/impossible to sit in the most desirable front corners, I still very much like the ability to be able to securely haul spare parts and many tools. I went with a Knaack Box Model #4824 (48" wide x 24" deep x 28" tall).
https://www.steelsoldiers.com/showt...ce-this-week&p=1553359&viewfull=1#post1553359
ImageUploadedByTapatalk1401202995.268764.jpg
And installed a rubber mat in the bottom of the Knaack box.
https://www.steelsoldiers.com/showt...ce-this-week&p=1554089&viewfull=1#post1554089

And finally installed that repaired cargo cover! Though, I didn't have enough Super Rope until an order arrived the following month in June, where I pulled the cargo cover off and patched most of its pin holes and added some stair tread rubber to the front flap where it rubbed a lot against the bolts on the headache rack, even though I put acorn nuts on those bolts to help protect the cargo cover
ImageUploadedByTapatalk1401202694.811312.jpg


June:
I installed a 66" Ibis Tek lightbar with interior control box. Thought it has taken a number of iterations for me to "get it right". Things I had to correct:
-Paint
-Interior ballasts were not held down correctly from the manufacturer
-Spacers to fit the deuce cab width
-Reinforcement of the curved brackets because they were cracking. I believe this was mostly caused due to the fact that the deuce cab tapers towards the front and the curved brackets were meant to go on a more square bodied/cab of a HMMWV
https://www.steelsoldiers.com/showthread.php?125231-Ibis-Tek-Light-Bar-Install
ImageUploadedByTapatalk1402150262.117617.jpg

Also in June:
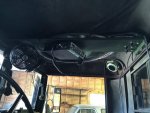
I installed a bed-mounted antenna and a CB on a "Those Military Guys" overhead console (the antenna also came from Those Military Guys). At the time, the overhead console was a poor fit (too short) but I was able to easily bend some adapter/extensions for about $3. It appears they now have a hard top-specific overhead console. The construction is very simple, and a couple of the tack welds on mine arrived already broken, but it has been holding up so for (summer 2017).
http://www.thosemilitaryguys.com/complete-hardtop-overhead/
ImageUploadedByTapatalk1402439622.418693.jpg
Though the CB has been next to useless as I've only ever heard someone once and it was all garbled, so I haven't been using it. I need to get the CB unit, coax, and antenna tested. However, I believe the problem is either the antenna, or the antenna location - or likely that I always have it tied down. I still haven't measured its height, mounted and fully extended - as I don't want to hit low bridges with the antenna. Even so, I have to have it tied down to exit my own driveway and there are a lot of low hanging trees on the surrounding streets. One may call this modification, not fully thought through. But at least it looks good for parades and car shows (which are not the reasons I do things though, but I'm trying to still see the positives)
https://www.steelsoldiers.com/showt...these-type-of-antenna-tie-downs-meant-to-work


June 7th:
A SteelSoldier's member, BBQROD, offered probably the single most practical and useful mod: Gas Shock Hood Lift. It clears the front tip-out windshields in (almost) every position, clears my light bar, and (future: 2016) M66 gun ring ammo can tray.
https://www.steelsoldiers.com/showt...-Bar-Install&p=1558134&viewfull=1#post1558134
https://www.steelsoldiers.com/showt...Availability&p=2037119&viewfull=1#post2037119
ImageUploadedByTapatalk1402150726.734997.jpg


All the previous work was a whirlwind to try and attend the Idaho Military Vehicle Preservation Association (IMVPA) show and swap meet which, at the time, was held in early June in Fruitland, ID at the Idaho Motor Pool. However, I hadn't learned that I should be driving my deuce with the side windows rolled *up* while the front windshield was open to pressurize the cab, and blow out the hot engine heated air. As well as shut off the coolant flow over to the cab heater. Even when not on, air still comes through it.
https://www.steelsoldiers.com/showthread.php?125222-Unbearable-heat-blowing-into-cab

When I packed up and left for this trip, I stopped about 30 miles from my home at a well known local store, Smith and Edwards. I was just cooked out of my truck and my poor dog was panting up a storm. It was about noon in June, so not that it was super cool outside anyway. Well, while there, I noticed dark splatter marks down the side of my truck and underneath and all over the rear axles. Long story short, I traced it back to the transfer case. Something was wrong there. I bailed on the trip and returned home. I had taken vacation from work for this trip (and to get ready for it), exhausted and over heated, I spent the remaining days visiting my mum. Later, I discovered that the leak was really at the speedometer cable adapter, an oil seal had failed there. To this day, it still doesn't like to keep oil out of the speedometer adapter, so I just grease it often. Very often. I thank the good Lord for stopping me early on that trip that I wasn't ready for - especially maintenance wise (see 2015 below).
https://www.steelsoldiers.com/showt...ing-Gear-Oil&p=1559207&viewfull=1#post1559207


June 12th:
I posted about the composite tail light license plate mount that one of my brother's designed for me. State law in Utah is that every vehicle must have a license plate light, no exceptions. It was such a good fit, I had a second mount made for my M105A2 trailer - even though its not required to have a license plate light (license plate lights on trailers is still common though).
https://www.steelsoldiers.com/showthread.php?125457-Composite-Tail-Light-License-Plate-Mount-Deisgn
deuce_plate_mount_front.jpg

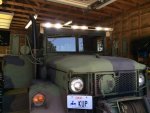
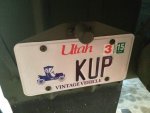
I also applied for an got my custom license plate in 2014. The story behind my license plate ("Kup"), is that one of my friends asked me how my ol' "Autobot" was doing. This gave me a good laugh, then I thought about as a kid, my favorite Transformer was an Autobot named Kup. He was the old, gruff, green painted Autobot veteran who had a story about everything and had about seen it all. Pretty geeky, I know. :roll: :D


August:
I went with one of my brothers (twice) to the mountains near Kamas, UT with to collect firewood (we had split the cost of the permit). With just the two of us, and the distance the wood was from the road (we were instructed that we couldn't leave the road with our vehicles), we were only able to (mostly) fill only the M105.
https://www.steelsoldiers.com/showthread.php?128156-Light-Wood-Hauling
ImageUploadedByTapatalk1407856608.532127.jpg


September:
For my M105A2 trailer, I added a 2x4 on top of its bows to prevent water pooling between and damaging the cover. Though due to the height of the board, I notice that it does put strain on the front's upper edge stitching. I should sand the corners to be even more rounded.
https://www.steelsoldiers.com/showthread.php?130186-M105A2-Water-Pooling-Prevention


October 6th:
A 60 mile trip north to visit my Mother for the weekend (her birthday and watch LDS General Conference).
https://www.steelsoldiers.com/showthread.php?130467-Fall-in-Cache-UT


October 18th:
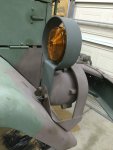
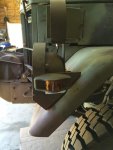
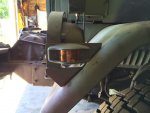
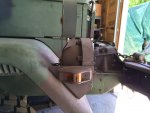
I installed a pair of NOS (dated 4/90) "lollipop" lights on the front blinkers. I really like the added signal light visibility to vehicles to either side, or even behind. NSN 6220-01-096-3496
https://www.steelsoldiers.com/showthread.php?130909-Installed-NOS-Lollipop-Lights
2014-10-17 19.49.51.jpg

November:
Two vent, or defroster, deflectors. They were both "left" side, but it was a simple modification to make a left side fit a right side.

November 21st:
To go with my deuce, I purchased a 1972 AM General M816 (wrecker)! Spoiler: I decided it was too much truck and I wanted to focus my funds and time on my deuce and sold it to SteelSoldiers member red.
https://www.steelsoldiers.com/showthread.php?132200-quot-Rescued-quot-M816-Wrecker


2015:
February 15:
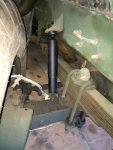
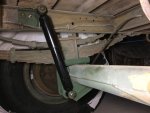
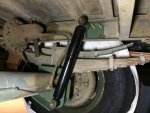
While trying to chase down the cause of front passenger tire cupping, I replaced the stock shocks with new Monroe 66605 gas shocks.
https://www.steelsoldiers.com/showt...-suggestions&p=1675218&viewfull=1#post1675218
2015-02-15 18.01.08.jpg


February & March:
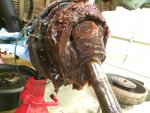
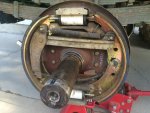
I finally tore into what I now realize should have been a much higher priority for me - like immediately after purchase. Almost all of the bearings had had their grease washed out with gear oil. That said, none of the front u-joints, king pins, bushings, bearings or cup/cone surfaces showed any damage, wear, or grooves. I was very blessed and lucky I never made it far or went on the long trip to the IMVPA show in 2014. I serviced all 6 axle ends, inspected brake pads, repacked bearings, replaced seals, boots, honed and rebuilt wheel cylinders, installed the new flexible brake lines from peashooter, and performed major & minor adjustment to all the brakes.

Over the course of the next 18 months I would end up re-doing all four rear axle ends due to, what I believe, was my failure at making my own keyway cork seal. The next time, I purchased the cork pieces from Big Mike's Motor Pool. So far (as of 7/13/2017), the inside of the tires has been dry (with one exception, but I think that was a loose banjo bolt).

Notes:
3" octagonal, axle spindle nut size for 2.5 ton Rockwell axles (front & rear are the same)
https://www.steelsoldiers.com/showt...ce-this-week&p=1684985&viewfull=1#post1684985
2015-02-28 18.10.51.jpg

I had a problem with the passenger tie rod threads:
https://www.steelsoldiers.com/showt...ce-this-week&p=1689439&viewfull=1#post1689439


March 13th:
Since my original passenger front tire was so heavily cupped, I purchased a single tire from a private seller not far from me. It looked very good tread wise and no cracking but probably hadn't been used in years. By the time I replaced it in just 5 months time, it had developed some sidewall cracking and I recovered only about 1/3rd of what I paid for it.
https://www.steelsoldiers.com/showt...ce-this-week&p=1688533&viewfull=1#post1688533


April 06th:
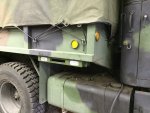
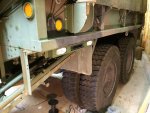
I installed A3 style reverse lights and marker lights (though the reverse lights would end up not being wired up until June 2017)
https://www.steelsoldiers.com/showt...m-bed-corner&p=1700052&viewfull=1#post1700052
Marker light wiring finished by April 19th:
https://www.steelsoldiers.com/showt...ce-this-week&p=1707915&viewfull=1#post1707915


April 07th:
I installed rubber bump stops for the tail gate. It is so nice having them, and they work great on the bumperetts.
https://www.steelsoldiers.com/showt...bber-Bumpers&p=1700446&viewfull=1#post1700446
image.jpg


April 19th:
I installed the remote brake fluid reservoir. I don't know how I ever lived without this thing!
https://www.steelsoldiers.com/showt...ce-this-week&p=1706688&viewfull=1#post1706688


Also in April:
I changed the oil in the following: @1222 Miles & 287.7 Hours

  • All 3 differentials - each took ~1.5 gallons of 80W90 MasterPro gear oil
  • Transmission - ~8.5 pints of 80W90 Rotella, yellow metal safe, gear oil
  • Transfer case - ~7qts of 80W90 gear oil (I can't remember if I used Rotella or MasterPro)

May 02nd:
I copied peashooter's axle, transmission, and transfer case vent line to an under-the-hood manifold:
https://www.steelsoldiers.com/showt...ce-this-week&p=1712496&viewfull=1#post1712496


May 03rd:
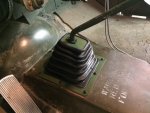
I changed the fluid in the transmission and transfer case. I also installed Mr. Gasket Shifter boot P/N: 9649
**I love this thing!
https://www.amazon.com/Mr-Gasket-9649-Shifter-Boot/dp/B000BWE4NG
http://www.steelsoldiers.com/showth...ce-this-week&p=1713198&viewfull=1#post1713198
image.jpg

I tried to do the same on the transfer case shift lever, but the boot proved to thick for the odd shape/angle of the lever. I didn't want to adjust the linkaging any so I removed and gave away the rubber boot (but kept the metal trim). Since I had already, foolishly, drilled the holes in the transfer case cover, my dear mother made a vinyl cover. It, obviously was much wider than it needed to be, probably doesn't do anything being thin, but it looks good.


I also installed a Kat's 400 W block heater, which, at the time of this writing, I have yet to use. I first tried to install the 600 W version with NPT threads , and it was too long and rubbed against the internal casting of the water pump, so I wasted that money.
http://www.steelsoldiers.com/showth...ce-this-week&p=1713221&viewfull=1#post1713221

Kat's 600 W (what didn't fit, was too long)
https://www.amazon.com/gp/product/B000I8TPNW/

Kat's 400 W (shorter, what is pictured below)
https://www.amazon.com/dp/B000I8XCFO/
image.jpg

May 07th,
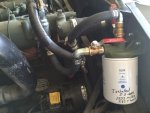
I completed installing a coolant filter:
http://www.steelsoldiers.com/showth...ce-this-week&p=1714632&viewfull=1#post1714632
image.jpg
Installed 05/05/2015
1222 Miles
287.7 Hours

Mounting Base: Wix 24019 (4019 at NAPA)
Filter Element: Wix 24070 (4070 at NAPA) - contains no additives (24071 contains 1 part additive, 24072 contains 2 parts, etc)
Equivalent Filter numbers (Unconfirmed though, only cross-referenced the Wix P/N):
  • Carquest: 89070
  • Baldwin: B5134
  • Fleet Guard WF2077

I know I'm up to nearly 2700 miles so it's probably time for a change. However, the filter is "bypass", meaning that the coolant is not required to go through the filter. In the colder weather, I have the valves closed so the coolant can't go through the filter as sufficient hot coolant wasn't making it to my heater box! Also, it is mounted so close to the headlight that a regular, all metal, filter removal tool can't get around it. I'll have to use the removal tools with the rubber strap.


May 17th:
I finally got a support brace for the gunner's cutout to keep water from pooling on the cover.
https://www.steelsoldiers.com/showthread.php?139879-Cab-gun-ring-vinyl-cover-quot-tented-quot

A year earlier I didn't now if there was an actual surplus part made to support the cover or not. Not surprisingly it, "No" was the answer, the soldiers just manually cleared the water and didn't care in-between using it.
https://www.steelsoldiers.com/showthread.php?124265-Water-leaking-through-gunner-s-opening-cover

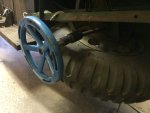
I put together my own "water wheel" setup for ease (and safety) of lowering the spare tire. I love this thing and use it every time I need to get the spare tire out of my way.
https://www.steelsoldiers.com/showthread.php?55919-Spare-Tire&p=1718461&viewfull=1#post1718461
2015-05-16 17.08.03.jpg


May 30:
I painted the transmission and transfer case tunnels (Rapco 383 green CARC substitute) and installed a transfer case lever cover my mother made for me since the Mr. Gasket shifter boot didn't work out for the transfer case lever. I then glued a ~1" circle of thing rubber to the transmission tunnel where the transfer case lever would make contact. This helped reduce noise and vibration, and protected the paint too!


June 02nd:
I used the deuce and M105A2 to haul the scrap to the landfill from a poorly designed and built shed at my place.
https://www.steelsoldiers.com/showt...ce-this-week&p=1736666&viewfull=1#post1736666


June 05th:
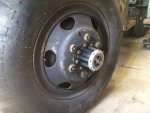
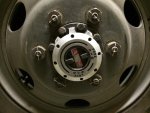
I went in on a group buy that Mr. Patracy put together and I purchased new AVM front lockout hubs, and installed them!
https://www.steelsoldiers.com/showthread.php?138001-2-5-Locking-hubs-group-buy
2015-06-05 17.09.18.jpg


June 12th:
From a 4'x8' sheet of 3/4" rubber stall mat (like you'd put in a barn stall for your horse), I cut rubber floor mats (passenger and driver). It makes it a bit more of a chore to put in/take out seats and especially the transmission tunnel cover, but otherwise, it helps cut down on some heat and noise. Every little bit adds up. While I had the seats out, I replace the following:
  • Rubber air line for air pressure gauge
  • Rubber air line for the front axle engage lever
  • Heater ducts - all of them
    • Purchased locally from Evco House of hose, I got about 7.75 ft of 4 inch diameter LT-4 ducting, and 7 ft of 3 inch diameter LT-3 ducting
The 3" ducts to the defroster vents were quite difficult to reach, get on, and tighten.


August 1st:
I installed an AD-9 style air-dryer. However, after a few iterations, that thing is still an on-going saga and doesn't operate correctly. At the time of this writing (07/13/2017), it is bypassed and electrical disconnected. Next step, I think I will take it to a shop with more experience with air dryers.
https://www.steelsoldiers.com/showt...for-an-M35A2&p=1748764&viewfull=1#post1748764


August 8:
At 1743.0 miles on my new speedometer, the 9.00-20 NDTs were replaced with Goodyear G177 11.00-20! The tires were surplus from M939 series 5 ton trucks, still on 5 ton budd wheels. I paid a local shop, Jack's Tire and Oil in North Logan, UT, less than $300 to dismount 18 tires and remount 9 - I consider that a steal of a price for the work involved! Though, these tires are awesome they weren't without their challenge. The G177s as duals, are basically more tire than the deuce needs. Even at 30 PSI in the rear of an empty deuce, full tread contact isn't made, though the tire will flex well off road at that pressure. However, the fronts I run at 80 PSI (now, with the M66 gun ring installed in 2016). Additionally, the left, middle axle rubs fairly heavily on a trunnion cap and bolt head, even with a 1/4" spacer plate. To eliminate the rub, one would probably need to replace all torque rod ends with the "ball & joint" style, add longer wheel studs, and run a 1/2" (or more) spacer plate.
https://www.steelsoldiers.com/showt...ce-s-tires-to-Goodyear-G177-11-00R20s-(dualed)
2015-08-08 12.37.35 HDR.jpg

After the drive home the next day, it was perfectly clear that I needed the caster adjustment - doing so spawned another little saga for me as I broke a locator pin when removing the leaf spring perches. Boyce Equipment welded blocks to the axle housing on either side of both front leaf spring perches and (as of summer 2017) everything seems just fine, even after long road trips and some off-roading. The caster adjustment was completed September 14th, 2015.
https://www.steelsoldiers.com/showt...-G-177-tires&p=1762653&viewfull=1#post1762653


August 19th:
Drove 'er to a church social ;)
https://www.steelsoldiers.com/showt...ce-this-week&p=1755426&viewfull=1#post1755426


August 22nd:
I replaced the petcock style air tank drain valves with the cable pull style:
https://www.amazon.com/gp/product/B0081TJ04O/
Maybe the ones I purchased are low quality (very likely), but I put up with them for 2 years. They didn't prevent me from having to crawl under the truck at all as after pulling on them, they wouldn't reseat fully and then would leak and I'd have to get under there and wiggle them. I suppose it prevented me from getting water and grime sprayed into the face when I would first purge the air tanks. Note: I hated these pull cable drain valves, the air flow was slower and the thin cable hurt my hand. I replaced them with brass quarter turn valves. Much better and faster though you still have to climb under the truck, and I recommend hearing protection when you dump the air.

August 23rd:
After the trip to pick up my tires earlier in the month, my driver's side head light took a rock to the face during some road construction in Soda Springs, ID. I personally believe it was from the dump truck in front of me. But, I would rather it be the head light than my windshield! I replaced both headlights with He.lla H4 24V 100/90W (HLA-H83140041) bulbs, adapted a Doorman 9003 socket with rubber shell connectors to fit the stock wiring harness, and then a IPCW CWC-7006 7-inch plain round conversion headlight. I did have to buy longer Philips screws to secure the face of the headlight bucket back down.
https://www.steelsoldiers.com/showt...ight-Upgrade&p=1758719&viewfull=1#post1758719


October 10th:
From my calculations in the above Goodyear G177 11.00-20 tire upgrade thread, if I had a 1:200 speedometer adapter (vs the stock 1:187), the speedometer would only have about a 1% error (vs the current ~8%). I tried purchasing one based off the NSN listed in the Technical Manual (2520-00-404-3098 ), but suppliers only seem to get a tachometer. Much to my embarrassment, without realizing that at the time, I tried to install one, which ran the odometer backwards (from ~1891 to 1881.2 miles). Similar to Ferris Bueller's Day Off, but instead of running the whole drive train, I used a corded drill to roll the speedometer forward to where it should be. It took about 20 minutes. lol


October 16th & 17th:
At 1891.7 miles, 307.3 hours, with the help of SteelSoldiers member red, we installed his old Wolverine Technologies 12v Alternator and 3rd 12v battery (Super Smart Battery Deep Cycle, new April 2015, P/N: 27DCM, 490 CCA). In that process, the following was replaced:
  • New lower radiator hose (Newstar S-E667, replacement for 10872023)
  • New upper radiator hose (Gates 2" I.D., 5" length)
  • New flame heater filter (Newstar S-19103, replacement for 10935646)
  • New air compressor belt (Gates 9510, 1/2" x 51-3/8")
  • New 24v alternator belt (Gates 9465, 1/2" x 46-7/8")
  • New 12v alternator belt (Master Pro v-belt 9550 (17550), 1/2" x 55-3/8" Outside Circumference (13mm x 1407 mm O.C.)) (for documentation purposes, this is the new, longer belt that goes around both 12v and 24v alternators that I installed in 2017)


sometime before the above...
I drained and remove the radiator and had it tested at Jake's Quality Radiator in Bountiful, UT (801-298-3477 ) (390 S 200 W, Bountiful, UT 84010 ). The fellow there said it was a good radiator and to run it! Excellent. He did note that the drain tube was clogged with dirt and he had cleaned it out, otherwise the radiator could be overpressured and I'd blow a cap or more likely, and worse, blow the radiator.


I want to talk about a problem that surfaced for me after pressure testing the radiator and installing a few new coolant hoses - particularly since the radiator over flow tube had been cleaned out - I would now leak coolant from the radiator after I parked the truck. I asked on Facebook and the 100% certain reply was "head gasket". The coolant was not oily, and I didn't have coolant in the oil. I explained the problem to Boyce Equipment and they were skeptical about a head gasket problem, but they wouldn't be able to look at it for over a month (sometime late August). I too was skeptical about it bing a head gasket was that the leak mostly occured after I had turned the truck off. Red suggested an exhaust gasses test of the radiator. Basically a rubber tipped tub full of a special fluid that you use to suck air from the radiator through the cap opening. The fluid will change colors if any exhaust gas pass through it. The fluid did not change colors. I also replaced the radiator cap with a new one in case the spring was worn and it wasn't holding proper pressure, but the radiator would still sometimes leak a bit after parking and shutting down. I kept driving the truck kept an eye on the coolant level in the radiator - if I could still see fluid in the filler neck, it was fine.

As of July 2017, @3357 miles, 353.3 hours - the radiator doesn't leak except maybe an occasional drip from the over flow. The explanation that I found the most accurate for this situation was that coolant expands when it get hot. The water doesn't, but the coolant mixed with the water does. The radiator was essentially over full and without an expansion tank, the coolant had no where to go but out and to the ground. This has been further proven to me as I drove the truck in the local 2017 Independence Day parade. Four days later I opened up the radiator to check out fluid levels. The radiator cap was still holding suction pressure! As the coolant cools down it shrinks, this causes negative pressure in the radiator.
 
Last edited:
silverstate55

Unemployable
2,075
872
113
Location
UT
It's interesting how so many of us start off our Deuce ownership with knowing so little about them, but after much TM absorbing and tinkering on them, as well as spending time here, we get to know them much more intimately. Starting with maintenance items (filters, fluids, brakes, etc..) really gets one some confidence-building knowledge of these vehicles, as you've shown.

They sure are fun to drive, I can't imagine ever selling mine...I just keep fixing whatever breaks/fails on it.
 

bonedoc

New member
502
1
0
Location
Bangor, PA
I didn't do or use my truck much for the first two or three years that I owned it.


I read this and felt a lot better as I haven't driven mine much in the last 5-6 months. I hate to let it sit....to me that creates as much trouble as excessive use.
 

Valence

Well-known member
Steel Soldiers Supporter
2,112
555
113
Location
Davis County, UT
2016:
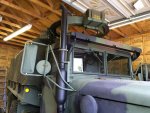
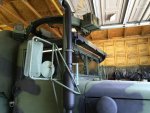
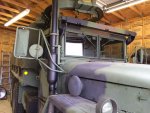
In November 2015 I encountered, what I considered, a screaming deal on a complete M66 gun ring on eBay. I knew my truck used to have a gun ring, so I couldn't pass up the opportunity. I was the only bidder at the opening price of $1250. Even with Rounder's Logistics handling the shipping from Louisiana with a residential pickup to Utah (~$430), the total cost was under $1700, delivered to a local friend's business (11/11/2015). I left the gun ring un touched, not even paint, but I did restore the gun ring legs, adapter plates, back rest, brass deflector, ammo can trays, fabricated ammo can tray brackets, restored and insulated the hard top, and installed the cab reinforcement kit. Work began 02/18/2016 and "completed" end of July 2016. It's all very well documented in probably my most popular thread:
https://www.steelsoldiers.com/showthread.php?146878-Valence-s-M66-Gun-Ring
2016-07-01 11.30.20.jpg 2016-06-25 19.55.51 HDR-2.jpg 2016-06-23 09.57.37.jpg 2016-06-23 20.04.18.jpg

In driving the truck around, the only thing I've noticed with the gun ring up there is I needed to inflate the front axle G177's from 70 to 80 PSI. I don't hear squeaks, rattles, or even shifting around. I really like it!

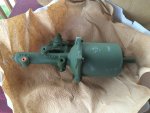
During the flurry to get the truck ready for my local Independence Day Parade, the air pack failed. I tried to rebuild it but broke a bolt off and I think something else failed too, so I just threw my hands up in the air and ordered a new short air pack.
https://www.steelsoldiers.com/showt...ce-this-week&p=1882856&viewfull=1#post1882856
https://www.steelsoldiers.com/showt...t-in-replacement-for-the-quot-long-quot-style
2016-06-29 18.49.30.jpg

April 22nd:
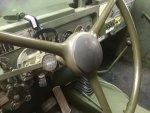
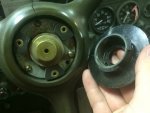
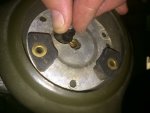
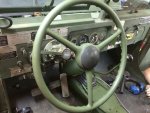
I replaced the 20" steering wheel with a new 18" steering wheel. I had trouble figuring out how to remove the horn button, and some nice fellows on Facebook came to my aid:
  • The outer most rubber button just pries off
  • Then on the inside, push down and turn left until that comes off (not unlike a pill bottle)
  • Remove the 3 screws, and remove horn assembly
  • Use an impact to remove the nut holding on the steering wheel
  • The wire for the horn was completely in the way of using any sort of puller tool. So I borrowed an air hammer to get the old steering wheel off. It was really on there! It broke some of the plastic in back, but I zero plans to reuse it, even though it wasn't in bad shape (a few cracks).
The new steering wheel is very nice - especially since I have air assist steering too. It has better grip to hold on to, softer, and just all around more comfortable!
IMG_1362.JPG IMG_1364 Cropped.jpg IMG_1367.JPG IMG_1370.JPG
Related:
When I drove the truck for the first time with the new steering wheel:
https://www.steelsoldiers.com/showt...M66-Gun-Ring&p=1874921&viewfull=1#post1874921

Funny story:
When I drove the truck in the local Independence Day Parade that year, I periodically honk at the crowd. I must not have gotten that plastic cap all the way tightened to the right because some of the horn parts fell off on me during the parade. The horn was briefly stuck on, until I made sure a loose spring wasn't contacting the wire. But I improvised and took off my boonie hat, grabbed what loose parts I could, and tossed them inside the hat on the passenger seat. I borrowed one of the metal parts that fell off and still kept "honking" the horn though. :lol:


May 07th:
I installed new pioneer tool rack and jerry can straps from Jatokam35s, as well as his spin-on primary fuel filter.
Wix Filter #33405
Adapter base large gasket #5131


June 06th:
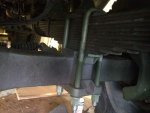
I replaced the driver's side u-bolts since I had only been just reusing the original ones after the caster angle adjustment.
https://www.steelsoldiers.com/showt...ce-this-week&p=1882860&viewfull=1#post1882860
2016-06-08 20.51.59.jpg


June 12th:
I finished installing the dual front shackle mod. Some of the old bolts were REALLY hard to remove! Thank goodness for red's very nice air-hammer he let me borrow!
https://www.steelsoldiers.com/showt...ce-this-week&p=1884178&viewfull=1#post1884178
2016-06-11 20.46.27.jpg


July 19th:
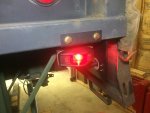
I added side marker lights to the rear.
https://www.steelsoldiers.com/showt...ce-this-week&p=1898310&viewfull=1#post1898310
image.jpg


July 20th:
I added a front bumper step
https://www.steelsoldiers.com/showt...ce-this-week&p=1898927&viewfull=1#post1898927
2016-07-20 21.17.47.jpg


July 10th & 30th:
I finally serviced the bearings and replaced the seals in my M105A2 trailer since the military was the last to do so. I think the grease was okay, but both spindle locknuts were loose. I'm glad I did it. You don't know until you look and inspect. The preload is much different than the deuce's and it was hard for me to tell.

Notes:
3-3/8", octagon, axle spindle nut size for M105 trailers
https://www.steelsoldiers.com/showthread.php?151593-M105-axle-spindle-size
2016-07-09 17.57.13.jpg

July 30th:
I also sucked some of the gear oil out of the deuce's front differential and transmission as I believe I over filled them (they were leaking where they hadn't been before I changed their oil).
https://www.steelsoldiers.com/showt...ce-this-week&p=1903150&viewfull=1#post1903150
2016-07-30 12.58.08.jpg

September 04th:
I replaced the springer seat with a HEMTT air-ride seat. I love that seat! Even for the cost, this is a very practical modification. I sit a little too high in cab though, so I might remove the 3/4" of floor mat below the seat adapter base.
https://www.steelsoldiers.com/showt...ce-this-week&p=1915877&viewfull=1#post1915877
2016-08-31 20.03.31.jpg


September 05th
I took the deuce to the movies and grocery shopping. :)
https://www.steelsoldiers.com/showt...ce-this-week&p=1916517&viewfull=1#post1916517
image.jpg


October 16th:
I purchased a set of 6 tire chains (Quick Grip, QG2251) and tensioners/tighteners (QG20073) for the Goodyear G177s and stored them in ammo cans in side the Knaack box. I'll probably never use them, but I like having them if I need them!


October 21st/22nd:
I took the deuce off-roading and camping to Five Mile Pass (south-west of Lehi, UT) with red's M816 wrecker. Good times were had!
https://www.steelsoldiers.com/showthread.php?161052-Utah-offroad-trip-to-5-mile-pass
2016-10-22 11.15.39.jpg 2016-10-22 11.18.11.jpg


November 12th:
I used the deuce to haul a very rusty and damaged 1960 pioneer tool trailer remnants to the scrap yard.
https://www.steelsoldiers.com/showt...ce-this-week&p=1918919&viewfull=1#post1918919
https://www.steelsoldiers.com/showt...Tool-Trailer&p=1944205&viewfull=1#post1944205
2016-11-12 15.05.04.jpg
 
Last edited:
Valence

Well-known member
Steel Soldiers Supporter
2,112
555
113
Location
Davis County, UT
Now to more current events:

2017:
May 17, 2017:
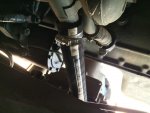
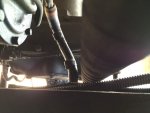
I replaced the crank case breather (aka "Slobber Tube") with a longer one. The original was 10-1/2" long, 1-1/4" inside diameter, and was cracked all over from age/deterioration. The new one is 24" long and cost $25.60 at O'Reilly's ($11.99 per foot + tax).

My truck seems to have quite a bit of blow-by, and it slowly makes an oily mess on the starter, brake lines, electrical and inside of the frame rail. I thought it'd be a lot easier to clean just the axle housing and maybe the leaf springs than all of the rest.

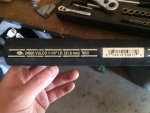
Hose reads:
Gates,24020 VULCO 1-1/4" I.D. (31.8 mm)
2017-05-19 19.05.39.jpg 2017-05-19 19.08.15 HDR.jpg

The tube doesn't touch the battery cable, but may chafe slightly on the side of the top-loaders on the axle, but that doesn't matter any to me.

2017-05-19 19.08.51-1.jpg 2017-05-19 19.09.07-1.jpg 2017-05-19 19.09.24 HDR.jpg 2017-05-19 19.09.28.jpg

A video from almost exactly 1 year ago (May 20th, 2016) of the blow-by levels when the engine is warmed up from running down the highway, cruising at 2100-2200 RPM:

https://youtu.be/nSyGIdhajA8

About the size of the oil puddle that'll drip out after the truck has parked and cooled down.

2016-10-02 15.00.07.jpg


May & June:
I completed my custom battery hold down bar:
http://www.steelsoldiers.com/showthread.php?168135-Deuce-Battery-Hold-Down-for-Group-31-Batteries
2017-06-03 20.19.34.jpg 2017-06-03 20.19.48.jpg


May 29th,
I installed a pair of 24" Ibis Tek Light bars for lighting up the side surrounding area, though they still need to be wired.
https://www.steelsoldiers.com/showt...-Bar-Install&p=2018848&viewfull=1#post2018848
2017-05-29 20.22.24.jpg 2017-05-29 20.41.09.jpg


June 4th,
Replaced the too short 12 v alternator belt that rubbed on the 24 v alternator pulley.
Master Pro v-belt 9550 (17550), 1/2" x 55-3/8" Outside Circumference (13mm x 1407 mm O.C.)


June 9th,
I used a white paint marker and the straight edge of a piece of 1/4" plywood to put lines on my wheel studs and lug nuts. I thought it was less obtrusive than the loose wheel nut indicator flags (and cheaper), but still quite visible for a quick inspection of each wheel to ensure a lug nut wasn't backing off. The same concept was applied to the rear dual budd lug nuts, but it was just a little more difficult to do.
https://www.amazon.com/gp/product/B0026HL1EO/
2017-06-09 21.54.53.jpg


June 17th,
I replaced the driver's side front hood bumper pad (P/N 8330495). Well, not so much as replaced as it was completely missing and had remnants of what appeared to be black RTV silicone? As can be seen, the screws on the grill for the loops that the cold weather front cover attach to were beating up the edge of the hood. Looking back, I suppose I should have put some paint there, at least the truck is stored indoors and eventually it will need a sandblast and paint. The mounting holes were 1/4", but I used 3/16" rivets with a 3/16"+ grip range and a #10 washer on the back side to back it up.

I had trouble finding these, but ended up paying $10 each for them at TNJ Murrays:
P/N 8330495
(at the time of this writing, they were sold out at Big Mike's Motor Pool)
https://www.bigmikesmotorpool.com/c.../products/copy-of-glove-box-door-seal-7373339
http://www.tnjmurray.com/militaryve...roduct/id/C008C763-5056-A847-7AE80A2B070FDB83
2017-06-17 13.35.19.jpg 2017-06-17 18.09.34.jpg


Also on June 17th,
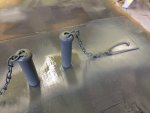
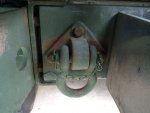
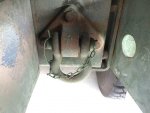
I wanted the rear shackles to be as easy to take on/off as the front were and have a "captured" retaining clip. I previously had had the rear shackle pins sand blasted, so then I welded to the top of the heads an 'S' hook and crimped on a short chain, another 'S' hook and a the large "safety pin" style retaining clip. It is the exact same style of retaining clip used on the front shackles. I had purchased the retaining clips in 2016 from Jatonka (when I bought his spin-on fuel filter adapter and pioneer tool rack straps), but they are widely available many places such as eBay or even Big Mike's Motor Pool.
P/N: 7418971
http://www.jatonkam35s.com/Salesmisc.htm
https://www.bigmikesmotorpool.com/products/copy-of-m151-hand-throttle-cable-8754130
2017-06-17 20.51.09.jpg 2017-07-04 07.12.08.jpg 2017-07-04 07.12.17.jpg

When welding, I did get a little lesson of when you have the welder set TOO HIGH. I blew right through the 'S' hook. I had to grind that mess off and replace the hook with a new one. At least it was a cheap and easy lesson.
2017-06-17 20.28.14.jpg


June 22nd,
I installed a VicoVation Opia2 dash camera. I spent over 12 hours researching dash cameras for my vehicles, but there is just such a wide variety of cameras, features, quality, and pricing it can easily be overwhelming. Eventually I ended up watching reviews on YouTube and came to enjoy the points and credibility of the Car Cam Central channel. Here's just a few of the videos that I found the most helpful:

Top 3 Premium Dash Cameras for 2017
https://youtu.be/zn6Sd2PXtmQ

Vicovation OPIA2 Review - Best Premium Camera for Most Drivers
https://youtu.be/L99xue0RWL8

Why a rotating camera is useful:
Hit & Run. Films the other driver's face who tries to claim that he was the one who was hit.
https://youtu.be/VtyzTL0HMCc

Without covering everything that differs on dash cameras, the above videos helped me decided on what was most important to me in a dash camera. So below are most of the reasons why I settled on the VicoVation Opia2 dash camera which I not only use in my deuce, but personal vehicles and as a present to my mother for her car:
  • High rated operating temperature (75 degrees C = 167 degrees F). It gets quite hot inside an enclosed vehicle parked in the sun, so a higher rating should mean it is more durable and should have a longer service life.
  • No lithium batteries, capacitors only. I have no need to use the camera outside of the vehicle, and lithium batteries are not friends of the heat or cold.
  • Its swivel mount meant that I could turn the camera to record any encounter/event to the side, or even rear, window.
  • HIGH video resolution (1440 p). I wanted clear pictures!
  • Compatible to very flat or vertical windshields.
  • Could optionally attach a polarized filter to remove sun glare, which I did.
  • Supported 128GB microSD cards (even though I only purchased 64GB for the time being)
  • Parking Mode features (time-lapse or motion sensor)
The negatives are that it is not very stealthy, the polarized filter makes night time videos a bit darker, and is only a single camera and thus, doesn't record a rear view.

Camera: I actually purchased it from BlackBoxMyCar when it was on sale, came with a free 64 GB microSD card, free shipping, with a $10 off Car Cam Central coupon, and finally free installation tool kit, that was really helpful in installing this same camera in my pickup truck and mother's car.
https://www.blackboxmycar.com/products/vicovation-opia2?variant=42022399431
https://www.amazon.com/VicoVation-Opia2-Ultra-HD-1440p-Dashcam/dp/B01FEE6J42

Lexar 64GB high endurance microSD card, because these are constantly being written and re-written and a proper card is key. Even though BlackBoxMyCar had included a 64GB Lexar microSD card, this one is better. I consider the other my back up. That way if the first fails, I can throw in the back up card and still have video coverage.
https://www.amazon.com/gp/product/B012PMDSYU/

SD Card and microSD card USB stick reader (to transfer videos to my computer and internet)
https://www.amazon.com/gp/product/B00OJ5WBUE/

52mm Amazon Basics Polarized Lens - a lot cheaper (and the same thing) instead of buying the VicoVation polarized lens:
https://www.amazon.com/gp/product/B00XNMXNV0/

VicoVation Vico-Power PLUS Battery Discharge Prevention (BDP) Device for Parking Mode - I'm mentioning this for completion sakes. I don't have this installed in my deuce (yet), but I did put one in my pickup truck and mother's car. Once wired, it'll still power the camera when the vehicle is off, but it will monitor the battery voltage as to not over-discharge the battery, so the vehicle can still start. That voltage threshold is configurable. It can also be set on a timer and will shut off once the time has been reached, or voltage drops too low - whichever comes first.
https://www.amazon.com/gp/product/B00ZPLSITE/

At the moment I have just borrowed the power connection fro the CB (which is on a small 24v to 12v converter) to power the dash camera.

2017-07-08 15.27.26 HDR.jpg 2017-07-08 14.22.57 HDR_crop.jpg
 
Last edited by a moderator:

Valence

Well-known member
Steel Soldiers Supporter
2,112
555
113
Location
Davis County, UT
In 2015 I started considering tinting my side (door) windows:

https://www.steelsoldiers.com/showt...-side-windows-did-you-fully-remove-the-window

Removing the windows was much easier than I expected, and I replaced the window channels and door weather seals while in there too.

2017-06-02 19.40.26.jpg 2017-06-02 19.41.39.jpg 2017-06-02 20.15.49.jpg 2017-06-02 15.09.20.jpg 2017-06-02 19.18.06.jpg


For the door weather seal, I not only reused the stock clamps, but I glued it down with pliobond. Judging by the amount of scraping I had to do, the original had been glued down too. The new weather seal makes me slam the door a bit harder (the driver's side considerably more), but I think that'll only be until the new seal is "broken in".

2017-06-02 19.04.36 HDR.jpg

Note, the door weather stripping and window channels were all purchased from Erik's:
http://www.eriksmilitarysurplus.com/m3setrcabwes.html

2 door latch vertical side and bottom seals P/N 7373292
2 door window slot outside seals P/N 7373287

http://www.eriksmilitarysurplus.com/wislchindofo.html
Two sets of cab door window slide channel;
Short: P/N 7373286
Long: P/N 7373298
 
Last edited:
Valence

Well-known member
Steel Soldiers Supporter
2,112
555
113
Location
Davis County, UT
June 10th, 2017,
Oil change @2760.0 miles, 338.5 hours, Mobil Delvac 15W40 conventional oil

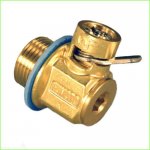
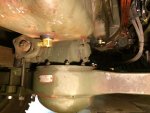
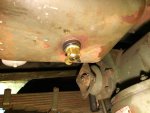
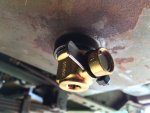
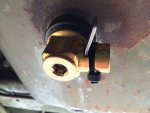
I also installed Fumoto T-208 (7/8"-18 UNF) oil pan drain valves (quantity 2):
https://www.amazon.com/gp/product/B003VKXLHA/
51Pojq0MsKL.jpg

2017-06-07 21.58.55.jpg 2017-06-07 21.59.15.jpg

A well placed zip-tie in the lever slot will prevent the valve from opening, and it's a lot cheaper than the lever lock that is sold for these.

2017-06-17 17.28.48 HDR.jpg 2017-06-17 17.29.12 HDR.jpg
 
Last edited:
Valence

Well-known member
Steel Soldiers Supporter
2,112
555
113
Location
Davis County, UT
Only slightly out of order, as of June 17th, 2017, I finished installing Peashooter's transmission mounted Reverse Light Switch, and I copied Clinto's wiring:

https://www.steelsoldiers.com/showt...ot-lights-so&p=2025995&viewfull=1#post2025995

I took a short video showing the interaction of this reverse light switch with my manual, panel mounted switch:
https://youtu.be/cyeGX8npYoQ

image.jpg image.jpg

While I had the transmission top plate off, I replaced the top gasket:
http://www.eriksmilitarysurplus.com/m35trgasetfs.html

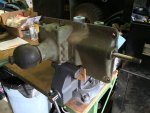
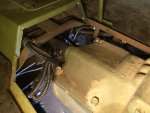
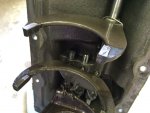
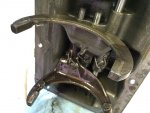
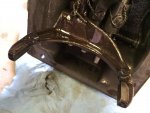
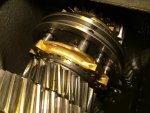
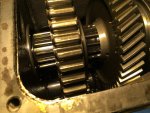
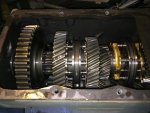
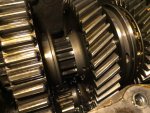
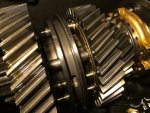
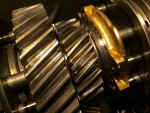
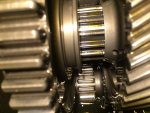
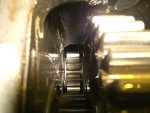
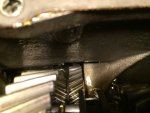
And then I inspected the shift forks and gears. As one of my brothers told me, "A transmission either looks perfect and works fine or shows wear and has problems." I think mine is in the "looks nearly perfect" camp. I think. :p

2017-06-09 17.26.43.jpg 2017-06-09 17.26.47.jpg 2017-06-09 17.26.52.jpg 2017-06-09 17.22.58.jpg 2017-06-09 17.23.41.jpg 2017-06-09 17.23.52.jpg 2017-06-09 17.24.12.jpg 2017-06-09 17.24.16.jpg 2017-06-09 17.24.25.jpg 2017-06-09 17.24.33.jpg 2017-06-09 17.24.53.jpg 2017-06-09 17.24.47.jpg

Today I learned how to properly re-install the top plate. When I went to test drive my deuce I had the following gears:

Reverse = Reverse
First = Reverse
Neutral = Reverse

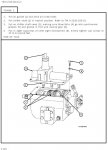
I had missed getting the rear most shift fork on the rear gear. I didn't know that any of the gears could be moved so easily. The following TM has a decent picture and description on how to reinstall the plate:
TM 9-2520-246-34-1 (Page 2-104, PDF page 124) - Technical Manual Maintenance Direct Support and General Support Level Transmission Model 3053A.
transmission_top_plate_replace.jpg
 
Last edited:
Valence

Well-known member
Steel Soldiers Supporter
2,112
555
113
Location
Davis County, UT
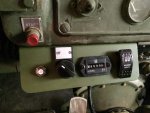
In February 2017 I started what turned out to be a rather unpopular mod, adding a pair of Extreme Outback 24 V supplemental electrical air compressors to my truck:
https://www.steelsoldiers.com/showthread.php?164188-Supplemental-Electric-Air-Compressor

It wasn't all that complicated or difficult, but it was a lot of work, in part for the quality of work I demand of myself - not that I could make a living doing this, I am slow, don't know a lot, and this is my hobby, but I demand of my self to do the best that I can do or think of at the time. There's still mistakes, and some better choices could have been made, the air compressors are a bit noisy, but they work beautifully.

A short video of them in operation:

https://youtu.be/WemTCVYnsuM

I replaced the switch from the one seen in the video above:

2017-06-08 16.46.45.jpg 2017-04-19 20.29.07.jpg

Final Parts list (minus various fittings and such):
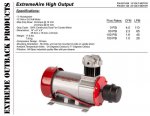
ExtremeAire High Output 24 Volt Compressor Part# 007-120 (Quantity: 2) (Note: I did not buy them new)
https://www.extremeoutback.com/prod...Output+24+Volt+Compressor++Part#+007-120.html
ExtremeAir_High_Output_Specifications.jpg

Two of High Temperature Check Valve Part# 002-097
https://www.extremeoutback.com/product/61/High+Temperature+Check+Valve+Part#+002-097.html
one_way_check_valve_61.jpg

85 PSI on, 105 PSI off Pressure Switch Part# 002-105
https://www.extremeoutback.com/product/55/105psi+Pressure+Switch+++++Part#+002-105.html
105psi_pressure_switch_55.jpg

100 Amp Continuous Relay Part# 002-240, $36.95
2A activation/control draw
NOTE: The below link is the 12v version:
https://www.extremeoutback.com/product/97/100+Amp+Relay+Part#+002-103.html
100_amp_relay_97.jpg

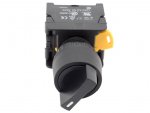
Alpinetech CS-22 Black 22mm Maintained Selector Switch 1NO 1NC 2 Positions
https://www.amazon.com/gp/product/B00FLZ7E4E/
51JYunDFZEL._SL1024_.jpg

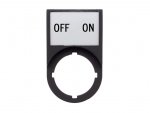
Legend Plate "OFF ON" with Holder, For Use with 22mm Switches
https://www.amazon.com/gp/product/B00ID4G7XY/
514Qz36-tgL._SL1024_.jpg

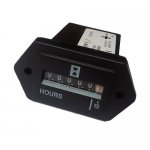
Neecooler Hour Meter DC 10V-80V Mechanical Hourmeter Gauge [SYS-1 ]
https://www.amazon.com/Neecooler-10V-80V-Mechanical-Hourmeter-Motorcross/dp/B01EJFEFH0/
41W490pQn4L.jpg

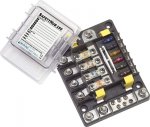
Blue Sea Systems SafetyHub 150 Fuse Block
https://www.amazon.com/Blue-Sea-Systems-SafetyHub-Block/dp/B0053BTSEK/
81HBeKwIiBL__SL1500_.jpg

2017-06-01 22.31.01.jpg 2017-06-03 19.41.29-edit.jpg
 
Last edited:
Valence

Well-known member
Steel Soldiers Supporter
2,112
555
113
Location
Davis County, UT
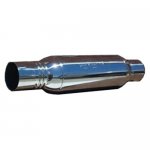
On June 10th, 2017, with much help from one of my brothers, I replaced my Dynomax muffler with an Aero Turbine 3535XL muffler.

  • Stainless steel
  • 3.5" ID Inlet
  • 3.5" ID Outlet
  • 6" Body Diameter
  • 26" Overall Length
9918.jpg 2017-05-22 19.28.09.jpg

In 2012 I paid a place to install the Dynomax muffler for me, unfortunately since they tightened the upper clamp way too much, we had to destroy the Dynomax muffler to separate the exhaust parts. I always felt the shop made the stack too short so we didn't shorten any pieces.

2017-06-10 19.36.07.jpg

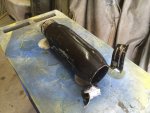
I used 220 grit sand paper and sanded the body of the muffler, primed and painted with high temperature flat black paint. I used to 11" pieces of 1-1/4" x 1/8" thick angle iron to raise the top clamp support 10".

Note
: I should not have used the primer, as it wasn't high temperature rated and it has thus, burned a bit and spoiled the nice, uniform paint finish.

2017-06-17 10.29.28-1.jpg

In this process I learned that there are exhaust gaskets and I had to wait for an order before reattaching the top stack.

2017-06-10 19.17.32.jpg

Exhaust Gasket for M35A2 Vertical Stack and J-Pipe, 11609349-2
http://www.eriksmilitarysurplus.com/exgaform3ves.html
yhst-59523690850641_2267_45896332.jpg

With my Goodyear G177 11.00-20 tires, the top of the exhaust is 9' 6" (114"). It is about the same height as the back rest on the gun ring.

2017-06-17 10.27.14.jpg 2017-06-17 10.27.25.jpg 2017-06-17 10.27.33.jpg 2017-06-17 10.29.41.jpg 2017-06-17 11.00.18-1.jpg


The truck sounds about the same at idle, but definitely deeper when you rev it. I have yet to drive it, so I'll have to return and report back when I do.
 
Last edited:
Valence

Well-known member
Steel Soldiers Supporter
2,112
555
113
Location
Davis County, UT
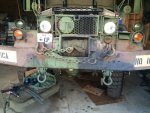
On June 18th, 2017, I wired up marker lights on the front. The mounts I purchased over a year ago, used, from Mr. Castle Bravo here on SteelSoldiers. They were from an M939 series truck that he parted out. Many trucks used these mounts and had marker lights in this very location on the front, but for some reason, not the M35A2's. Most of the front blinker bucket mounts come with holes already drilled for marker lights to mount to. My truck had no such holes, which of course, I had to add (and the hole in the fender too).

I ran a wire down the passenger-side frame rail to piggy-back off the taillight circuit, and then used a 'Y' splitter to also run a line on top of the front cross-member (under the front engine mounts) over to the driver's side light. The marker lights will be on when ever the headlights (and taillights) are on.

2017-06-18 14.37.16.jpg 2017-06-18 14.37.40 HDR.jpg 2017-06-18 14.38.06 HDR.jpg 2017-06-18 14.39.11 HDR.jpg 2017-06-18 14.40.32 HDR.jpg

I realize that there is the in-cab 3-lever light switch plug you can buy that'll turn the marker lights on with the headlights, but I actually did not want that. The reason is, because when I'm climbing a hill, slowly, at night, I have my 4-way flashers (hazards) on and that rear-facing "lollipop" light is fairly blinding (just like the green light on the steering column blinker control), and I don't want it on at all times when the headlight is on - only when it has to be. I have that lollipop light facing backwards so vehicles to the side of me can see if I have my turn signal/flashers on. I personally believe it helps a lot!
 
Last edited:
m715mike

Well-known member
2,797
3,823
113
Location
Montgomery, Texas
Valence - This is an awesome idea for a thread. There is a ton of useful information here that I know others (including me) will benefit from! And, as always, your documentation and write-ups are second to none! Also, years from now, I know you will find great joy re-reading and reflecting on the memories preserved in this thread.

I saw this thread when you first posted it, but was too busy to read it at the time. I'm slowly catching-up on my SS reading list and really enjoyed your thread this morning!

It looks like this is still a work in progress. I didn't see anything about BBQ Rod's hood lift, your light bar or the gun ring. I'm subscribed and tuned-in for updates.

Oh, and I'm looking forward to a report on your new muffler. I've thought about adding one to my truck at some point.
 

Valence

Well-known member
Steel Soldiers Supporter
2,112
555
113
Location
Davis County, UT
Valence - This is an awesome idea for a thread. There is a ton of useful information here that I know others (including me) will benefit from! And, as always, your documentation and write-ups are second to none! Also, years from now, I know you will find great joy re-reading and reflecting on the memories preserved in this thread.

I saw this thread when you first posted it, but was too busy to read it at the time. I'm slowly catching-up on my SS reading list and really enjoyed your thread this morning!

It looks like this is still a work in progress. I didn't see anything about BBQ Rod's hood lift, your light bar or the gun ring. I'm subscribed and tuned-in for updates.

Oh, and I'm looking forward to a report on your new muffler. I've thought about adding one to my truck at some point.
m715mike, I really appreciate all the nice things you have to say. :)

I apologize it took me over a week to respond, but - you are correct - it was a work in progress. That said, I think I've dug through most things and caught up - except my most recent trip and Independence Day Parade. I literally spent about 12 hours digging through posts, finding links and pictures, and writing the blurbs. Feel free to go back a page and re-read posts 2 & 5 as there is a lot more information and content there now for years 2014-2016! :jumpin:
 
Last edited:
Valence

Well-known member
Steel Soldiers Supporter
2,112
555
113
Location
Davis County, UT
June 23 & June 25th:
I drove my M35A2 over 300 miles (one way) to attend the Idaho Military Vehicle Preservation Association (MVPA) show and swap meet. This year it was held in Meridian, ID.
https://www.steelsoldiers.com/showt...daho-MVPA-Vintage-Military-Show-amp-Swap-Meet
2017-06-23 20.56.32 HDR.jpg 2017-06-23 21.16.03 HDR.jpg 2017-06-24 10.21.36.jpg

And my dear mother followed me in a chase truck at the excruciating 50-55 MPH just in case I had issues with the deuce, as this was the single longest trip I had taken in it.
https://www.steelsoldiers.com/showthread.php?168657-MV-Road-trip-with-a-civilian-chase-vehicle
2017-06-23 09.02.59 HDR.jpg 2017-06-23 13.39.47.jpg 2017-06-23 07.15.19.jpg

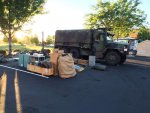
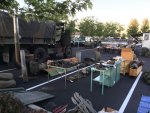
Of academic note, my deuce and a half, as pictured with front hub disconnected, gun ring, ten Goodyear 11.00-20 G177 tires on the ground and a large Knaack box in the bed full of chains and tools weighs about 17,000 lbs. As visible from the pictures of stuff I set out for sale above, I had the whole cargo bed full to the top of the troop seats (I didn't unload it all). I estimate I had about 3000 lbs of cargo so I think it is fair to estimate the deuce weighed roughly 20,000 lbs.

Post trip report:
No break downs. The deuce and chase pickup both ran and drove great! A few items to note though:
  1. The Aero 3535XL muffler is great. I really like it. According to the decibel meter on my phone, it was 95 dB inside the cab at full speed on the interstate with a windshield tipped out, side windows up, and floor wind vents open. According to OSHA, one can be exposed to 95 dB for a maximum of 2 hours before permanent hearing loss occurs.
  2. I liked how I could adjust/reseat my ear buds (I don't actually care for ear buds) without the noise levels in the cab hurting. However, I still drove the whole time with my Bose noise canceling headphones. I consider them critical equipment to have and use. They claim to have a 12 hour battery life (for the noise canceling) and I had no problems with them meeting the drive time (I only turned them off and rest/fuel stops, but sometimes forgot). I just listened to music the whole time. The only down side of noise canceling head phones for hearing protection in the deuce, is that they do not work very well if it is too windy in the cab. I had some popping noise to put up with as a gust would hit the microphone, but it was very livable.
  3. The window tinting and insulation on my cab is spectacularly wonderful! Seriously. I had the passenger windshield tipped out about 4-6". The inside of the cab was basically outside ambient temperature with a breeze. In other words, very comfortable! I only became too warm when outside temperatures reached 90 degrees F. I wish I could tint the front windshields (or a UV screen at least), as at the right angle the sun can still come through the windshields and burn my knees (I was wearing shorts, so I put on sun screen).
  4. The HEMTT air ride seat is also fantastic! I did not have restless leg, numb butt or an aching back, and I sat in that truck for nearly 8 hours on Friday (June 23rd) and 8 hours on Sunday (June 25th). My right calf did get a bit fatigued from holding the throttle pedal, but it was minor.
  5. For some reason a bit of brake fluid burped out of the remote reservoir. I'm not sure why, as I couldn't find anything wrong. I can only think that I had the reservoir too full and I had some heavy braking into the rest stop as I misjudged the coasting distance available (it was a lot shorter exit ramp than I expected).
  6. When I arrived home I noticed a fuel leak from the front left. I suspect a flame heater line, booster pump, or the fitting where the hard line from the primary fuel filter attaches to a flexible line (I replaced that flexible line last year - I tried it tighten it, but it was already pretty tight...)
  7. When my supplemental electrical air compressors kick on, it puts a drag on the 24 v alternator and sometimes I get a belt squealing. I presume I need to tighten one or more alternator belt.

The trip to Meridian, Idaho was 295.2 miles on the odometer, but there is a 7.9% error (under) reading on the odometer due to the tires being larger than the stock 9.00x20's. The true mileage would have been 318.22 miles, 38.576 gallons of diesel, or about 8.26 MPG. I tried to hold the throttle at about 2100-2200 RPM.

The return trip from Meridian, Idaho was 298.8 miles on the odometer, ~322.41 miles actual, approximately 37.8 gallons of diesel, or about 8.52 MPG. For long stretches I held the throttle at 2300-2400 RPM. Not ideal mileage, but I was going a solid ~58 MPH (actual).


Starting Odometer: 2763.0 miles
Starting Hour Meter: 338.5 hours

Ending Odometer: 3357.0 miles
Ending Hour Meter: 353.3 hours


For fun, I recorded (most) of the trip on a dash camera. Part one I have uploaded to YouTube. It was 50 GB and took almost 19 hours to upload. I still need to upload the return trip and maybe make a speedup version! No, I don't expect anyone to sit and watch this 6.5 hour long video as I did this just for fun. :mrgreen:

In this video, I accidentally recorded over the first hour or so of the trip (I forgot to change micro-SD cards). It starts just north of Brigham City, UT, (about Honeyville, UT) headed north on I-15 to Tremonton, UT. From there it continues on to I-84 north into Idaho, joins with I-86 and runs west up to Boise, ID and then finally Meridian.

https://youtu.be/ZLp4eRNBG78
 
Last edited:
Another Ahab

Well-known member
17,999
4,556
113
Location
Alexandria, VA
8 MPG sounds like pretty good mileage for a deuce. It's not great, but it's pretty good.

I guess it was that steady pace and relatively low speed.

Are you happy with the mileage?
 

Valence

Well-known member
Steel Soldiers Supporter
2,112
555
113
Location
Davis County, UT
8 MPG sounds like pretty good mileage for a deuce.

I guess it was that steady pace and relatively low speed that paid off.

Are you happy with the mileage?
Yes, I am very happy with that mileage. I believe without the heavy tool box and stuff in the bed I would have easily been over 9 mpg. I believe these are expected, typical mileage for a deuce, especially with the front hubs unlocked. There were plenty of hills to climb too, but I wasn't driving over the Rock Mountains or anything. I only had to shift down to 3rd a couple times. One of which was on a single lane stretch of the interstate due to bridge construction/maintenance projects. 25 MPH in an 80 MPH lol. Sorry everyone behind me. Hahahahah. Glad it was broad daylight though.
 
Last edited:
Valence

Well-known member
Steel Soldiers Supporter
2,112
555
113
Location
Davis County, UT
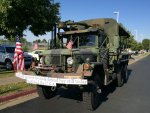
As most military vehicle owners I, yet again, participated in the my city's Independence Day parade on July 4th. I believe this marks the 6th or 7th year that I've done so. I can't remember if I participated in 2011 or not, so far I can only find documented proof that I did so starting in 2012.

I have a tradition where I create a homemade banner and attach it to the front bumper, and each year I change what it says. My goal with the banner is to make a tie-in and/or reference to the country and/or service men (because I usually have local veterans in the bed of the truck - some quite elderly) and of course God.
https://www.steelsoldiers.com/showthread.php?141749-Honoring-The-Lord-and-Nation

This year I used "God Bless the U.S.A" by Greenwood Lee (Chorus, 2nd half, minus one line):
I gladly stand up next to you
And defend her still today
God bless the U.S.A.


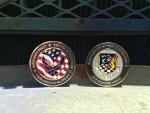
To not duplicate threads, the story from this year can be found in post #11, and lets just say there was a Commander's coin involved. Two in fact.
https://www.steelsoldiers.com/showt...d-and-Nation&p=2032203&viewfull=1#post2032203
2017-07-04 09.01.30.jpg 2017-07-04 12.29.18 HDR.jpg
 

montaillou

Well-known member
Steel Soldiers Supporter
806
831
93
Location
W.WA
8 MPG sounds like pretty good mileage for a deuce. It's not great, but it's pretty good.
My 1100 mile trip when I first bought my deuce I got ~8 mpg. Almost all freeway speeds around 55, sometimes as high as 58. I've read other threads about people getting as high as 12 mpg, though 9-10 seems more common. I've been running straight diesel. My trip did include driving over the cascade mountains.
 

Valence

Well-known member
Steel Soldiers Supporter
2,112
555
113
Location
Davis County, UT
Since it doesn't have its own thread, and my M105A2 is exclusively used with my deuce and a half, I guess I'll talk about it too in this thread.

I just finished installing the M103 chassis shocks. I purchased these used from Big Mike's in October 2015. They came from a mobile kitchen trailer. In spring of 2016 I sand blasted and had them powder coated. It was a pretty straight forward install, with the upper shock mounts using the rear cargo bed to frame mount and only required drilling 2 new holes on each side.

New, Monroe 37114 shocks.

https://www.steelsoldiers.com/showthread.php?145413-M103-Trailer-Shock

2017-08-08 21.07.33.jpg 2017-08-07 21.26.18.jpg 2017-08-08 21.07.54.jpg
 
Top