• Steel Soldiers now has a few new forums, read more about it at: New Munitions Forums!

  • Microsoft MSN, Live, Hotmail, Outlook email users may not be receiving emails. We are working to resolve this issue. Please add support@steelsoldiers.com to your trusted contacts.

Valence's M66 Gun Ring

USAFSS-ColdWarrior

Chaplain
Super Moderator
Steel Soldiers Supporter
18,541
5,852
113
Location
San Angelo, Tom Green County, Texas USA
Thank you, Valence!
As you could probably tell, I'm just now getting my feet wet - so to speak - on this topic.
The background story to my query is my recent acquisition of some mount parts (will determine true names as I research your links) and now must chose to keep them and build on these beginnings, or to put a price tag on them and feed someone else's project.
Thank you again for the links and info.
John
 
Last edited:

Valence

Well-known member
Steel Soldiers Supporter
2,112
555
113
Location
Davis County, UT
I've previously used a large sand blaster (steel shot media) at one of my brother's places of employment when I was restoring my troop seats two years ago. See:
http://www.steelsoldiers.com/showthread.php?123907-The-Long-Road

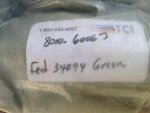
I had an opportunity again so I gathered up my various projects, one of them being the gun ring legs, adapter plates, ammo can holders, and etc. I plan on having everything powder coated with a 383 green matching. I've previously used TCI Fed 34094 Green powder coat. It was a GREAT match with 383 Green.

2016-02-16 16.17.56.jpg

However, I've recently learned that there are at least three basic types of powder coatings (I'm repeating here what Ray, at the Murray, UT based Powder Works (801-973-2317) told me over the phone):

  1. Epoxy Based - Strongest but absolutely do not use in the sun-shine or it'll turn a gray color
  2. Urethane Based - Fine in the sun, will discolor with solvents, chemicals, or gasoline.
  3. Polyester Based - Best for sun exposure

So obviously I will want the gun ring parts to be out of a 383 matching powder coat that is polyester based, and I'm not sure if the TCI brand Fed 34094 Green is such. Ray was checking for me.


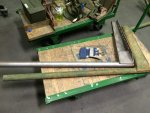
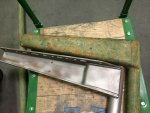
The two behind-the-cab legs just barely fit in the blaster cabinet, and I found blasting the ends rather difficult (I did still have to wire wheel the very top of the flat plate). The passenger side leg, unfortunately, did not fit. I'll have to pay to have it blasted.

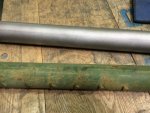
There were at least three layers of paint on the legs. The red primer, an old, dark, olive drab that I'm sure was lead based paint from the 70's, and then CARC. The legs had some rust pitting from sitting for many years but they're so big that it didn't even matter.

2016-02-15 14.01.45.jpg

So shiny...
2016-02-15 14.24.38.jpg 2016-02-15 14.24.44.jpg 2016-02-15 14.24.32.jpg

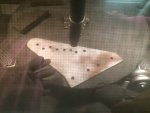
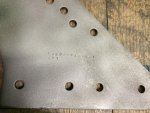
Adapter plate.
The number (probably an NSN) reads:
19200-7357081
DR1
2016-02-15 15.24.58.jpg 2016-02-15 15.33.18.jpg


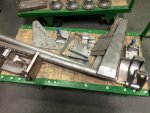
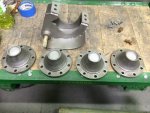
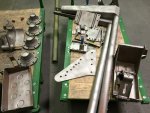
Also visible are the shock mounts from a kitchen trailer I plan to mount on my M105A2, and 4 stock deuce front drive hub flanges (no, I didn't sand blast the inside of them, and no, I won't have the inside powder coated... they will need some brake parts cleaner to clean them up now though)
2016-02-15 16.27.36.jpg 2016-02-15 16.27.41.jpg

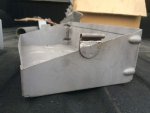
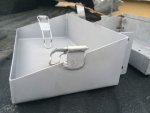
In the lower left of this picture is a spare ammo can holder. Unfortunately it was rusted out on two corners and much of the bottom. It is currently at The Iron Works in Woods Cross, UT being repaired or replicated (whichever is cheaper).
2016-02-15 16.27.52.jpg
 
Last edited:

Valence

Well-known member
Steel Soldiers Supporter
2,112
555
113
Location
Davis County, UT
Ray at the Powder Works researched and found for me that the TCI brand Fed 34094 flat green powder coat is a Urethane based powder coat. That means it'll be just fine with sun (UV) exposure as well be amply strong. However, it does have a weakness to solvents, chemical cleaners and even gasoline (it'll discolor and turn milky if you pour, say gasoline over it). Of course, cleaning it with just soap and water is best.

I don't think any of this will be a problem based on where the parts will be located on my truck.

The bad news is that this 383 matching flat powder coat has limited suppliers. I could buy it from resellers in 5 lb options which are ~$25 per lb, or 50 lbs from TCI for ~$7.00 per lb (+ tax + freight). Since I can get 10 times as much for about three times the cost I've opted for the 50 lb option! :shock:

Needless to say, when the powder coating is done on my current projects this year, I may consider reselling some of the excess to help recoup my costs.
 

Valence

Well-known member
Steel Soldiers Supporter
2,112
555
113
Location
Davis County, UT
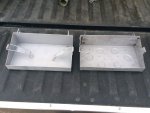
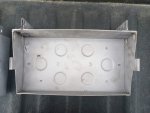
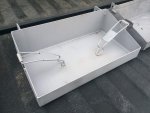
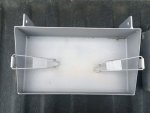
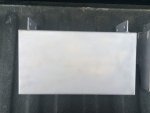
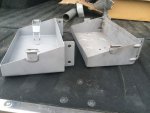
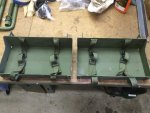
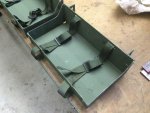
Parts of the spare ammo can cradle partially disintegrated in the blasting cabinet and there's still more internal rust on the back and bottom. It obviously had been left too long in the weather. I took it to be repaired at my favorite place: The Iron Works in Woods Cross, UT.

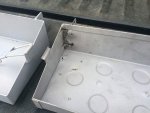
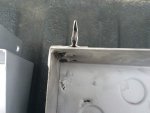
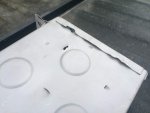
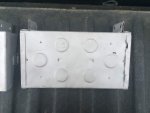
Scott informed me that it would be easier/cheaper just to make a new box instead of repairing the original, but he'd do whatever I wanted. I opted for him just to make a new one. Boy, did Scott just pull off another great feat of workmanship in replicating the box in just 2 hours of shop time. The original ammo can holder only had 1 spring clasp remaining, but even that Scott duplicated (with stainless steel, not spring steel but I'm a-okay with that), and reused the original. It is my opinion that the new box is better made than the original! Instead of folded and crimped steel with tack welds, it's solid and thicker steel with complete welds. Just absolute superlative quality of craftsmanship here! No money better spent than buying the best work. It was a bargain really.

The only thing I think I need to do is drill 5 water drain holes in the bottom before it's powder coated. I believe one hole near each corner and one in the center should suffice.

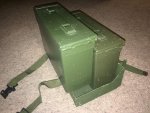
The new ammo can cradle is on the left, with the original one on the right:

2016-03-31 07.48.33.jpg 2016-03-31 07.48.37.jpg 2016-03-31 07.49.09.jpg 2016-03-31 07.48.45.jpg 2016-03-31 07.49.55.jpg 2016-03-31 07.50.02.jpg 2016-03-31 07.48.59.jpg 2016-03-31 07.49.13.jpg 2016-03-31 07.50.07.jpg 2016-03-31 07.50.31.jpg 2016-03-31 07.50.38.jpg 2016-03-31 07.50.45.jpg

I probably should have had him make two ;P
 
Last edited:

Valence

Well-known member
Steel Soldiers Supporter
2,112
555
113
Location
Davis County, UT
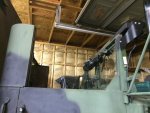
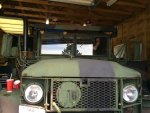
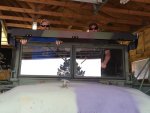
With the help of red and another friend, we removed the hard top and seats from the truck, and these crazy guys found out what it would be like to drive a deuce like a boat: standing up! :D

image.jpg image.jpg image.jpg

Before the gun ring goes on I want to more or less restore the hardtop / cab. I do not particularly want to remove the gun ring once it is in place.

I'm currently trying to decide if I want to go to all the hassle of pulling the cab free of the truck to add heat reflective material/insulation to the engine side of the firewall and the underneath side of the cab. I want to "do it right" but I'm greatly leaning to just adding it to the easy to access transmission and transfer case tunnel only and not removing the whole front body of the truck (cab, fenders, hood, grill, and engine side panels). Going to that extent I'd feel like I might as well go the full restoration route but I'm not to that point yet. I have a personal goal that my truck must be ready and operational for every 4th of July. That gives me just under 3 months, and I've still got a cast on my left arm for at least two more weeks.

Also, I still need to decide on the reflective material, insulation and/or sound deadening I want to buy. I'm liking the Boom Mat products but there's a lot of options and, honestly, they all sort of seem the same.

I want to put as much as I can of that sound deadening and insulation material inside the cab (back and top) - especially before I install the cab reinforcement plate.

Speaking of the reinforcement plate, I was considering installing it with nutserts instead of the supplied rivets. I don’t know how much torque the nutserts can handle but it'd make the plate fully removable for future needs (wiring, repair, etc)! The nutserts look like they'd be physically larger so maybe not as many could be used? I have zero intention of shooting a .50 caliber gun from the truck. .30 maybe, but never .50 (I may go with the .50 dummy gun though!).

Nutsert info video:
https://www.youtube.com/watch?v=sz2yZNqGNqo
 
Last edited:

Valence

Well-known member
Steel Soldiers Supporter
2,112
555
113
Location
Davis County, UT
Some information, links, and parts finding I was doing:

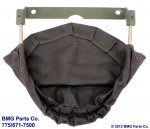
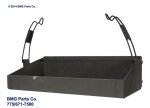
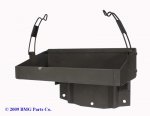
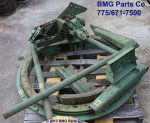
I just found these identifying pictures on BMGParts.com:
http://www.bmgparts.com/mount.html
(Please forgive me BMG Parts & TNJ Murray for borrowing your pictures, but I wanted them here in case the links fail at some point)

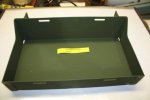
Pictured earlier in this thread was the metal bracket as seen below, that apparently is part of the cartridge catcher assembly.
M66BrsCtchr.jpg

To the best of my knowledge, the M66 gun ring in the more recent, bigger, heavier ring (that I have, pictured earlier in this thread too) that the ring itself spins. The M49 gun ring is the lighter, earlier gun ring that doesn't move but rather the gun does on "roller skates" around the ring. Both of these use the M36 mount system (legs and such) that this ammo can is part of (as indicted in BMGParts.com's pictures).

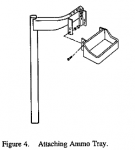
I have the tray (above) and plate (pictured earlier in this thread) but I am missing the 90 degree angle adapters between the two. I wonder what purpose of the plate is as I've never seen one before. I can only suppose so that the ammo can tray can be mounted a bit higher and lower. If I had to guess, something would hang from the lower center hole on the mounting plate. And that BMGParts.com place said they had 10 of these ammo can trays. NOS US GI for $50 each. I paid a little over twice that to have one made. Darn. Oh well, I suppose my new one is stronger.
M36Tray.jpg trayplate.jpg m36tray_with_plate.jpg

They also show this ammo can tray on their "M66 Set"
M66Set.jpg

TNJ Murray's shows a similar, but different .50 caliber ammo can tray. I have to say, I like how this one is designed for the straps. It seems like that'd be slower for a gunner to get a new ammo can out, but much more secure for said ammo can while moving/driving (my purpose). I may put a strap or two around my remade tray with the side clips.
NSN: 1010-01-413-7167
P/N: 12251616
http://www.tnjmurray.com/militaryve...tid/52/id/FD85B8F7-947B-EC98-B5CB049E745B7F9F
tnj_murray_50_cal_tray.jpg

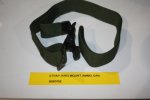
Ammo can tray straps. These look a better fit for the tray above than the M36 tray, since when undone the holes in the tray will prevent the straps from falling away and being easily lost.
P/N: 8690471/8690458
http://www.tnjmurray.com/militaryve...roduct/id/58E9DCE7-09CF-BDE4-E3A9A9AB83C5E694
ammo_can_strap.JPG

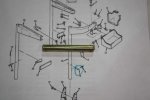
The Pin for the passenger leg (though this doesn't look big enough for the holes in my passenger side leg, but the Part Number matches the Mounting instructions):
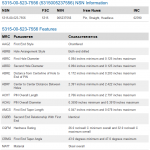
NSN: 5315-00-523-7556
P/N: 5237556
http://www.tnjmurray.com/militaryve...roduct/id/0C65C8D8-5056-A847-7A94893A0278E3DD
m66_passenger_leg_pin.jpg
1627340837891.png

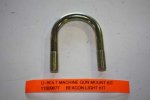
And of course, the u-bolt for the behind the cab legs (quantity of 4 needed):
NSN: 5306-01-130-5994
P/N: 11609677
http://www.tnjmurray.com/militaryve...tid/52/id/D3E3A03F-5056-A847-7A2FDA6D3BB602C2
u-bolt_ring_leg.jpg
5306-01-130-5994 (5306011305994) NSN Information
NSNFSCNIINItem NameINC
5306-01-130-59945306011305994Bolt, U06665
5306-01-130-5994 Features
MRCParameterCharacteristics
AAJDThread Class2A
AAJFThread DirectionRight-hand
AASAThread Length0.500 inches nominal
AAWVDistance from Inside Center of Bend to Bolt End3.370 inches nominal
AAWWInside Distance Between Shanks1.120 inches nominal
AHYMNominal Thread Diameter0.500 inches
CMLPThread Quantity per Inch20
CQFMHardness Rating23.0 rockwell C minimum overall and 32.0 rockwell C maximum overall
MATTMaterialSteel overall
MDCLMaterial Document and ClassificationQQ-S-634 mil spec single material response overall or QQ-S-637 mil spec single material response overall or SAEJ403 assn std single material response overall
SFTTSurface TreatmentZinc overall or cadmium overall
STDCSurface Treatment Document and ClassificationQQ-Z-325 mil spec single treatment response overall or QQ-P-416 mil spec single treatment response overall
STYLStyle DesignatorRound bend
THSDThread Series DesignatorUNF
 
Last edited:

Valence

Well-known member
Steel Soldiers Supporter
2,112
555
113
Location
Davis County, UT
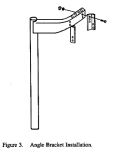
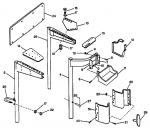
I appear to be missing #'s 6 & 7:

parts_identification.png angle_bracket_install.png attaching_ammo_tray.png bracket_identification.png

6: Bracket, Mounting Angle Left
NSN: 5340-01-112-5476
P/N: 7106057

7: Bracket, Angle Right
NSN: 5340-01-110-7086
P/N: 7106058
 

rustystud

Well-known member
9,280
2,988
113
Location
Woodinville, Washington
With the help of red and another friend, we removed the hard top and seats from the truck, and these crazy guys found out what it would be like to drive a deuce like a boat: standing up! :D

View attachment 616576 View attachment 616577 View attachment 616578

Before the gun ring goes on I want to more or less restore the hardtop / cab. I do not particularly want to remove the gun ring once it is in place.

I'm currently trying to decide if I want to go to all the hassle of pulling the cab free of the truck to add heat reflective material/insulation to the engine side of the firewall and the underneath side of the cab. I want to "do it right" but I'm greatly leaning to just adding it to the easy to access transmission and transfer case tunnel only and not removing the whole front body of the truck (cab, fenders, hood, grill, and engine side panels). Going to that extent I'd feel like I might as well go the full restoration route but I'm not to that point yet. I have a personal goal that my truck must be ready and operational for every 4th of July. That gives me just under 3 months, and I've still got a cast on my left arm for at least two more weeks.

Also, I still need to decide on the reflective material, insulation and/or sound deadening I want to buy. I'm liking the Boom Mat products but there's a lot of options and, honestly, they all sort of seem the same.

I want to put as much as I can of that sound deadening and insulation material inside the cab (back and top) - especially before I install the cab reinforcement plate.

Speaking of the reinforcement plate, I was considering installing it with nutserts instead of the supplied rivets. I don’t know how much torque the nutserts can handle but it'd make the plate fully removable for future needs (wiring, repair, etc)! The nutserts look like they'd be physically larger so maybe not as many could be used? I have zero intention of shooting a .50 caliber gun from the truck. .30 maybe, but never .50 (I may go with the .50 dummy gun though!).

Nutsert info video:
https://www.youtube.com/watch?v=sz2yZNqGNqo
You need to install just as many "nutserts" as you would regular bolts. I have used nutserts for years now and they are a real blessing when used correctly.
 

Valence

Well-known member
Steel Soldiers Supporter
2,112
555
113
Location
Davis County, UT
You need to install just as many "nutserts" as you would regular bolts. I have used nutserts for years now and they are a real blessing when used correctly.
Thanks Rusty. Do you have any recommendations for brand/model etc of the tool to put them in with?
 

DrillerSurplus

New member
443
7
0
Location
Salt Lake City. UT
Thanks Rusty. Do you have any recommendations for brand/model etc of the tool to put them in with?
I agree with Rusty, nutserts are great and pretty easy to use. I've used in lots of different situations. You do need to install correctly or it can start spinning when you start torquing the bolt into it.
Sometimes that can be cured by putting the tool back on and cranking it down a little more-it is a PITA to try and get the old one out & replace it.
Where we've run into issues is when the metal we are putting it into is thin which limits the holding power. If you have access to the underside sometimes we've put a washer on before we expand the nutsert, but often it's in a "blind" location where that's not an option.
I can't remember the name brand or model of the tool we have, but I'll get some photos next time I'm at the shop- got to finish taxes this weekend, so it will be a few days.
 

Valence

Well-known member
Steel Soldiers Supporter
2,112
555
113
Location
Davis County, UT
I agree with Rusty, nutserts are great and pretty easy to use. I've used in lots of different situations. You do need to install correctly or it can start spinning when you start torquing the bolt into it.
Sometimes that can be cured by putting the tool back on and cranking it down a little more-it is a PITA to try and get the old one out & replace it.
Where we've run into issues is when the metal we are putting it into is thin which limits the holding power. If you have access to the underside sometimes we've put a washer on before we expand the nutsert, but often it's in a "blind" location where that's not an option.
I can't remember the name brand or model of the tool we have, but I'll get some photos next time I'm at the shop- got to finish taxes this weekend, so it will be a few days.
Thanks for the reply! The deuce cab is rather thin... and all of them would be "blind". Madfarmersson has some excellent pictures of his cab reinforcement plate riveted into place:
http://www.steelsoldiers.com/showthread.php?74809-M66-installed-on-M35-pics
 

rustystud

Well-known member
9,280
2,988
113
Location
Woodinville, Washington
Thanks Rusty. Do you have any recommendations for brand/model etc of the tool to put them in with?
I like the "Marson" lever unit for up to 3/8" inserts. If you need bigger inserts then the manual insert tools are best. They have a grade 8 bolt and bearing to push against the insert. I cannot remember the brand name but any bolt store will know what I'm talking about. The only problem is the price of the manual ones. They can go for over $60.00 a unit. I also use the inserts with the lateral grooves in them. When compressed they grip the metal better then the smooth inserts.
 

Valence

Well-known member
Steel Soldiers Supporter
2,112
555
113
Location
Davis County, UT
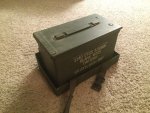
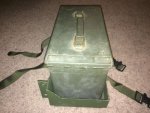
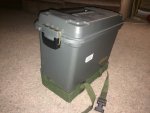
I received the ammo can trays from TNJ Murray's and boy, are they nice! (note, the straps were sold separately). For those curious about fitment, here's a number of pictures of how various ammo cans fit, and even a Cabela's plastic ammo can which almost fits.
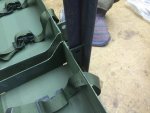
2016-04-27 18.36.20.jpg 2016-04-27 18.36.28.jpg 2016-04-29 23.55.55.jpg 2016-04-29 23.57.08.jpg 2016-04-30 00.02.50.jpg 2016-04-30 00.09.28.jpg

It looks like 1-1/4" wide by 1/8" thick angle iron will work perfectly for attachment brackets.
2016-04-27 18.36.51.jpg

For reference, here are two pictures with measurements from 98G of the original military tray mounting brackets:
2016-04-23 15.28.33.jpg 2016-04-23 15.28.17.jpg
 
Last edited:

Valence

Well-known member
Steel Soldiers Supporter
2,112
555
113
Location
Davis County, UT
I agree with Rusty, nutserts are great and pretty easy to use. I've used in lots of different situations. You do need to install correctly or it can start spinning when you start torquing the bolt into it.
Sometimes that can be cured by putting the tool back on and cranking it down a little more-it is a PITA to try and get the old one out & replace it.
Where we've run into issues is when the metal we are putting it into is thin which limits the holding power. If you have access to the underside sometimes we've put a washer on before we expand the nutsert, but often it's in a "blind" location where that's not an option.
I can't remember the name brand or model of the tool we have, but I'll get some photos next time I'm at the shop- got to finish taxes this weekend, so it will be a few days.
I wanted to write that DrillerSurplus did get back with me about the above and he said:
"Marson brand model 325-RN. I think it is middle of the size range- the biggest nutsert I think we have put in is 1/2". I know we've done 3/8ths for sure."
 

rustystud

Well-known member
9,280
2,988
113
Location
Woodinville, Washington
I wanted to write that DrillerSurplus did get back with me about the above and he said:
"Marson brand model 325-RN. I think it is middle of the size range- the biggest nutsert I think we have put in is 1/2". I know we've done 3/8ths for sure."
Yeah that's the one I have. I wouldn't use it for the 1/2" ones though. 3/8" is really the limit for this tool.
 
277
4
18
Location
Belton, SC
After reading this thread, I've come to the conclusion that the Busted Knuckle is going to have to have a gun ring.
Which means a hard top, I imagine. The War Department is not going to be happy about this.

You guys are a bad influence.
 

Valence

Well-known member
Steel Soldiers Supporter
2,112
555
113
Location
Davis County, UT
After reading this thread, I've come to the conclusion that the Busted Knuckle is going to have to have a gun ring.
Which means a hard top, I imagine. The War Department is not going to be happy about this.

You guys are a bad influence.
HAH! Well, bear in mind it's no small cost for a hard top, gun ring, and gun (replica or no). Also, you don't have to have a hard top. I've seen pictures of folk's trucks with gun rings and soft tops, or even a gunner hole in the soft top (highly uncommon).
 

Clay James

Member
524
4
18
Location
Reno/NV
That will look nice when installed! I think mine is in need of a gun ring too. It came with a cab reinforcement plate already installed and the front mount by the passenger door has marks from the leg being there so it definitely had one before. At the moment I will deviate from the M66 and put an MG3 ring mount for my MG42 on it :D
 
Top
AdBlock Detected

We get it, advertisements are annoying!

Sure, ad-blocking software does a great job at blocking ads, but it also blocks useful features of our website like our supporting vendors. Their ads help keep Steel Soldiers going. Please consider disabling your ad blockers for the site. Thanks!

I've Disabled AdBlock
No Thanks