Farmallmilitary
Member
- 238
- 0
- 16
- Location
- Las cruces nm
Scootertrs did you have a chance to mess with the a/c install over the weekend? I am still trying to figure out how I should install the evap box.
Steel Soldiers now has a few new forums, read more about it at: New Munitions Forums!

Scootertrs did you have a chance to mess with the a/c install over the weekend? I am still trying to figure out how I should install the evap box.
If it was me I would cut the evap box to fit. A lot of time there is wasted space inside that can be eliminated. If possible cut it in the middle of a void, then overlap the two pieces and either rivet or screw them together. Since it is inside you don't need to weld the pieces together like i did on my toolbox project. Call me if you want me to further explain this.
Another idea would be to build a custom box out of heavy sheet-metal and use the innards of the evap in the new custom box. (cheaper than buying a whole new evap)I like that idea... Also If we could figure out a way to have the intake and outlet come out on the same end... or at 90 degrees to each other
Another idea would be to build a custom box out of heavy sheet-metal and use the innards of the evap in the new custom box. (cheaper than buying a whole new evap)
Funny thing is i am not even installing an A/C unit, but here i am giving advise!
I didnt even think of the toolbox option but I think that may be harder to do. I was also thinking about having the box half in half out which would be probably the easiest but wouldn't look as good. I will probably end up heating up the middle hump thing with a torch and just bending it enough for the box to slide in then I wouldn't have to cut or weld anything together.
P.S. Once you take the heater out of he truck, cover up the hole. Birds like to climb in there and start making the cab their home. Personal experience.
Overlap and rivet. Then use aluminum tape to go over the seam if you want air tight.Got a picture of what that looks like (not the birds... the cab and the engine compartment without the heater...)
BTW, I just thought of fiberglass as an alternate fabrication material... basically cutting up the box to fit and using the fiberglass as an interconnector of parts.
Overlap and rivet. Then use aluminum tape to go over the seam if you want air tight.
How about some pictures. Check out my thread on my M923 modifications. I built 2 tool boxes to take up that space above the large tool box.Guys, I cannot stress enough how that MK48 battery box kicks butt... even if you do not mount batteries in it. It fits perfectly in the space on top of the tool box behind the passenger side of the M925. All I had to do is remove the Jerry can mount and the bracket with 2 fabric straps that goes right behind it.) As bolt in a mod that adds a lot of space. If you use it as a battery box, you now have the room below the seat as a stash area... and if you make it lock, a pretty secure area. It was pretty much an impulse buy, but worked out great and since the lid slides out, works great.
How much did that box end up costing?

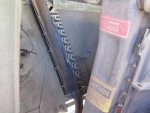
Here are some pictures of the condensor that I installed yesterday. You can hardly even see it behind the grill.
yes there is a port for outside air, I believe that there is a flap that opens the vent but in the pictures goldneagle posted I cant really see it. I'm not positive about all the air ports because I haven't looked at that part in depth but I know there is a outside air vent.
Thanks zev for posting the pictures.
