• Steel Soldiers now has a few new forums, read more about it at: New Munitions Forums!

  • Microsoft MSN, Live, Hotmail, Outlook email users may not be receiving emails. We are working to resolve this issue. Please add support@steelsoldiers.com to your trusted contacts.

WC-51 Restoration or Bust!!

Tinwoodsman

Well-known member
Steel Soldiers Supporter
3,923
76
48
Location
Comfort, Texas
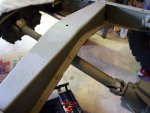
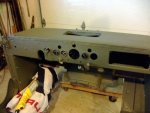
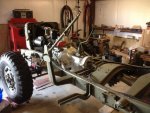
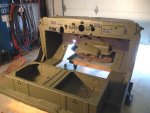
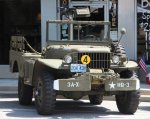
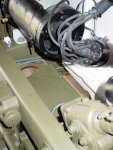
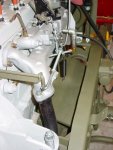
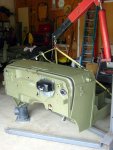
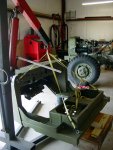
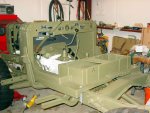
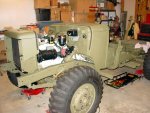
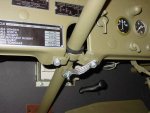
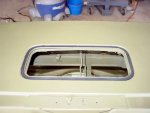
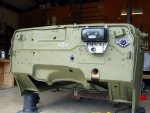
Spending a good amount of time in the shop and getting little done. Did get the cab bodywork and painting finished. Installed the dash pad on the firewall as well as the Radio Interference Filter and starter plunger and side kick panels. Also cleaned and painted the regulator and associated hardware and mounted it with the wiring junction block and choke and throttle cable guide. Also, cleaned, painted and installed the rear drive shaft. Then the project took a dump when I learned my tranny has a crack in the housing causing a leak. I have a lead on a used transmission housing so we will see what developed. This vehicle may just end up at the CAMO compound as a static display. :-D

By the way, I installed the cowl vent seal using that 3M adhesive that Zout recommends. Have been using it for some time and got two of my fingers stuck together two years ago. It is so good, they are still stuck!!!!
Dash-Pad.jpgCowl-Vent-Seal.jpgFirewall-and-Regulator.jpgRear-Drive-Shaft.jpg
 

papabear

GA Mafia Imperial 1SG
13,520
2,469
113
Location
Columbus, Georgia
Spending a good amount of time in the shop and getting little done. Did get the cab bodywork and painting finished. Installed the dash pad on the firewall as well as the Radio Interference Filter and starter plunger and side kick panels. Also cleaned and painted the regulator and associated hardware and mounted it with the wiring junction block and choke and throttle cable guide. Also, cleaned, painted and installed the rear drive shaft. Then the project took a dump when I learned my tranny has a crack in the housing causing a leak. I have a lead on a used transmission housing so we will see what developed. This vehicle may just end up at the CAMO compound as a static display. :-D

By the way, I installed the cowl vent seal using that 3M adhesive that Zout recommends. Have been using it for some time and got two of my fingers stuck together two years ago. It is so good, they are still stuck!!!!
View attachment 442833View attachment 442834View attachment 442835View attachment 442836

I would recommend getting your trans case welded rather than replacing it...if it's cracked in a place where you CAN weld it.

I guarantee if that baby ends up here IT WON'T be a static display!!:beer:
 

zout

In Memorial
In Memorial
7,744
154
63
Location
Columbus Georgia
I think it needs to be hauled sealed up to the Smithonian Museum immediately - chit on ever driving it or thinkin about it - imaculate build - too fussy for me. You'll be scared to drive it or let anyone near it.
 

Tinwoodsman

Well-known member
Steel Soldiers Supporter
3,923
76
48
Location
Comfort, Texas
I think it needs to be hauled sealed up to the Smithonian Museum immediately - chit on ever driving it or thinkin about it - imaculate build - too fussy for me. You'll be scared to drive it or let anyone near it.
It may appear that way Bro but all my vehicles get driven although I plan to put this baby in the third garage bay at night. :driver:
 

o1951

Active member
899
155
43
Location
Bergen County, NJ
If the used case don't pan out, I have heard good things about this: Welcome to LOCK-N-STITCH Inc.
Cast iron repair is our specialty
We can fix it or you can fix it; either way, we can help
Follow LOCK-N-STITCH on
Facebook and
YouTube
 

Tinwoodsman

Well-known member
Steel Soldiers Supporter
3,923
76
48
Location
Comfort, Texas
Spent most of the day under the dash installing the upper chassis harness between the rotary light switch and the firewall junction box. The I fabricated a body to connect the amp meter, fuel gauge, panel lights, ignition switch and the radio interference filter. Picture is not too good but it will give you an idea.

Dash.jpg
 

Tinwoodsman

Well-known member
Steel Soldiers Supporter
3,923
76
48
Location
Comfort, Texas
Well, I have been on grandkid break for 6 days plus it has been hotter than **** here lately but I did get the tranny pulled and the parts into the new case. Remounted it today and installed the parking brake setup and will finish the hook up of those parts tomorrow. Was also able to bleed the brake system and test the brakes. Started out kind of bad as I felt like the little dutch boy trying to put his finger in the dike. Several leaks but was able to get it done and have a nice firm pedal. Working on the chassis wiring so I can get the cab mounted soon. Hope for some pictures tomorrow.
 

Tinwoodsman

Well-known member
Steel Soldiers Supporter
3,923
76
48
Location
Comfort, Texas
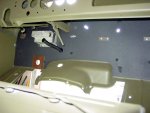
The poor old cab is all wired with the glovebox installed and sporting new dataplates. Unfortunately, it will have to sit there a little longer. Reinstalled the tranny crossmember and also the spare tire carrier and one of the running board supports. Now I have to wait on a new master cylinder and a repair kit for the right front wheel cylinder (purchased new), both are leaking and I want to get this resolved before installing the cab. Parts are on the way.

Chassis-supports.jpgCab Data Plates.jpg
 

rrrr

Member
752
0
16
Location
Missouri
Looking good TWM.

Took my WC to its first car show. Just waiting for a few stenciles to finish it off. The steering is stiff and I'll be replacing the steering box :(
 

Attachments

Tinwoodsman

Well-known member
Steel Soldiers Supporter
3,923
76
48
Location
Comfort, Texas
Looking good TWM.

Took my WC to its first car show. Just waiting for a few stenciles to finish it off. The steering is stiff and I'll be replacing the steering box :(
Looking outstanding rrrr. Did you use a reproduction wire harness or build your own. I might bug you for a few pictures to aid in my reassembly. Many of my parts were not installed when I got my WC.
 

rrrr

Member
752
0
16
Location
Missouri
Looking outstanding rrrr. Did you use a reproduction wire harness or build your own. I might bug you for a few pictures to aid in my reassembly. Many of my parts were not installed when I got my WC.
Vintage maine harness. They are worth the money.
 

zout

In Memorial
In Memorial
7,744
154
63
Location
Columbus Georgia
TWm - if you would have found 15 semi trailers in the last couple weeks to cut the ENTIRE wiring harness out from the underside of the trailers you would have enough wiring to buy beer an build your own wire harness. Yes we had 15 trailers sabotages with complete wire harness and abs cables cut out of them sitting in customers yards - wonder if there are 14 WC's out there getting built besides yours
 

papabear

GA Mafia Imperial 1SG
13,520
2,469
113
Location
Columbus, Georgia
TWM you're my hero Brother! (Hopes TWM will keep PB in mind when he passes and maybe put the WC in his will for me).

Anyhoo...that rascal is gonna be a world class rebuild...and I'm gonna come see it or my name ain't...er...wait...I know this one...er...I'll get back to ya!aua
:papabear:
 

o1951

Active member
899
155
43
Location
Bergen County, NJ
we had 15 trailers sabotages with complete wire harness and abs cables cut out of them sitting in customers yards
!!AGAIN!! I thought you lived in a good area - far enough from Atlanta to not have that .. uh... stuff. Planned on checking it out as possible place to retire.
 

Tinwoodsman

Well-known member
Steel Soldiers Supporter
3,923
76
48
Location
Comfort, Texas
Spent the first part of the week tweeking the break system and getting the cab ready for installation. Started with the driver and passenger side engine splash pans. Then I rigged up a sling harness to hoist the cab onto the chassis. With a little help from a reluctant Soldier B, who was watching one of her favorite TV programs, we moved the cab over the chassis and "Voila" it went right into place. Todays efforts are for a vary patient Zout and PB. The turtle is inching forward. :D :D

Drivers-Side-Splash-Pan.jpgPassenger-Side-Splash-Pan.jpgCab-Sling.jpgSling-2.jpgInstalled-Cab.jpgInstalled-Cab-2.jpg
 

Tinwoodsman

Well-known member
Steel Soldiers Supporter
3,923
76
48
Location
Comfort, Texas
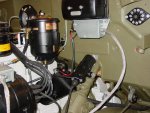
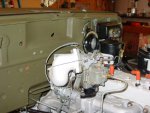
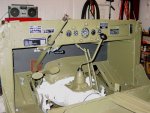
Concentrated on getting the engine compartment wiring and the cab issues completed. Fastened down the steering column to the cab and installed the RFI grounding strap. Then finished the wiring in the engine compartment and will start on the lighting portion wiring harness tomorrow. Did get the horn installed and the carb air horn. Installed the temp gauge and sensor and the speedometer along with the choke and throttle cables. Soldier B will help me get the started plunger fastened to the starter after dinner. Providing of course that she does the dishes first. :D

Steering-Shaft.jpgEngine-Wiring.jpgAir-Horn.jpgCompleted-Dash.jpg
 
Top
AdBlock Detected

We get it, advertisements are annoying!

Sure, ad-blocking software does a great job at blocking ads, but it also blocks useful features of our website like our supporting vendors. Their ads help keep Steel Soldiers going. Please consider disabling your ad blockers for the site. Thanks!

I've Disabled AdBlock
No Thanks