• Steel Soldiers now has a few new forums, read more about it at: New Munitions Forums!

  • Microsoft MSN, Live, Hotmail, Outlook email users may not be receiving emails. We are working to resolve this issue. Please add support@steelsoldiers.com to your trusted contacts.

What have you done to your 5 ton this week?

US6x4

Well-known member
Steel Soldiers Supporter
1,239
2,277
113
Location
Wenatchee, WA
Last edited:

TheQuaker

Well-known member
Steel Soldiers Supporter
246
943
93
Location
Eagle Twp, MI

fuzzytoaster

Well-known member
Steel Soldiers Supporter
4,319
3,208
113
Location
Fort Worth, Texas
You got a WHOLE lot of fine assorted iron in that yard, fuzzytoaster. Nice.

What got that collection started?
I bought 2 deuces way back in the GL days for cheap while in college. Sold both to SS members to pay for food. Vowed never again to be without some Green Iron and I'm doing my best to keep my vow. I just have a good buffer now is all. rofl

Those look like nice trucks. I liked mine... did a lot of work with it.
Don't forget the radiator cover....a rock or stick into the open area would not be good and this stuff is cheap.

I'd gladly give up my M929A2 for one of the 7 ton dumps.
Thanks and good idea. I've still got a pair of NOs spring seats to put in each truck 'cuz you know..classy. lol.
 

US6x4

Well-known member
Steel Soldiers Supporter
1,239
2,277
113
Location
Wenatchee, WA
Looks good Adam!

And when you pull the pin...???


Sent from my SM-T580 using Tapatalk
Thank you, it took a lot of work to get this finished but it turned out better than I expected.

When you pull the pin there is a few seconds delay before...
 

CHIEFSONN

Active member
Steel Soldiers Supporter
I want to thank you all that gave me there suggestions. The passenger door has been removed.
To remove the door that I could not open with the handle from either the inside or the out side and what I had to do was:
remove the three nuts/bolts holding the passenger side mirror on,put that aside. from inside kick it outward on the hinged side fwd end of the door. with enough space between the door and the front of the cab I then removed the cotter pin holding the door that prevents the door from opening to much and hit your mirrors.
At this point I had the fwd hinged side of the door out a little. I still could not get the after part of the door with the latch open. I think if this was to happen to any one that does not have keyless entry like I have you would be able to have the door removed with soldier B at this time.
What I had to do next was to use 2 motorcycle tire irons to pry the door fwd and out at the lower corner and to get from the top a thin pry bar to get the door lock pushed inward passed the door lock on the door frame.
Once free and opened with soldier B my Son I rehung the door with the side mirror and then I checked the door locking mechanism,outer door handle all seemed to be good,grassed all moving parts reinstalled.
With that taken care of I tested my keeless entry function that too tested positive. when I installed my access door cover I did not put in the lower screws beneath the door frame so as if this ever happens again i will be able to get access to what I need to inside the door.
 

8madjack

Active member
416
78
28
Location
Gold country Ca.
I went crawling under the truck greasing zerks and managed to get most of the U-joints, I couldn't get the ones on the short propeller shaft between the trans and T-case. The grease gun tip is too fat. Does this one require disassembly or is there a thinner grease coupling?20190818_170851.jpg

I also noticed this lower arm bushing looks like crap. They all passed the test within the last year, but looks like ill be doing them soon.20190818_162455.jpg 20190818_162433.jpg
 

simp5782

Feo, Fuerte y Formal
Supporting Vendor
12,131
9,415
113
Location
Mason, TN
I went crawling under the truck greasing zerks and managed to get most of the U-joints, I couldn't get the ones on the short propeller shaft between the trans and T-case. The grease gun tip is too fat. Does this one require disassembly or is there a thinner grease coupling?View attachment 773651

I also noticed this lower arm bushing looks like crap. They all passed the test within the last year, but looks like ill be doing them soon.View attachment 773652 View attachment 773653
There is a needle type grease coupler. I always just grind mine down on the outside
 

8madjack

Active member
416
78
28
Location
Gold country Ca.
Thanks simp, I actually thought of the needle style after the fact, haven't seen mine in forever, I'll get an other one. I have extra standard tips, might try grinding one down, good Idea.

Thanks for always being helpful :goodjob:
 

74M35A2

Well-known member
4,145
334
83
Location
Livonia, MI
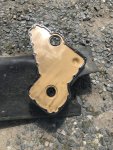
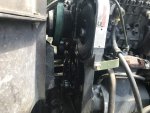
Changed the front timing cover gasket and crank seal on my 8.3L. Gravy job, went quick
. 676515B0-F7B9-4667-8CE1-9B559B4714BF.jpg737921C9-7614-42DA-86AC-0B900069582F.jpg

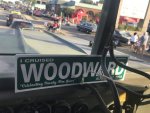
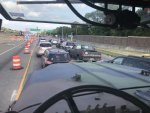
Took my 9 to Woodward Dream Cruise last weekend. The largest single day car event in the world.
89371F1B-4A88-4DF1-AB31-421438D6E0DD.jpg0EF44B49-54CE-4CE1-A392-775BF2C91204.jpg

Now at band camp with my daughter, and you know why...
 

8madjack

Active member
416
78
28
Location
Gold country Ca.
So here's a stupid question I noticed that the U-joints have two grease fittings. Is that just to make it easy or do I have to hit both of them?

I've never seen that on a U-joint before that's why I'm asking.
 
Last edited:

8madjack

Active member
416
78
28
Location
Gold country Ca.
Thanks again Simp.

I made a plate for the bad torque rod bushing. I made a couple of drill guides on the lathe 1 for 1/4 inch pilot and one for 17/64. I drilled and tapped it and put a plate on it to make sure it doesn't pop off. I will replace them before I do any road driving right now I'm just moving it around on my property particularly in case there's a fire.
20190820_134212.jpg here's a couple of in progress pics just for funIMG_20190820_134813_327.jpg IMG_20190820_134807_286.jpg IMG_20190820_134800_976.jpg
 

simp5782

Feo, Fuerte y Formal
Supporting Vendor
12,131
9,415
113
Location
Mason, TN
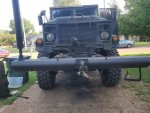
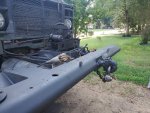
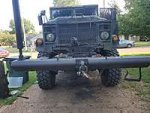
Got a little work done today Installed a 20k winch on the front to help keep the front end down. Fixed an oil leak between the oil pump and the power steering pump. Then instslled a second draft tube system to get rid of some internal pressure. The larger draft setup is also an oil fill tube. Installed 3 new 1600s to match the one i swapped on after a blow out. Added a new pintle to front bumper as well. About to go for a test drive to haul my wrecker back across town. Blah long day.
 

Attachments

TechnoWeenie

Well-known member
Steel Soldiers Supporter
1,657
1,676
113
Location
Nova Laboratories, WA
Sold it... Waiting for the lowboy to get here..... again.... First one came and it was overheight because the broker lied to the trucker and told him it was 11'0" instead of 11'6"... Compound that with a deck height of 3'7" instead of 3'2" and letting the air out of the tires wasn't gonna get it below legal height.

Now, I go on the hunt for a 931/932....
 
Last edited:

tobyS

Well-known member
4,832
833
113
Location
IN
Sold it... Waiting for the lowboy to get here..... again.... First one came and it was overheight because the broker lied to the trucker and told him it was 11'0" instead of 11'0"... Compound that with a deck height of 3'7" instead of 3'2" and letting the air out of the tires wasn't gonna get it below legal height.

Now, I go on the hunt for a 931/932....
I saw two really nice ones going south on US 31 yesterday on the back of a drop deck, not that does you any good.
 
Last edited:
Top
AdBlock Detected

We get it, advertisements are annoying!

Sure, ad-blocking software does a great job at blocking ads, but it also blocks useful features of our website like our supporting vendors. Their ads help keep Steel Soldiers going. Please consider disabling your ad blockers for the site. Thanks!

I've Disabled AdBlock
No Thanks